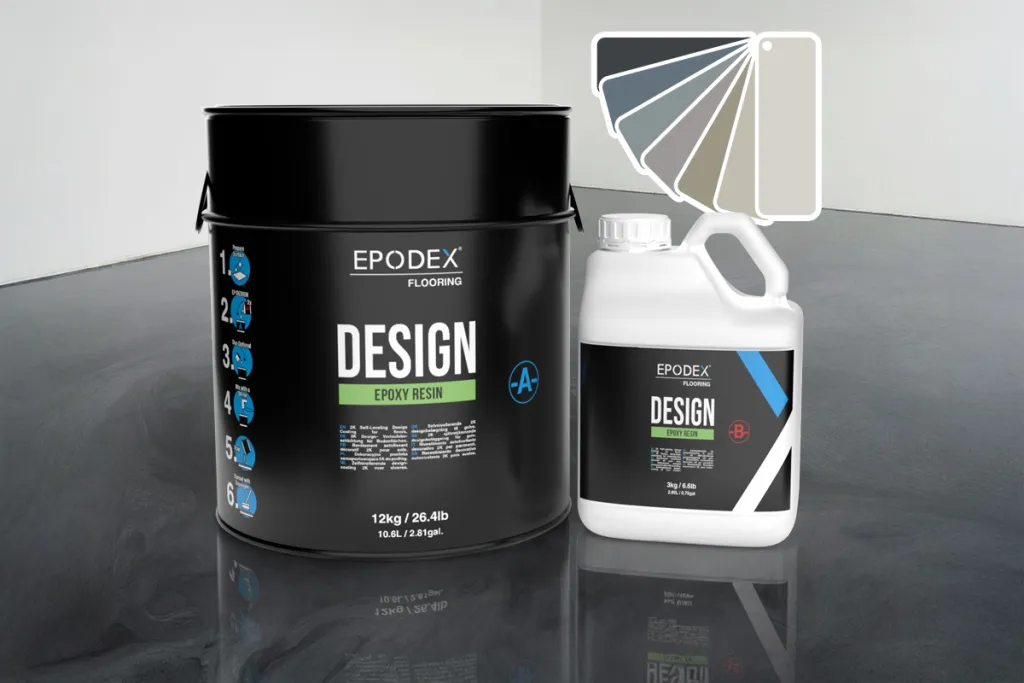

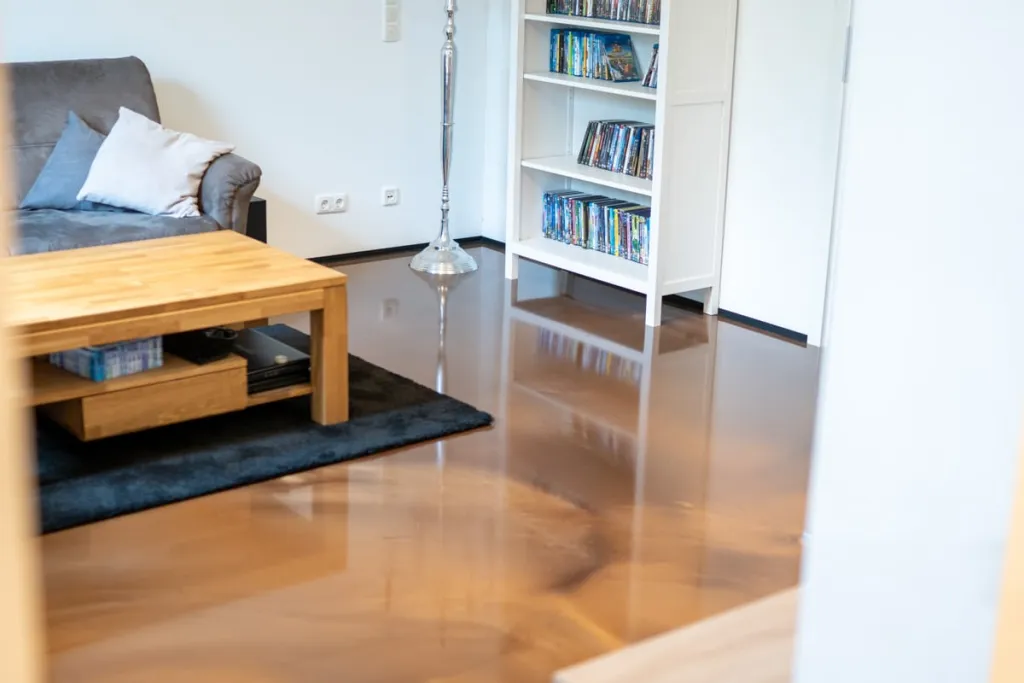


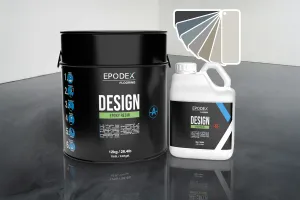
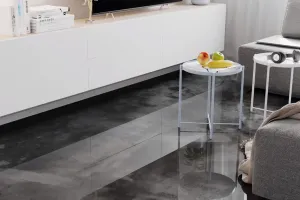


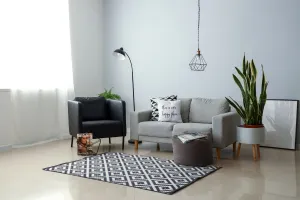


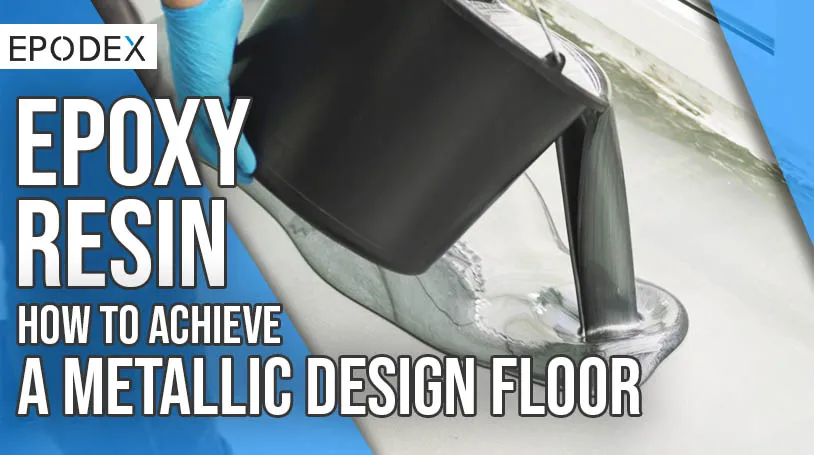
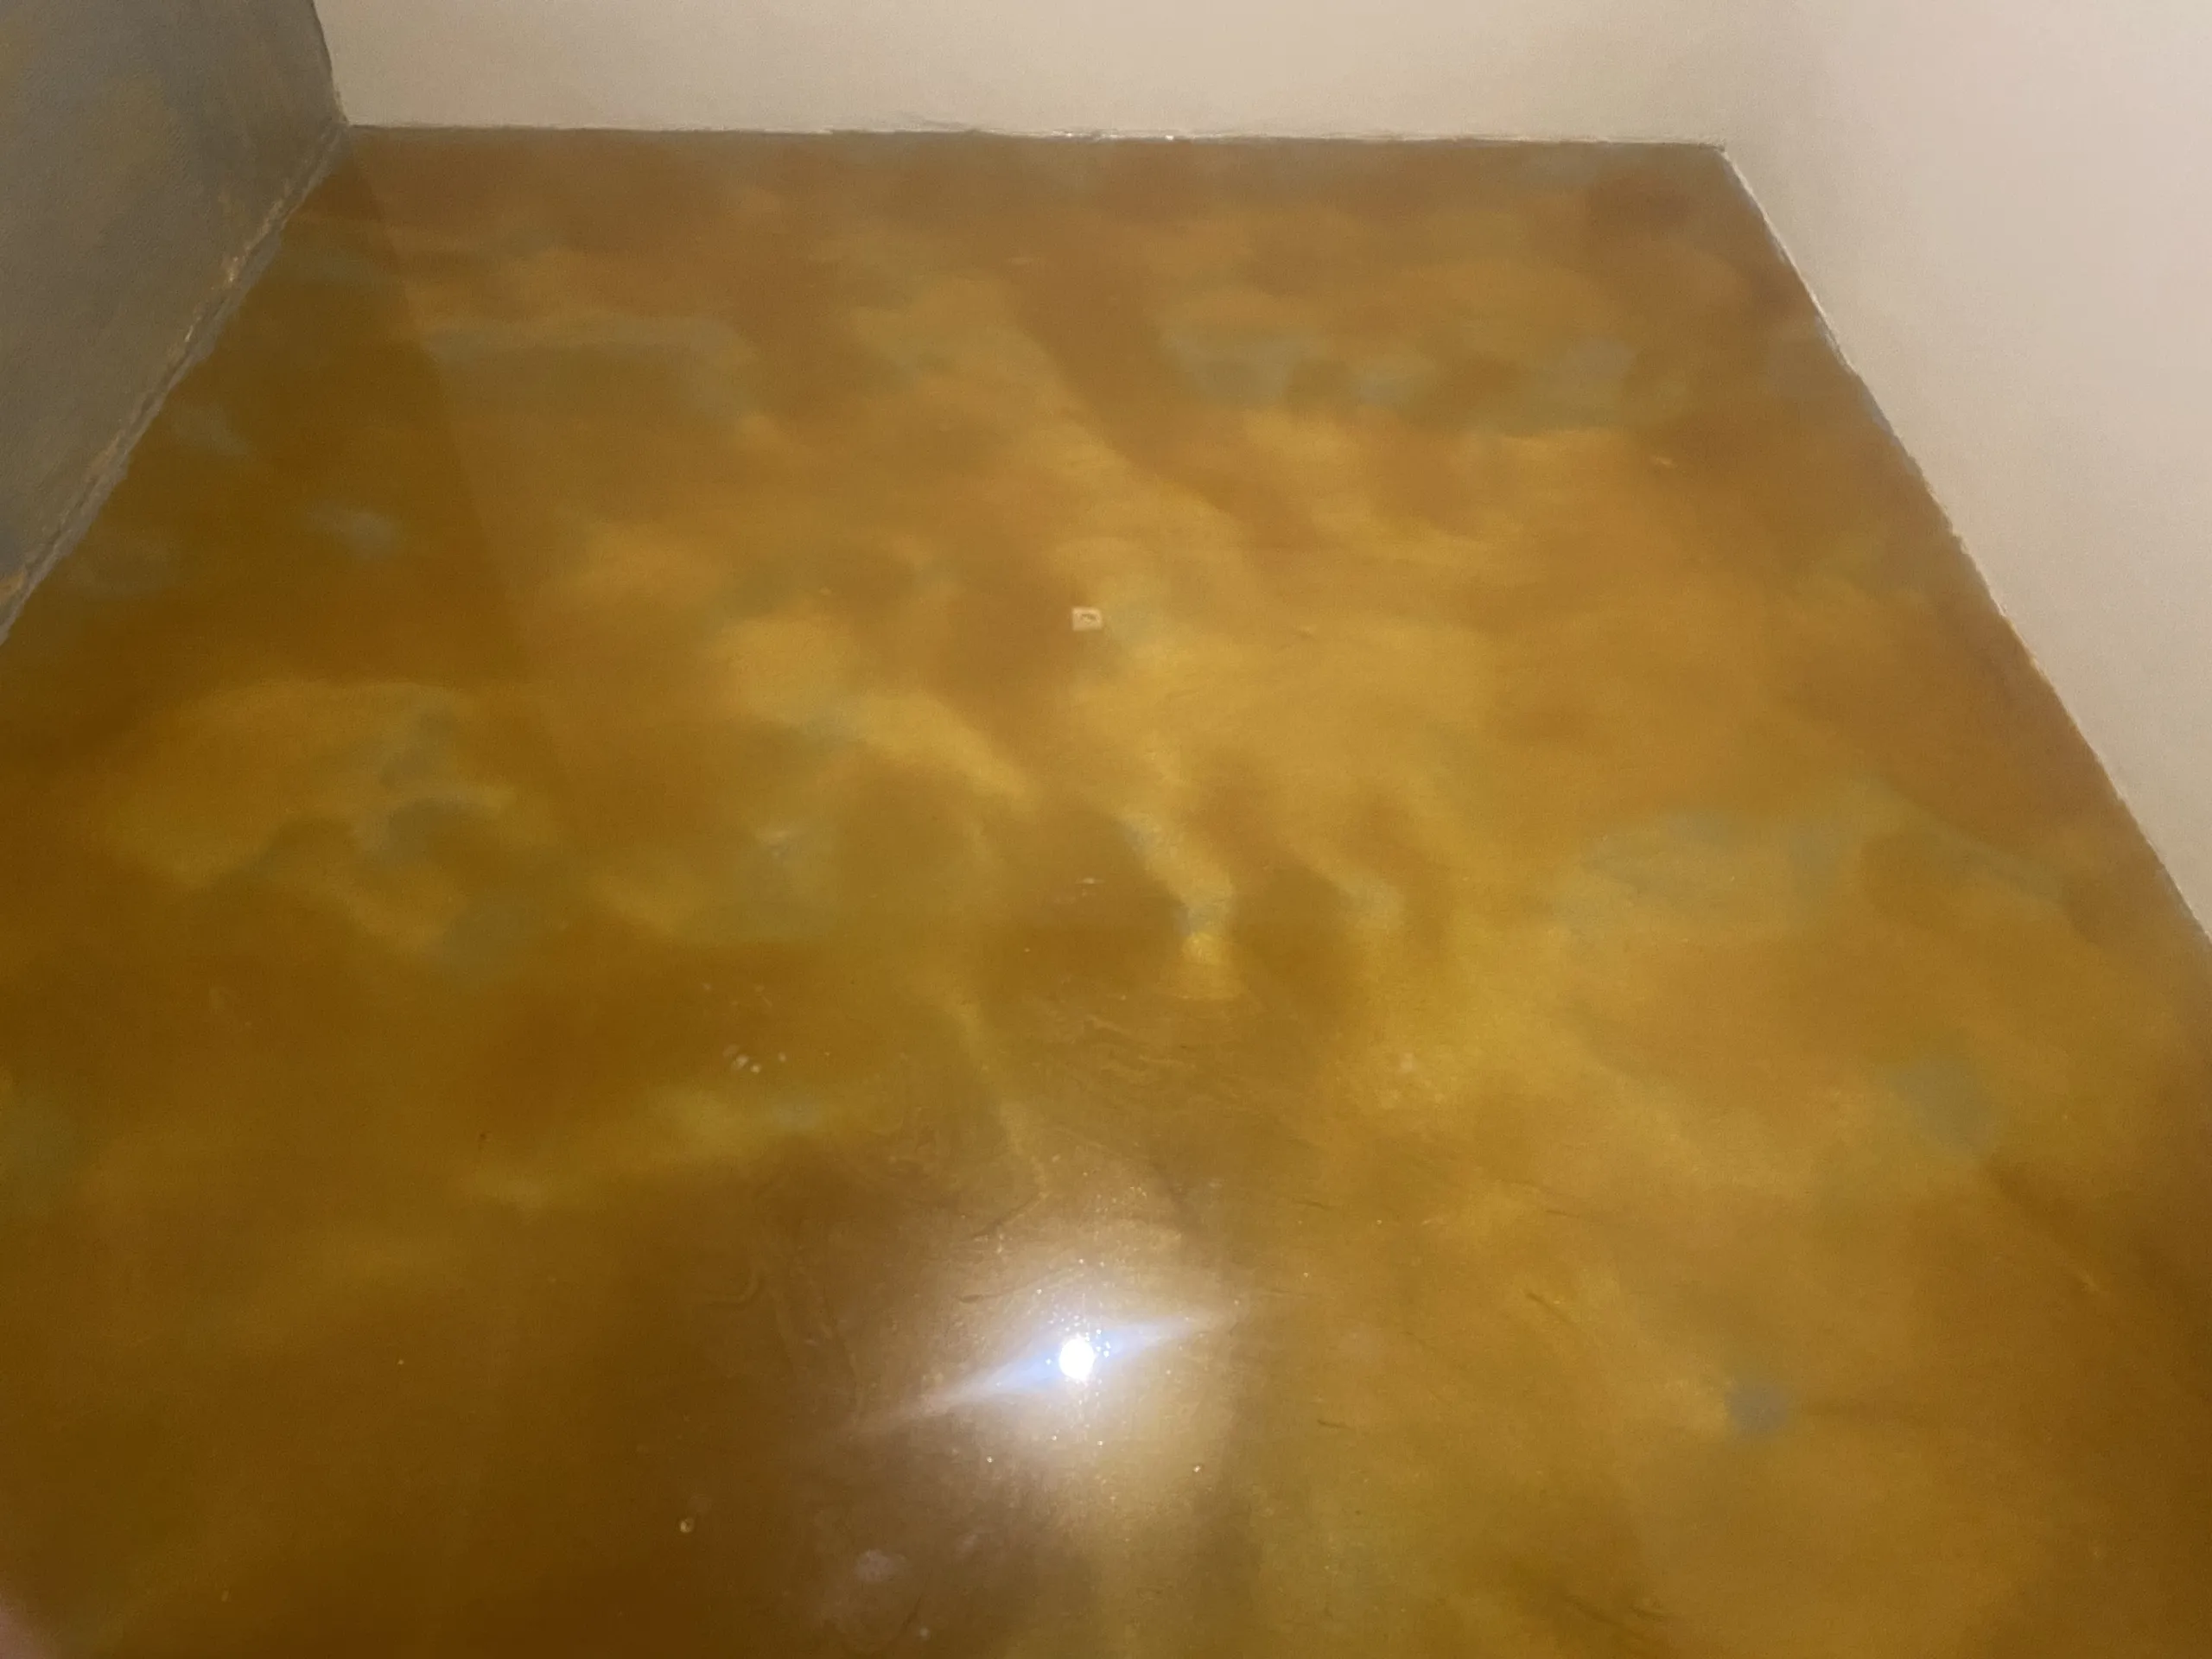
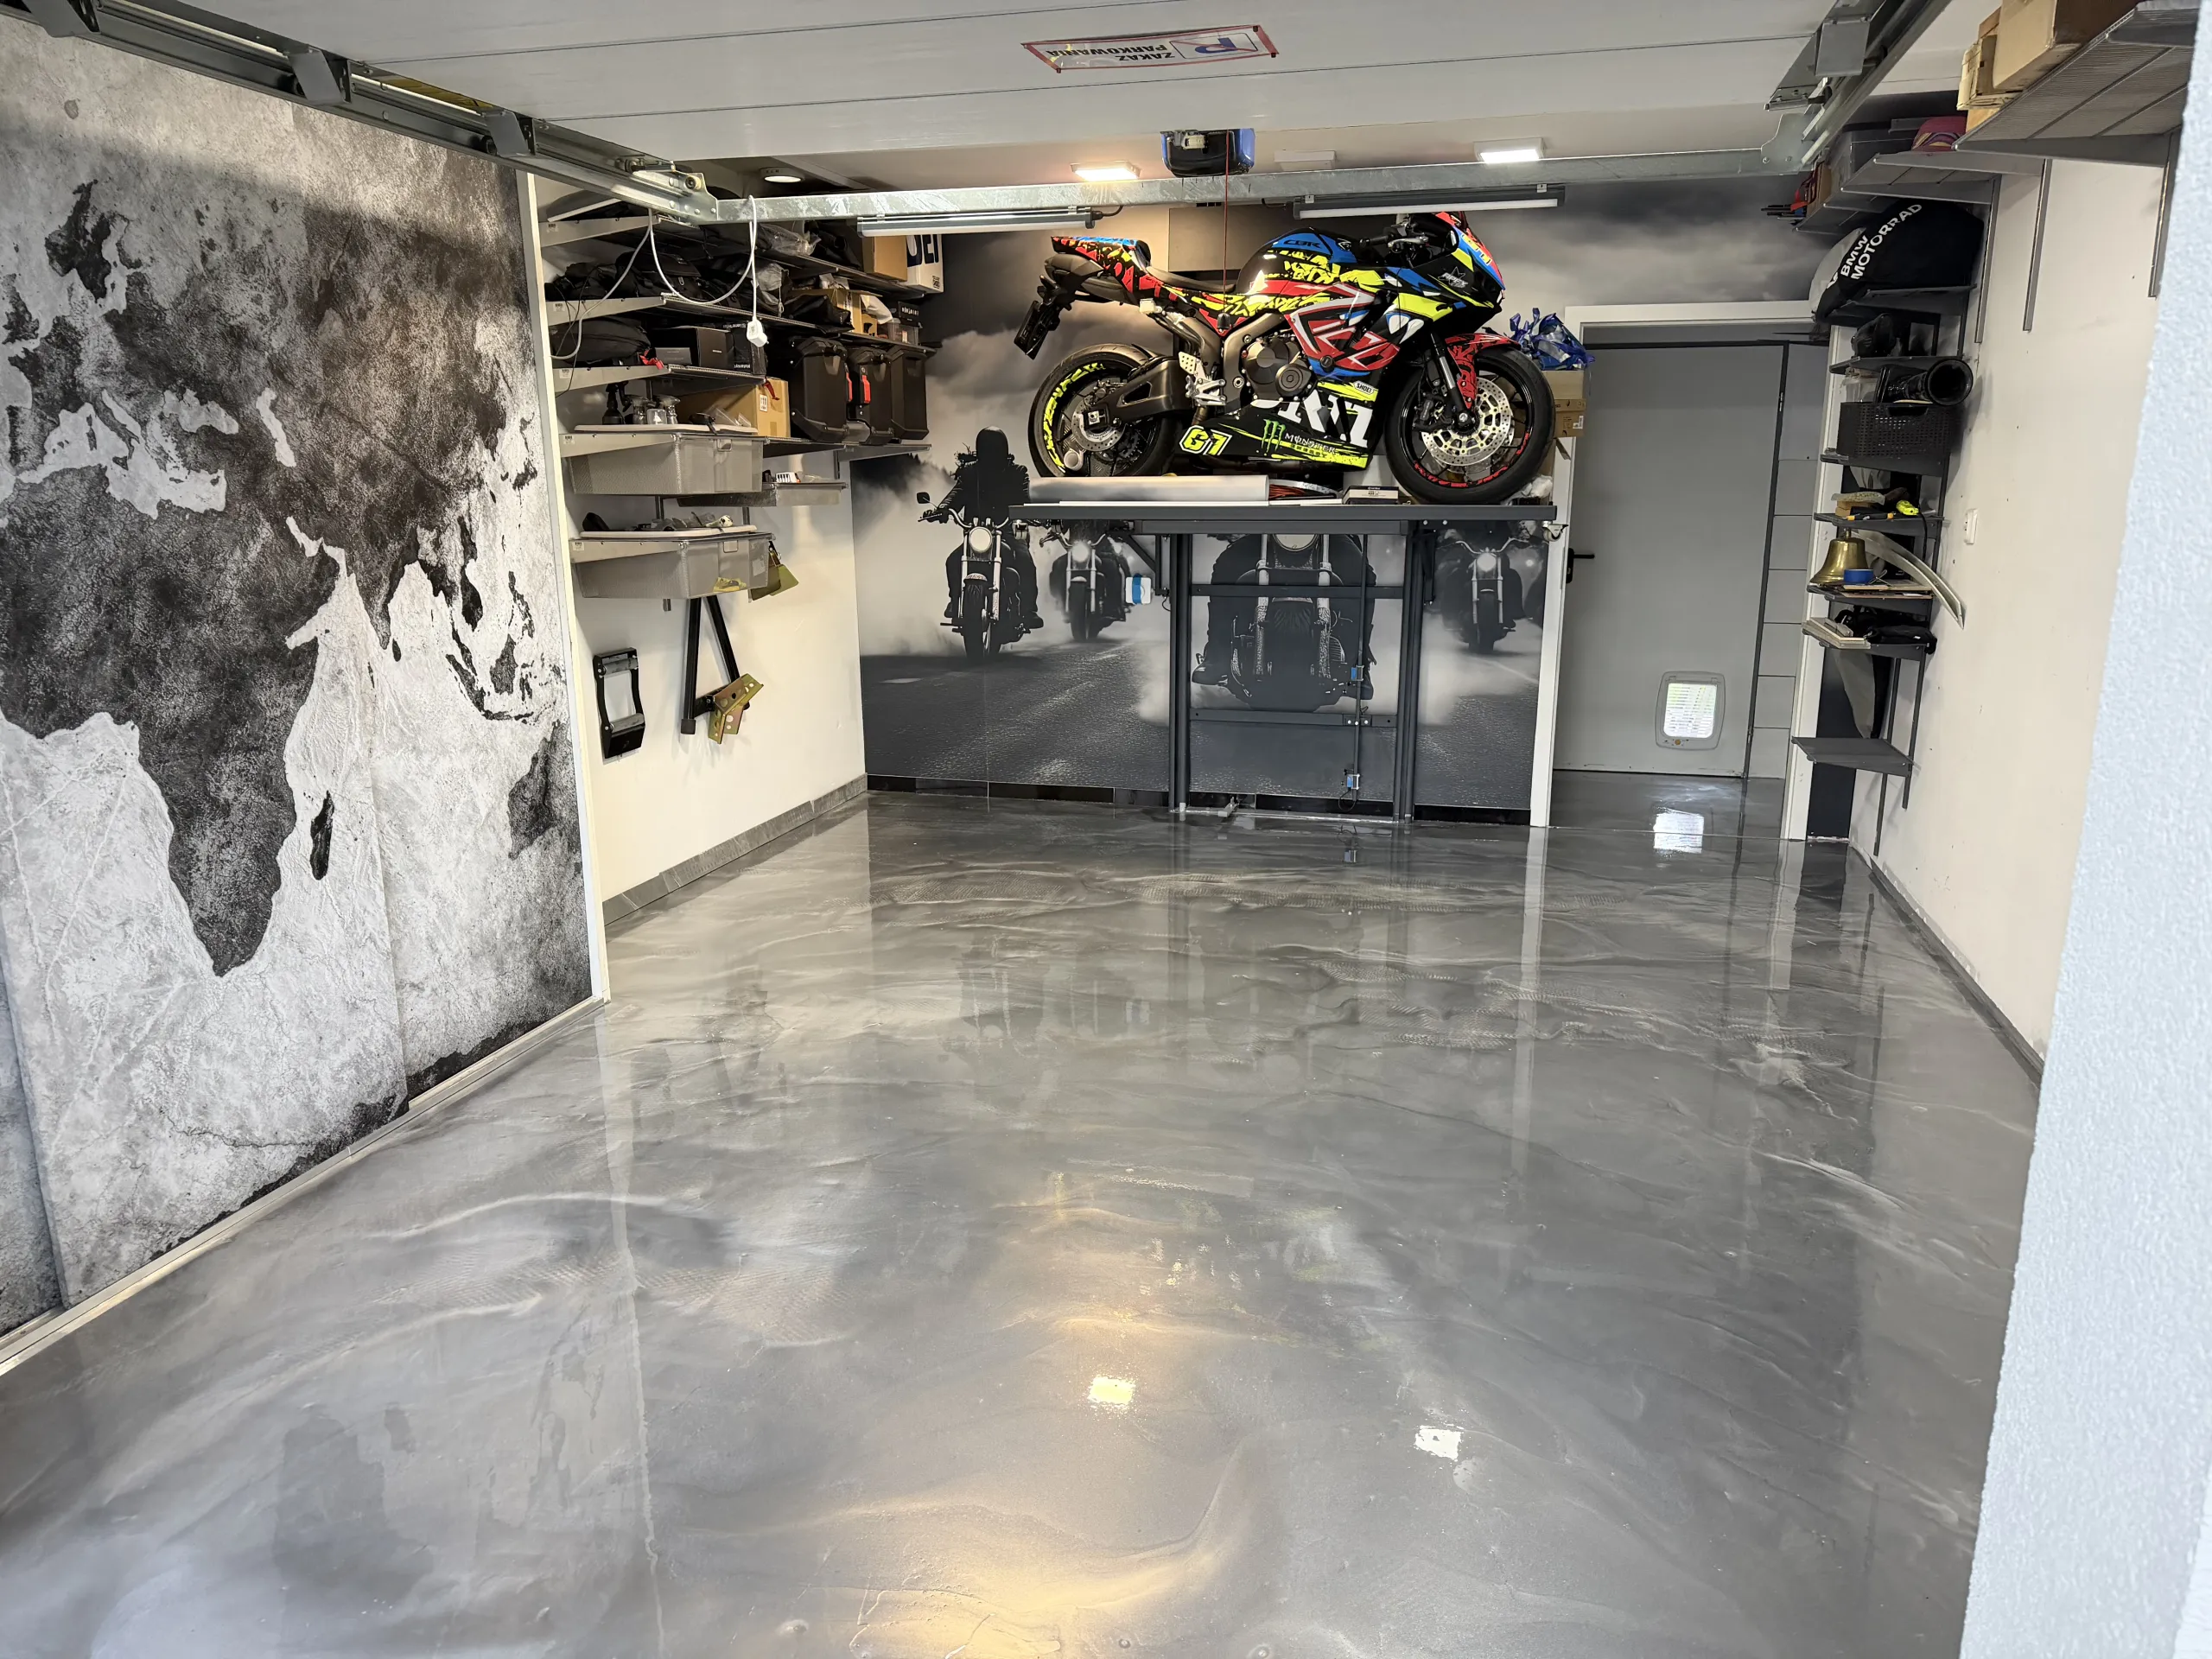
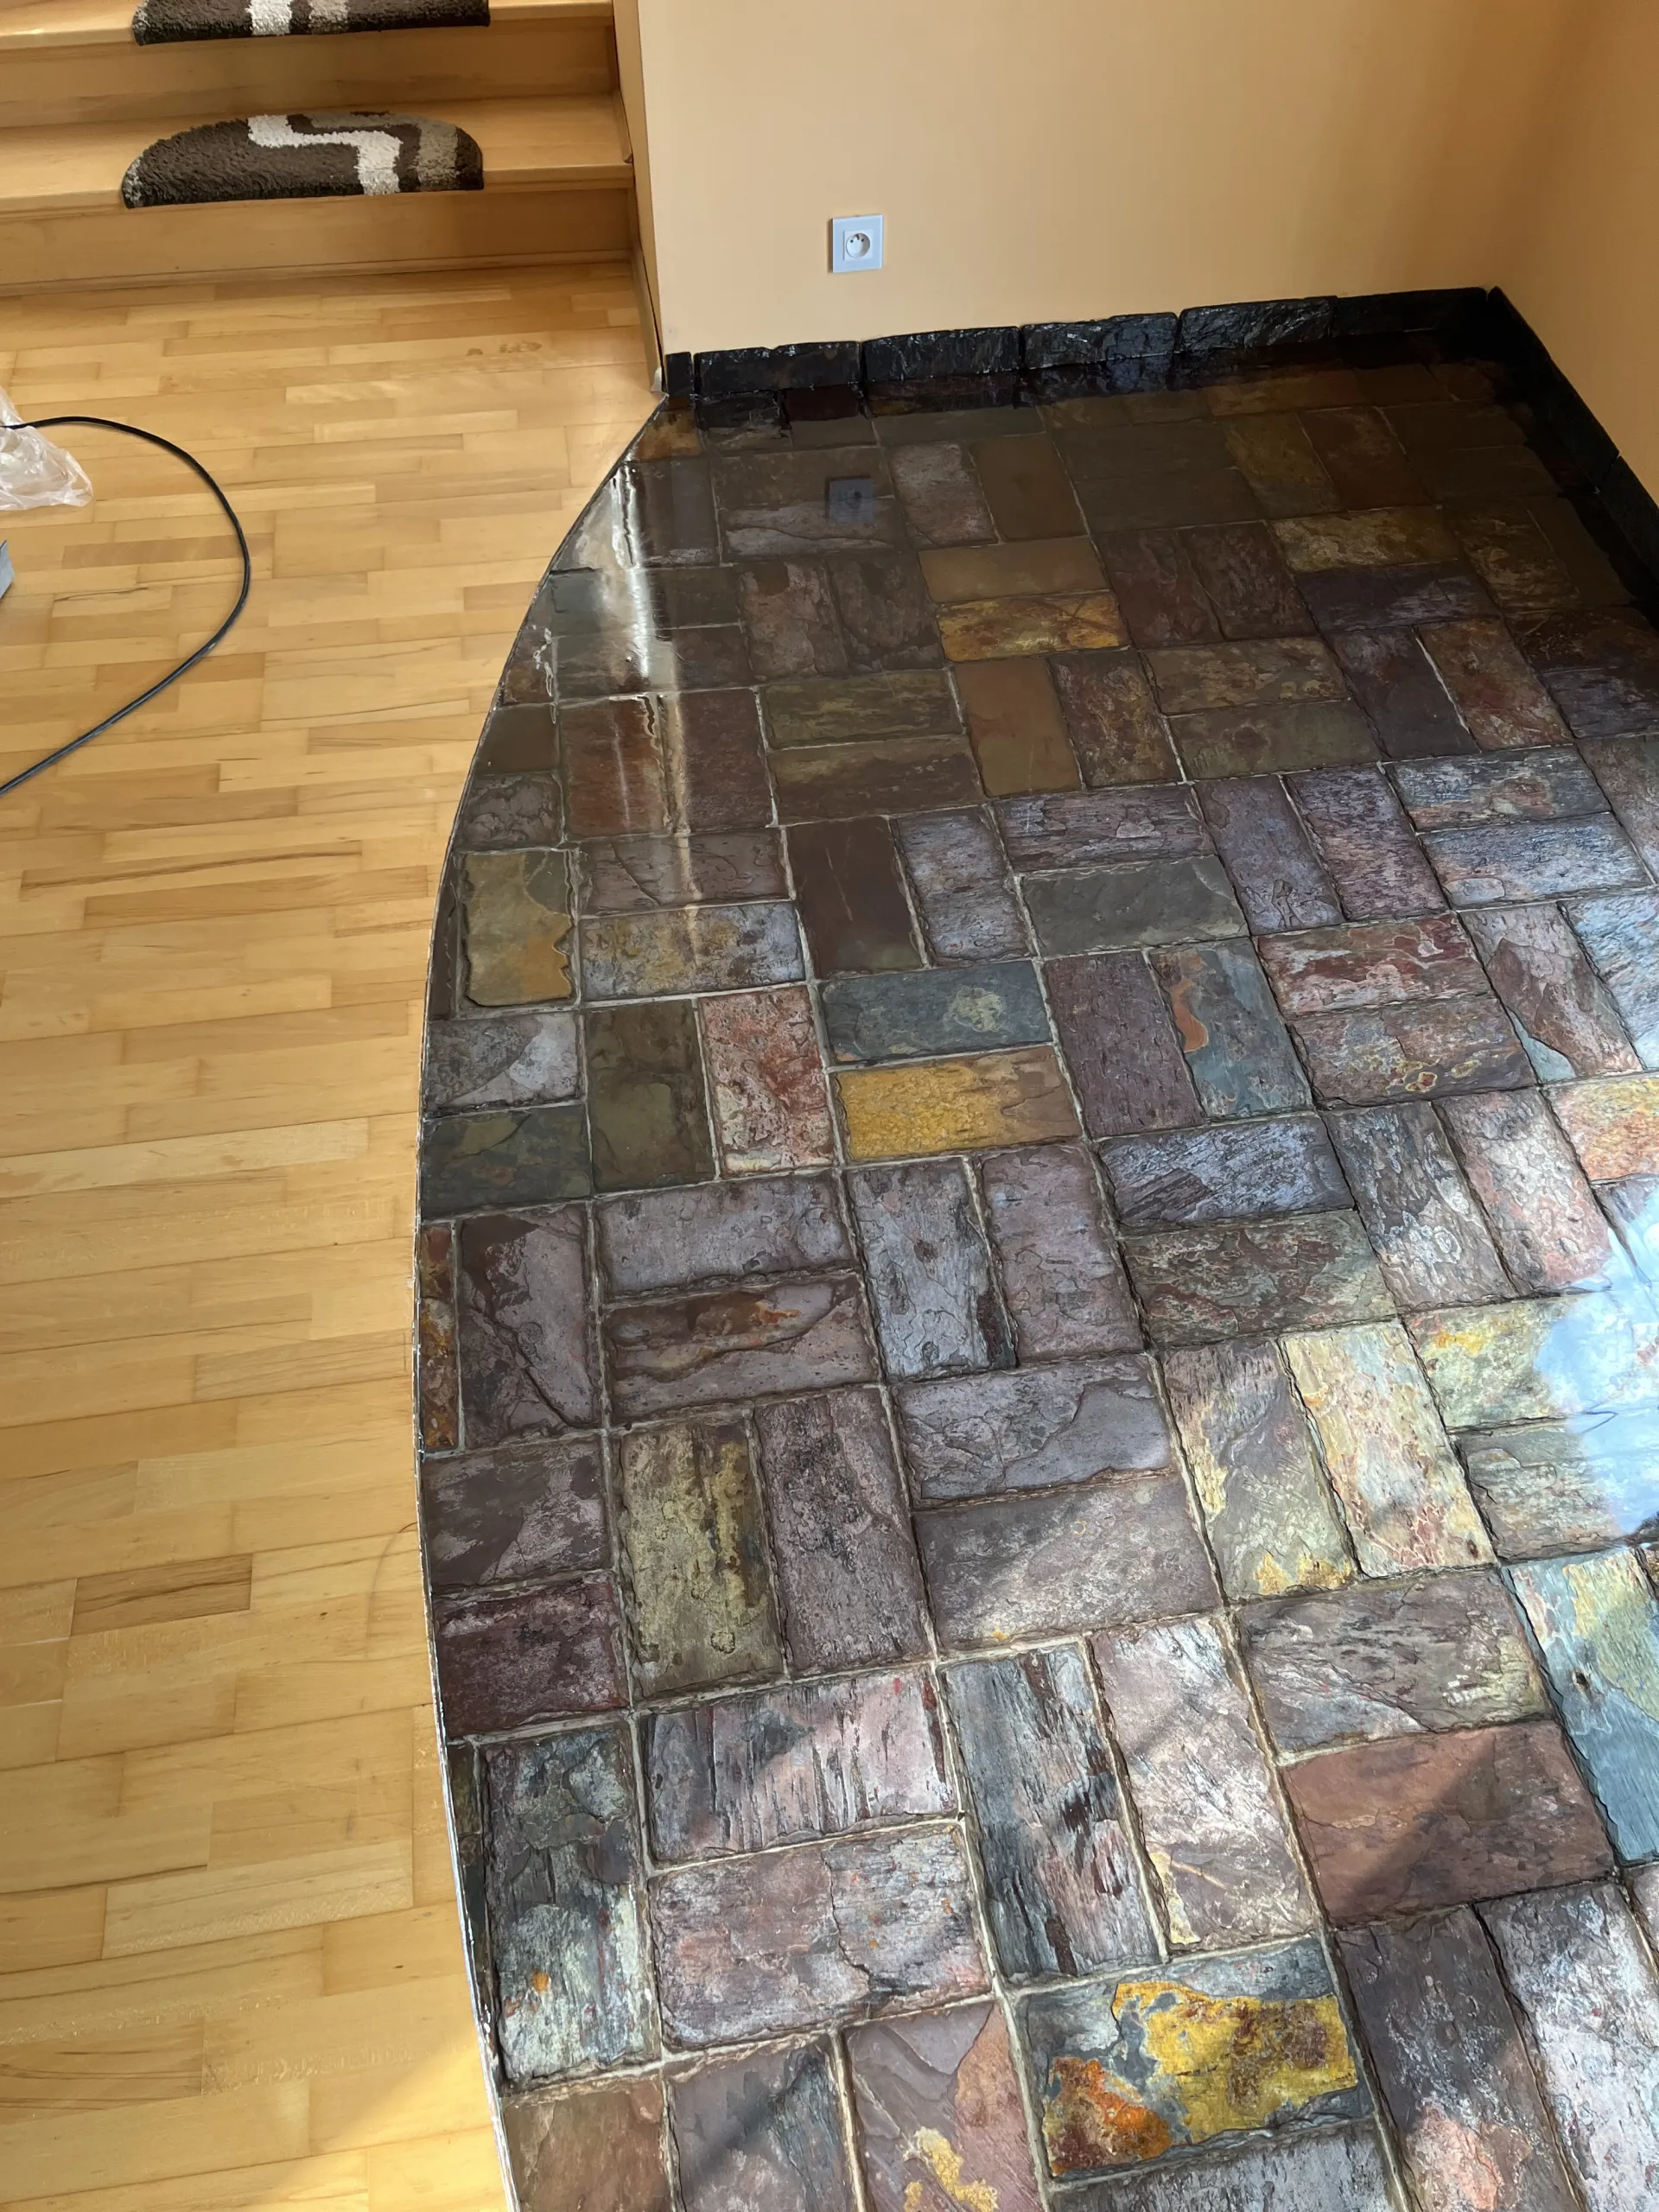
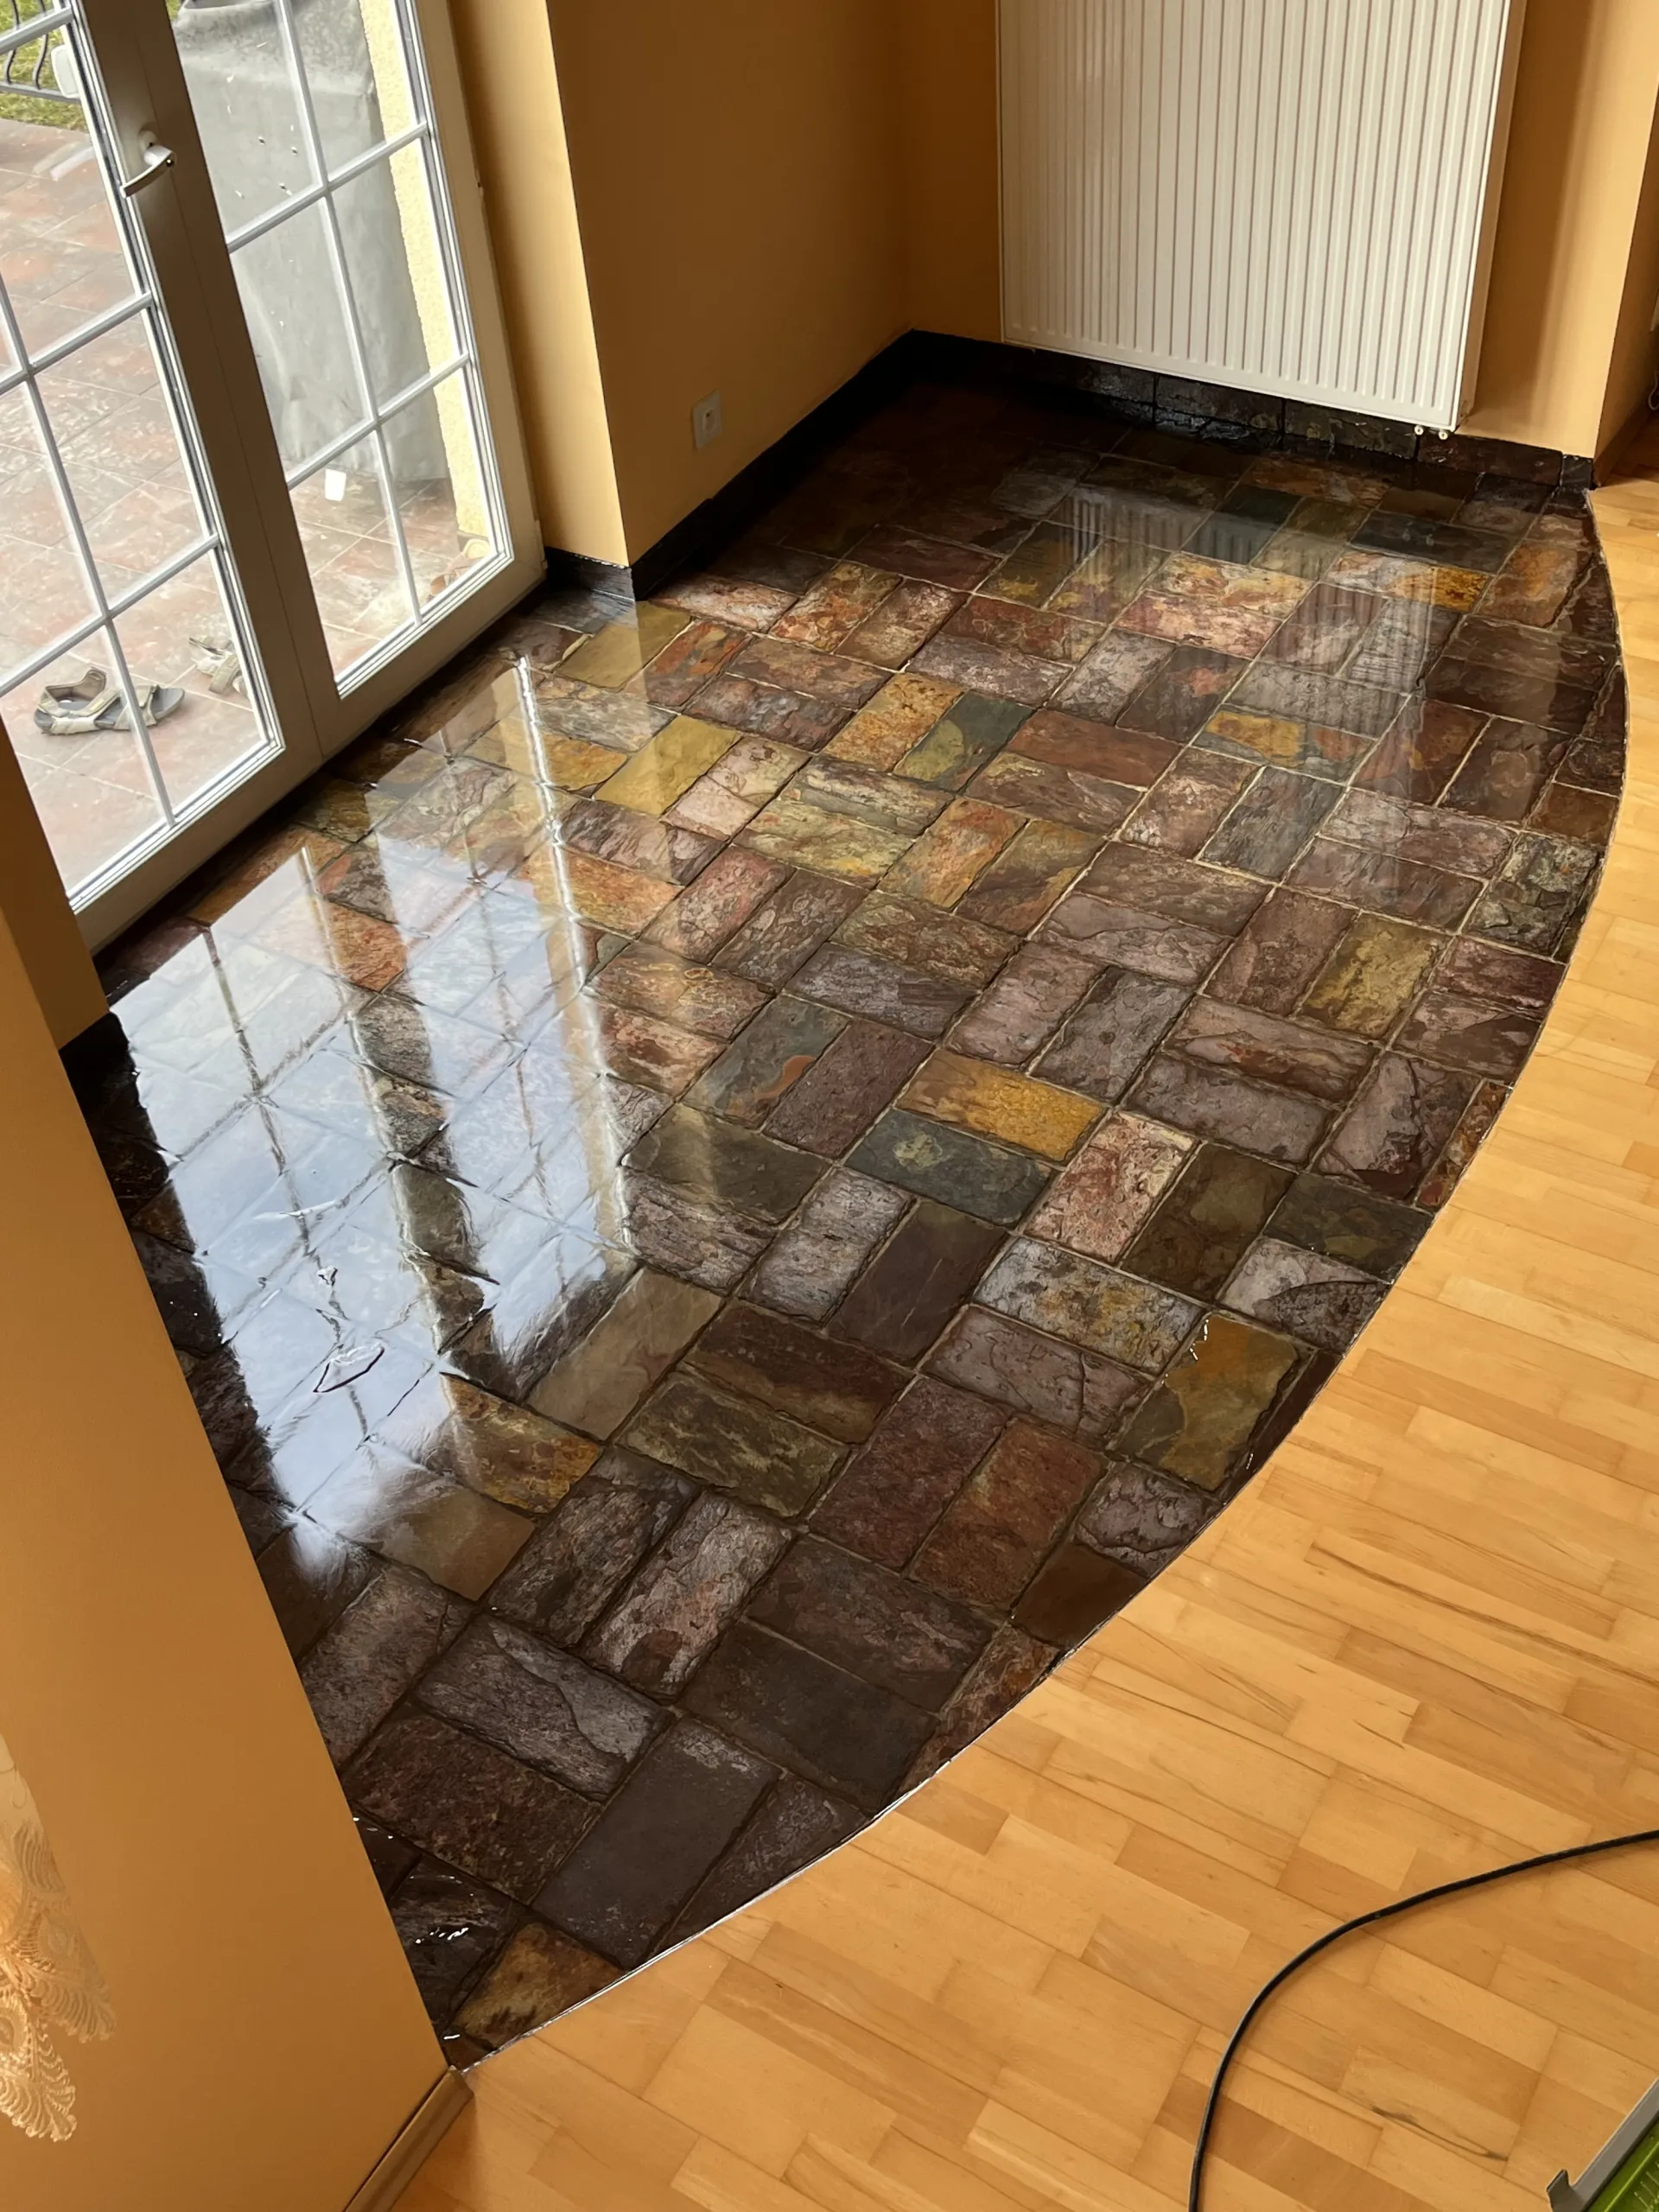
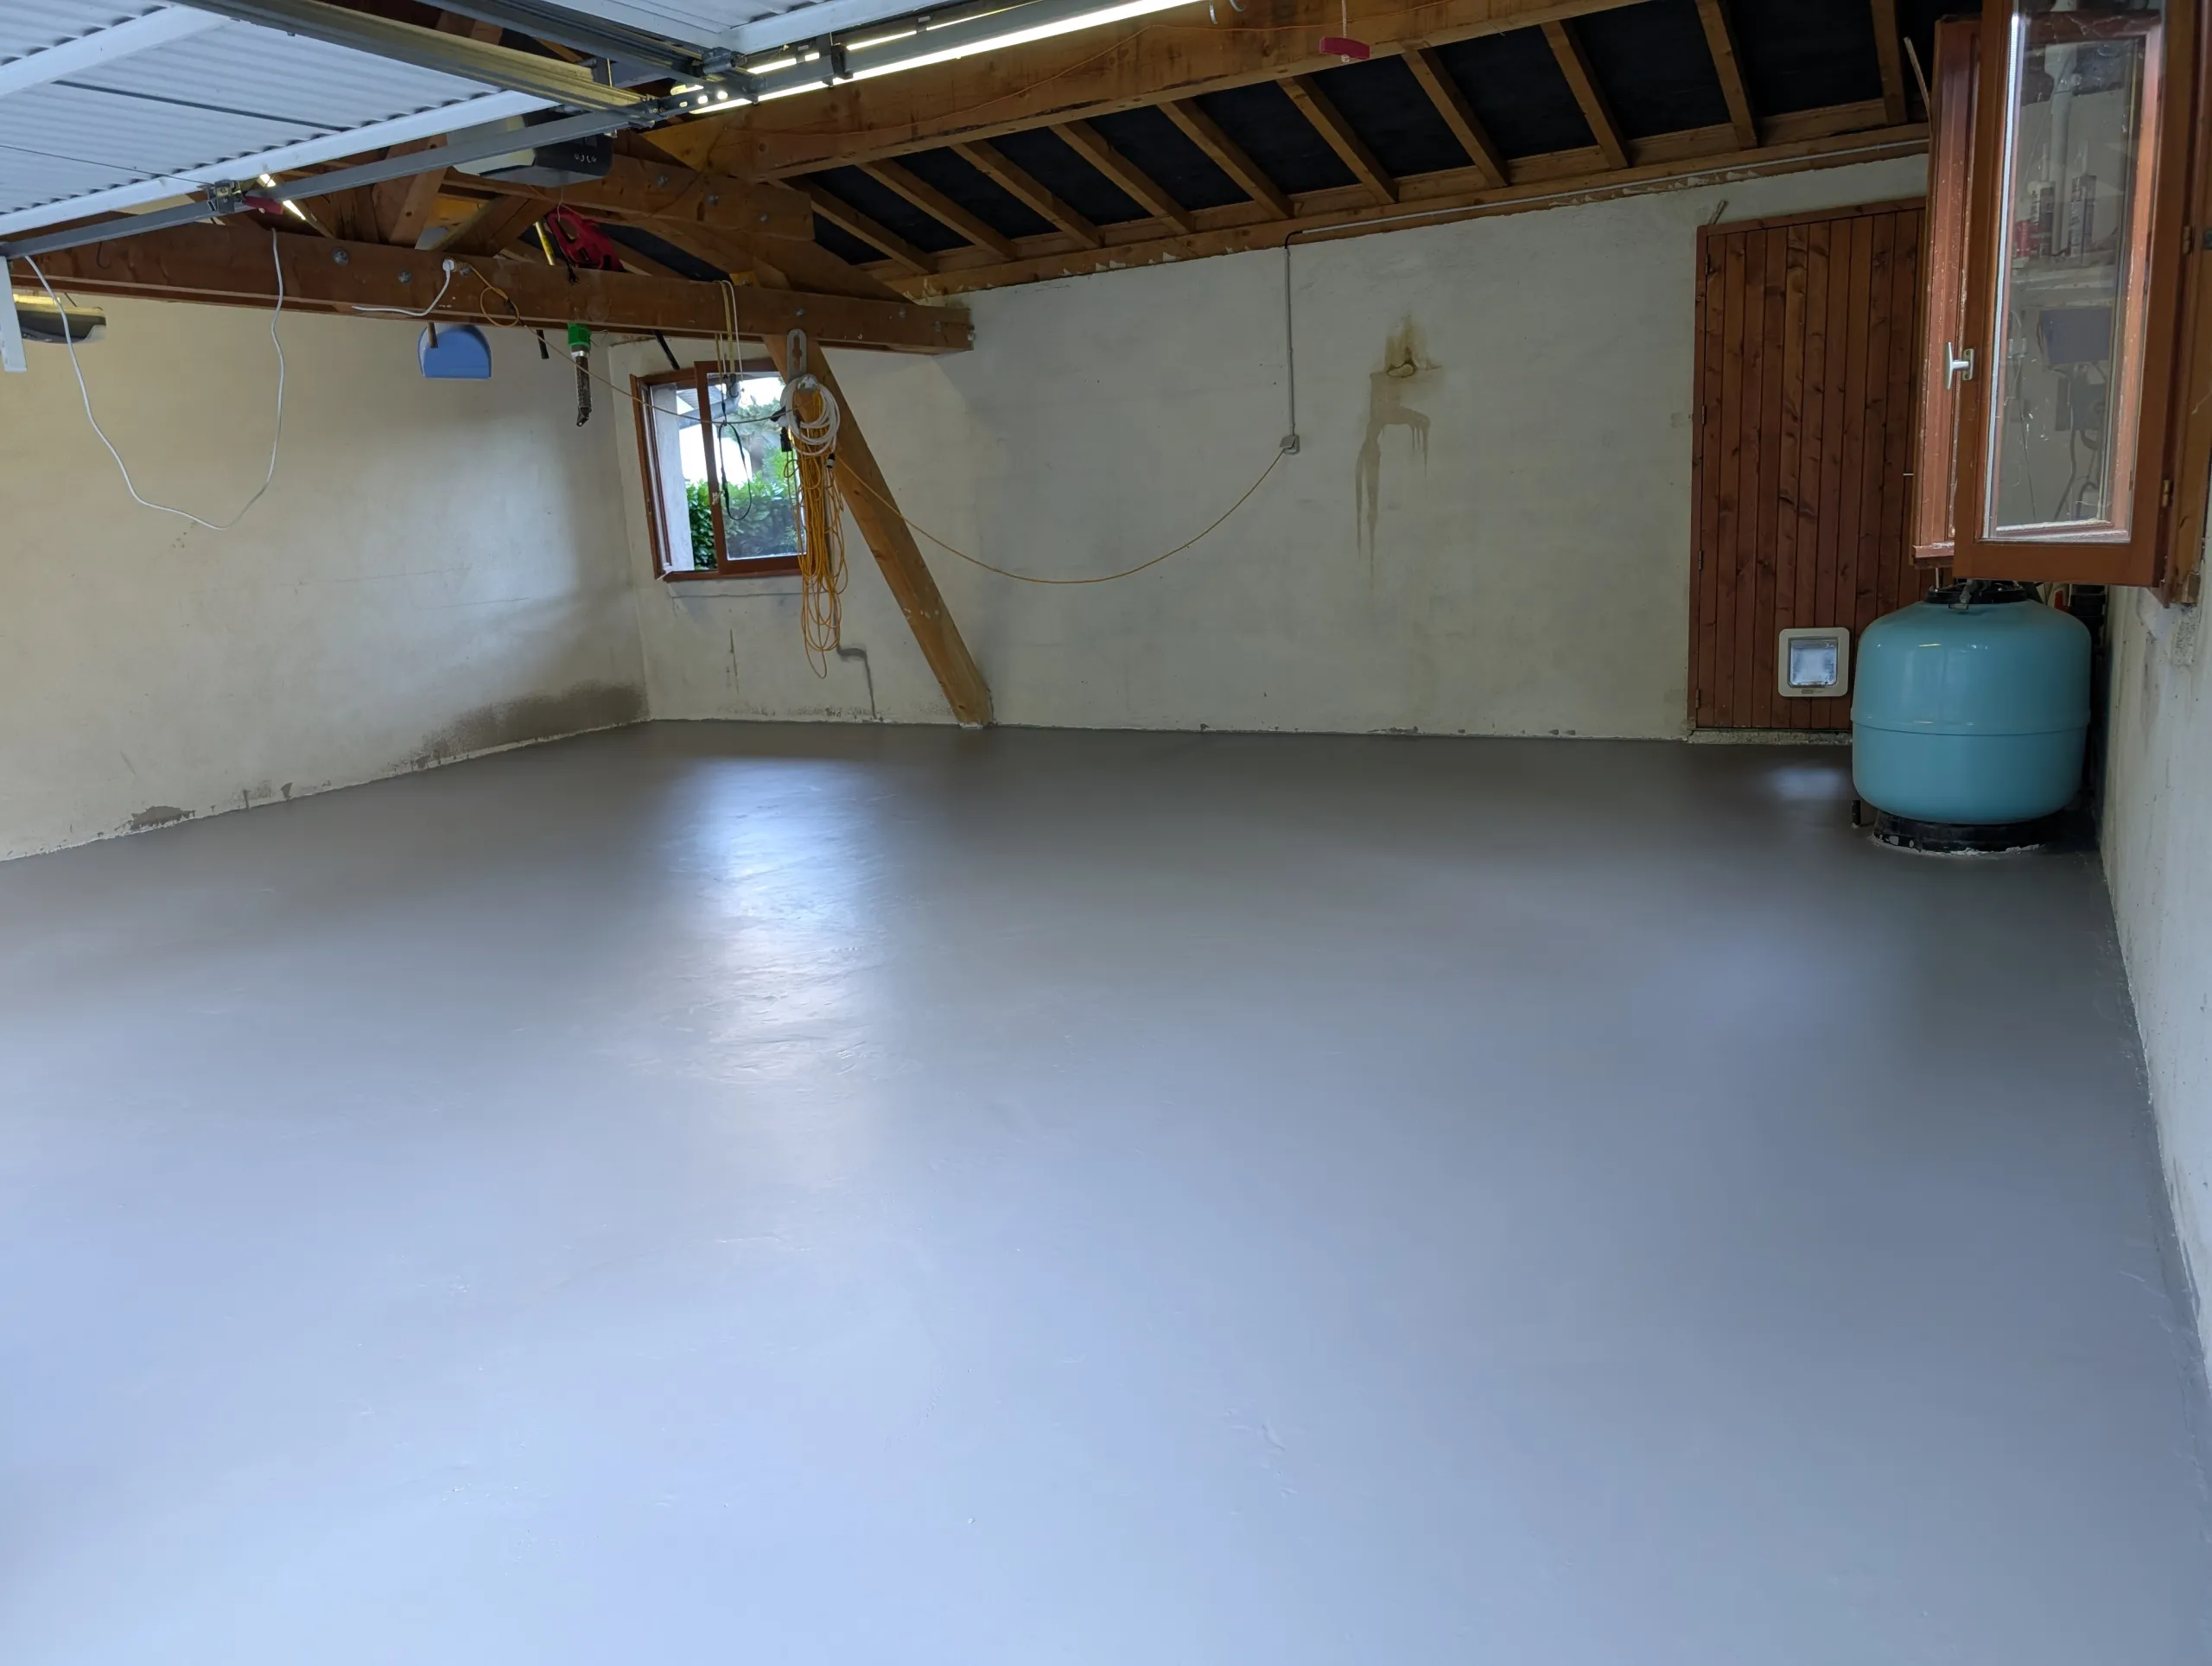
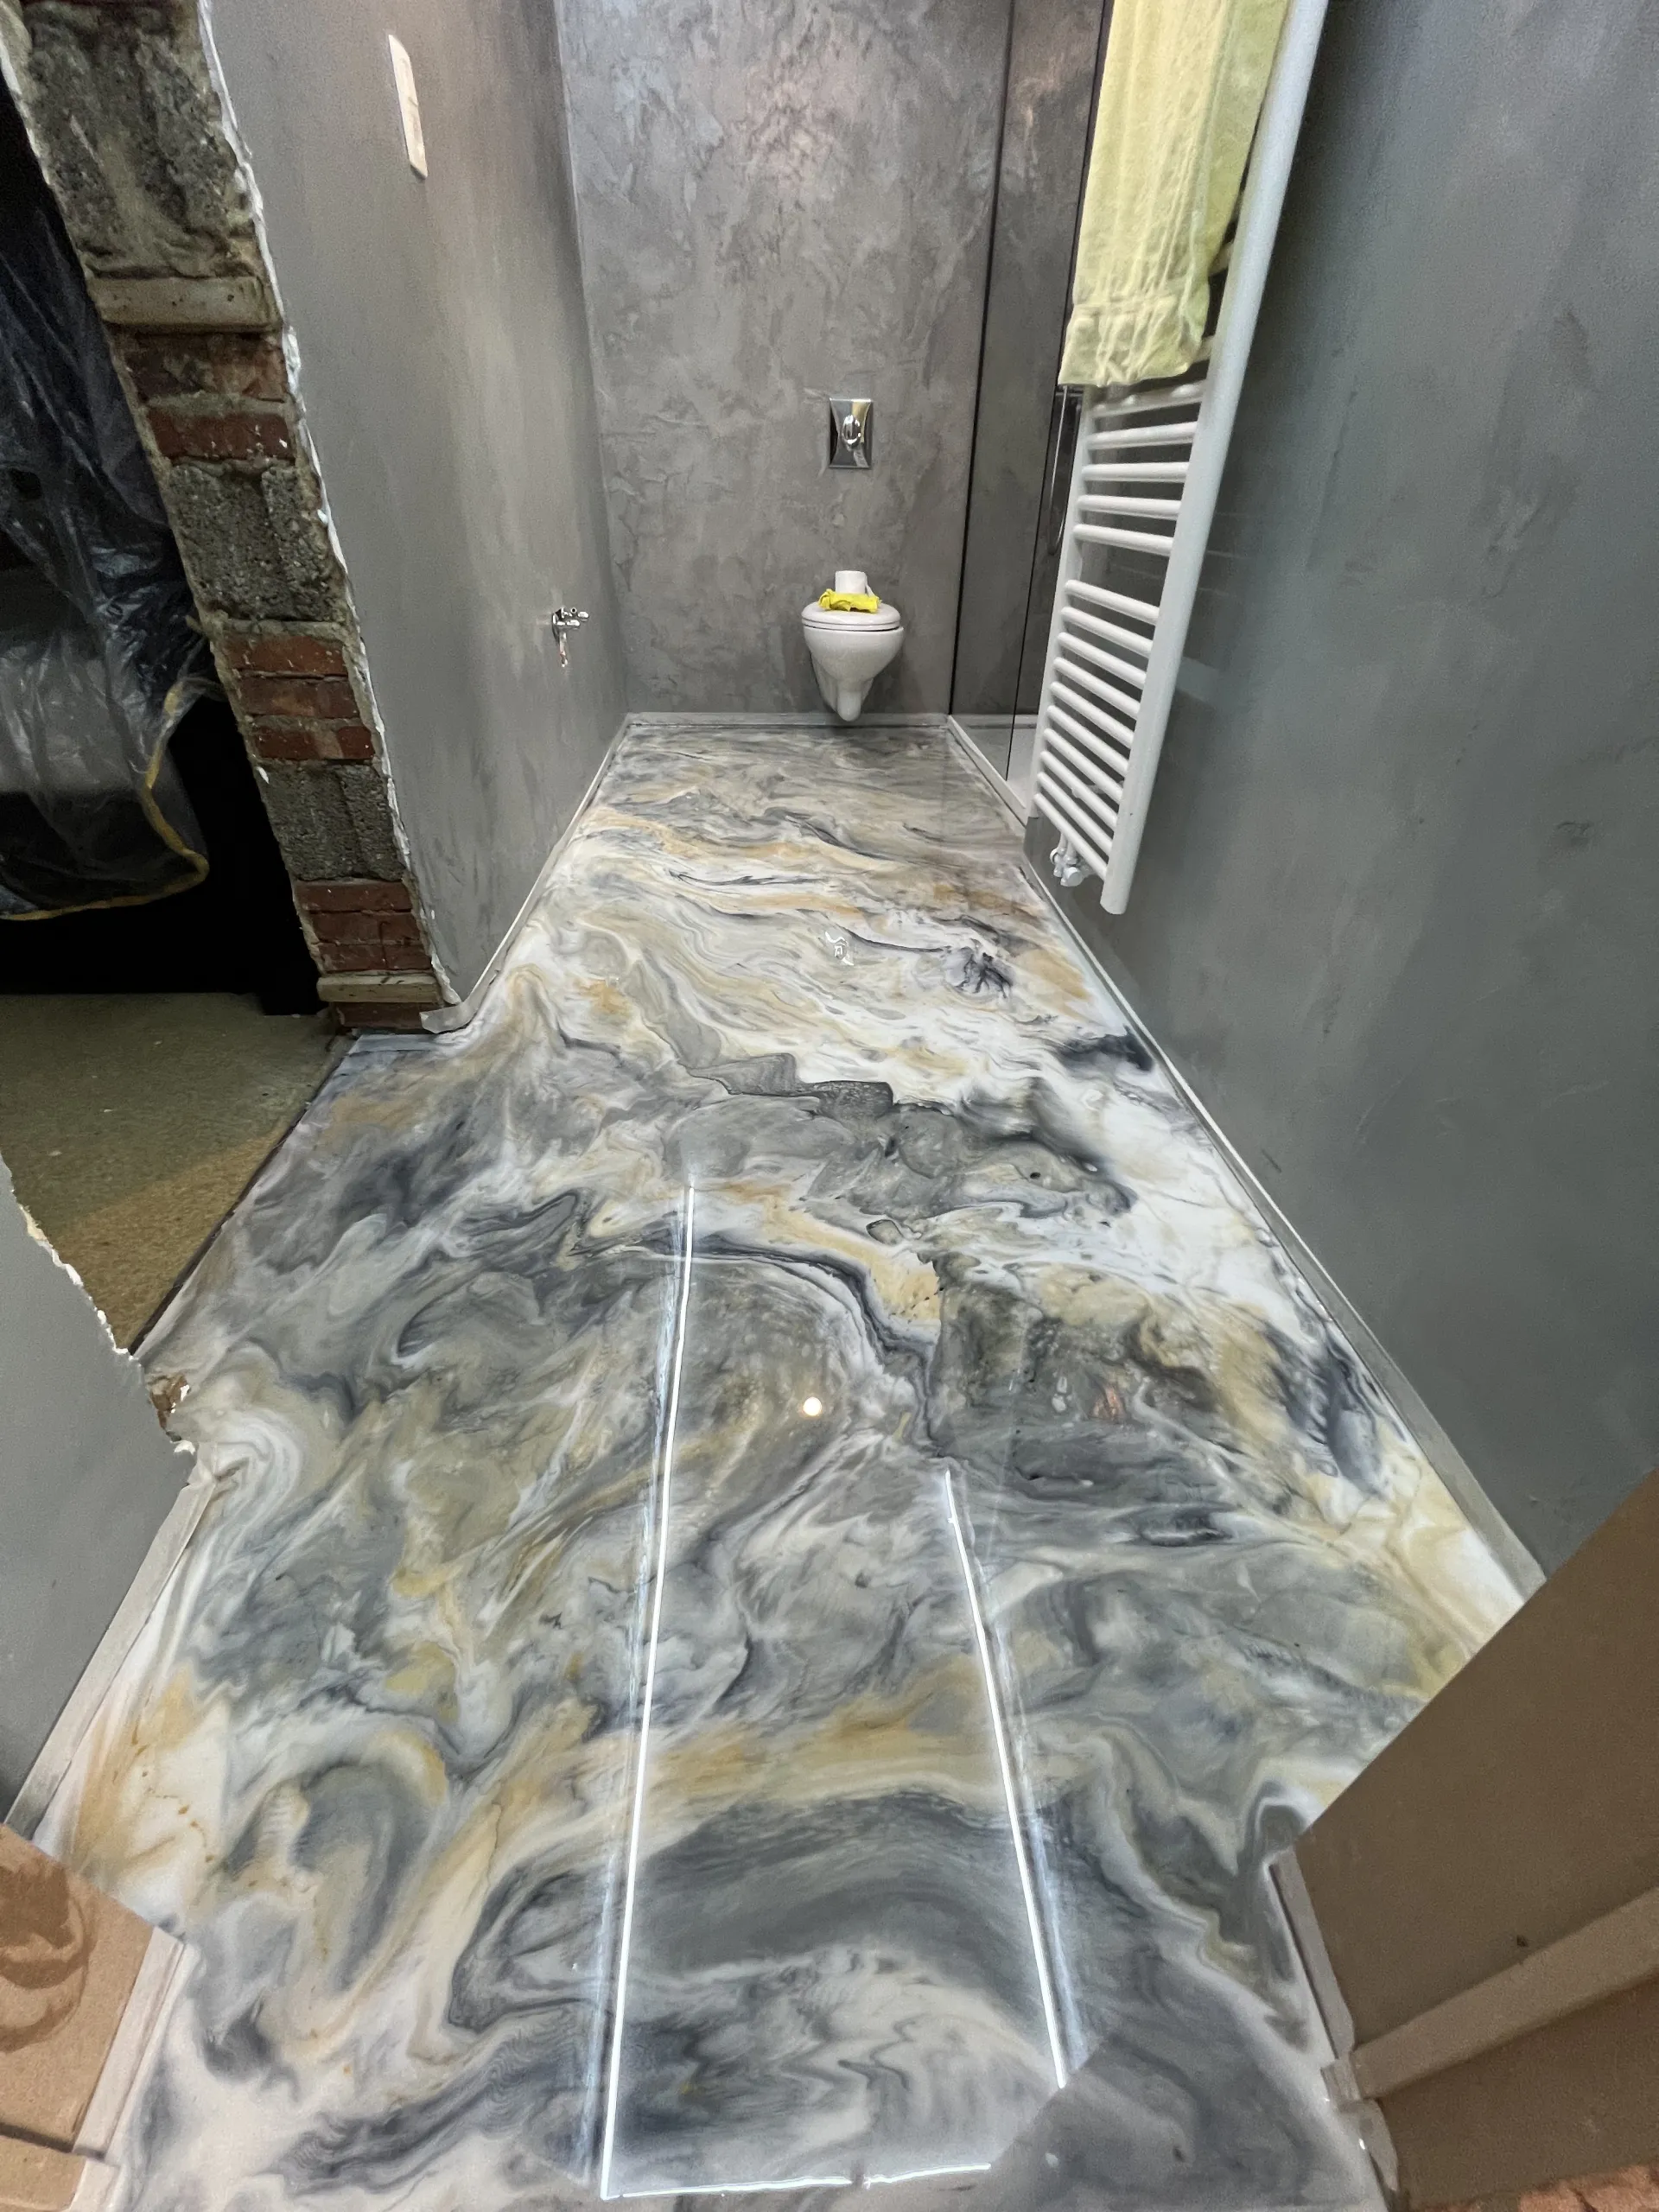
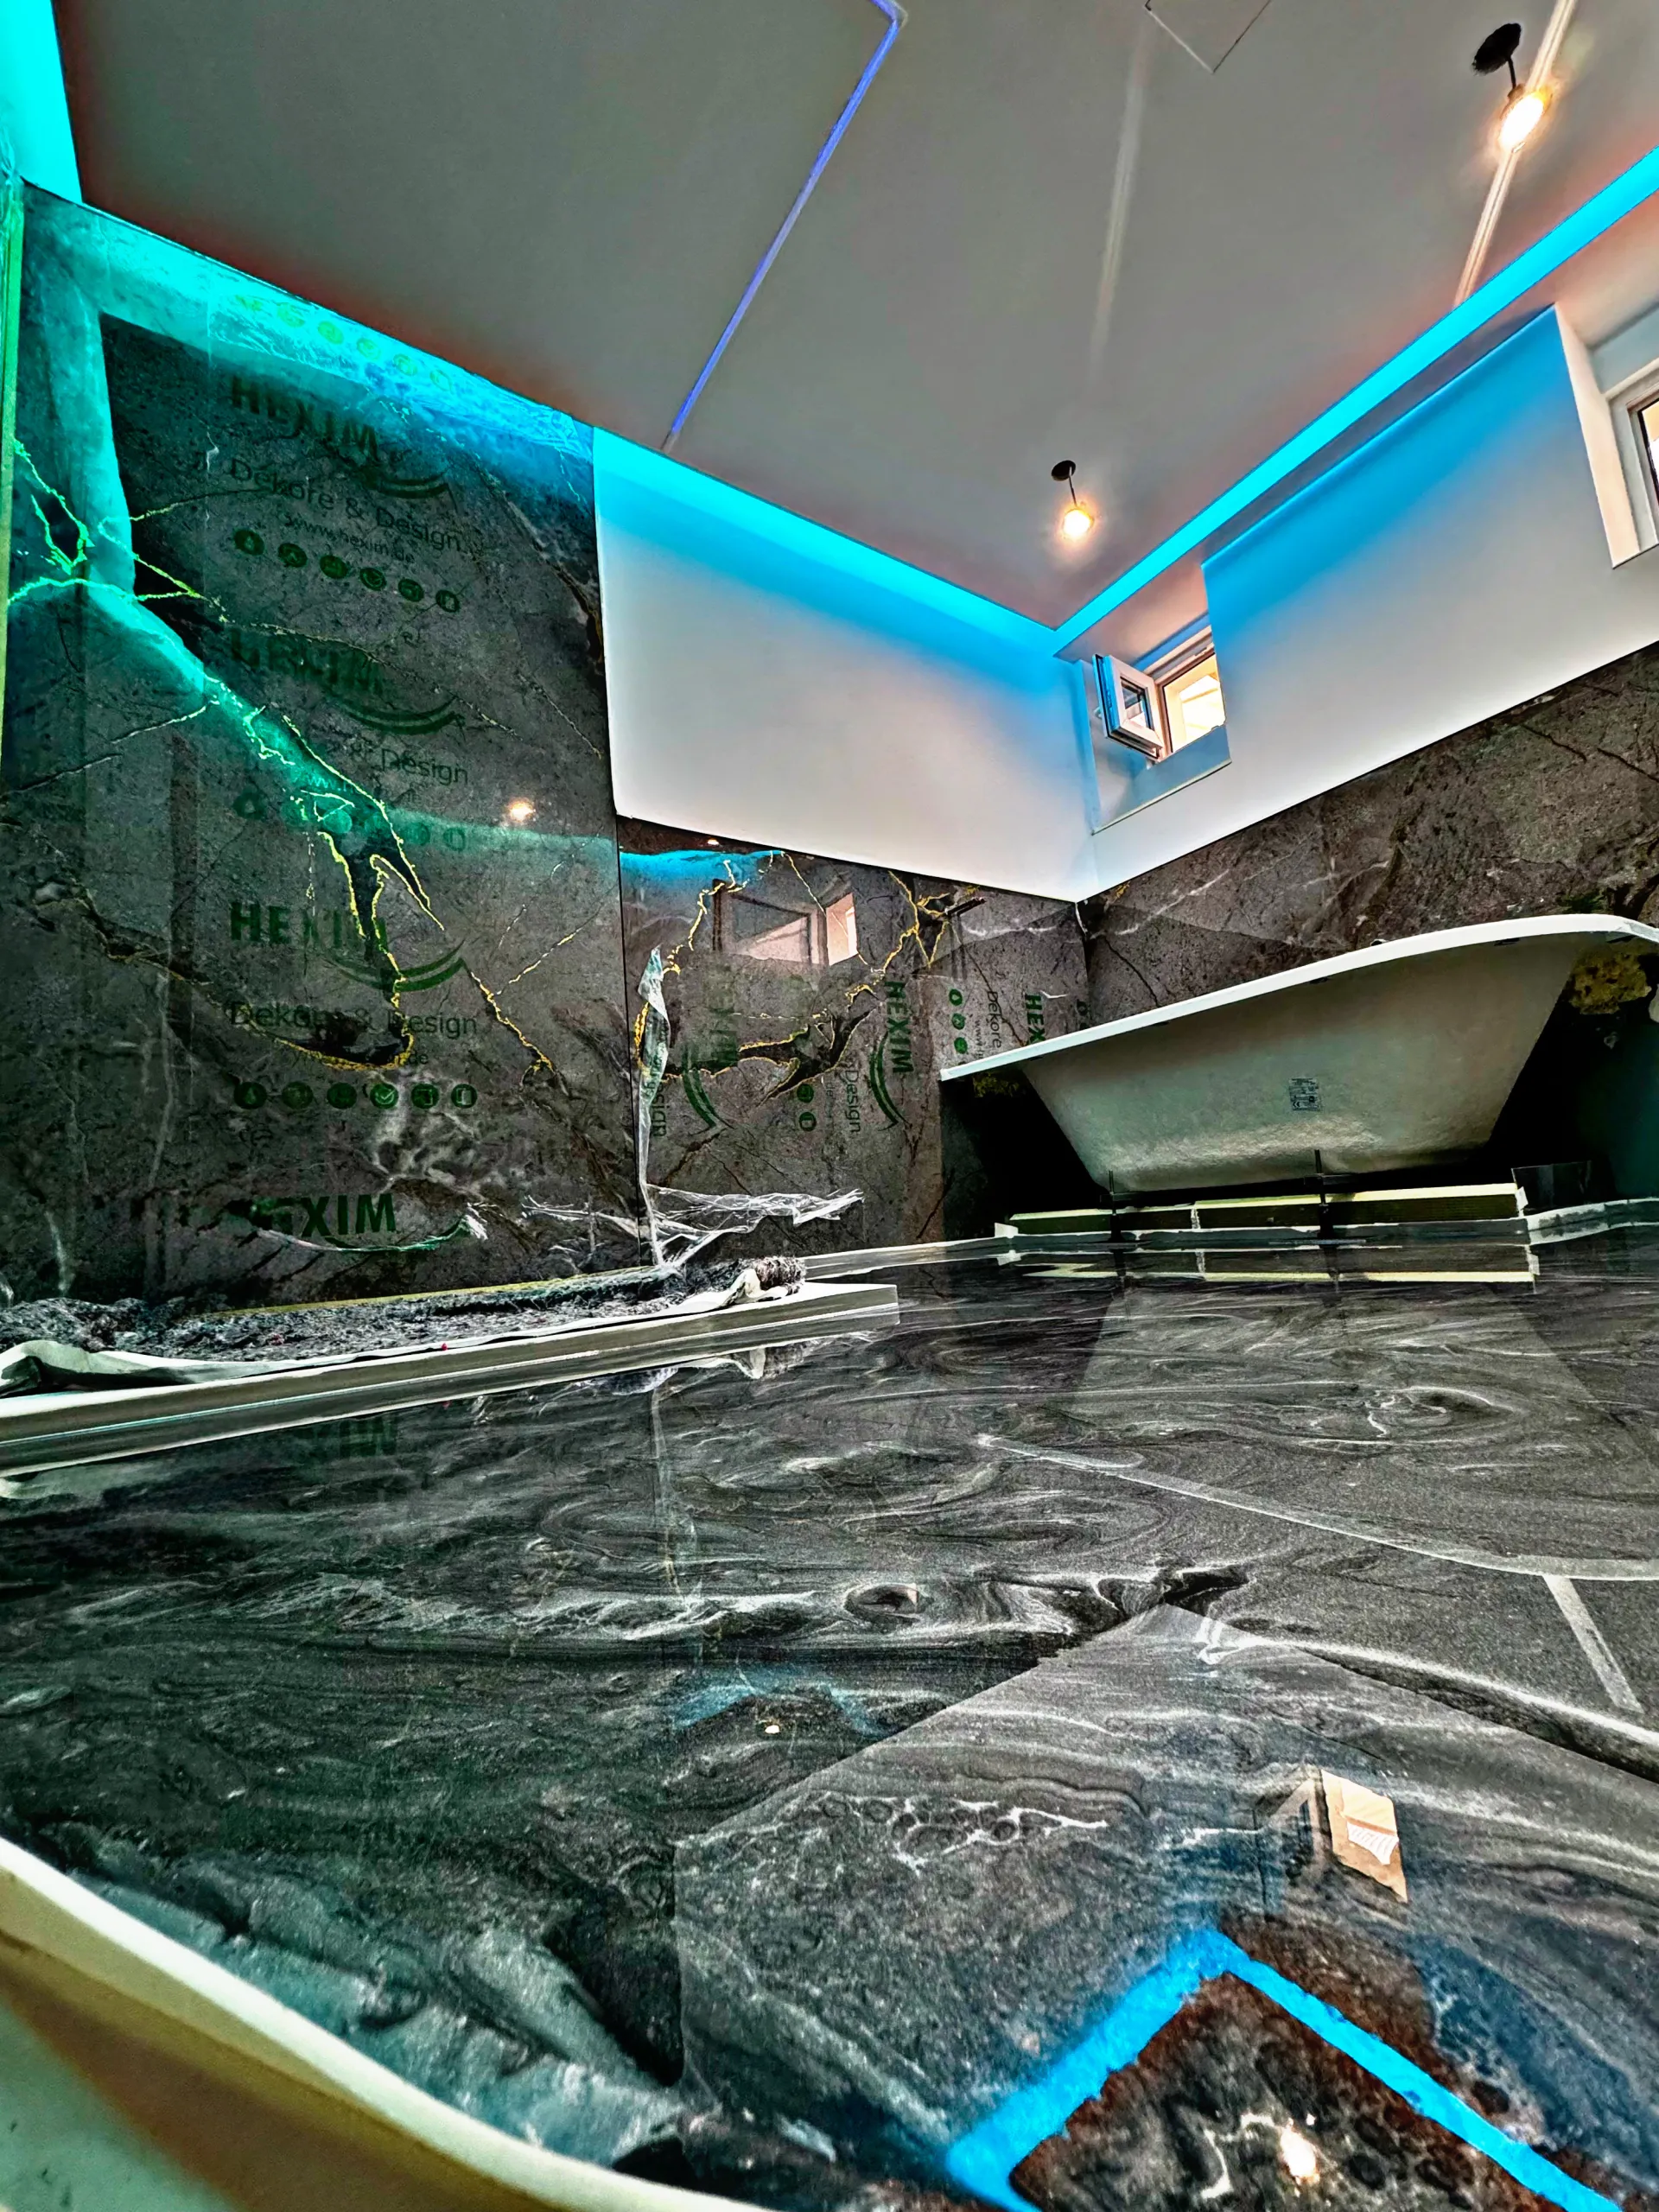
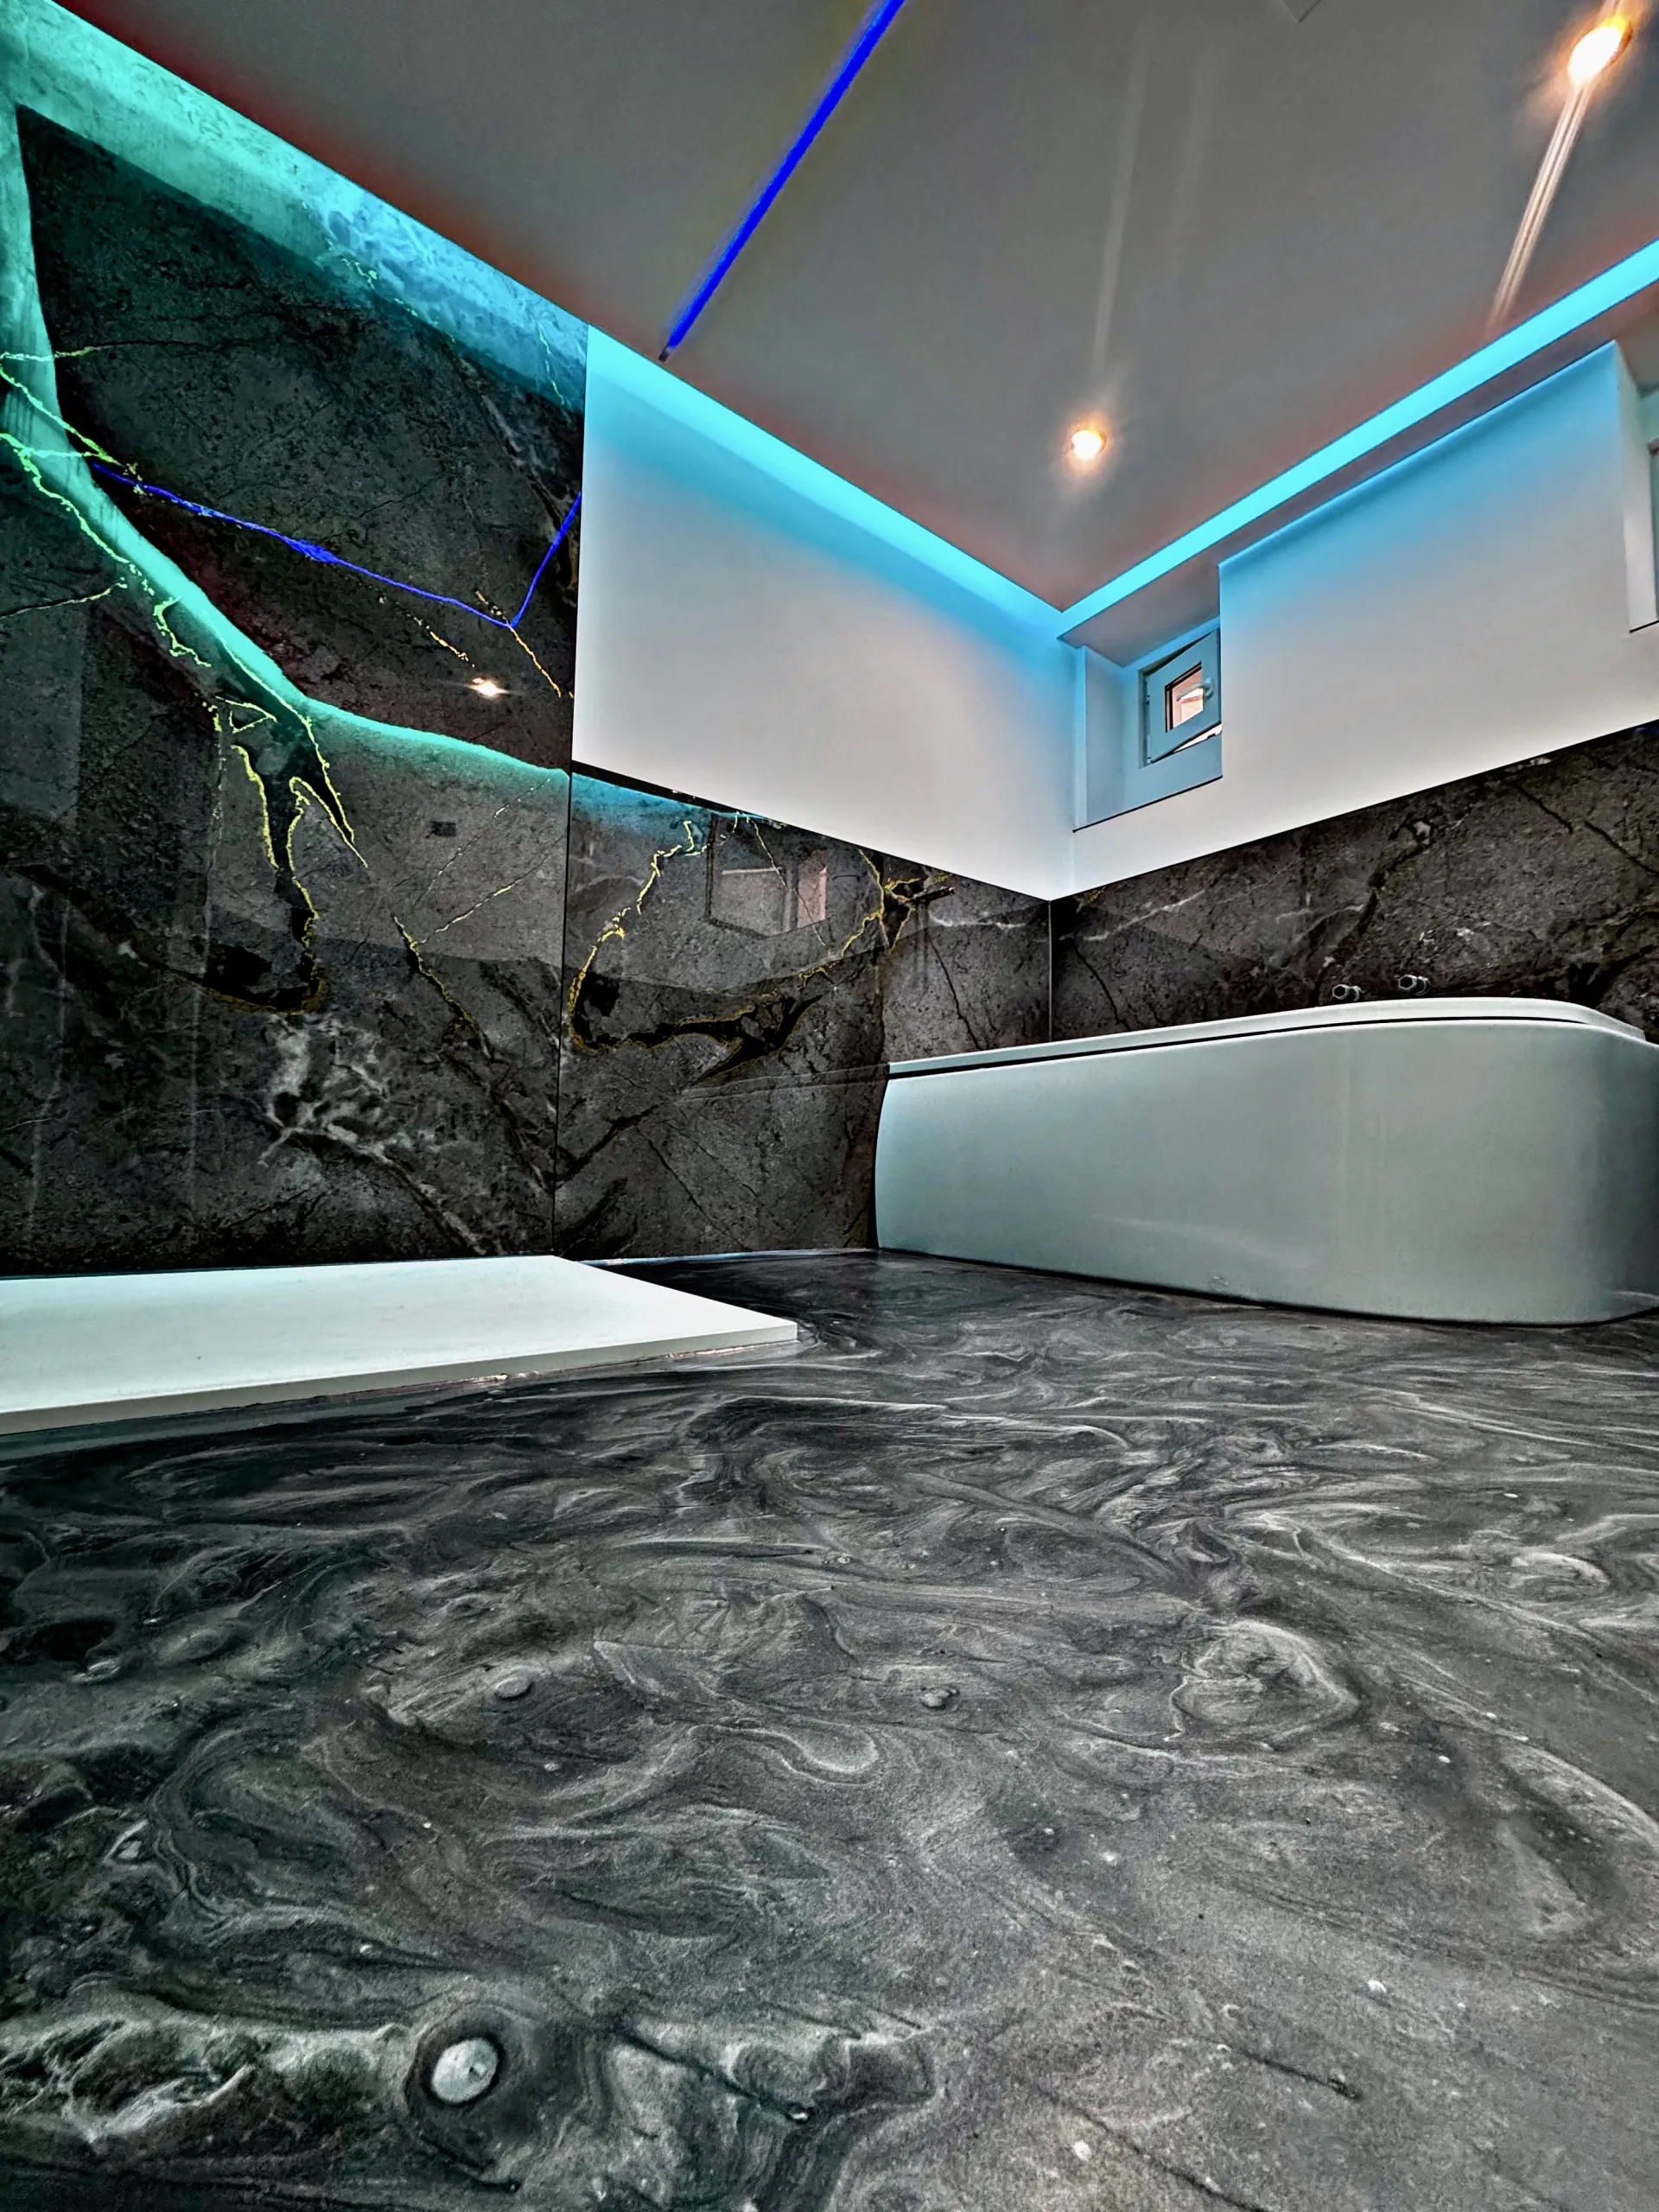
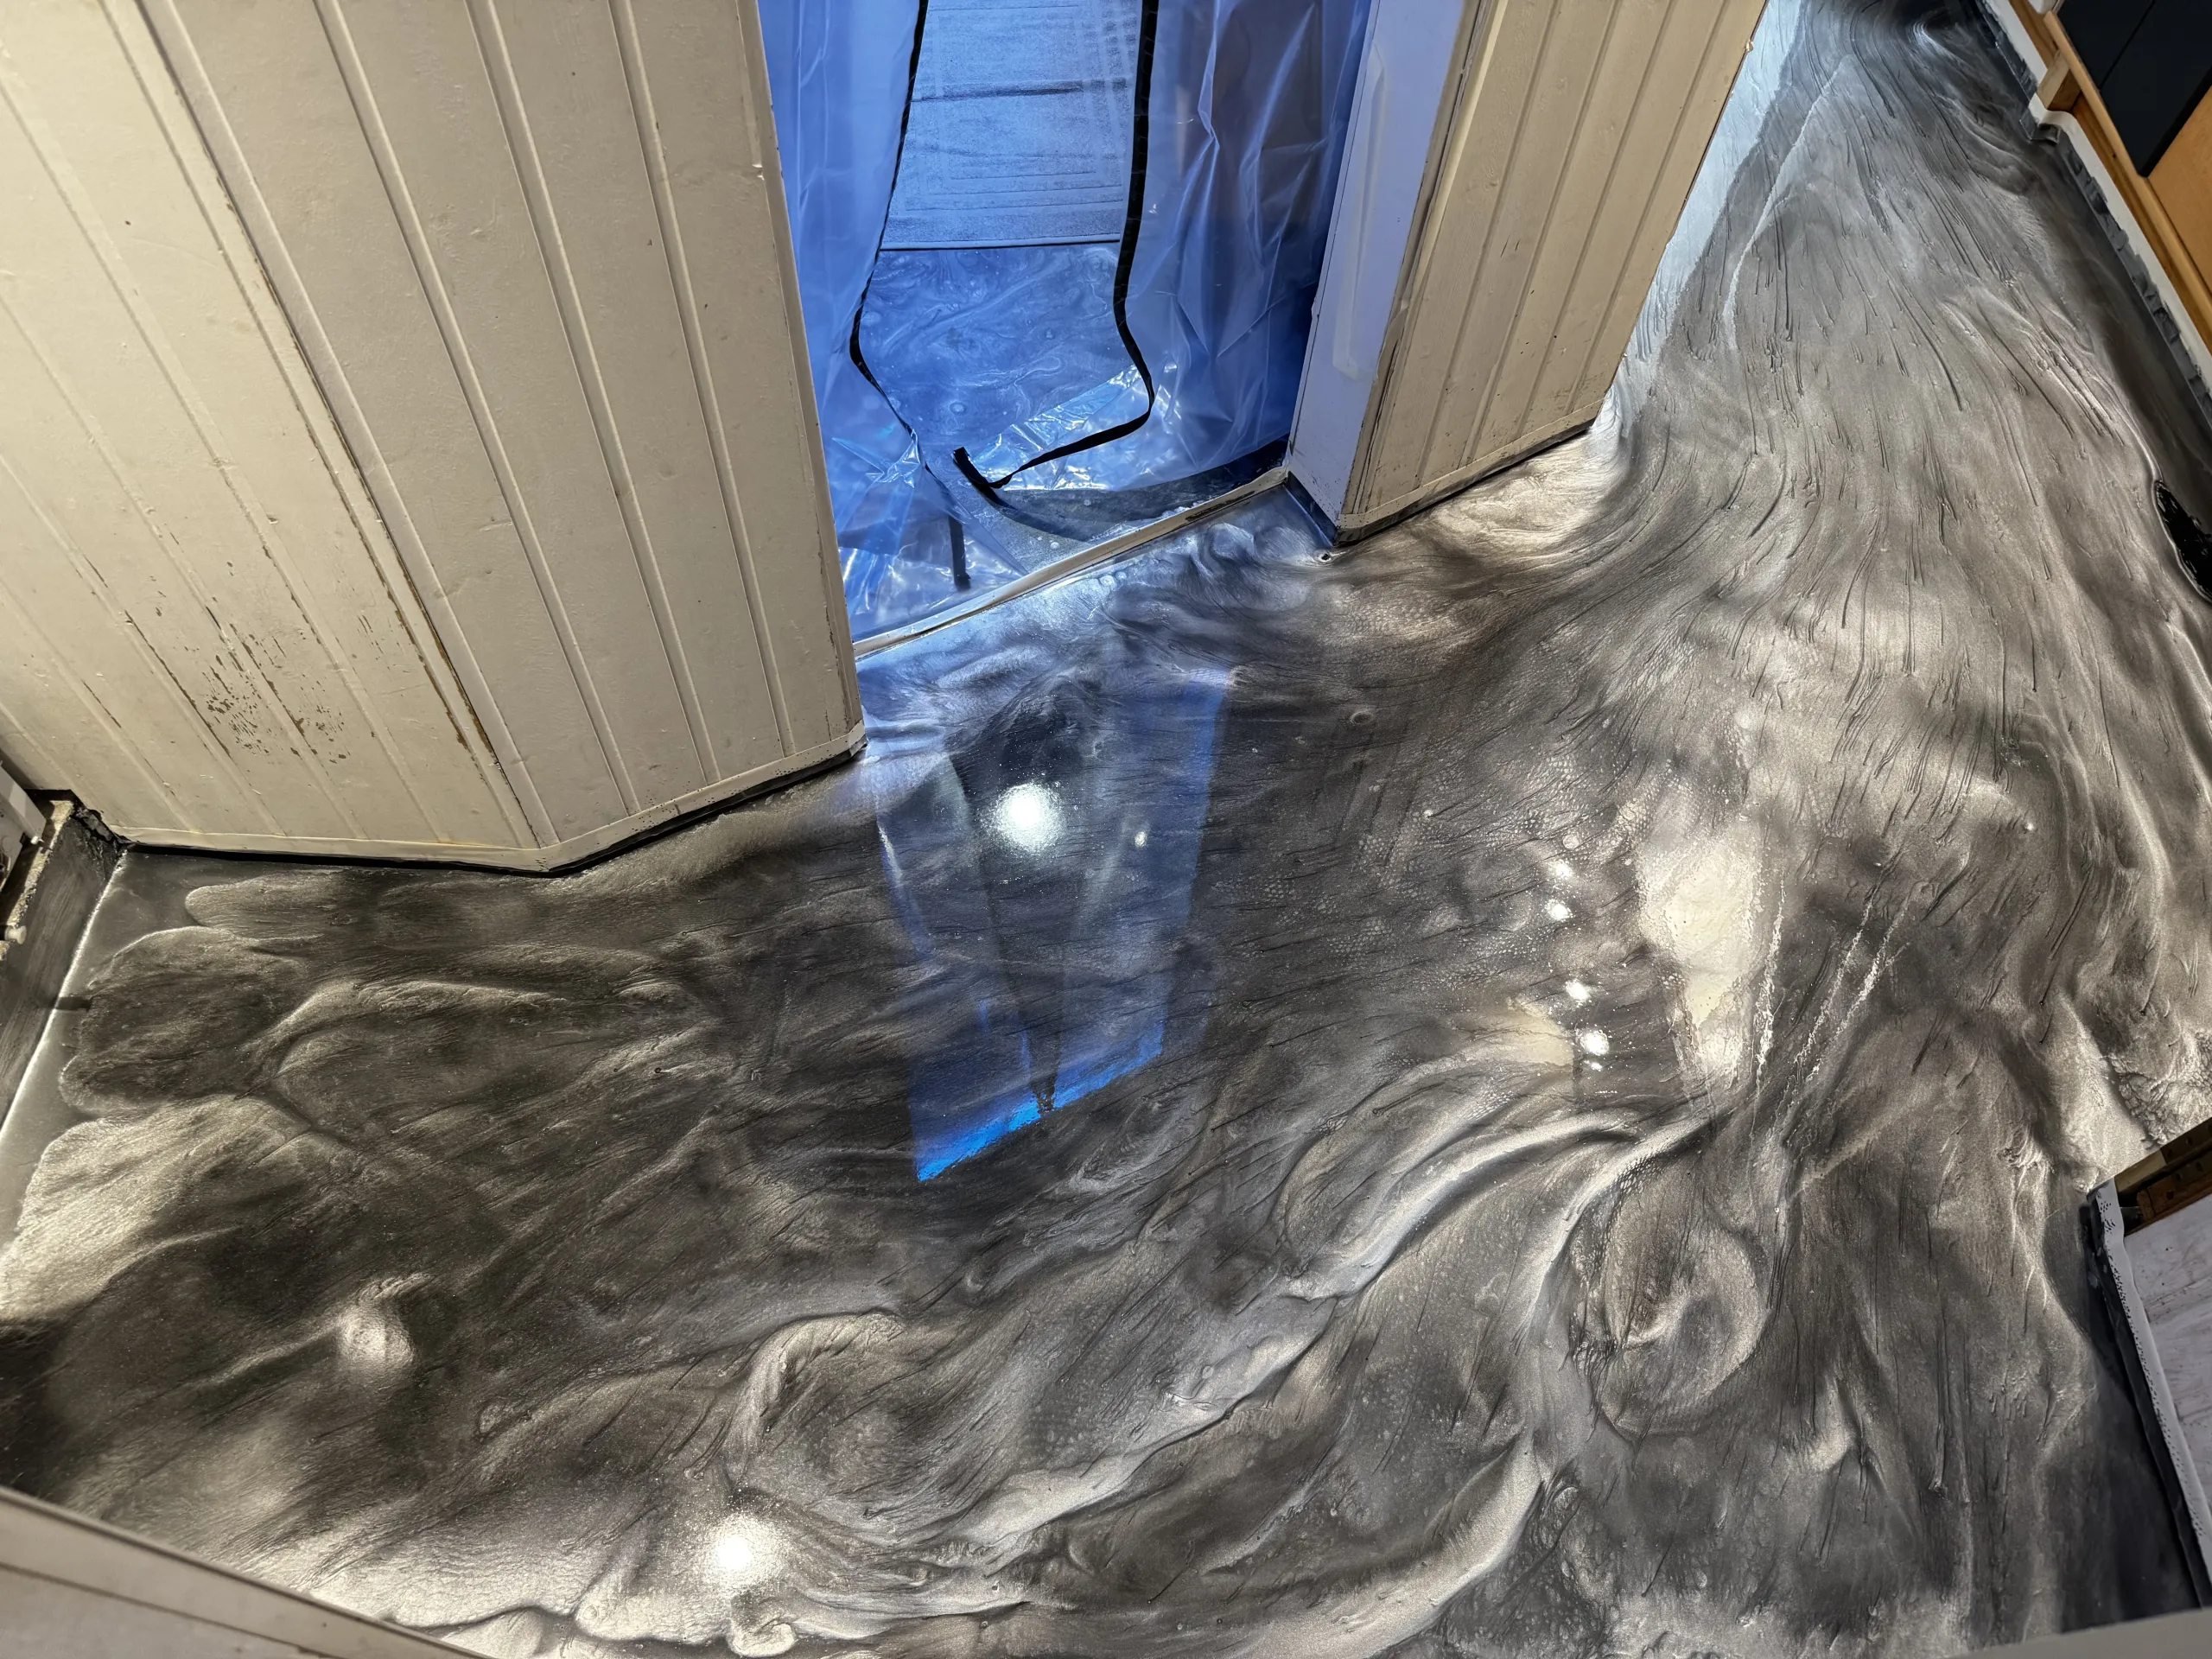
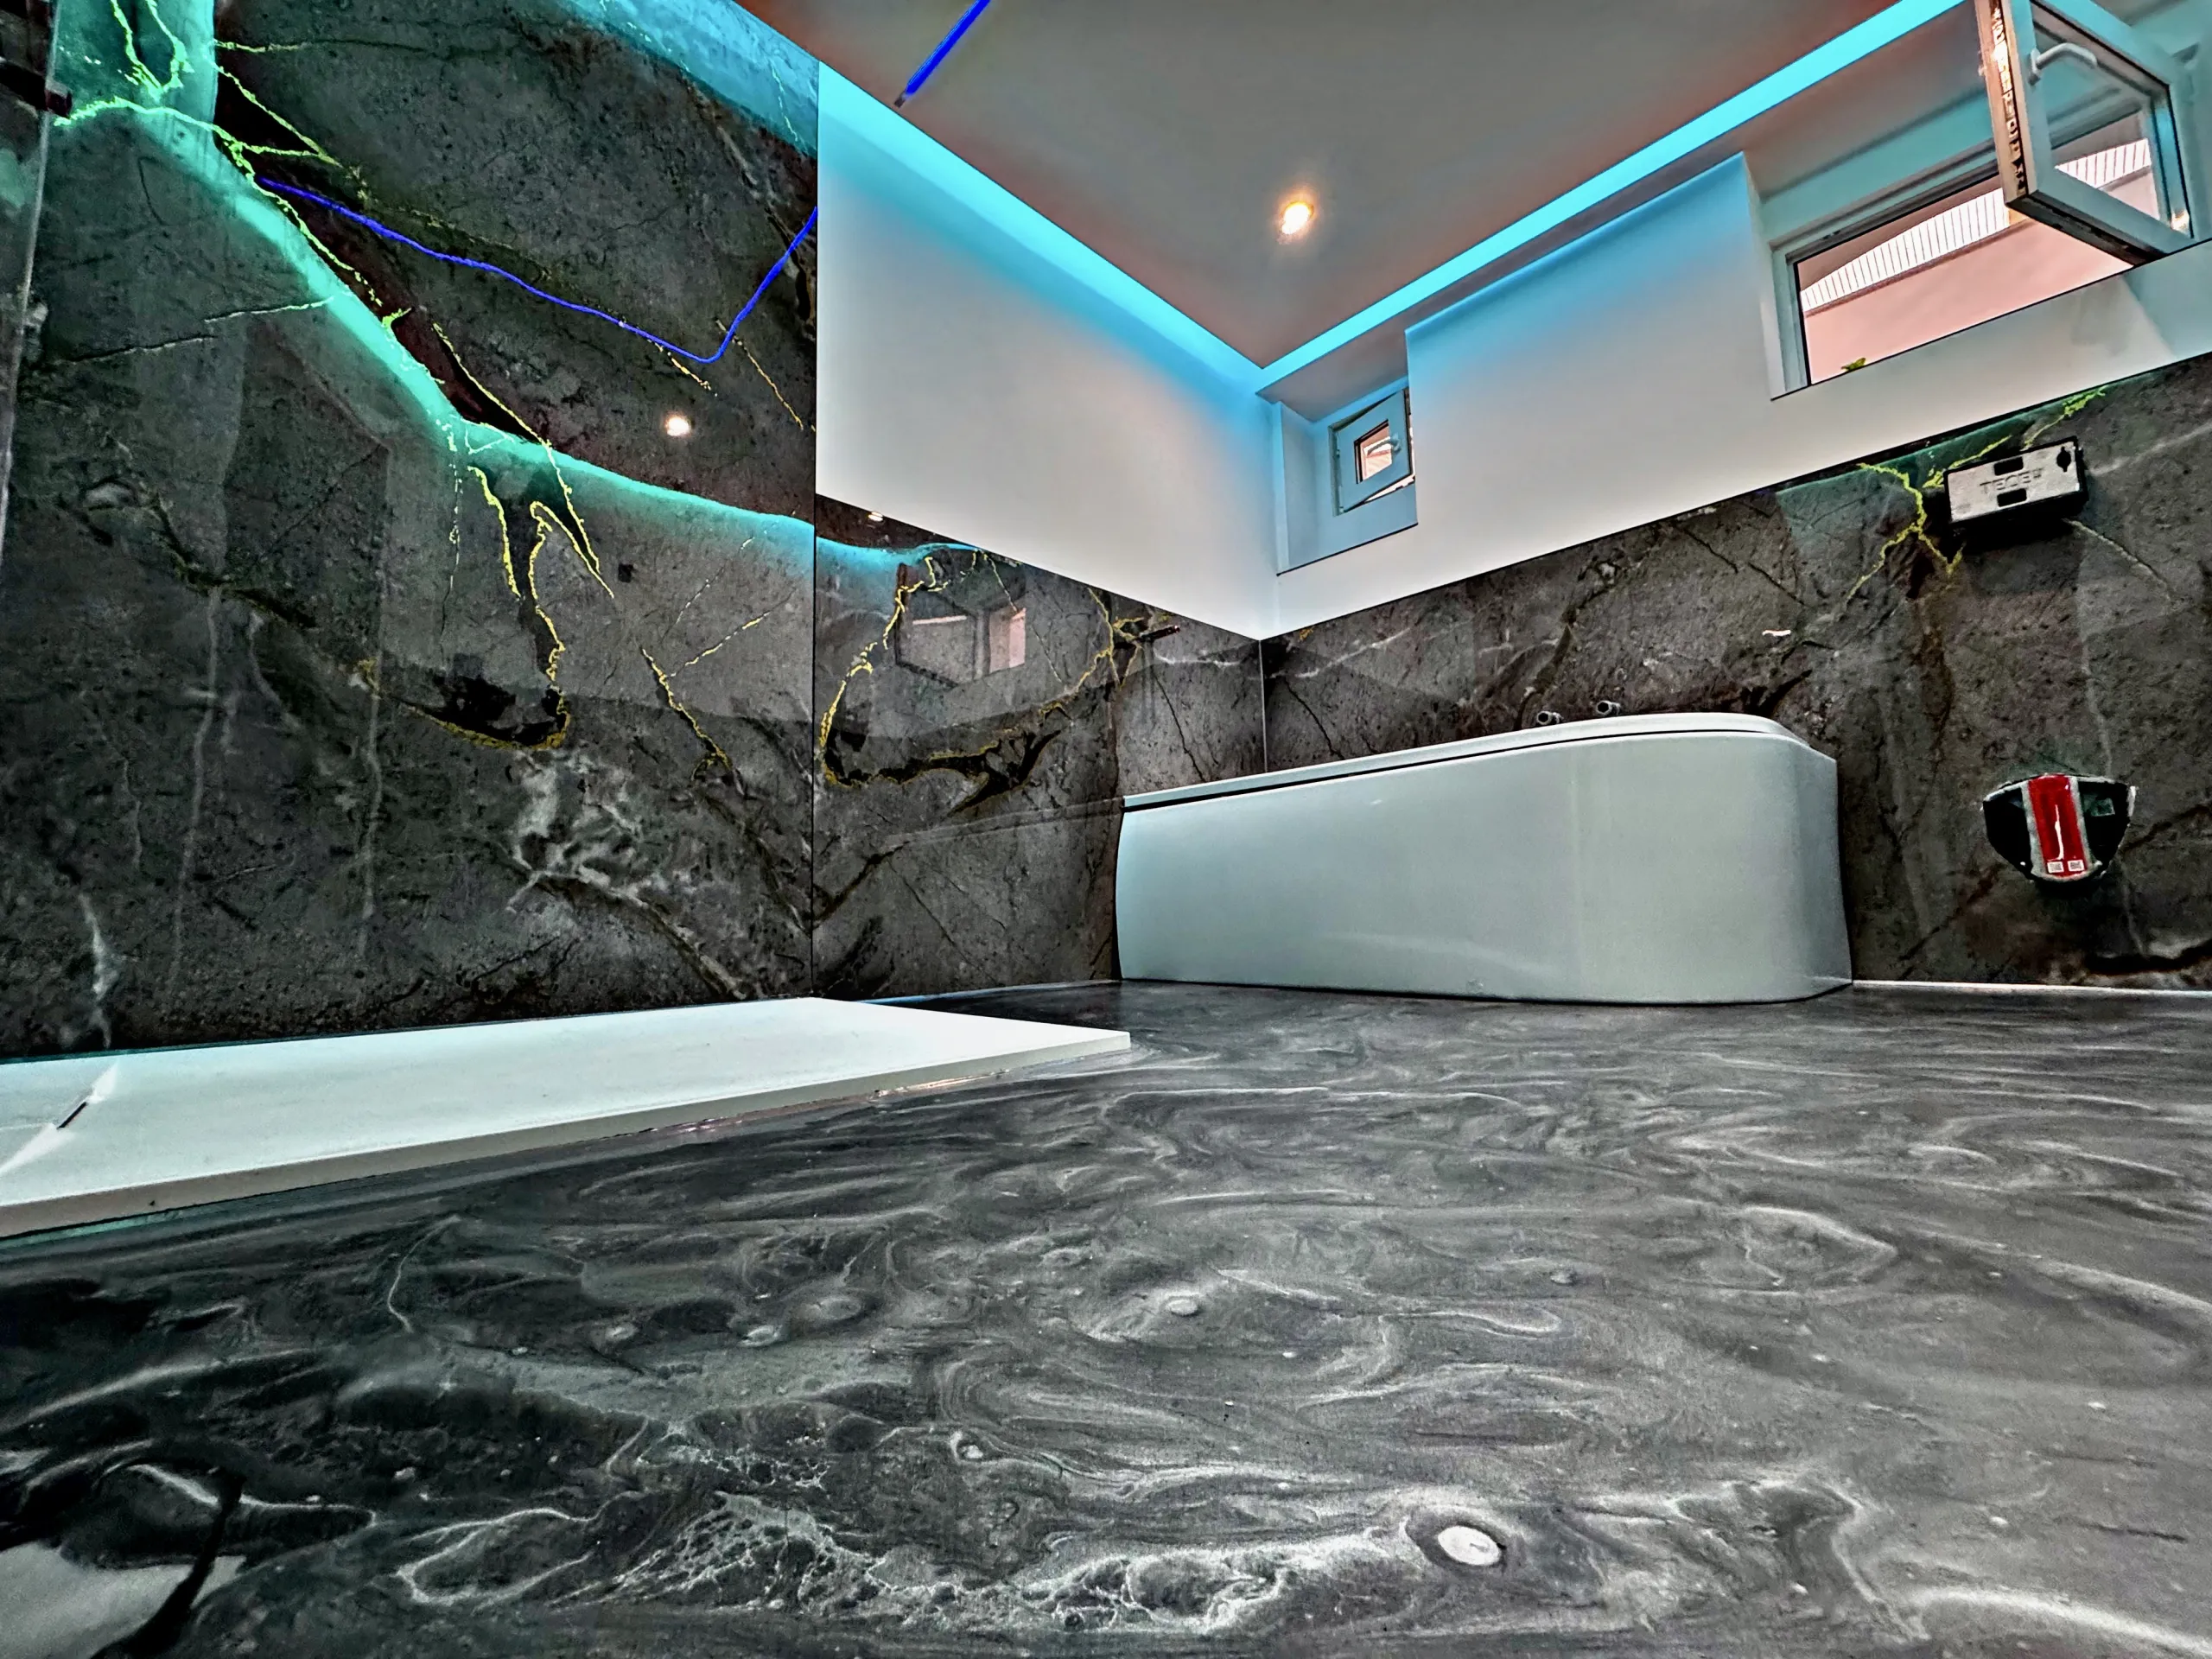
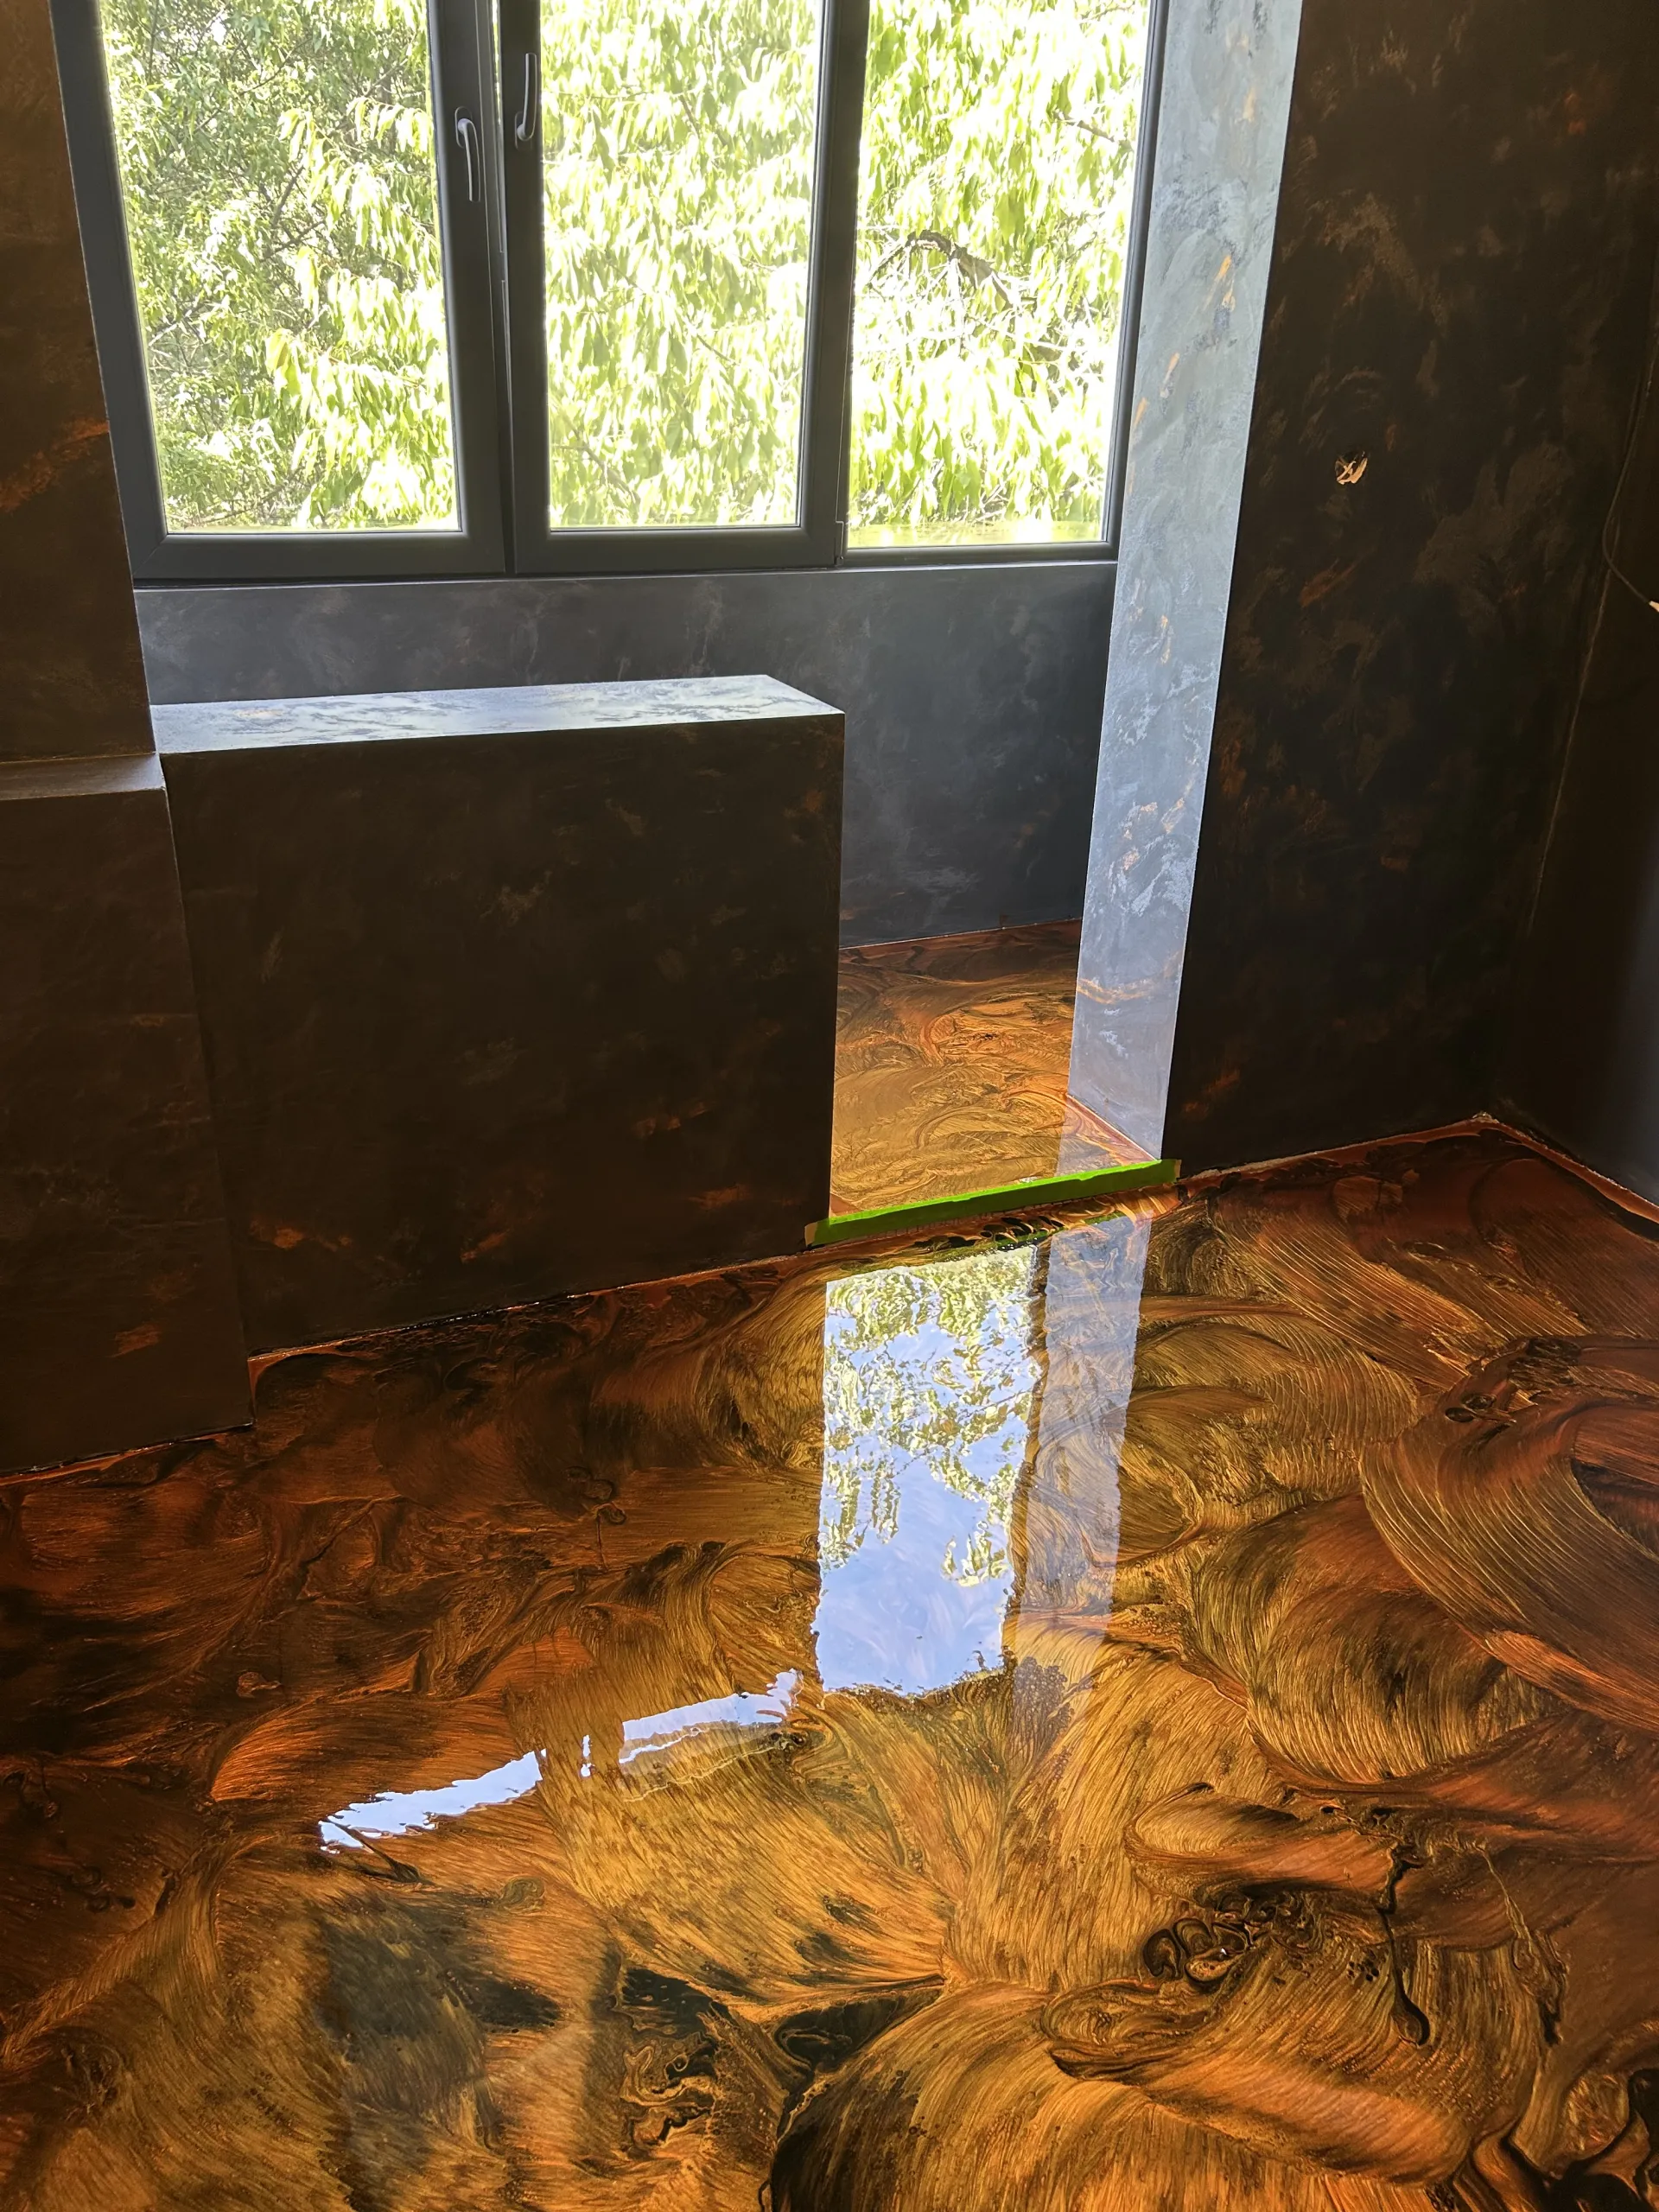
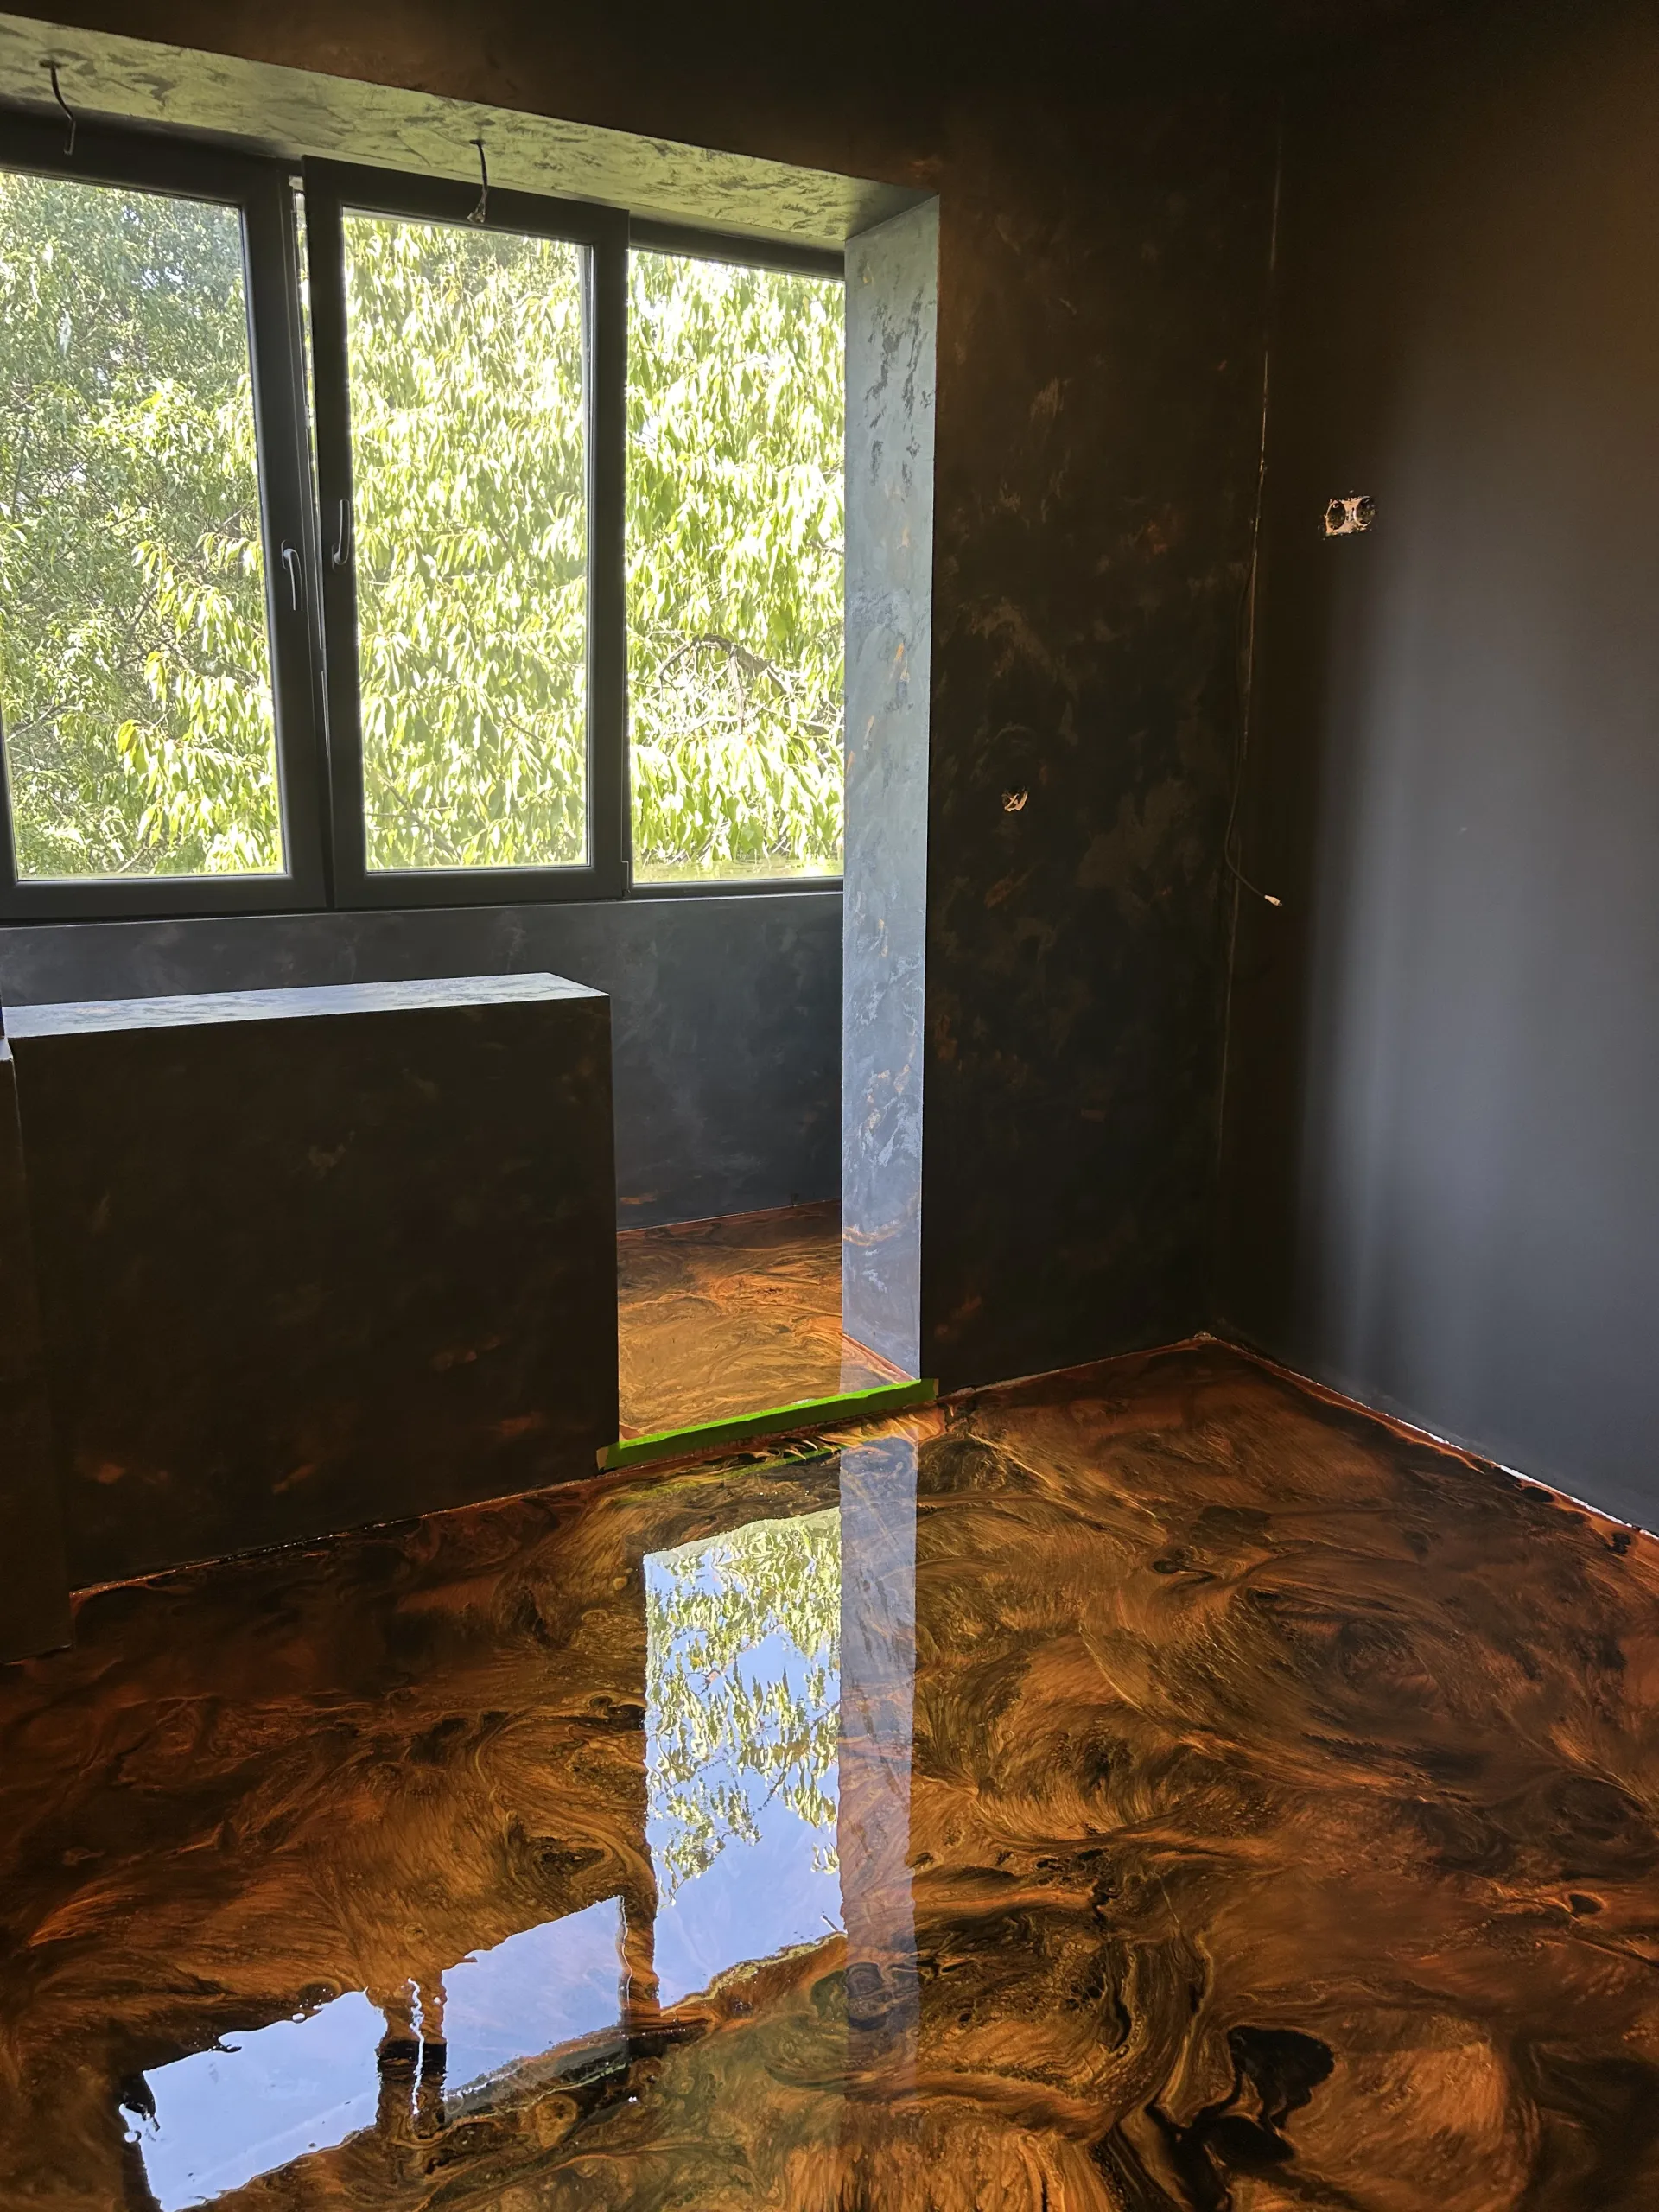
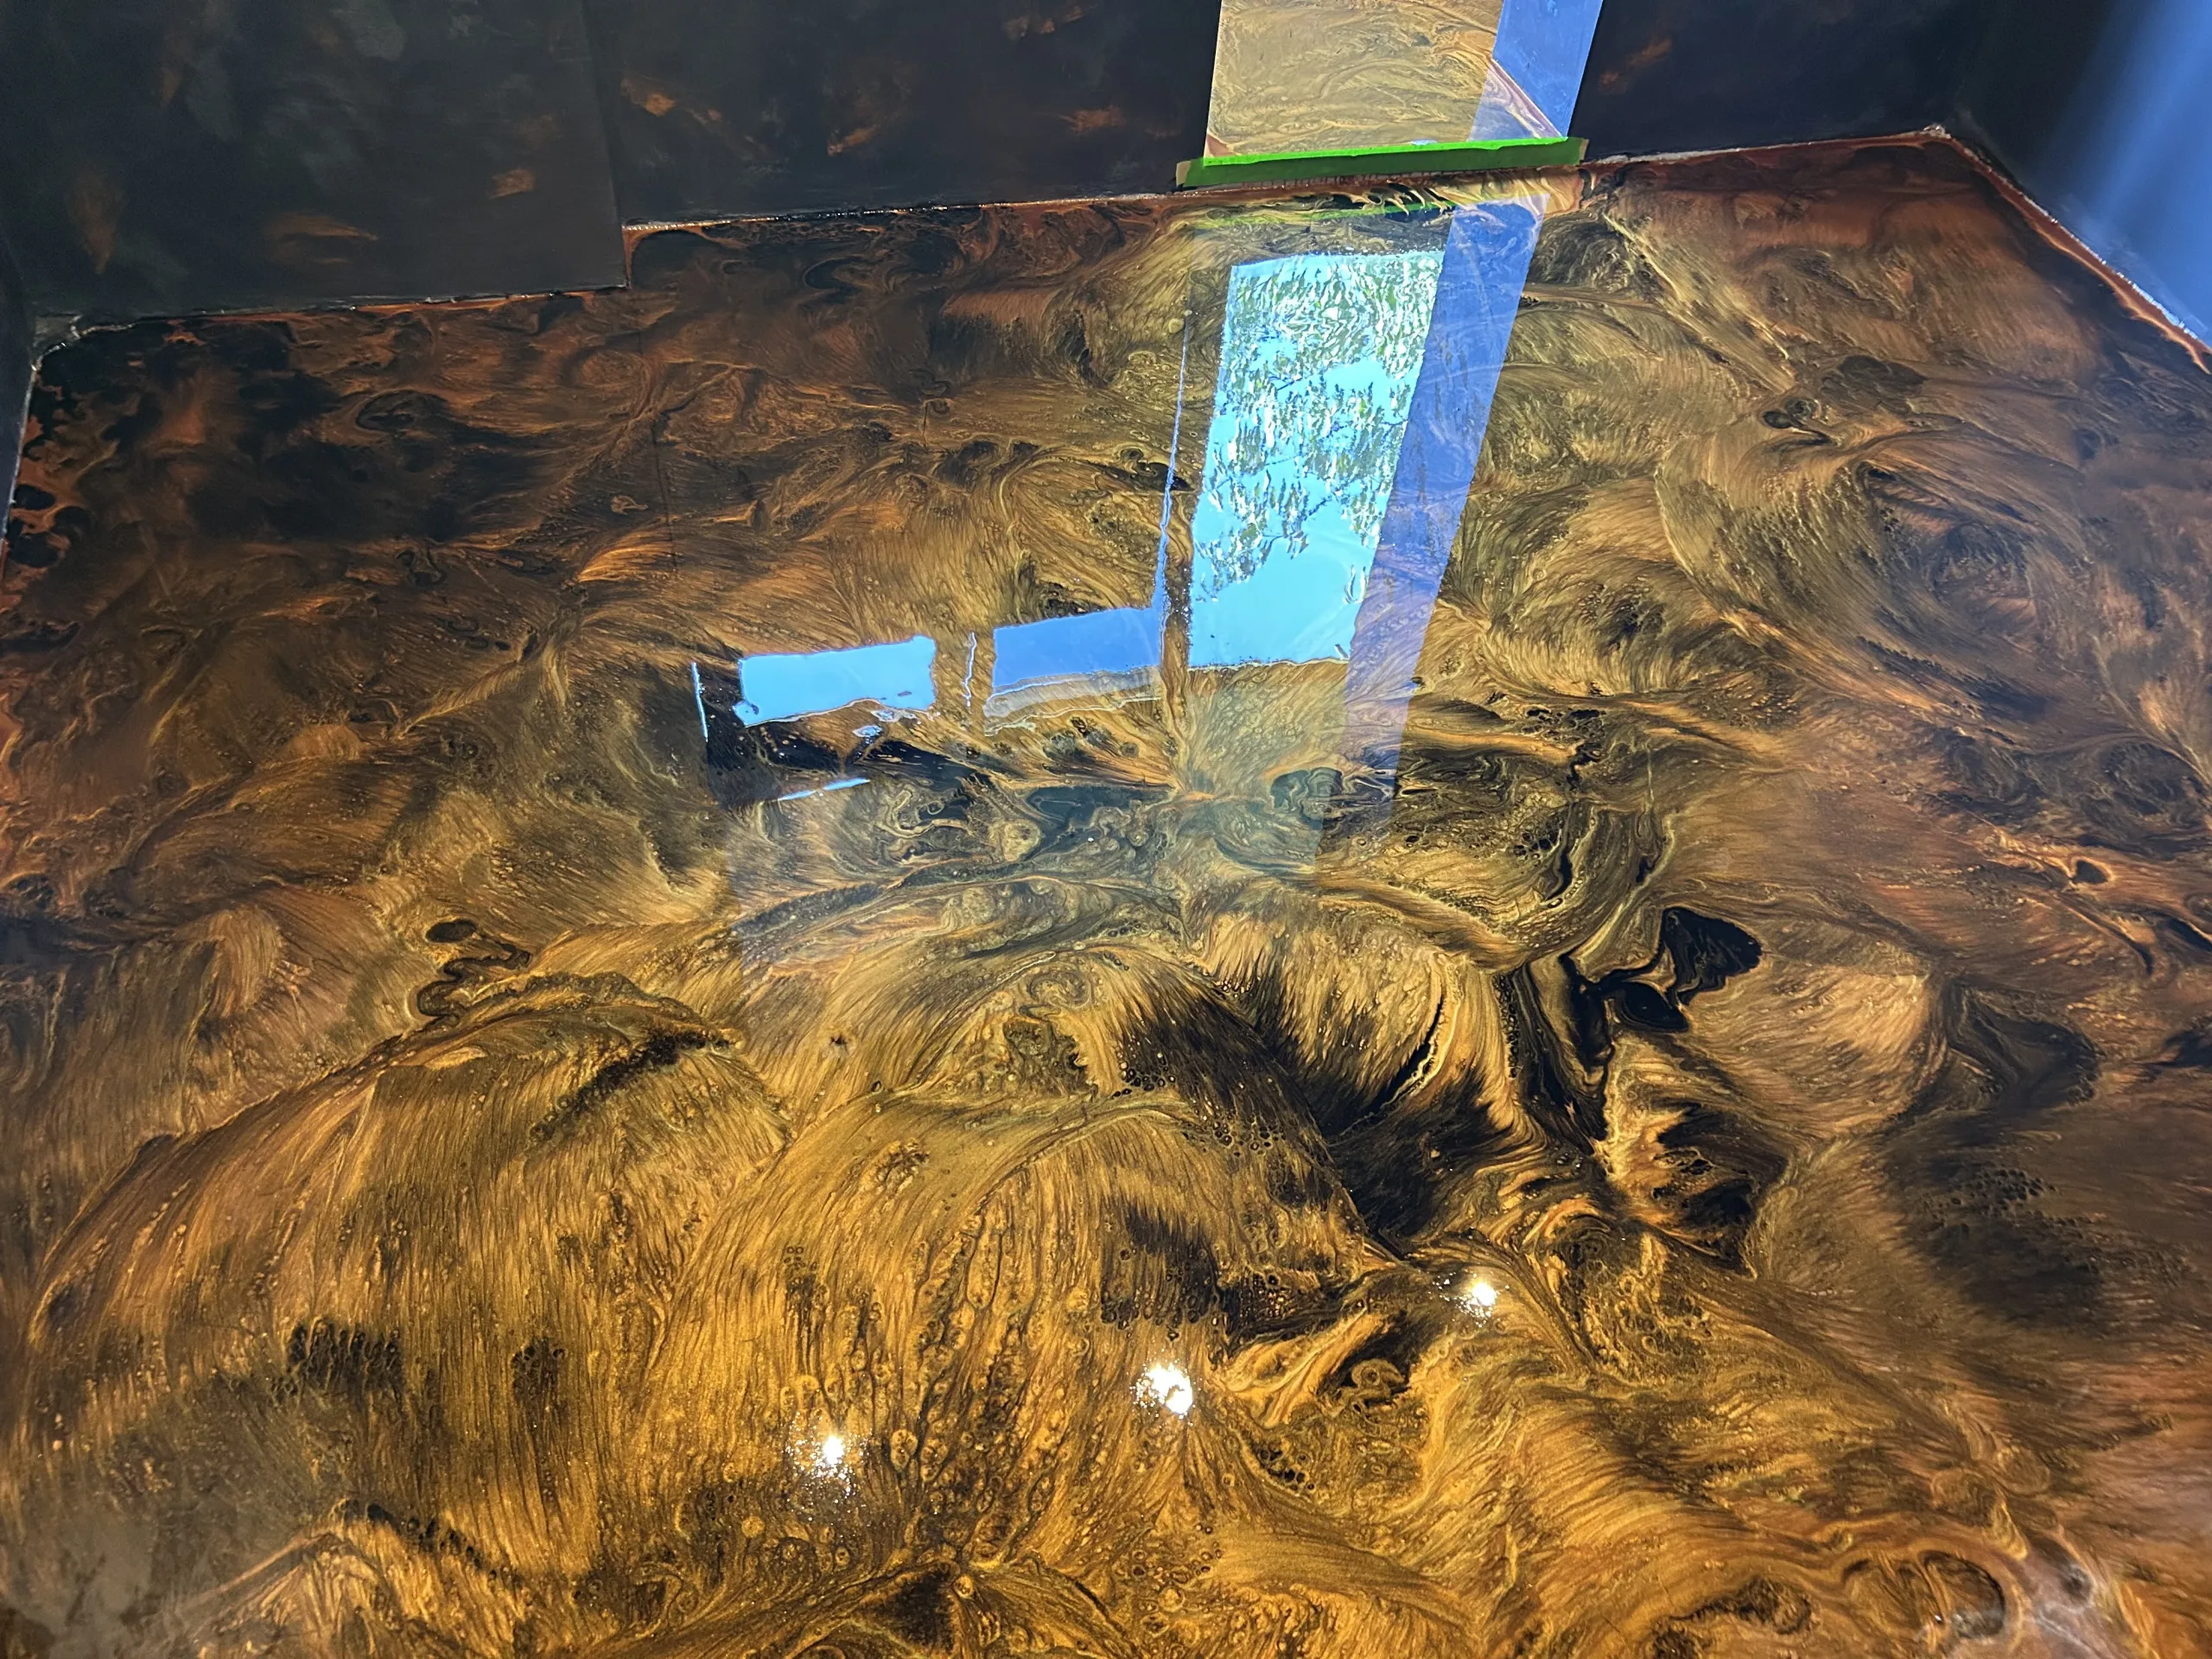
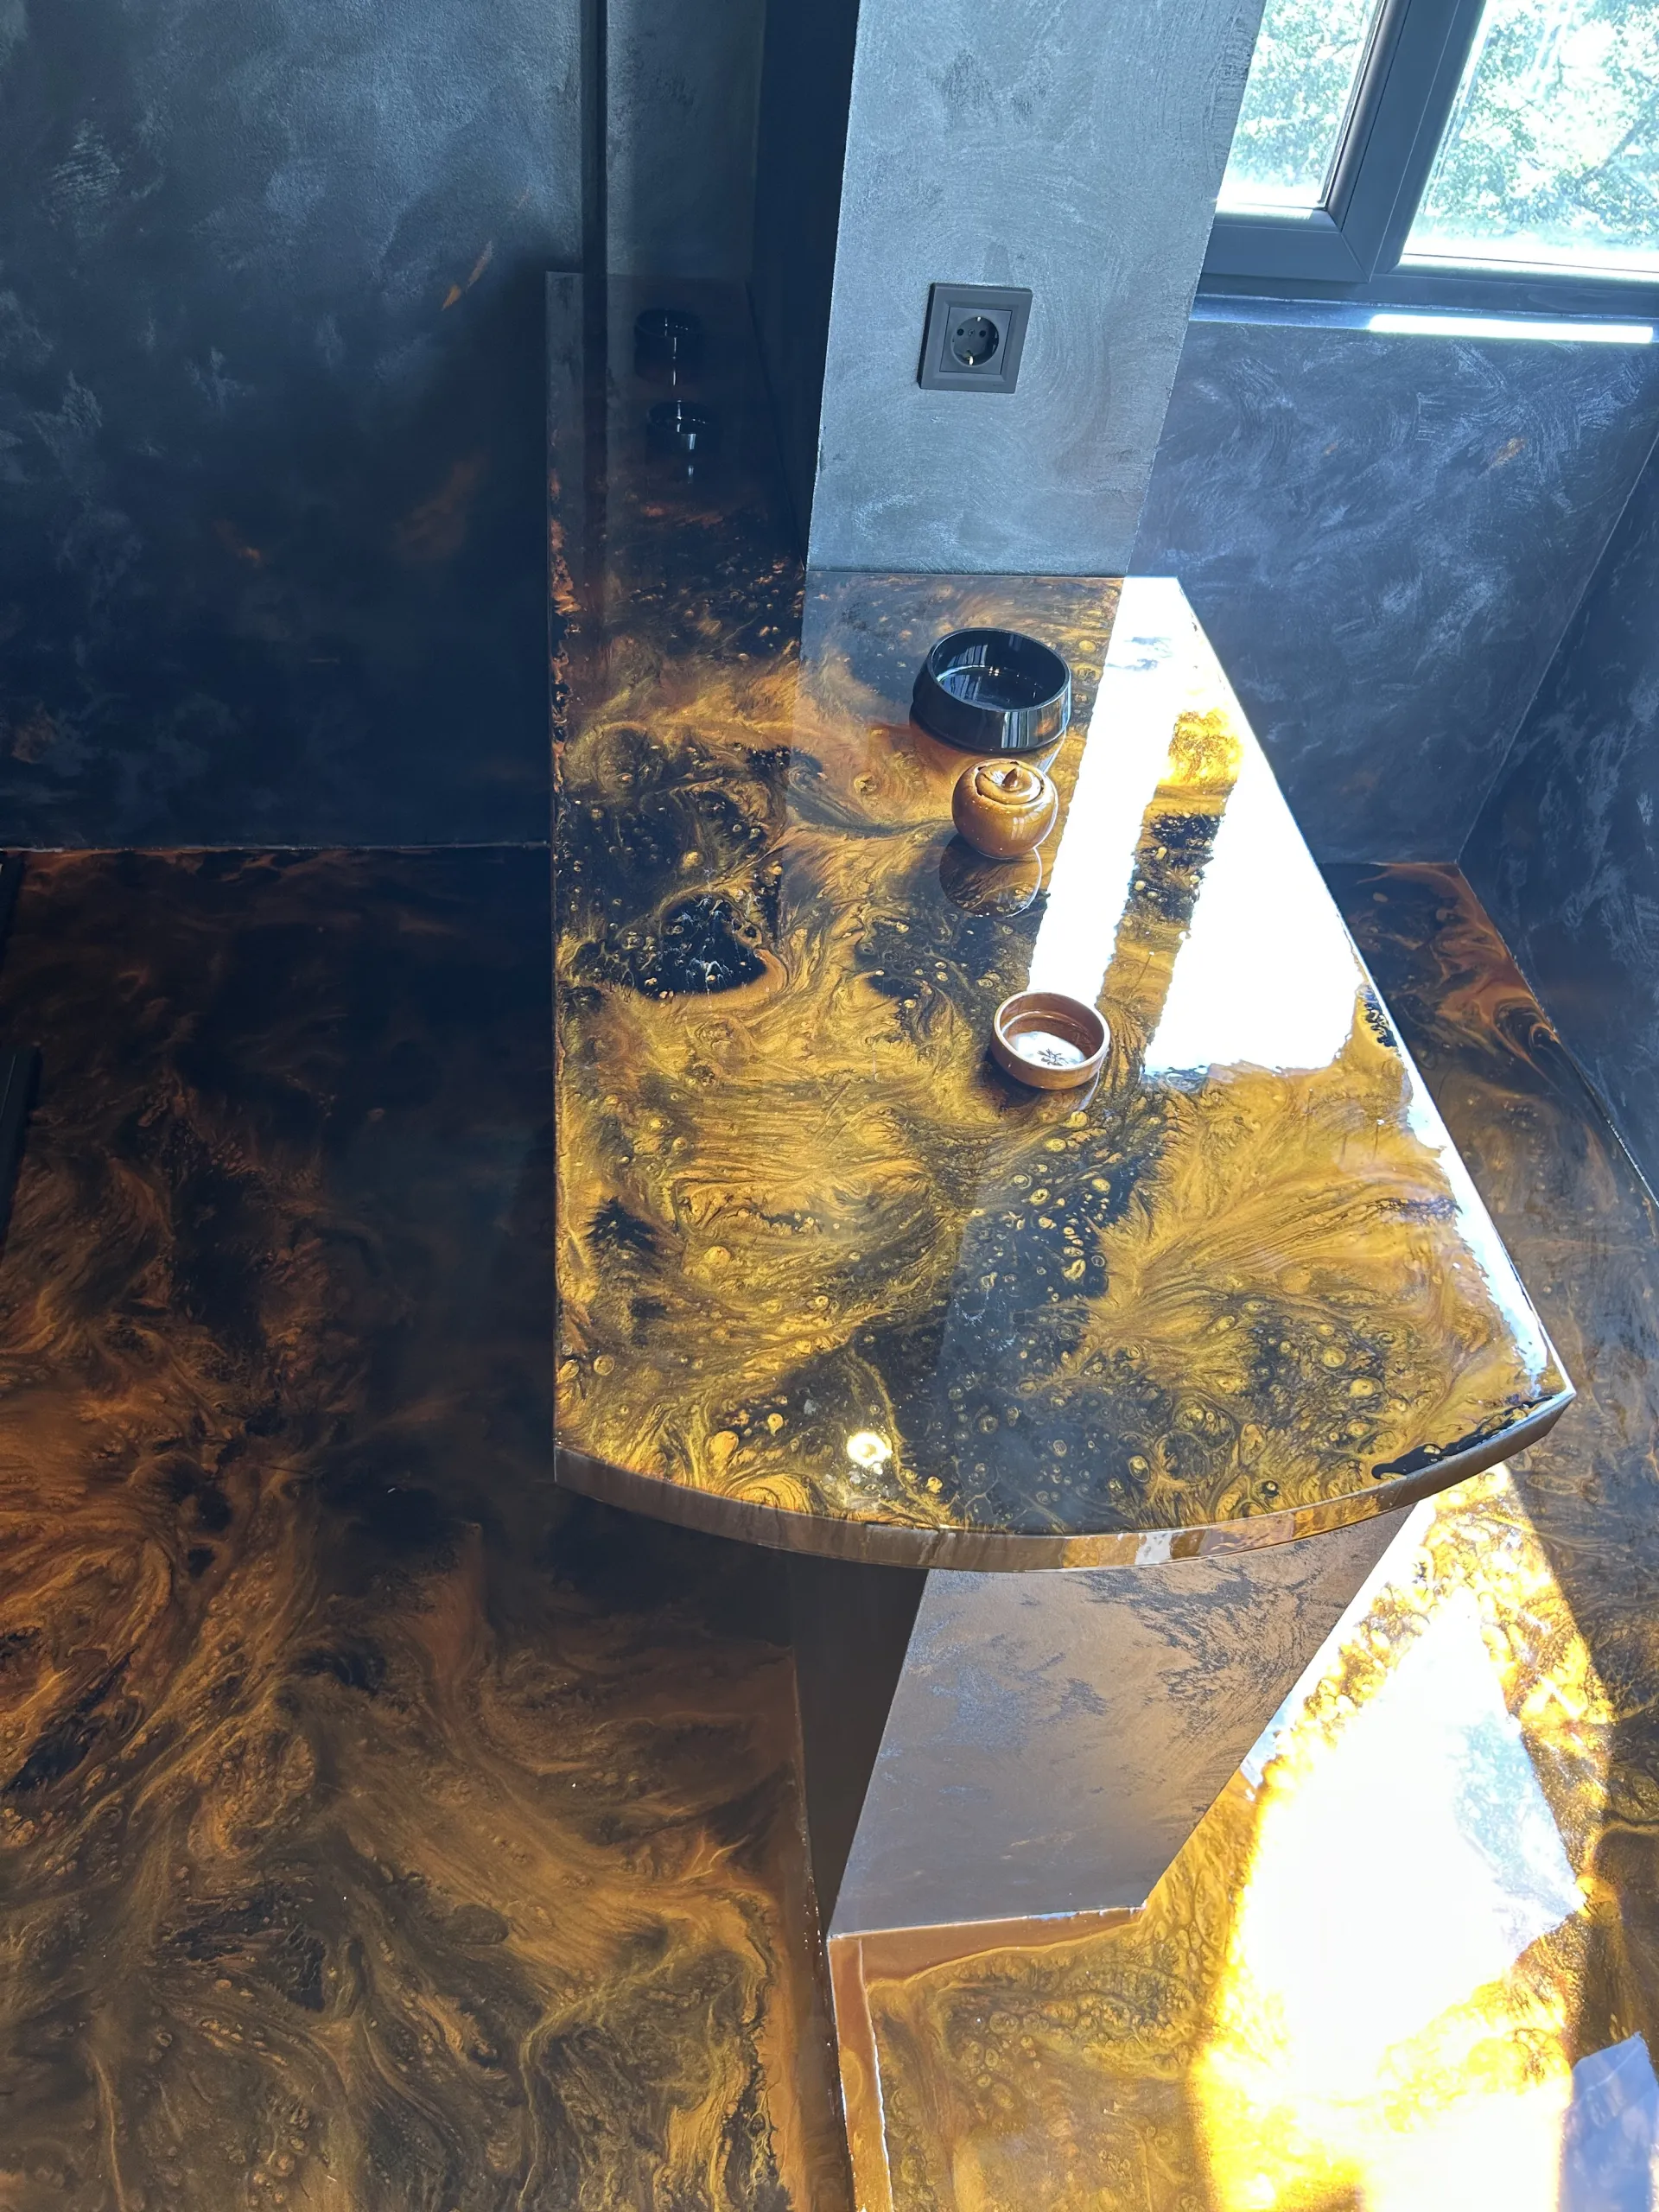
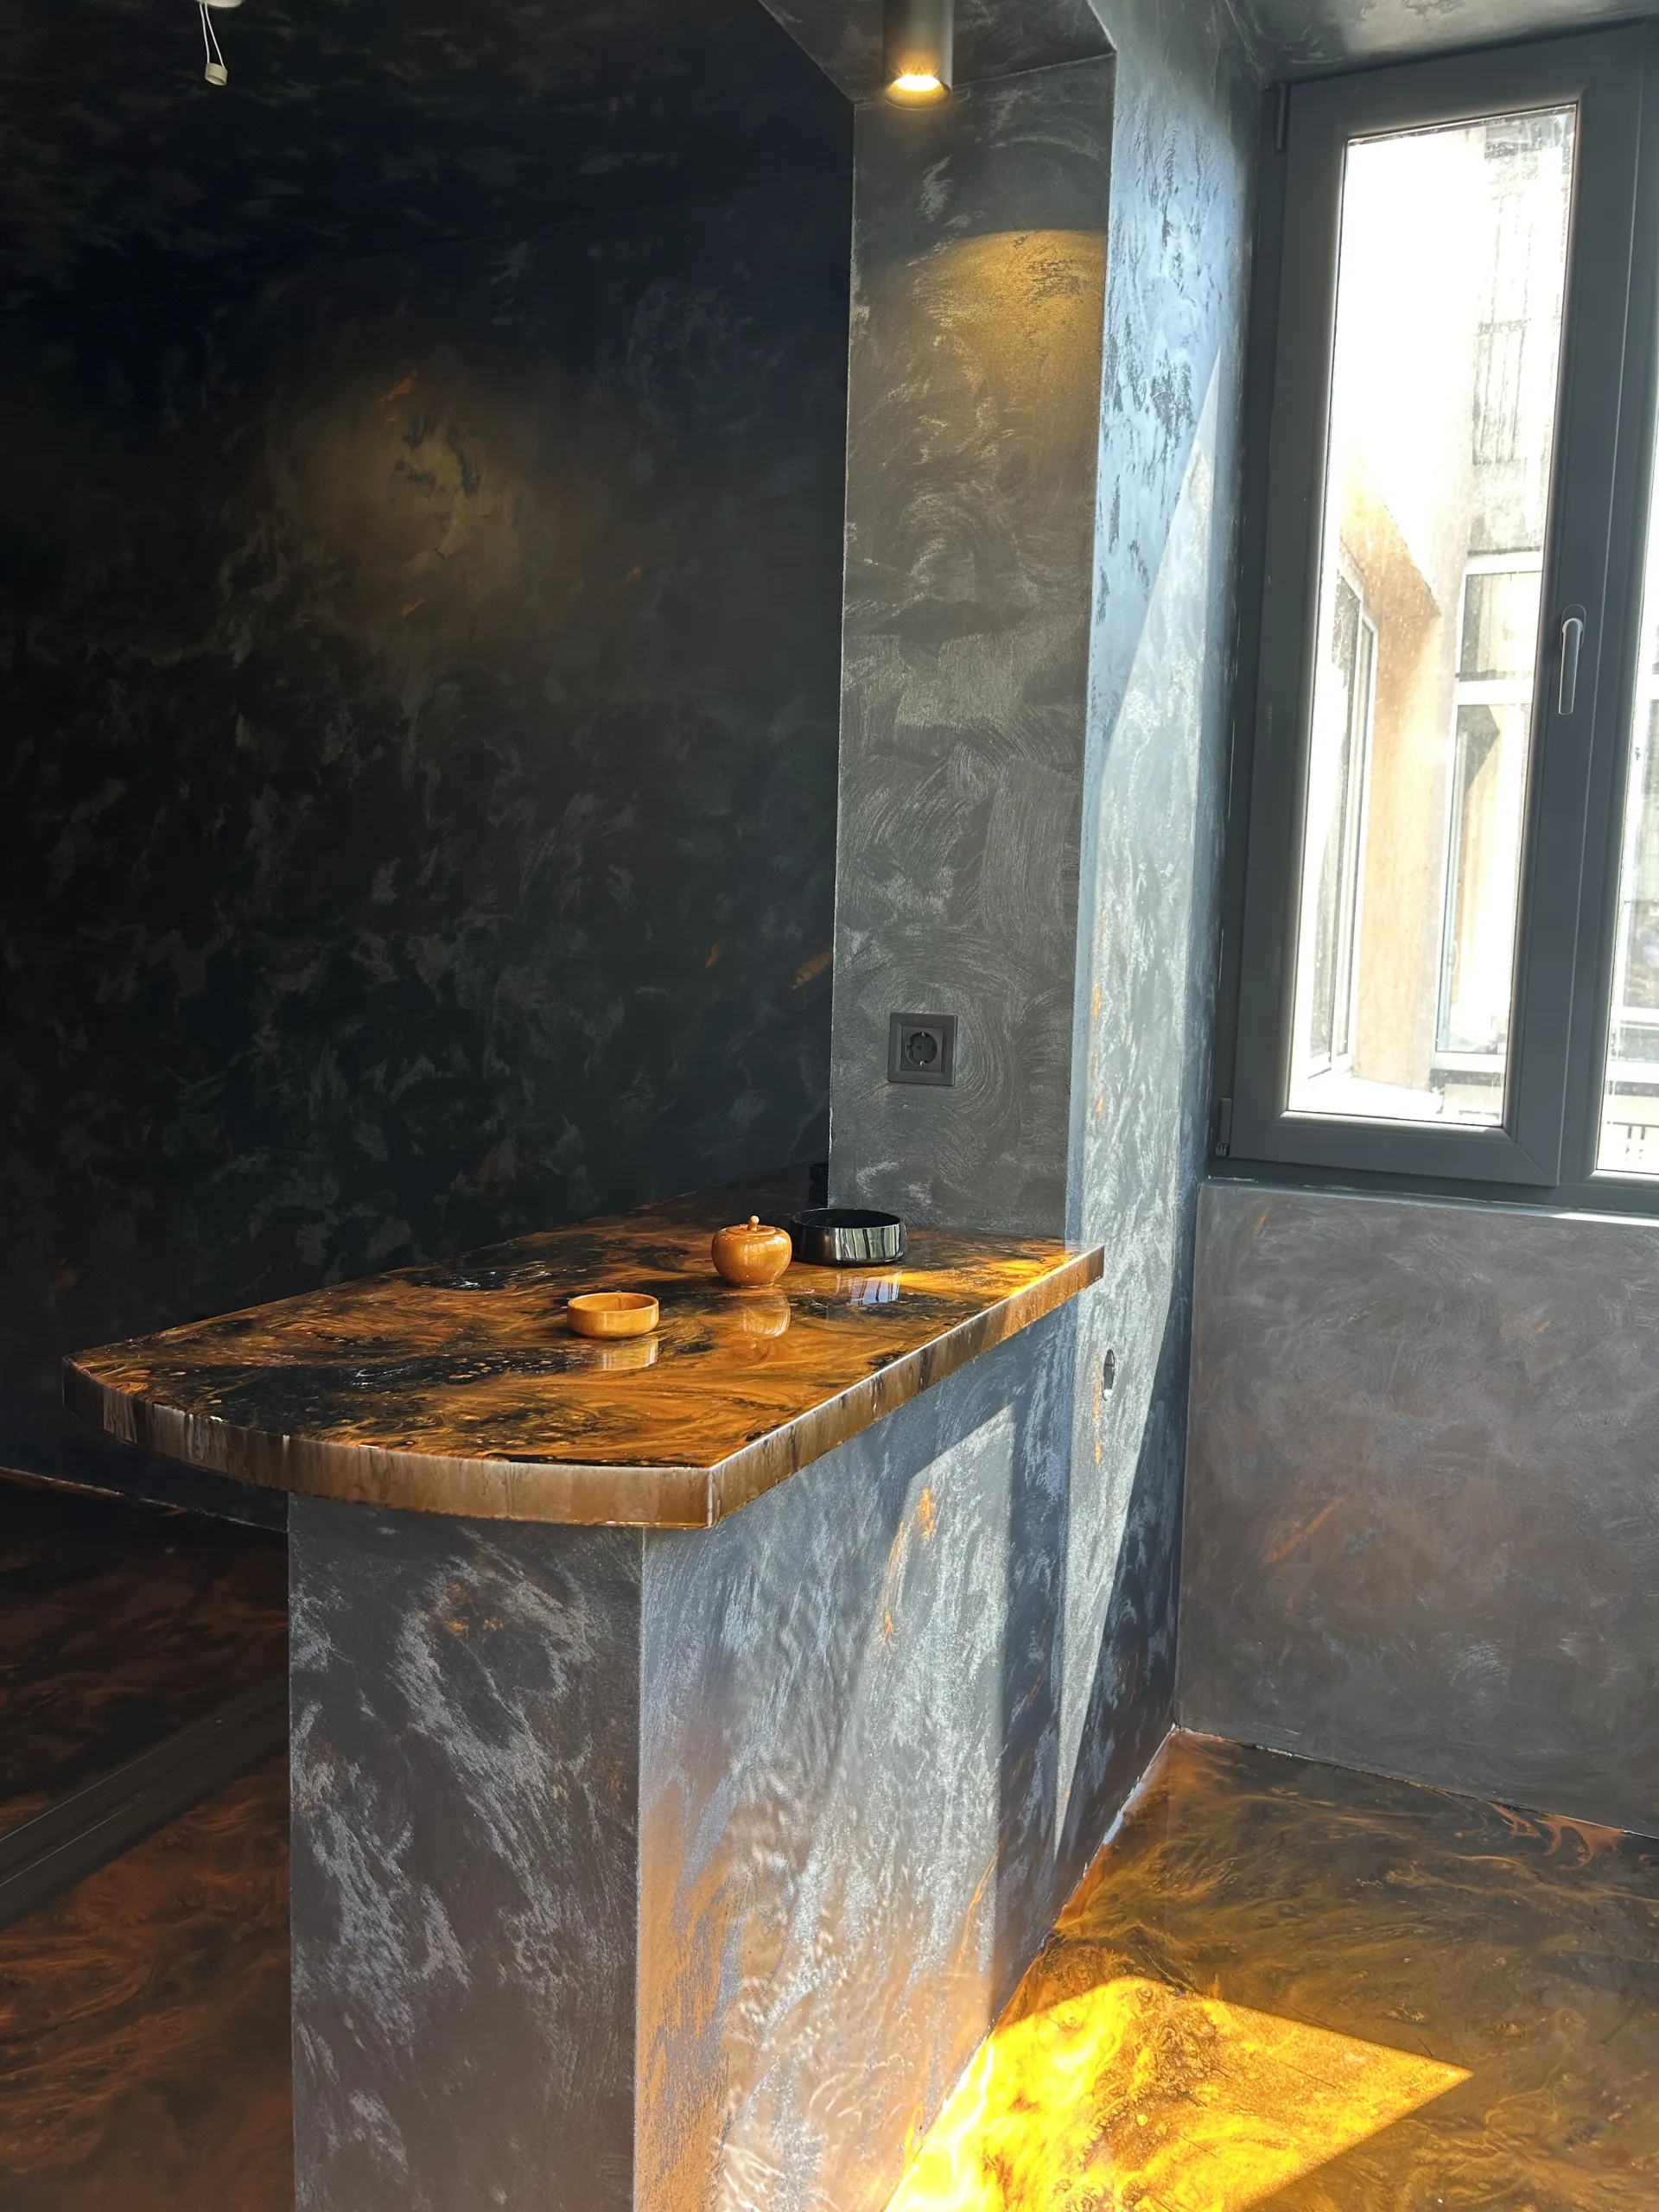
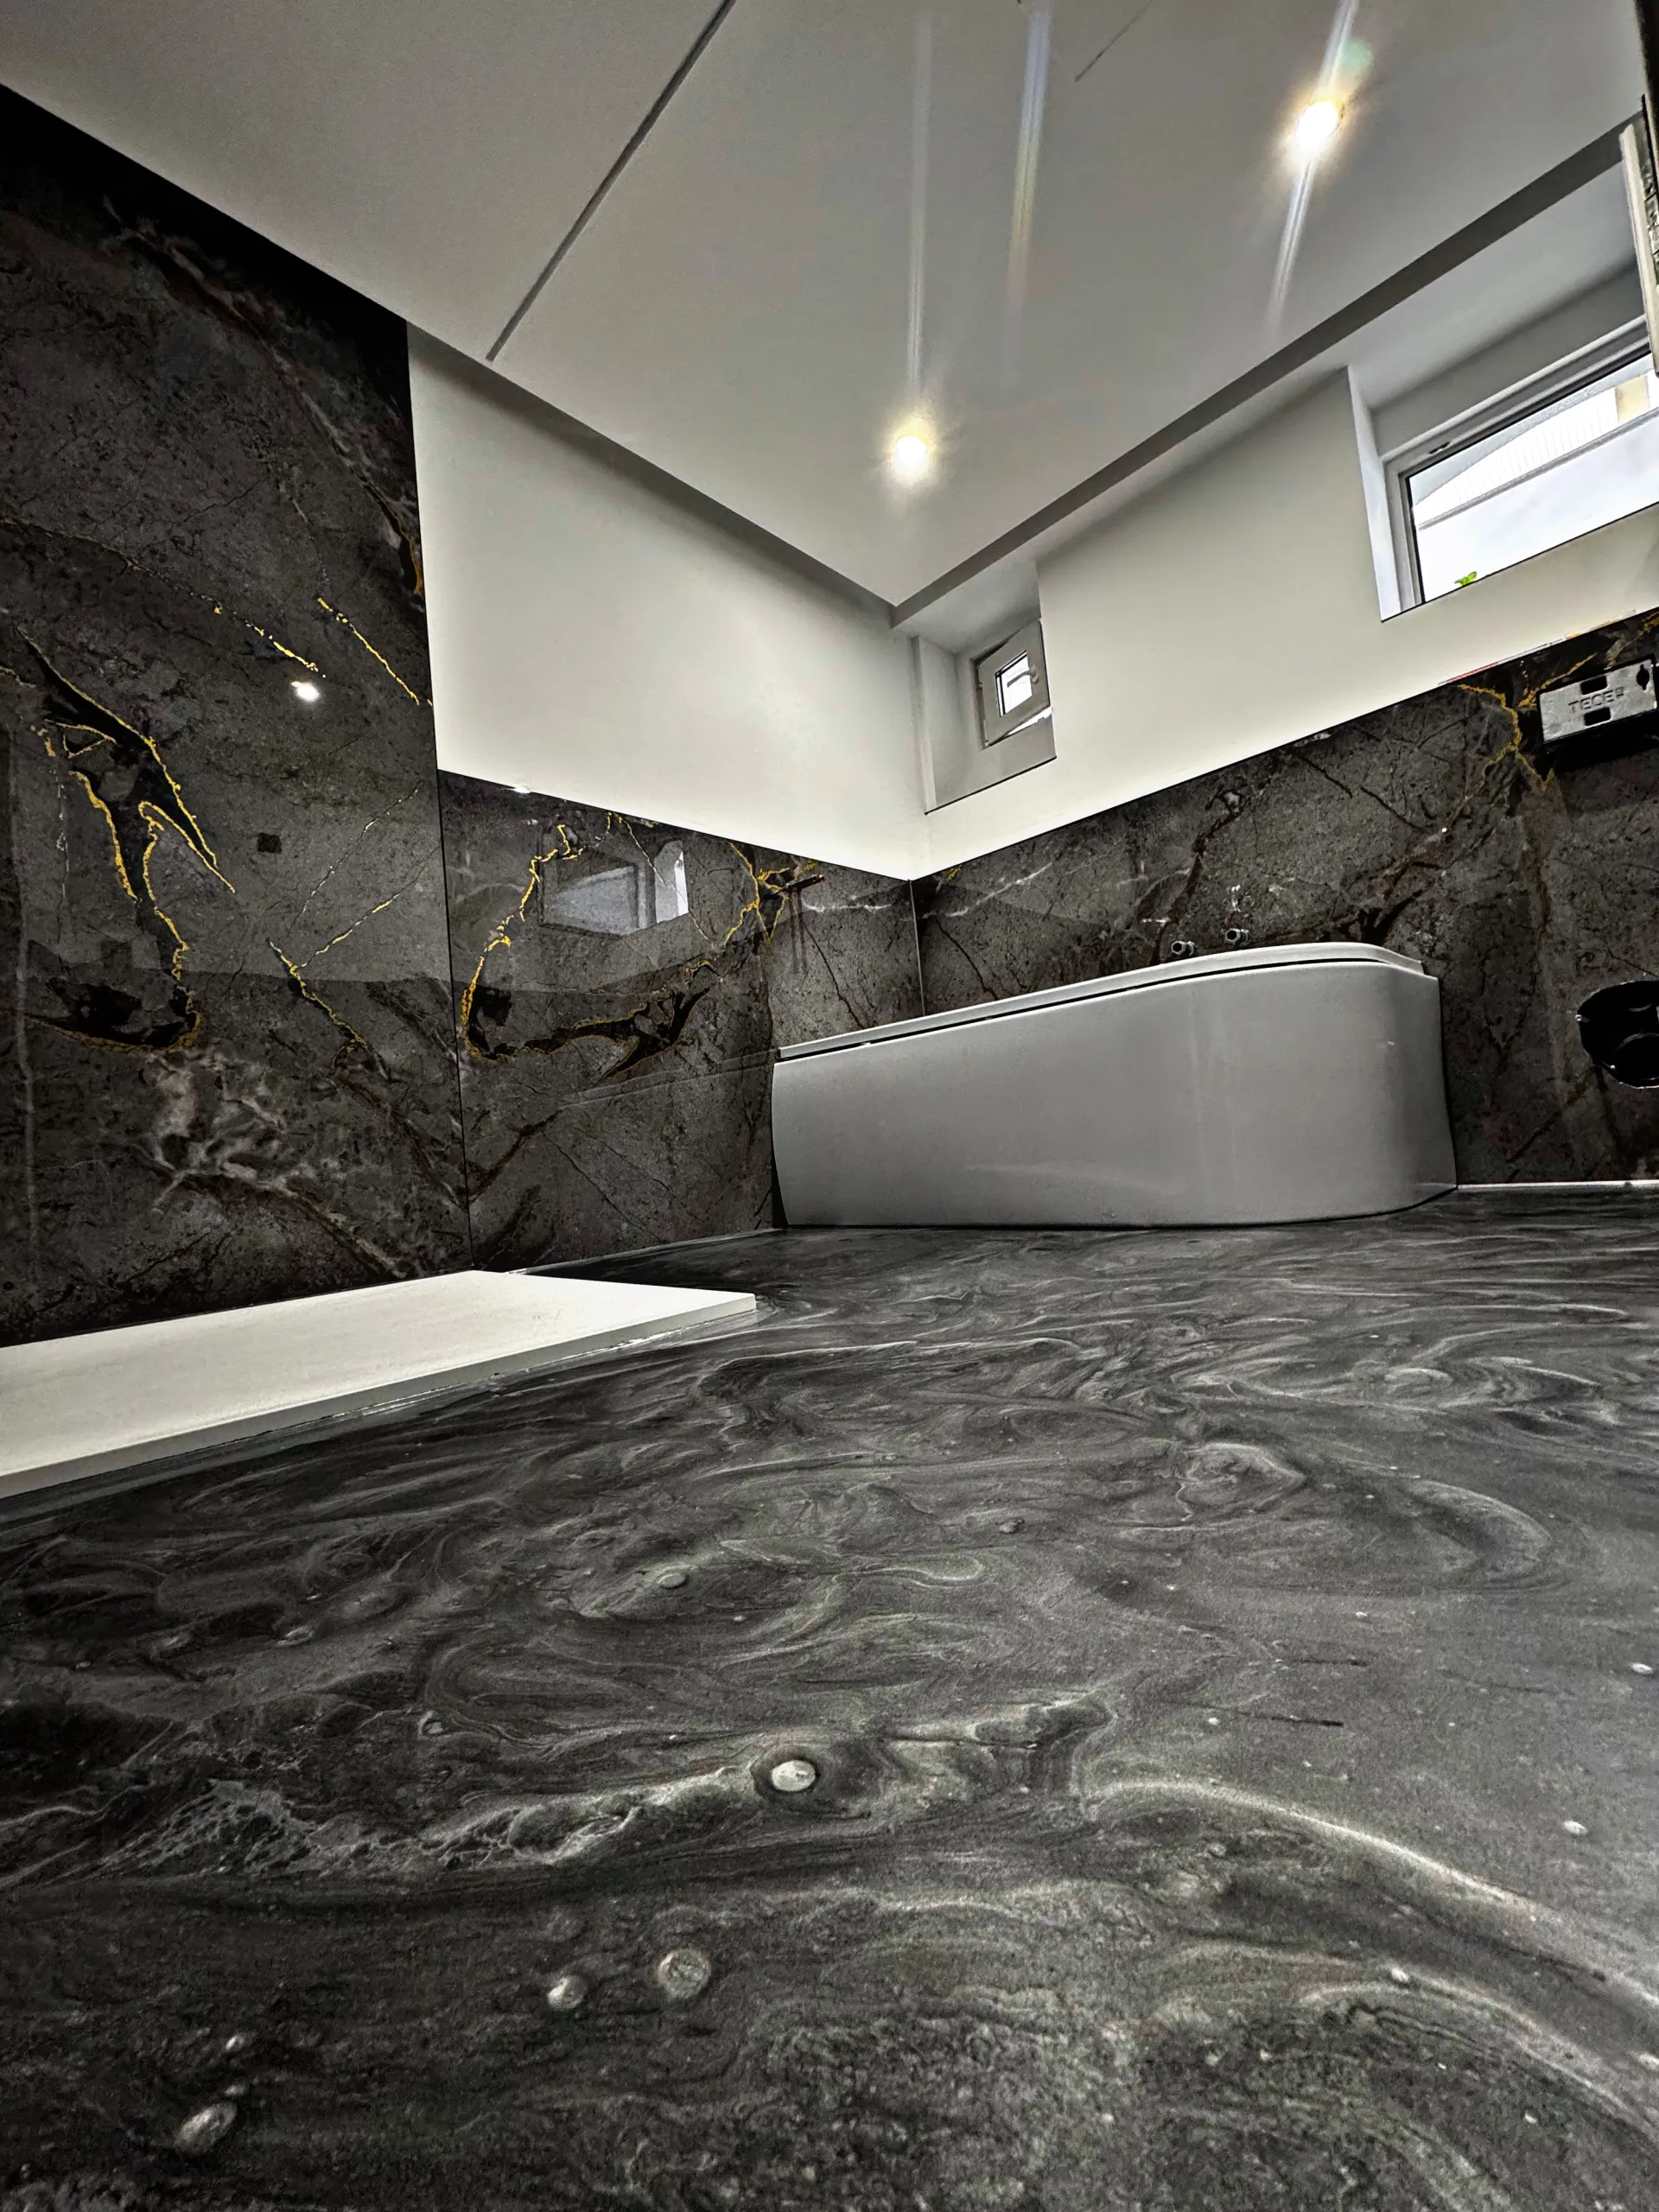
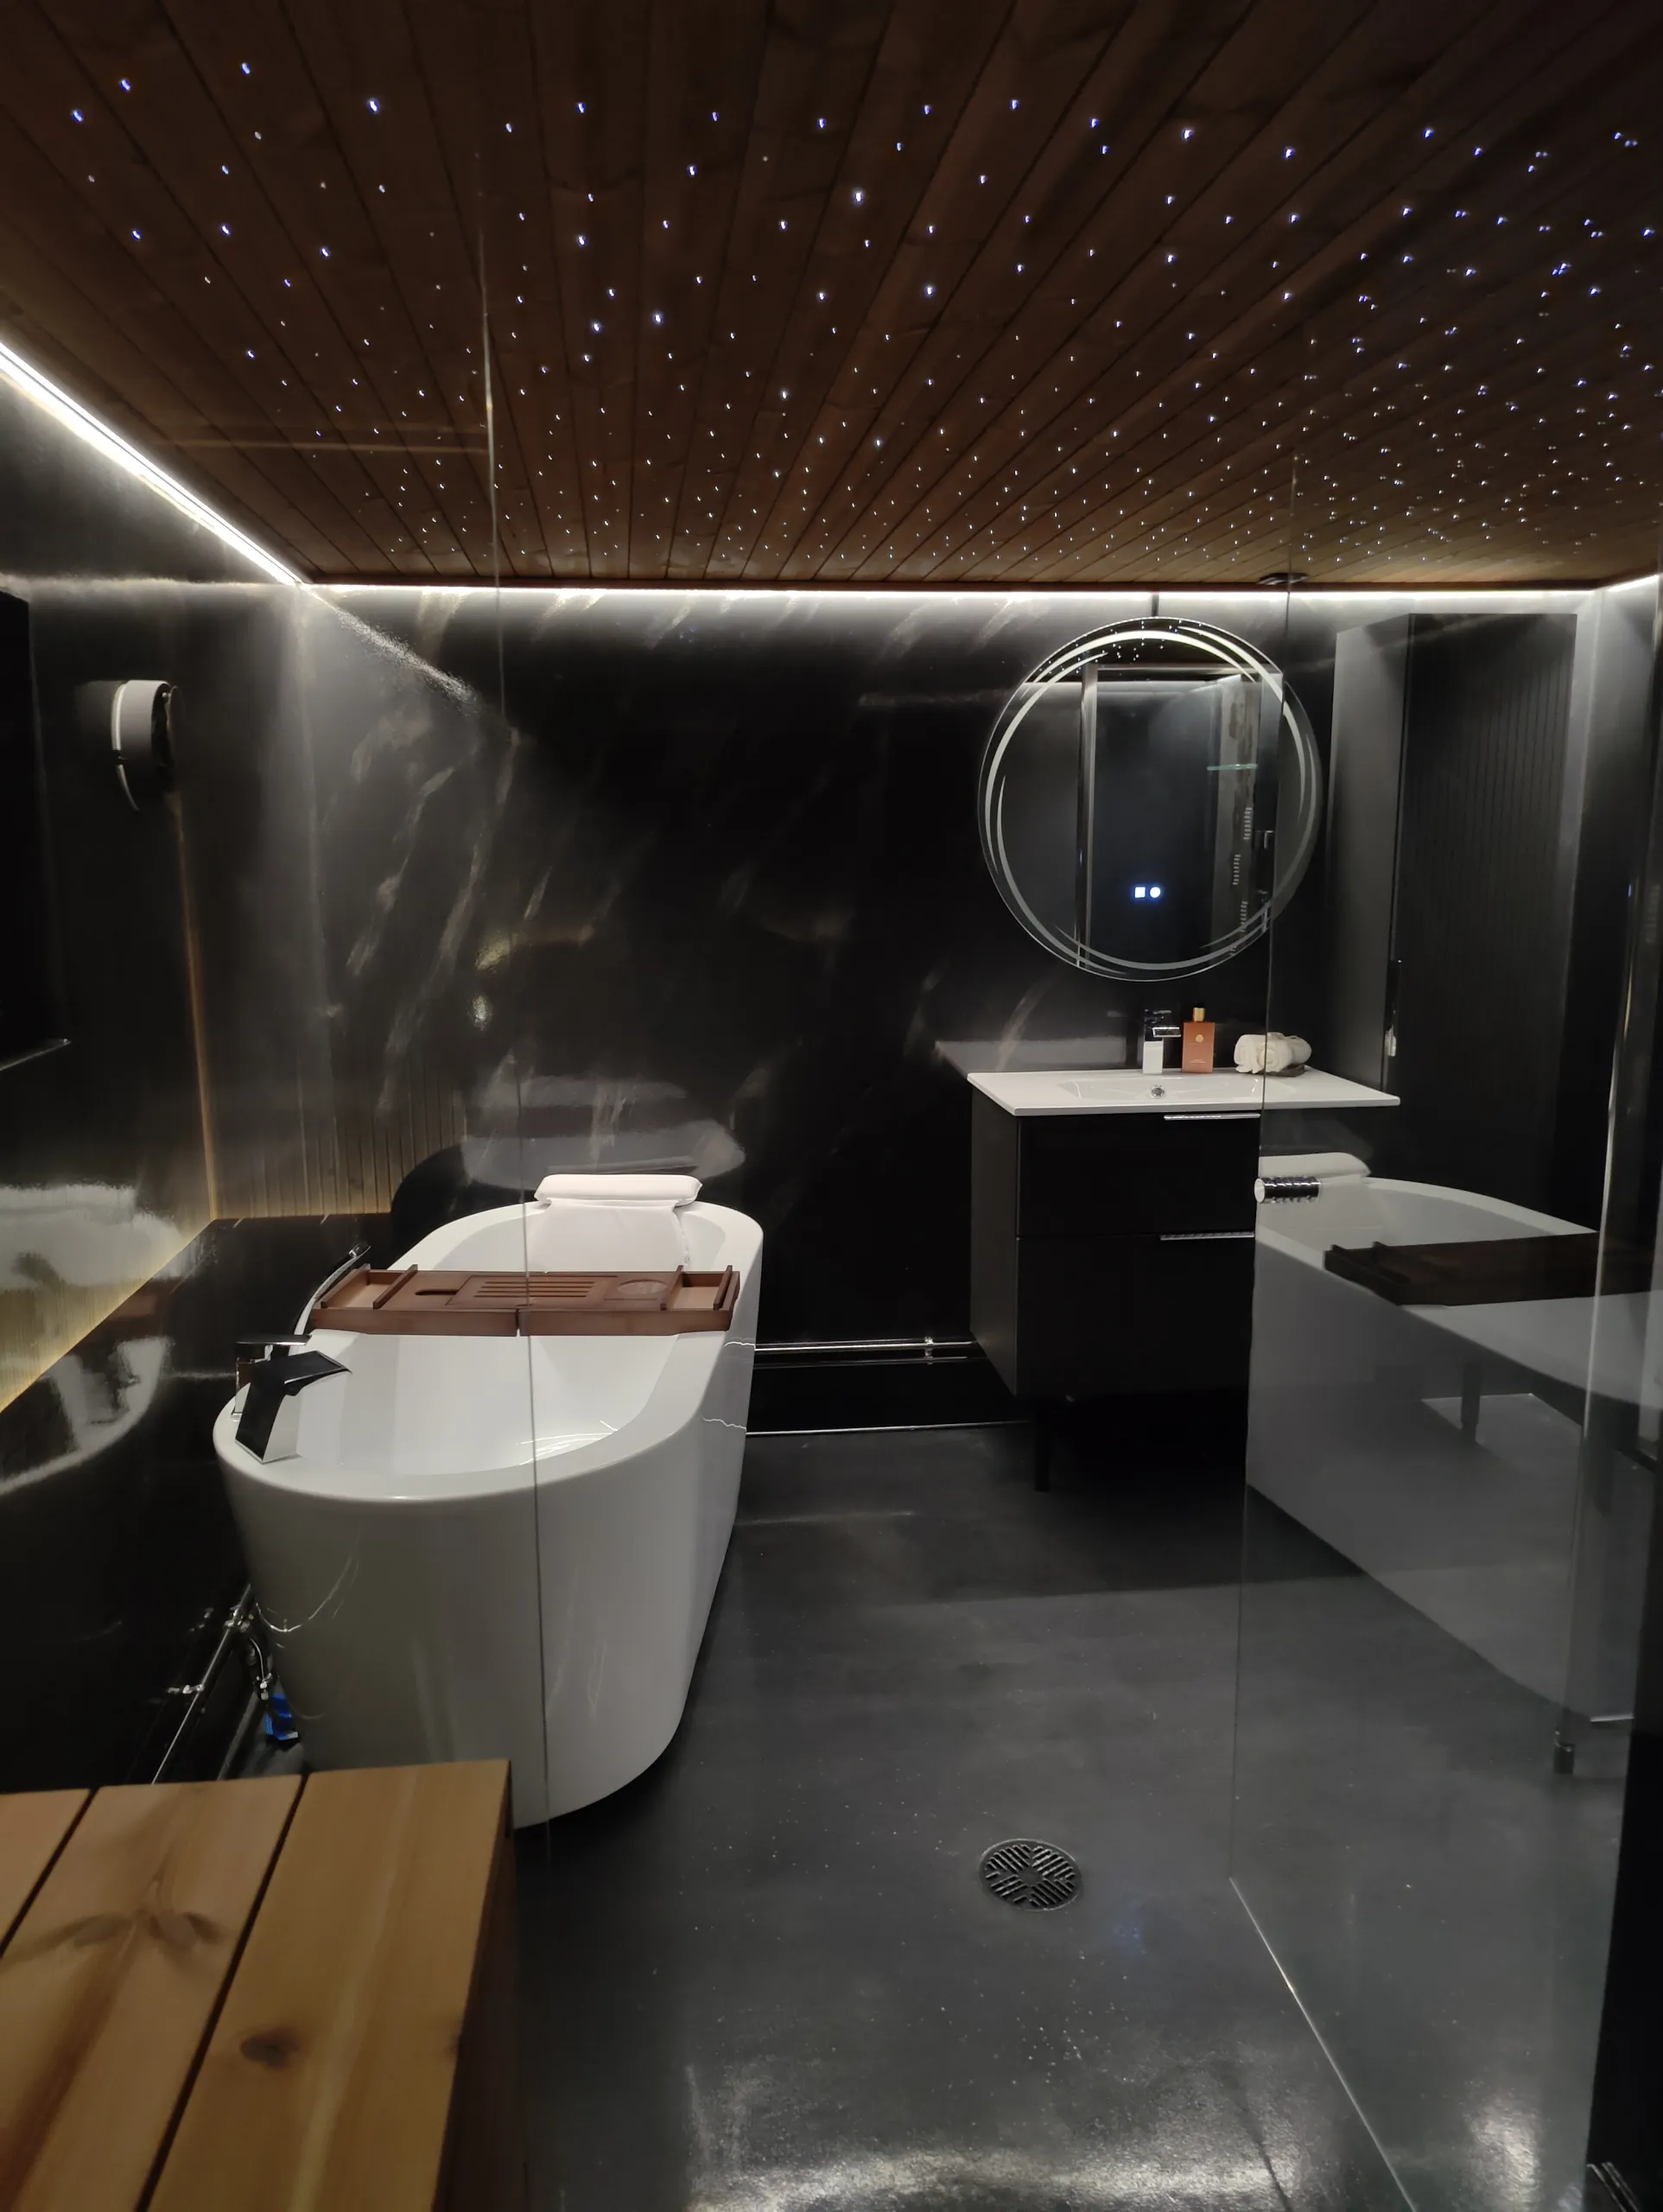
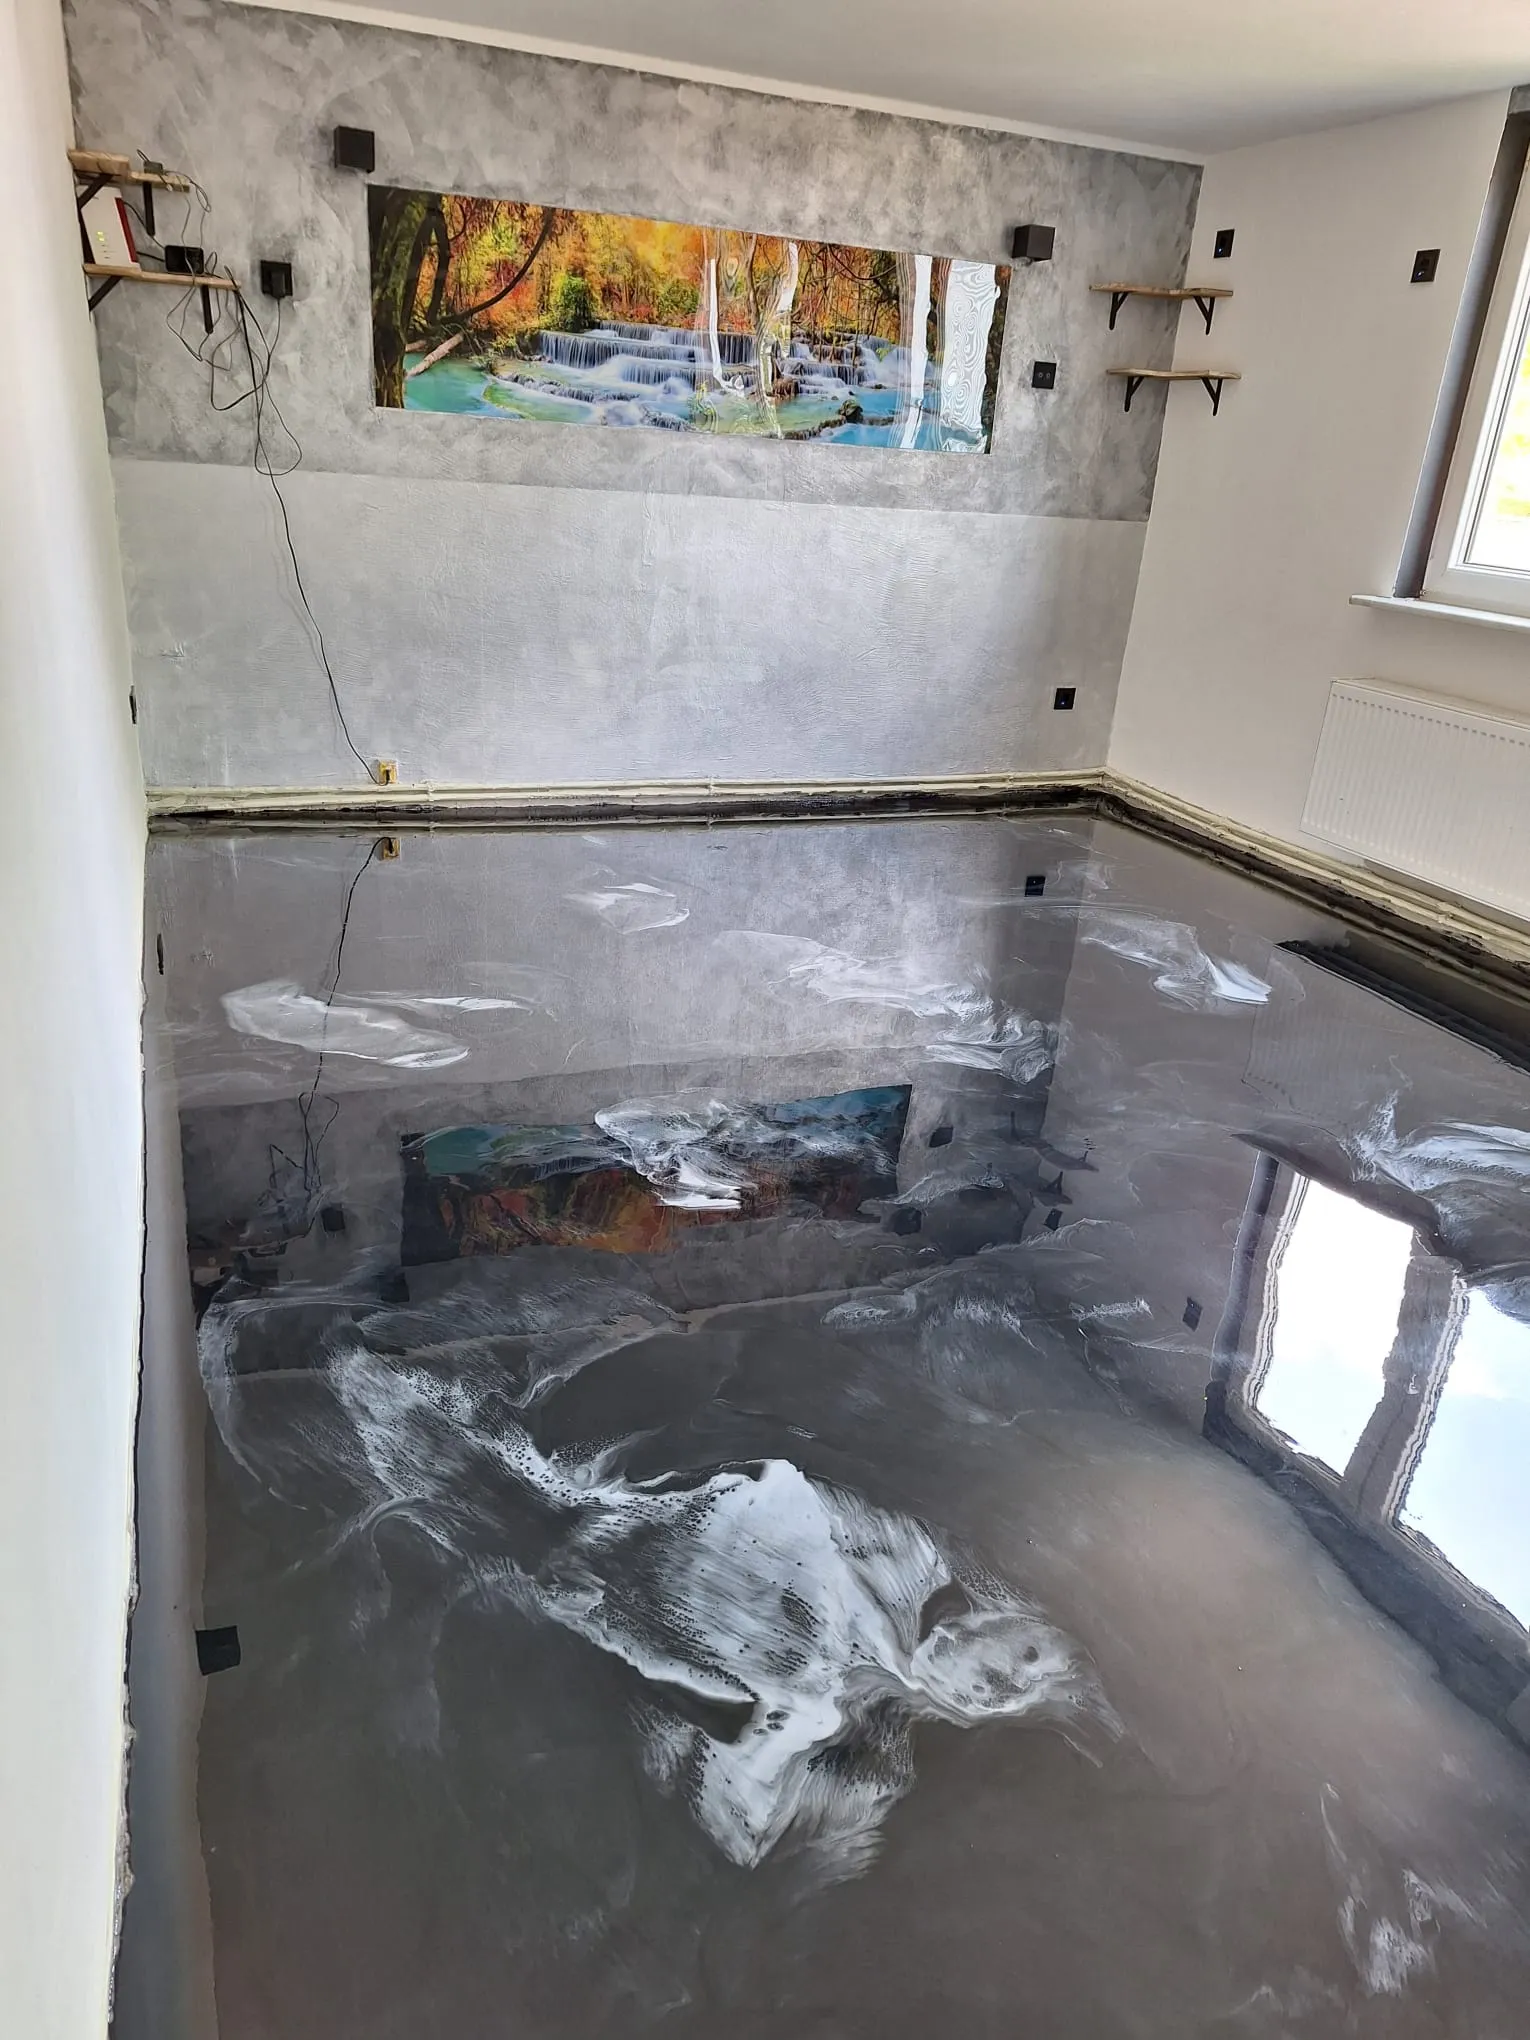
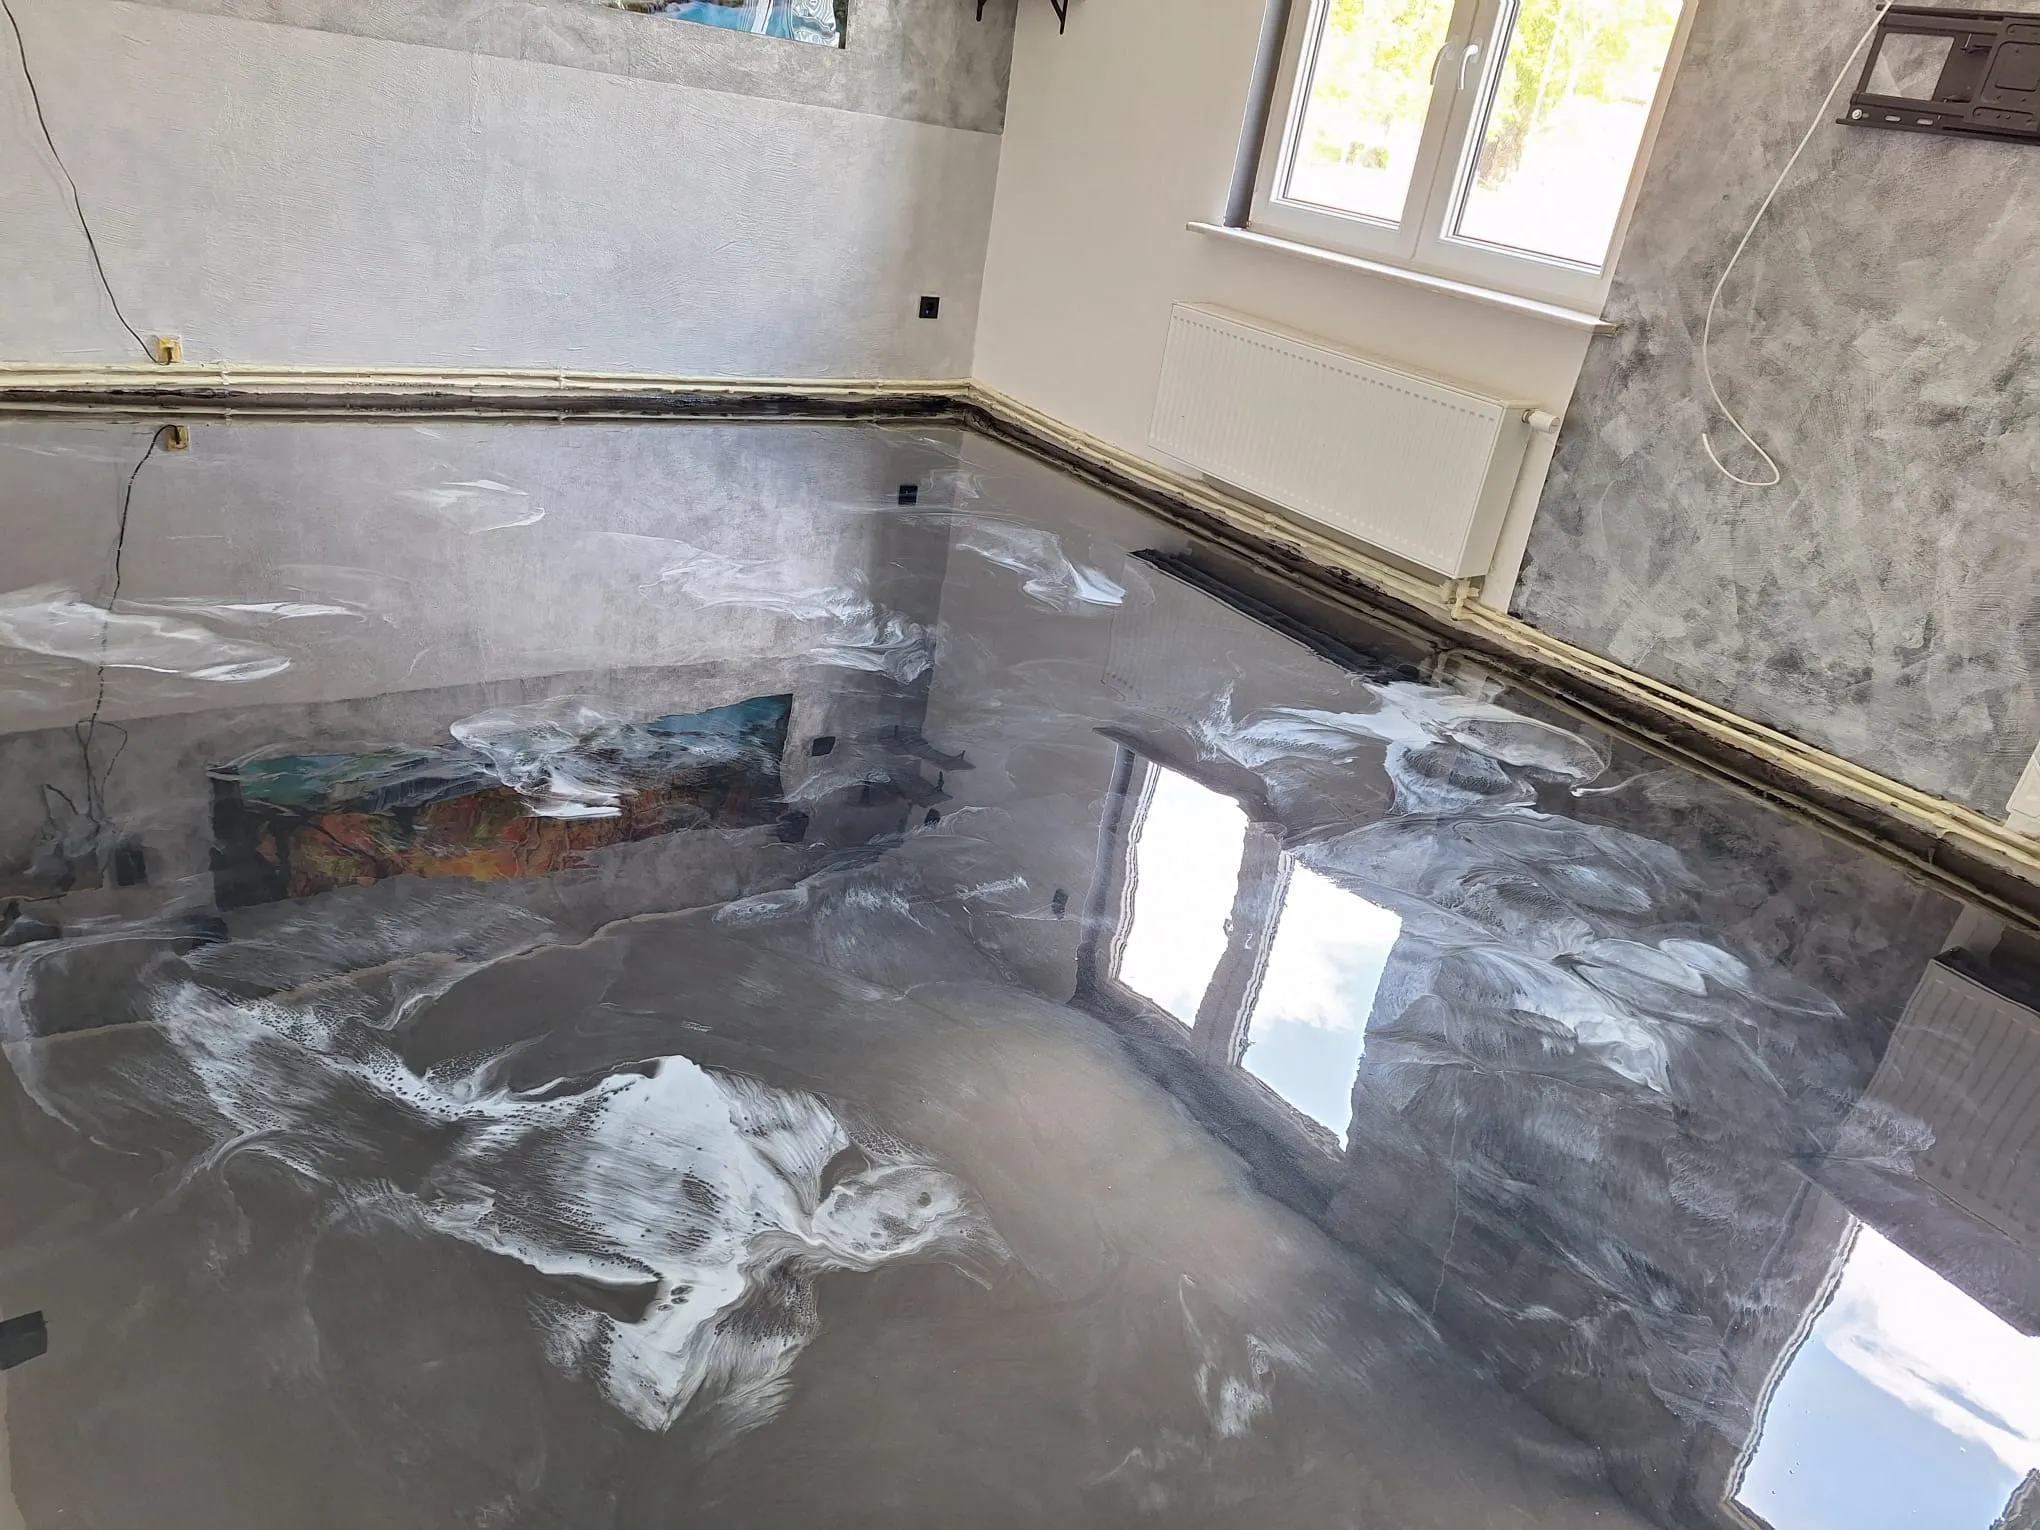
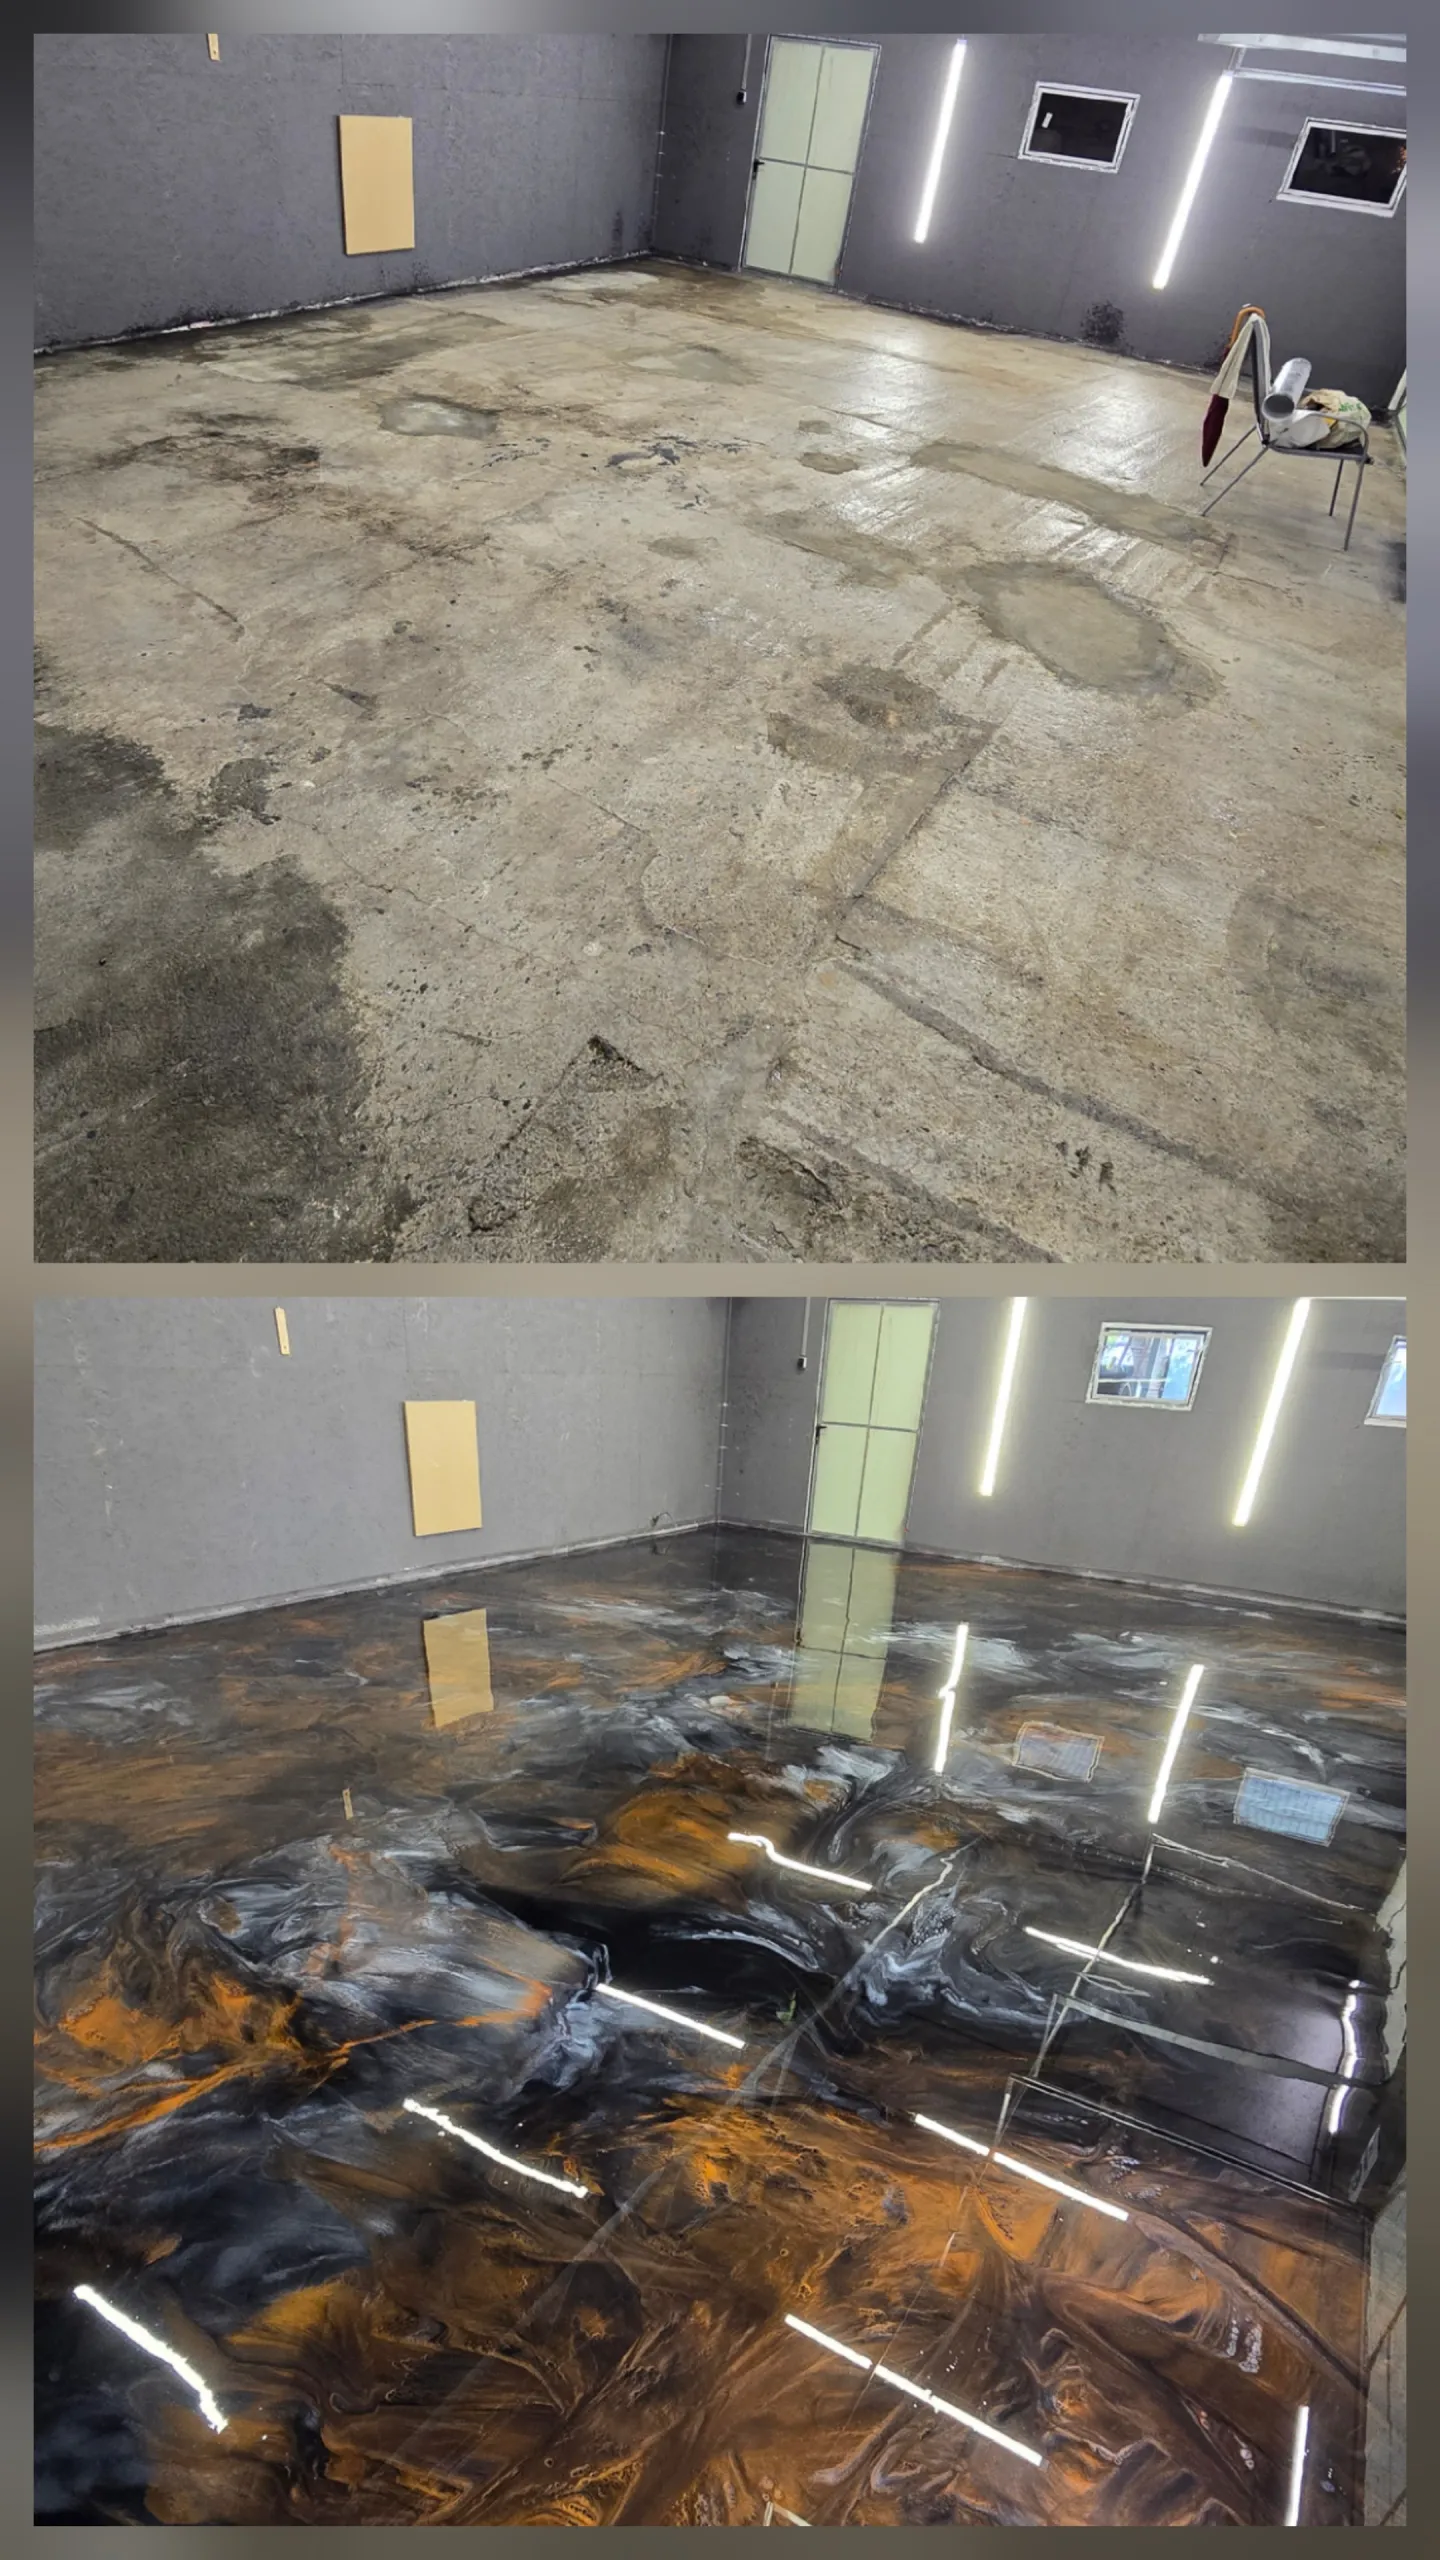
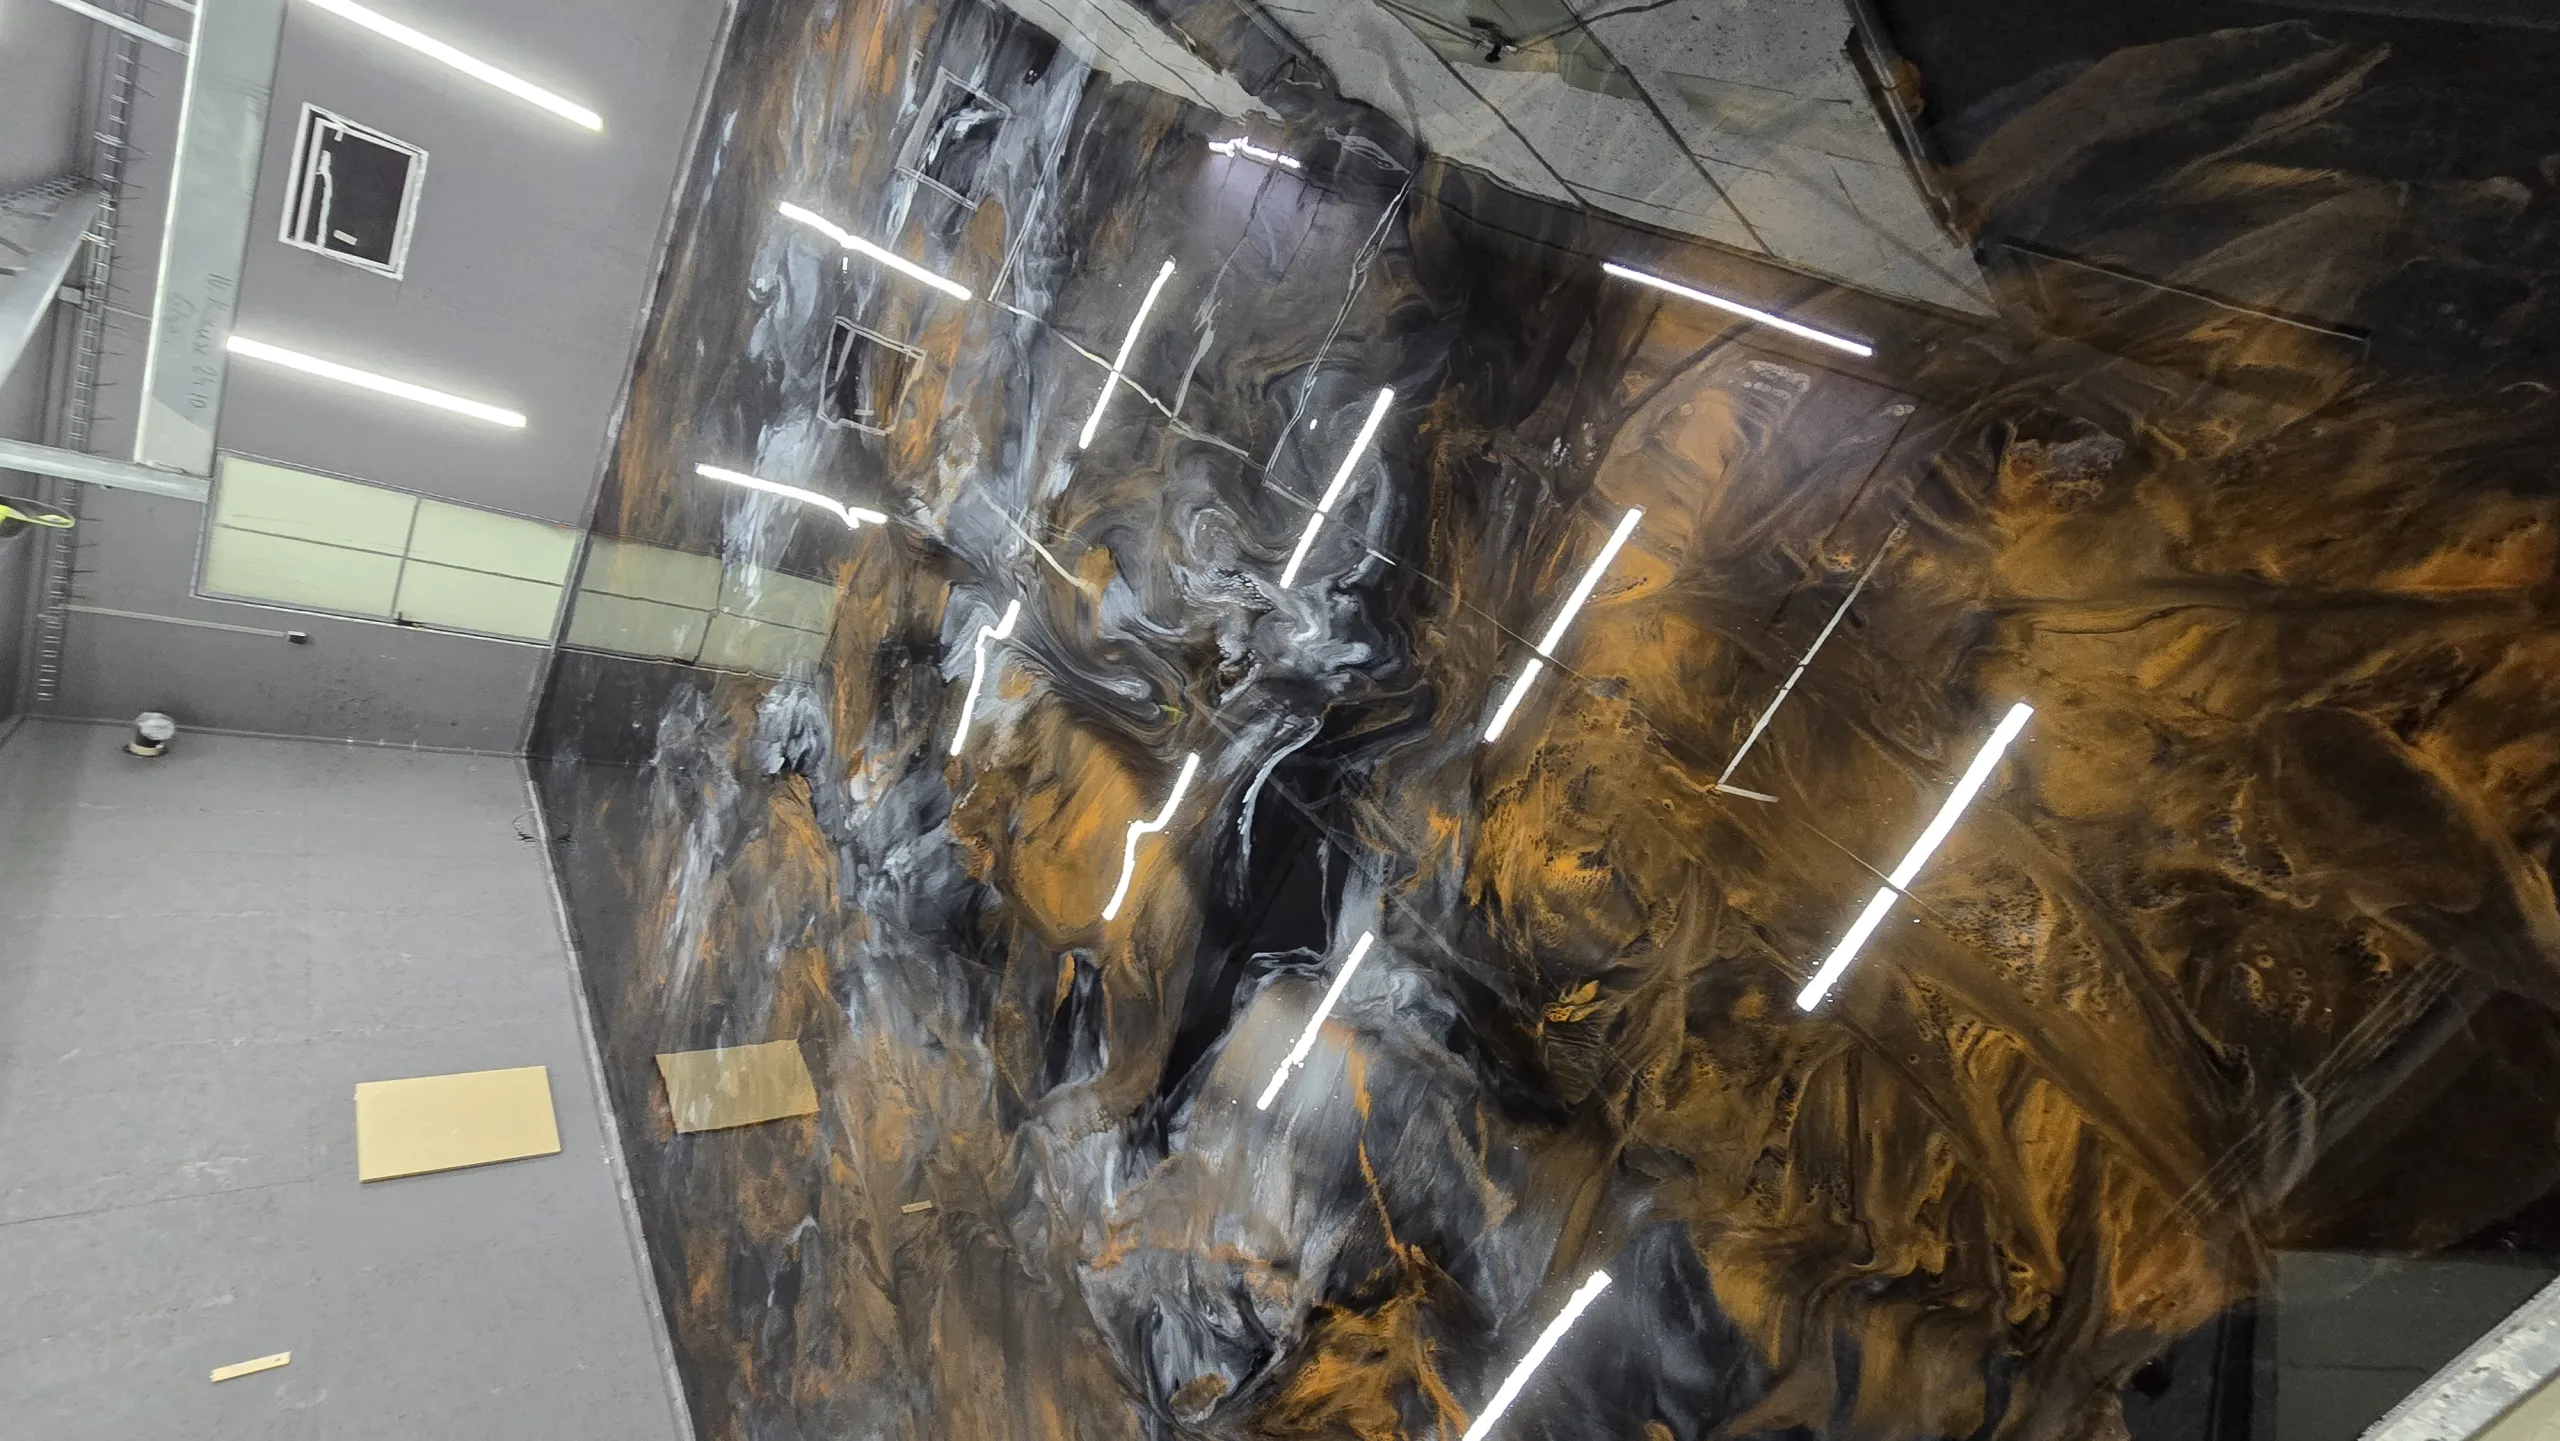
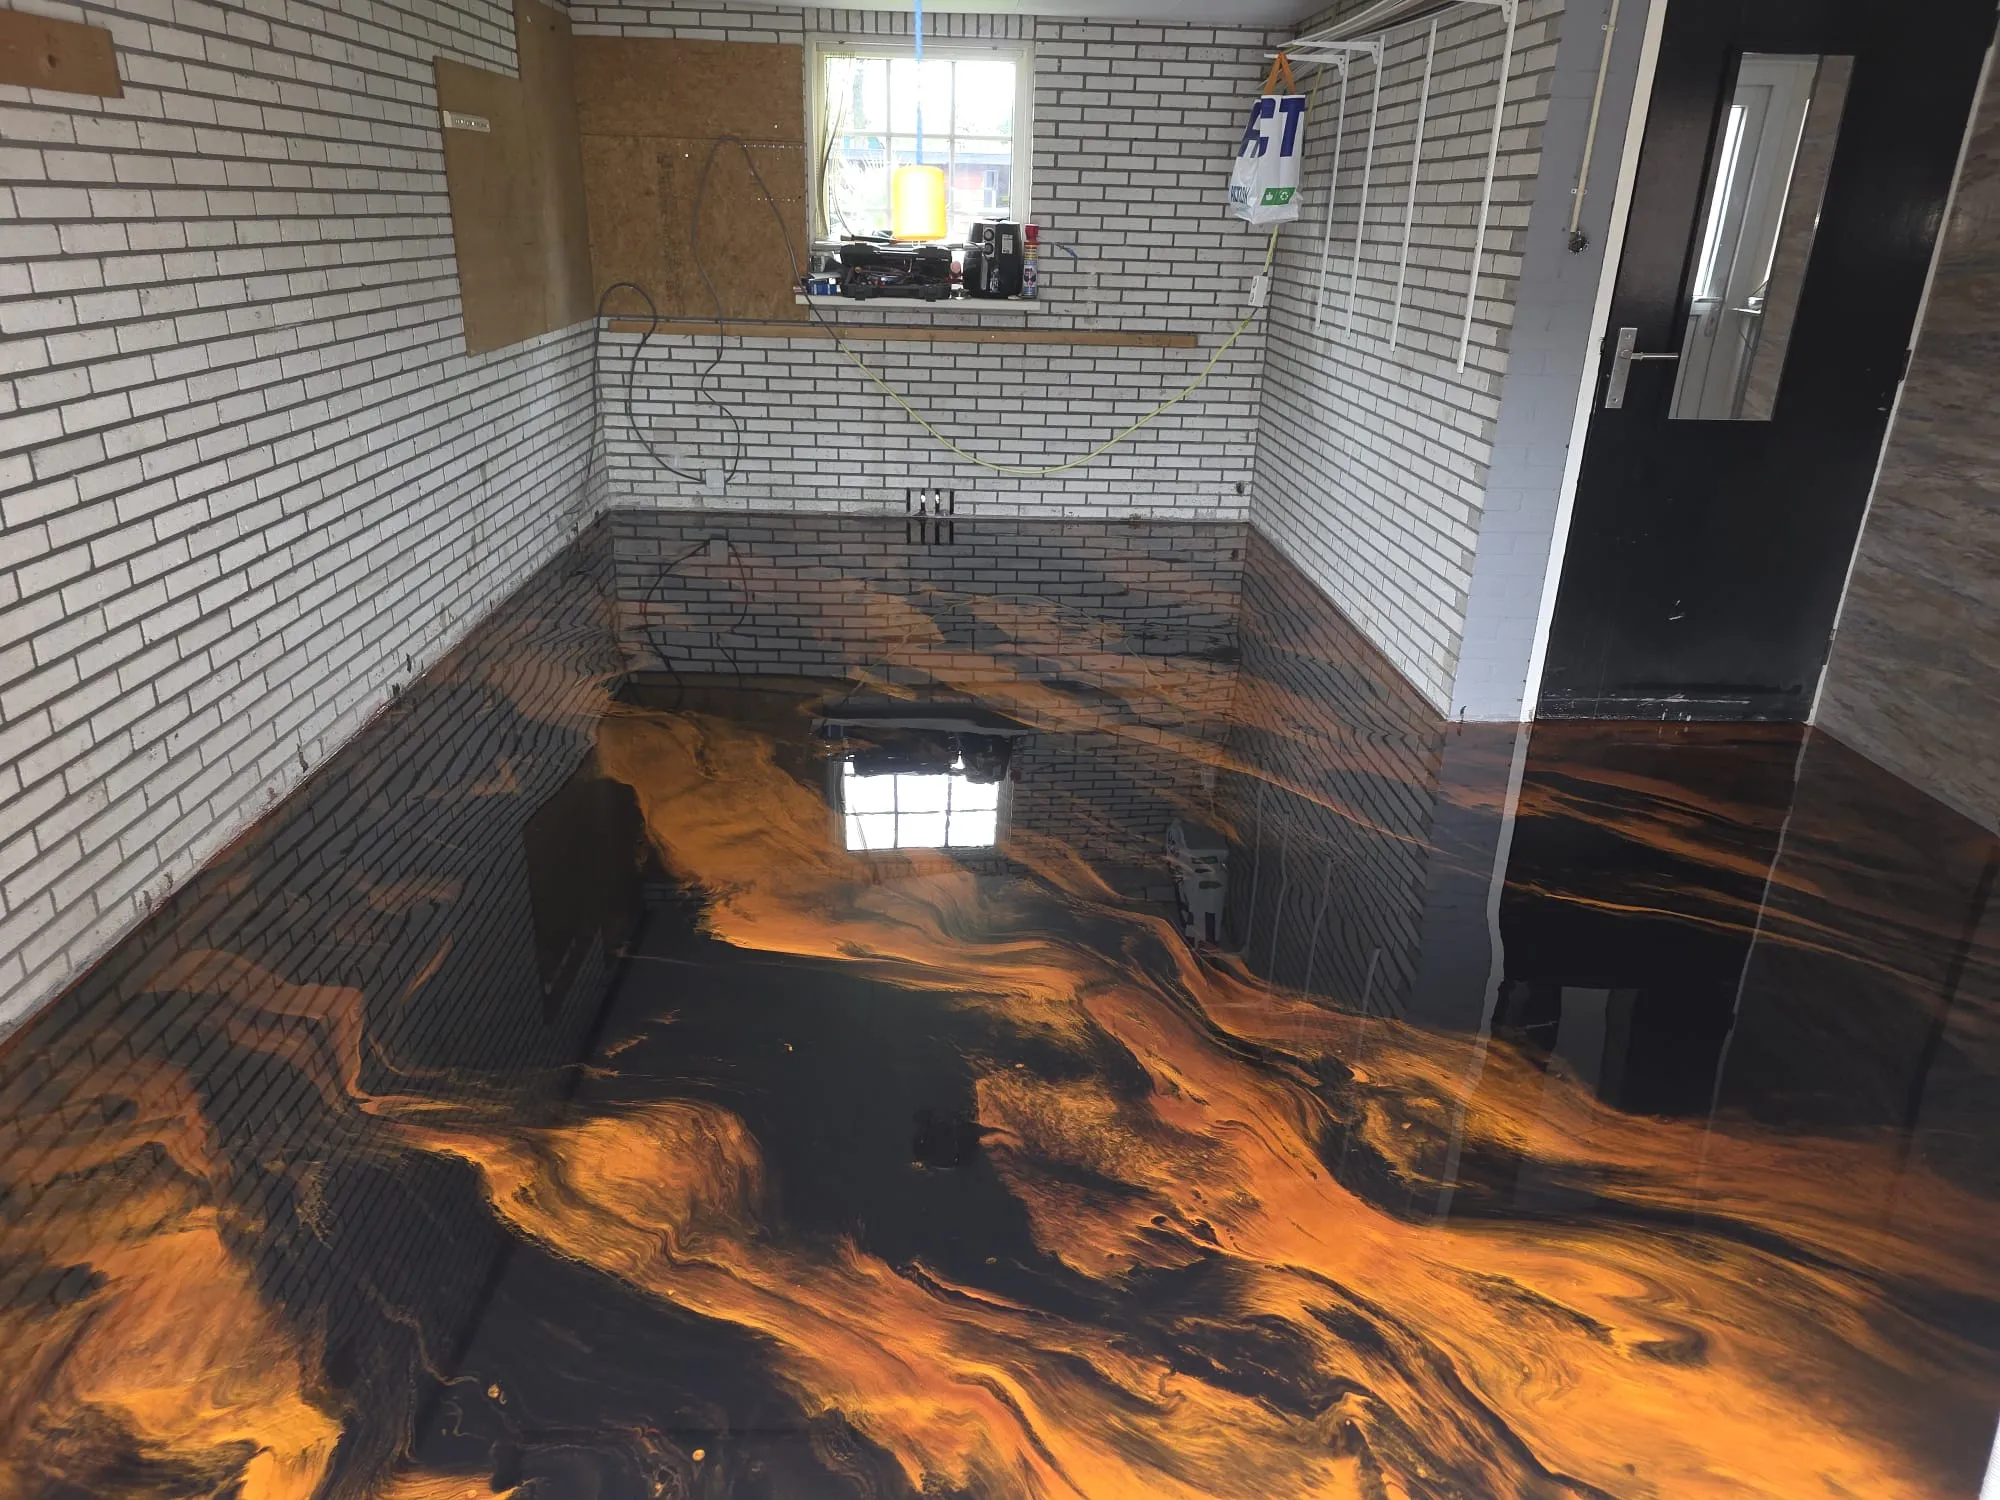
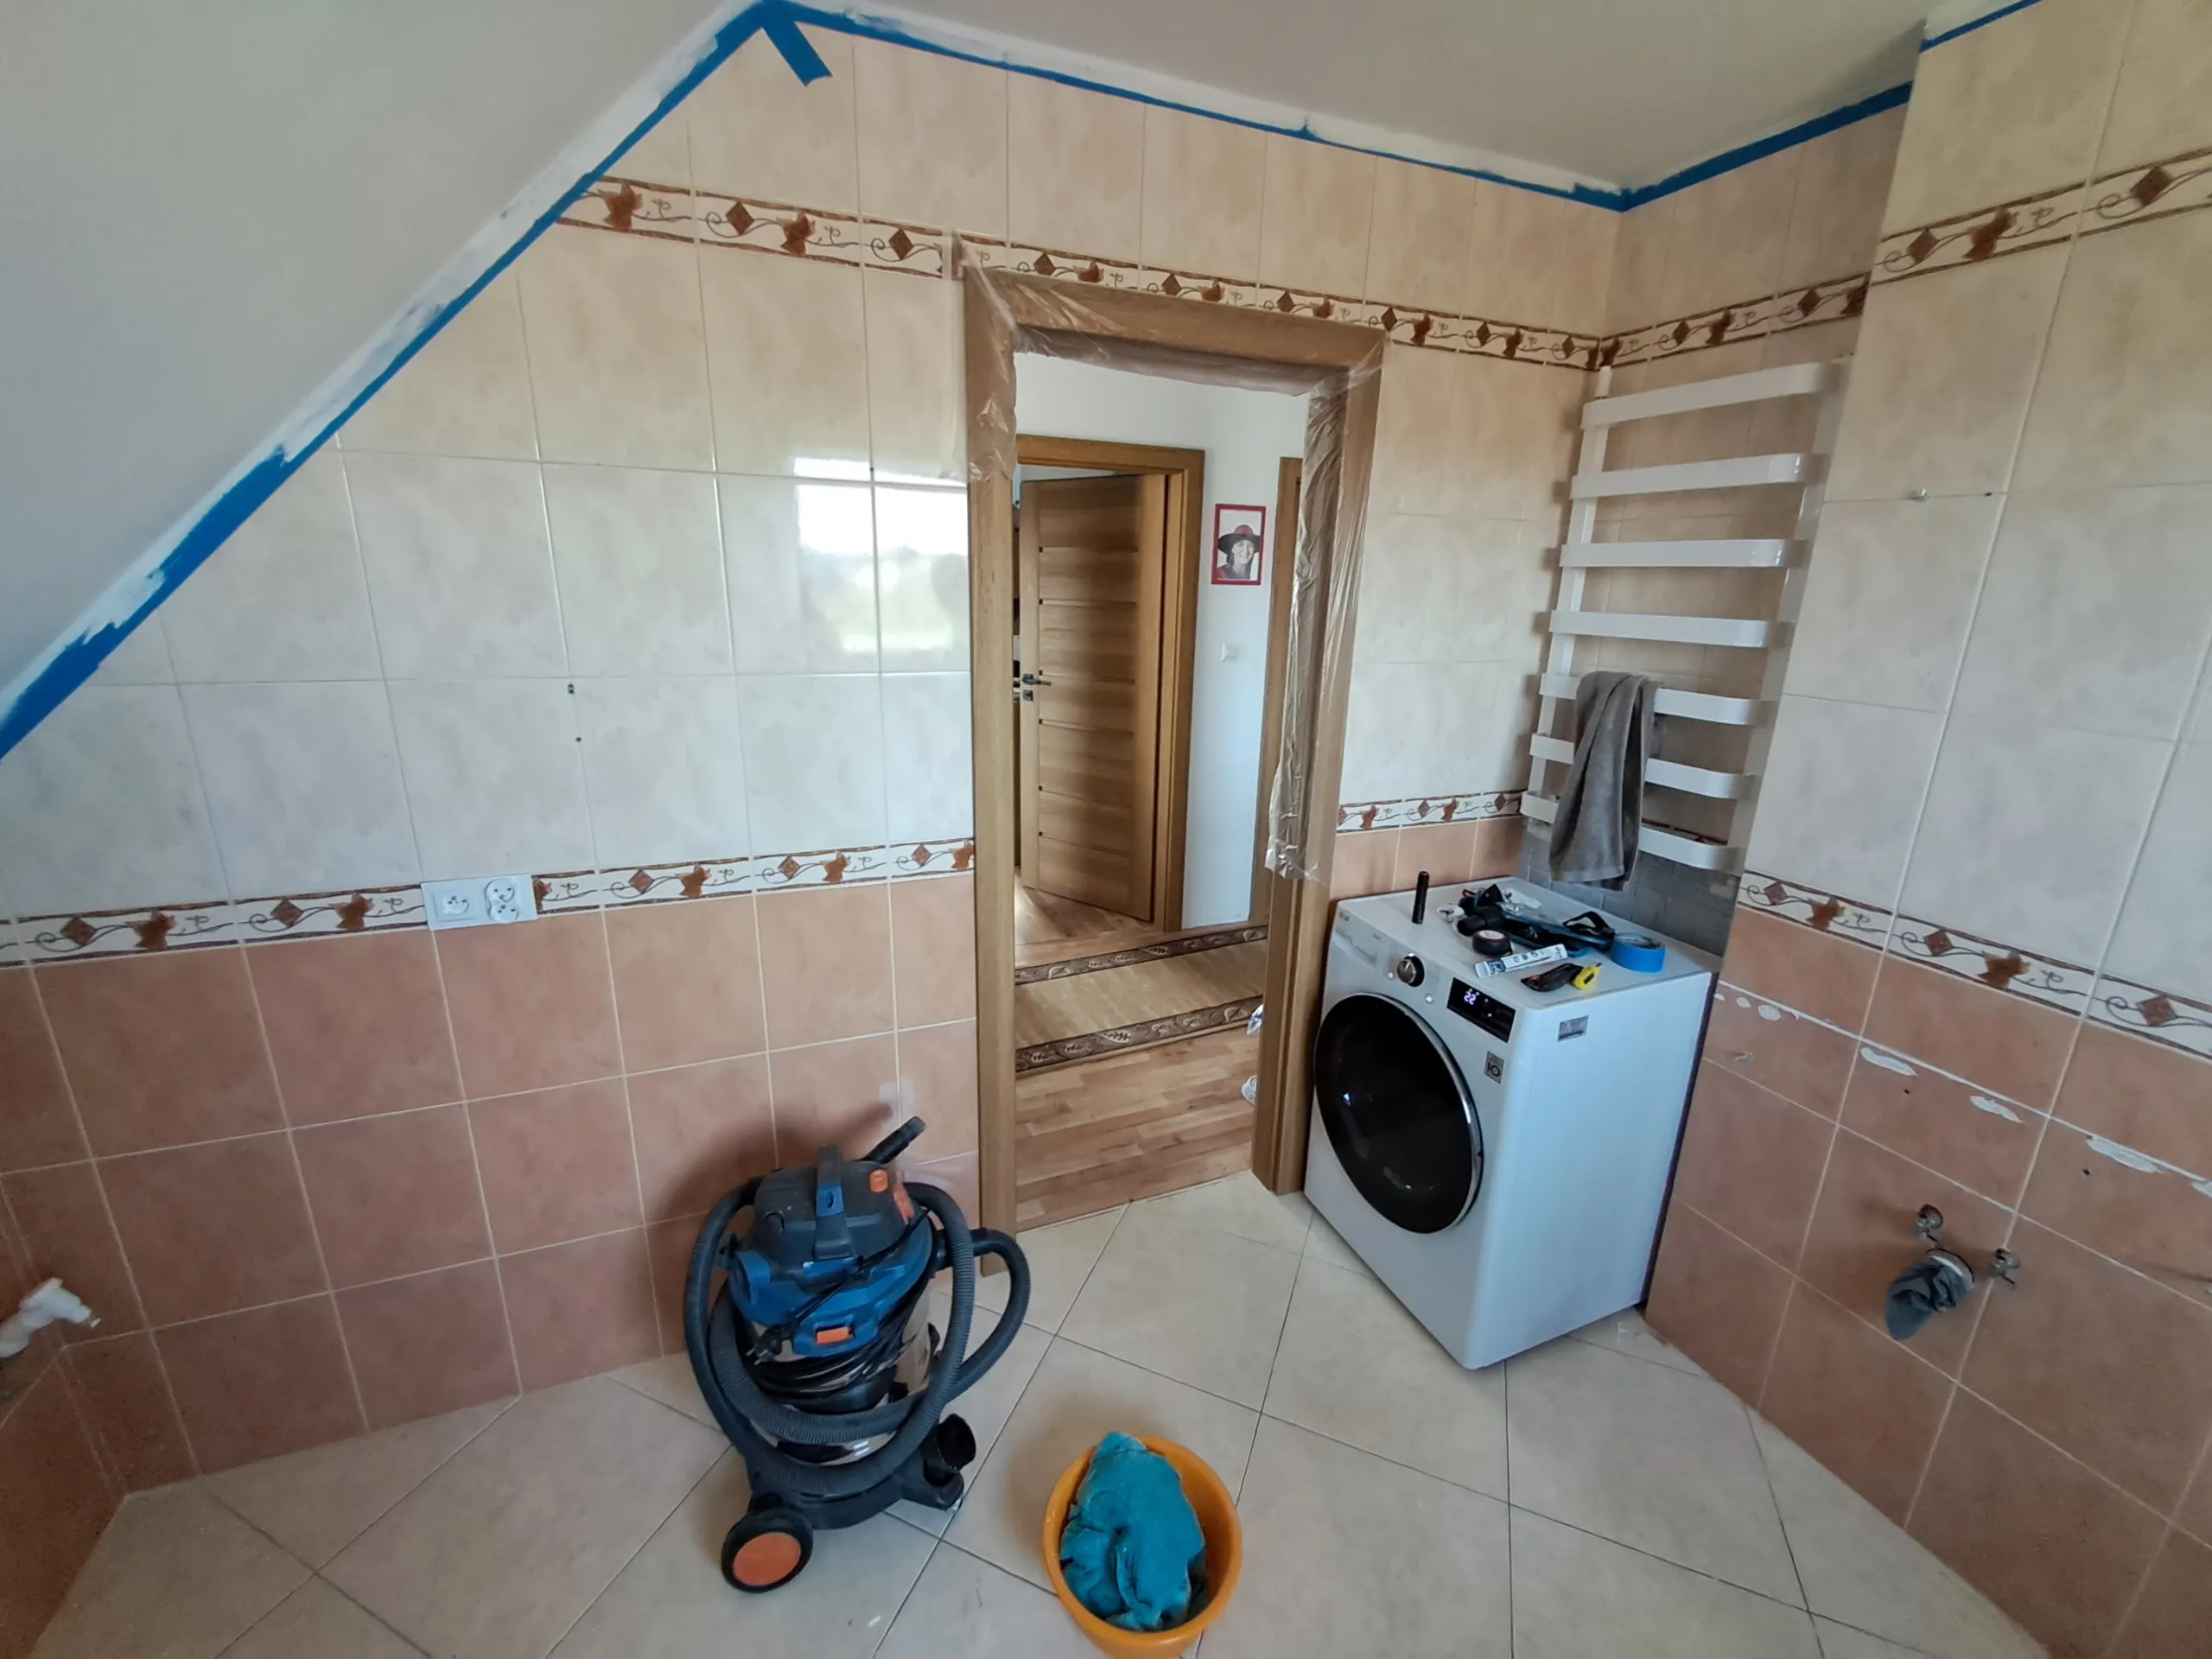
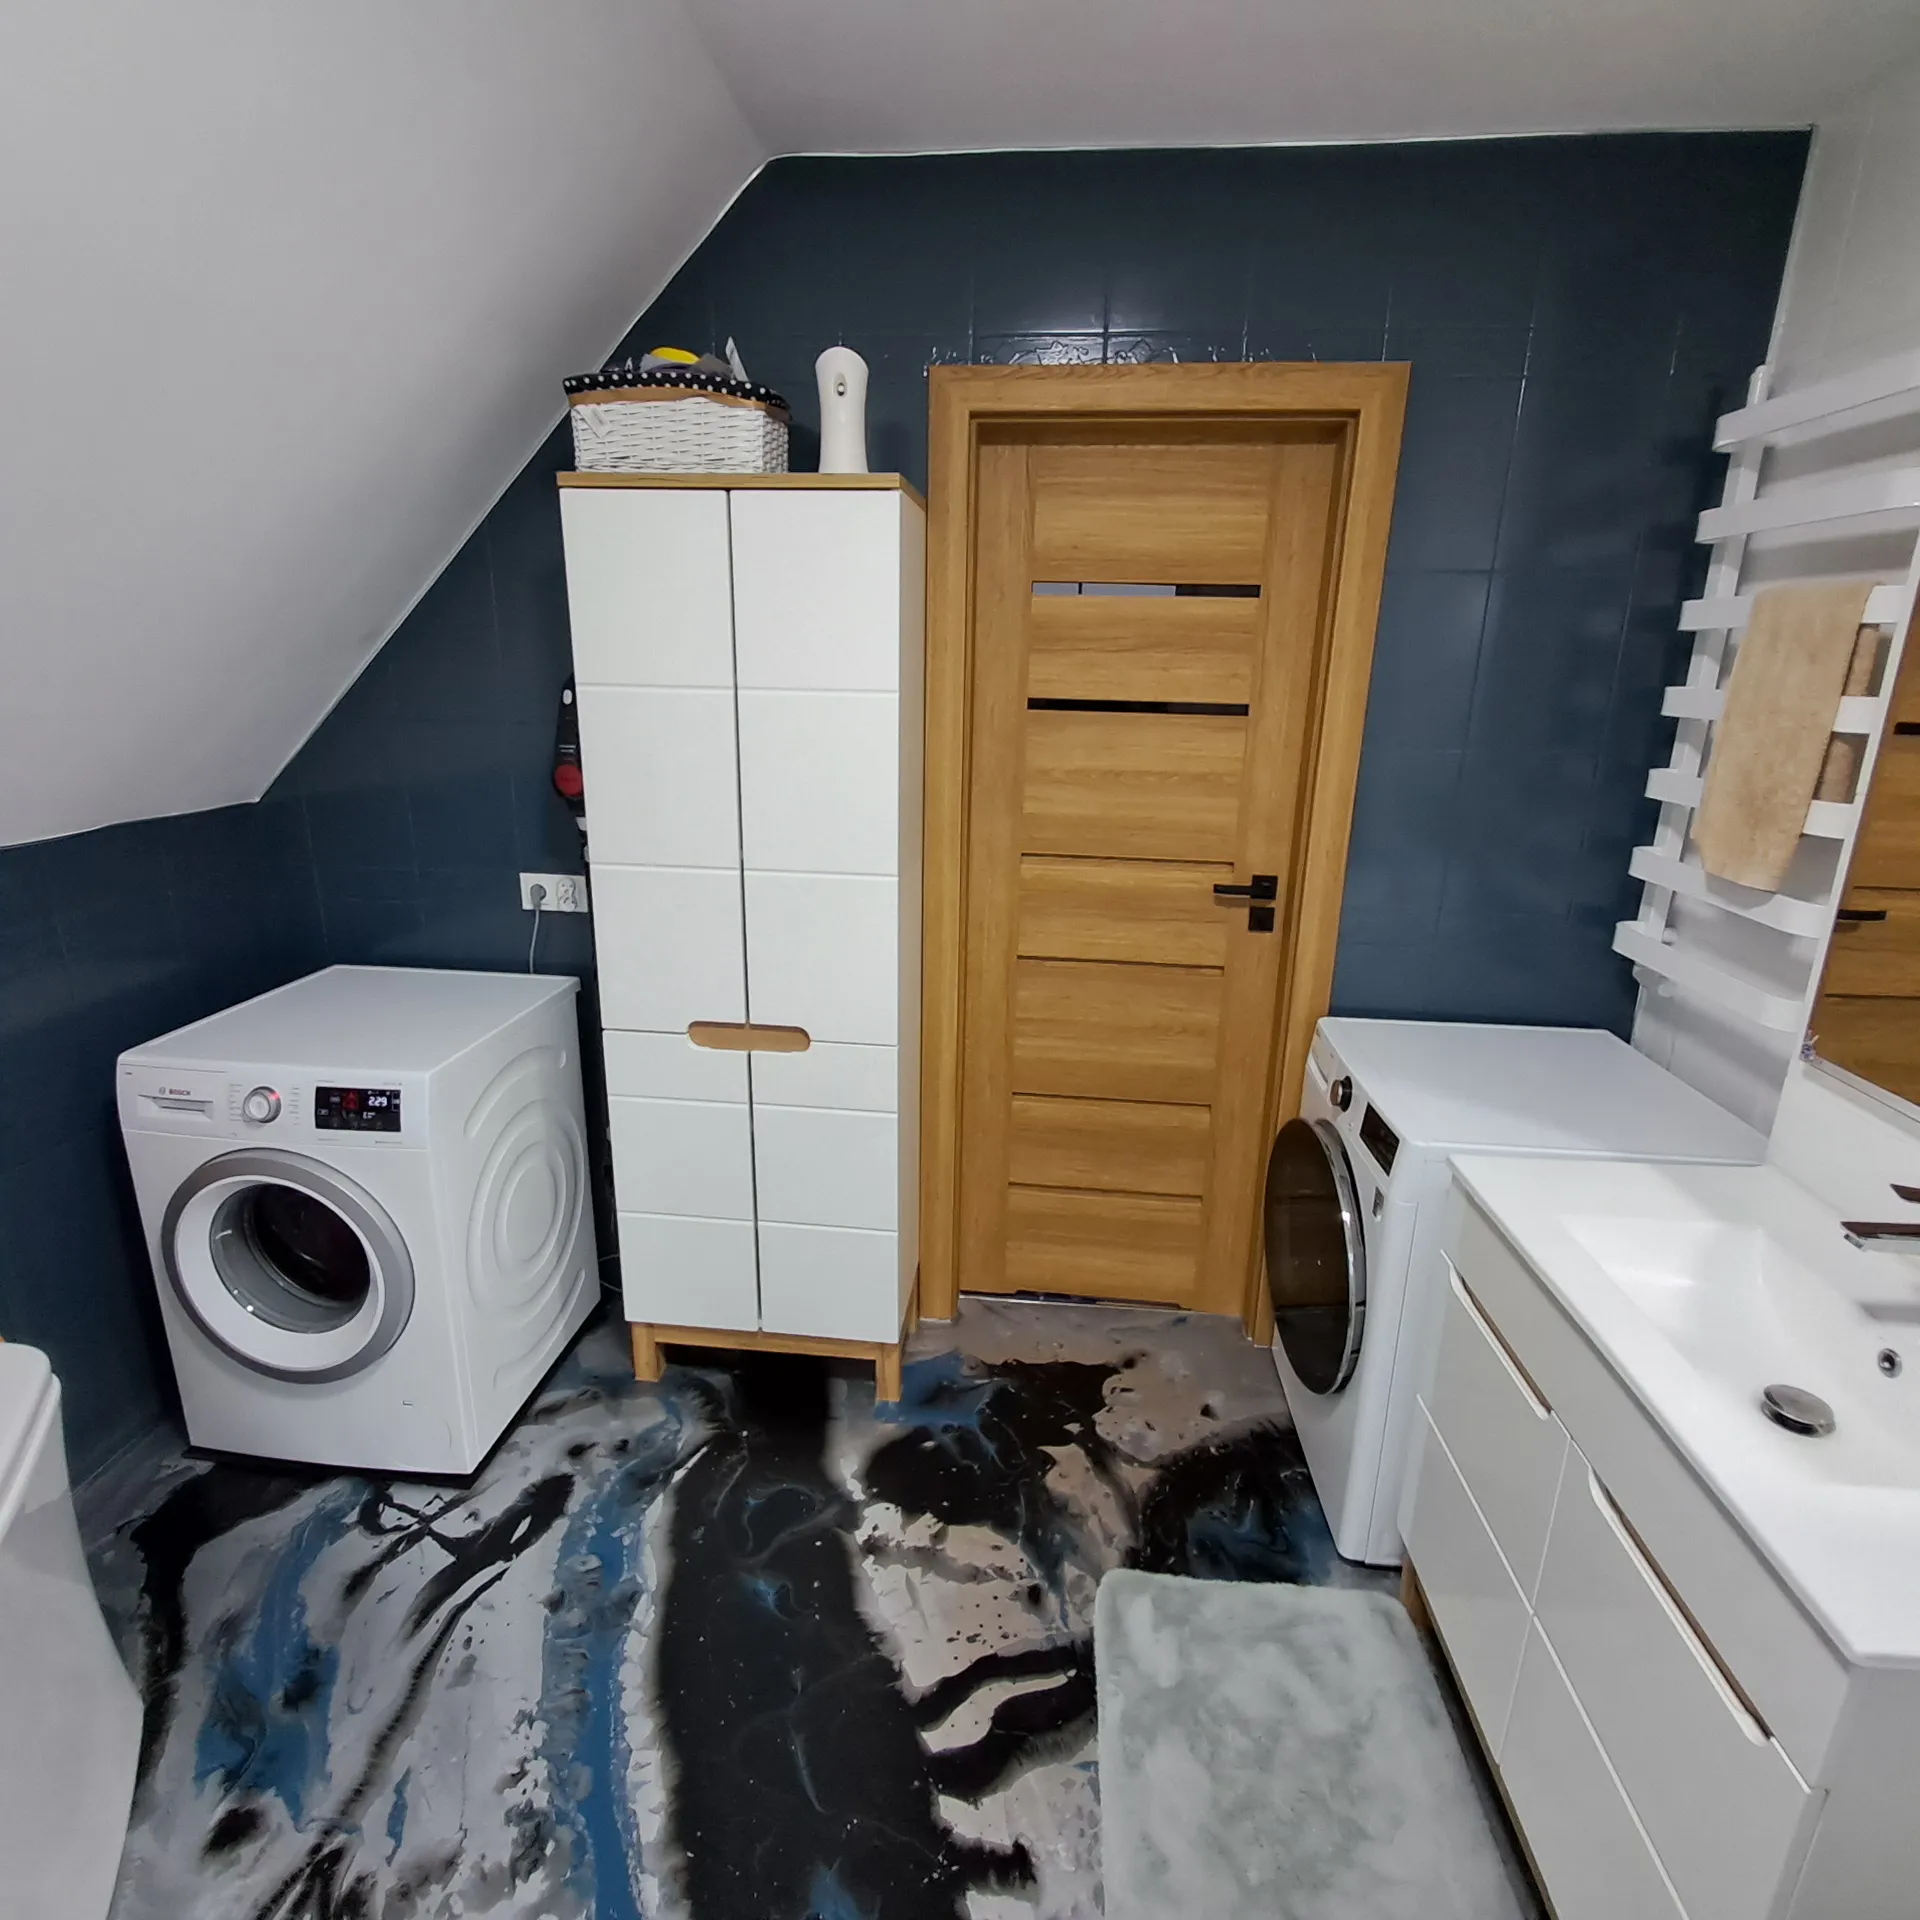
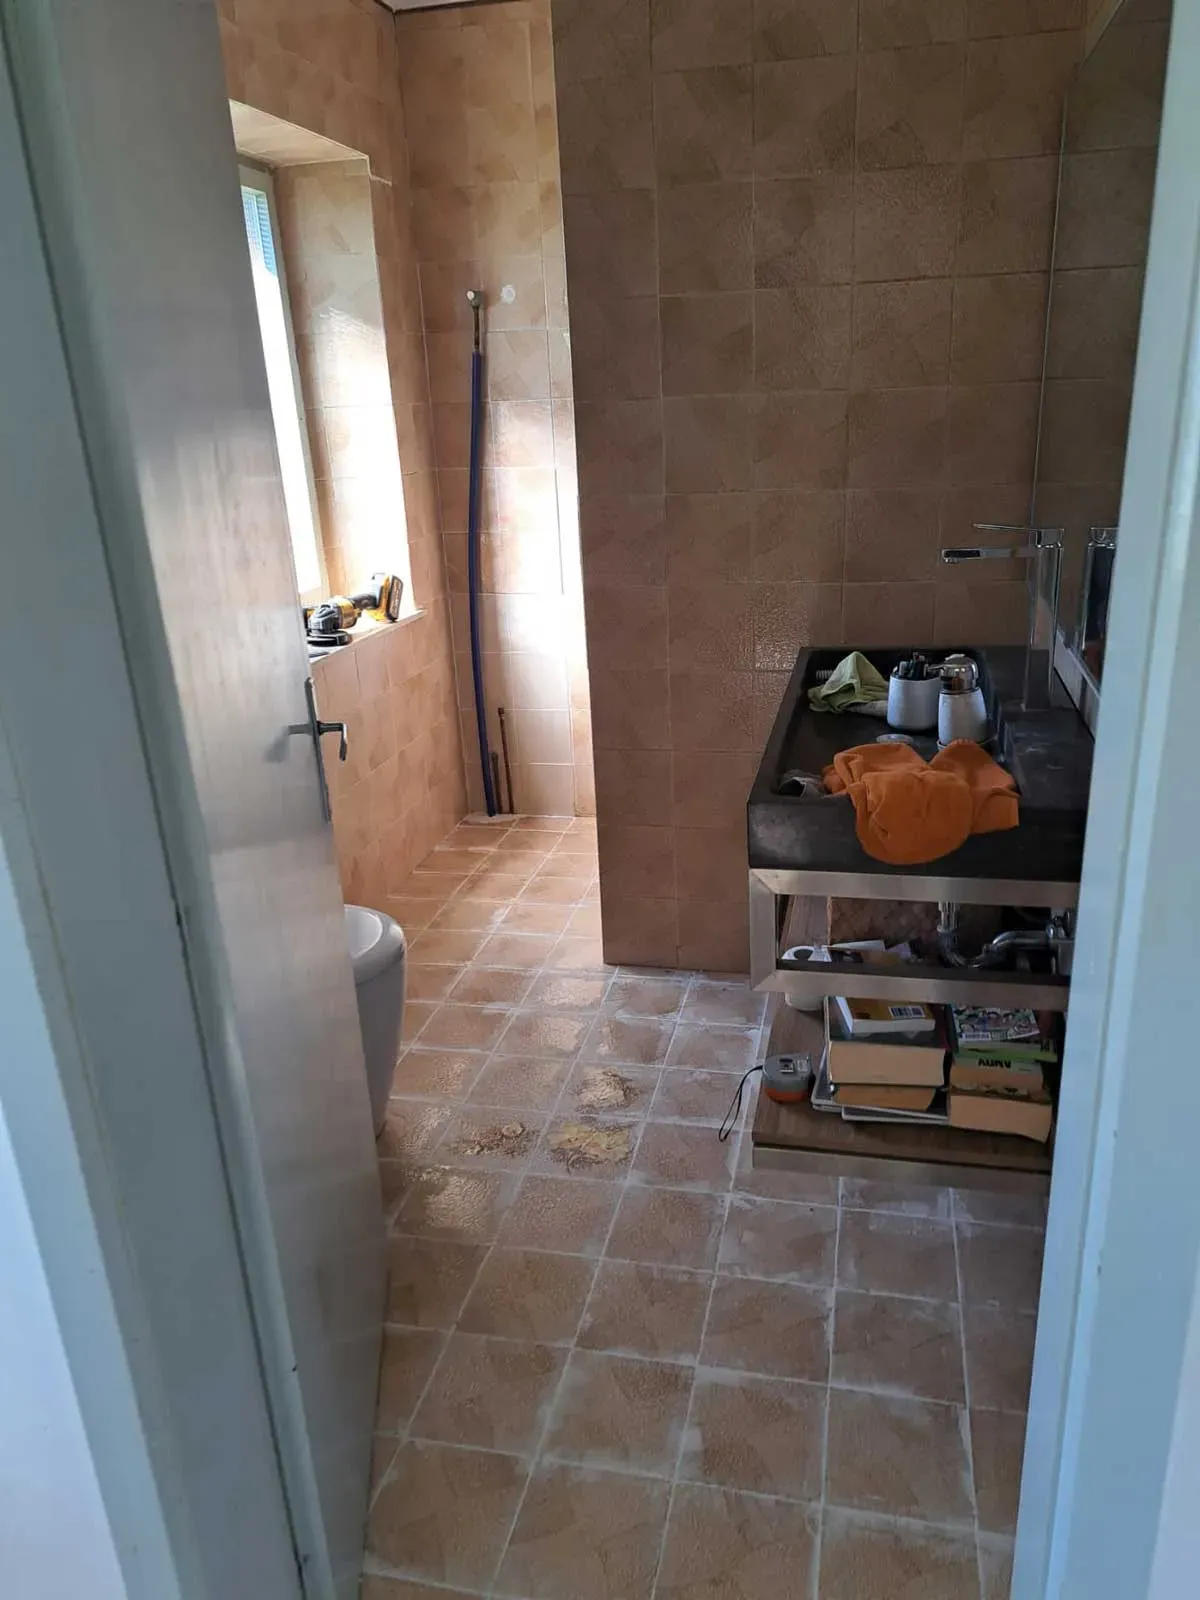
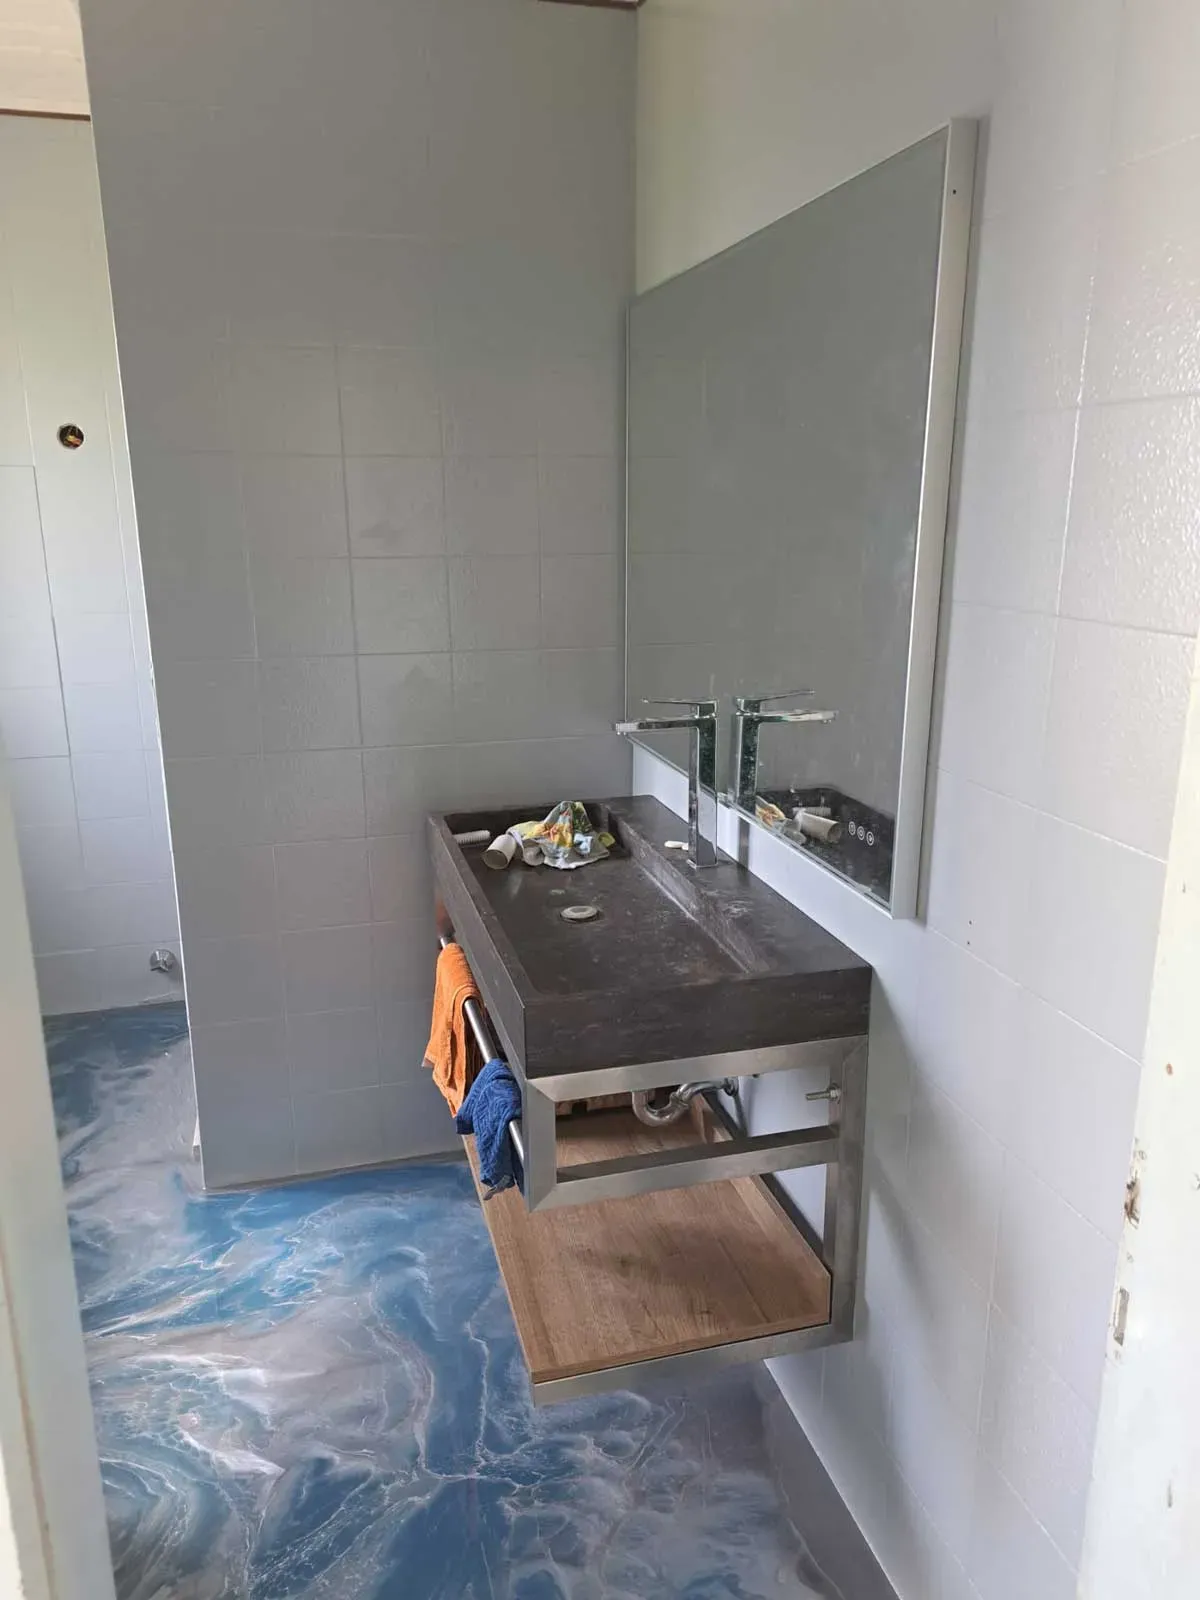
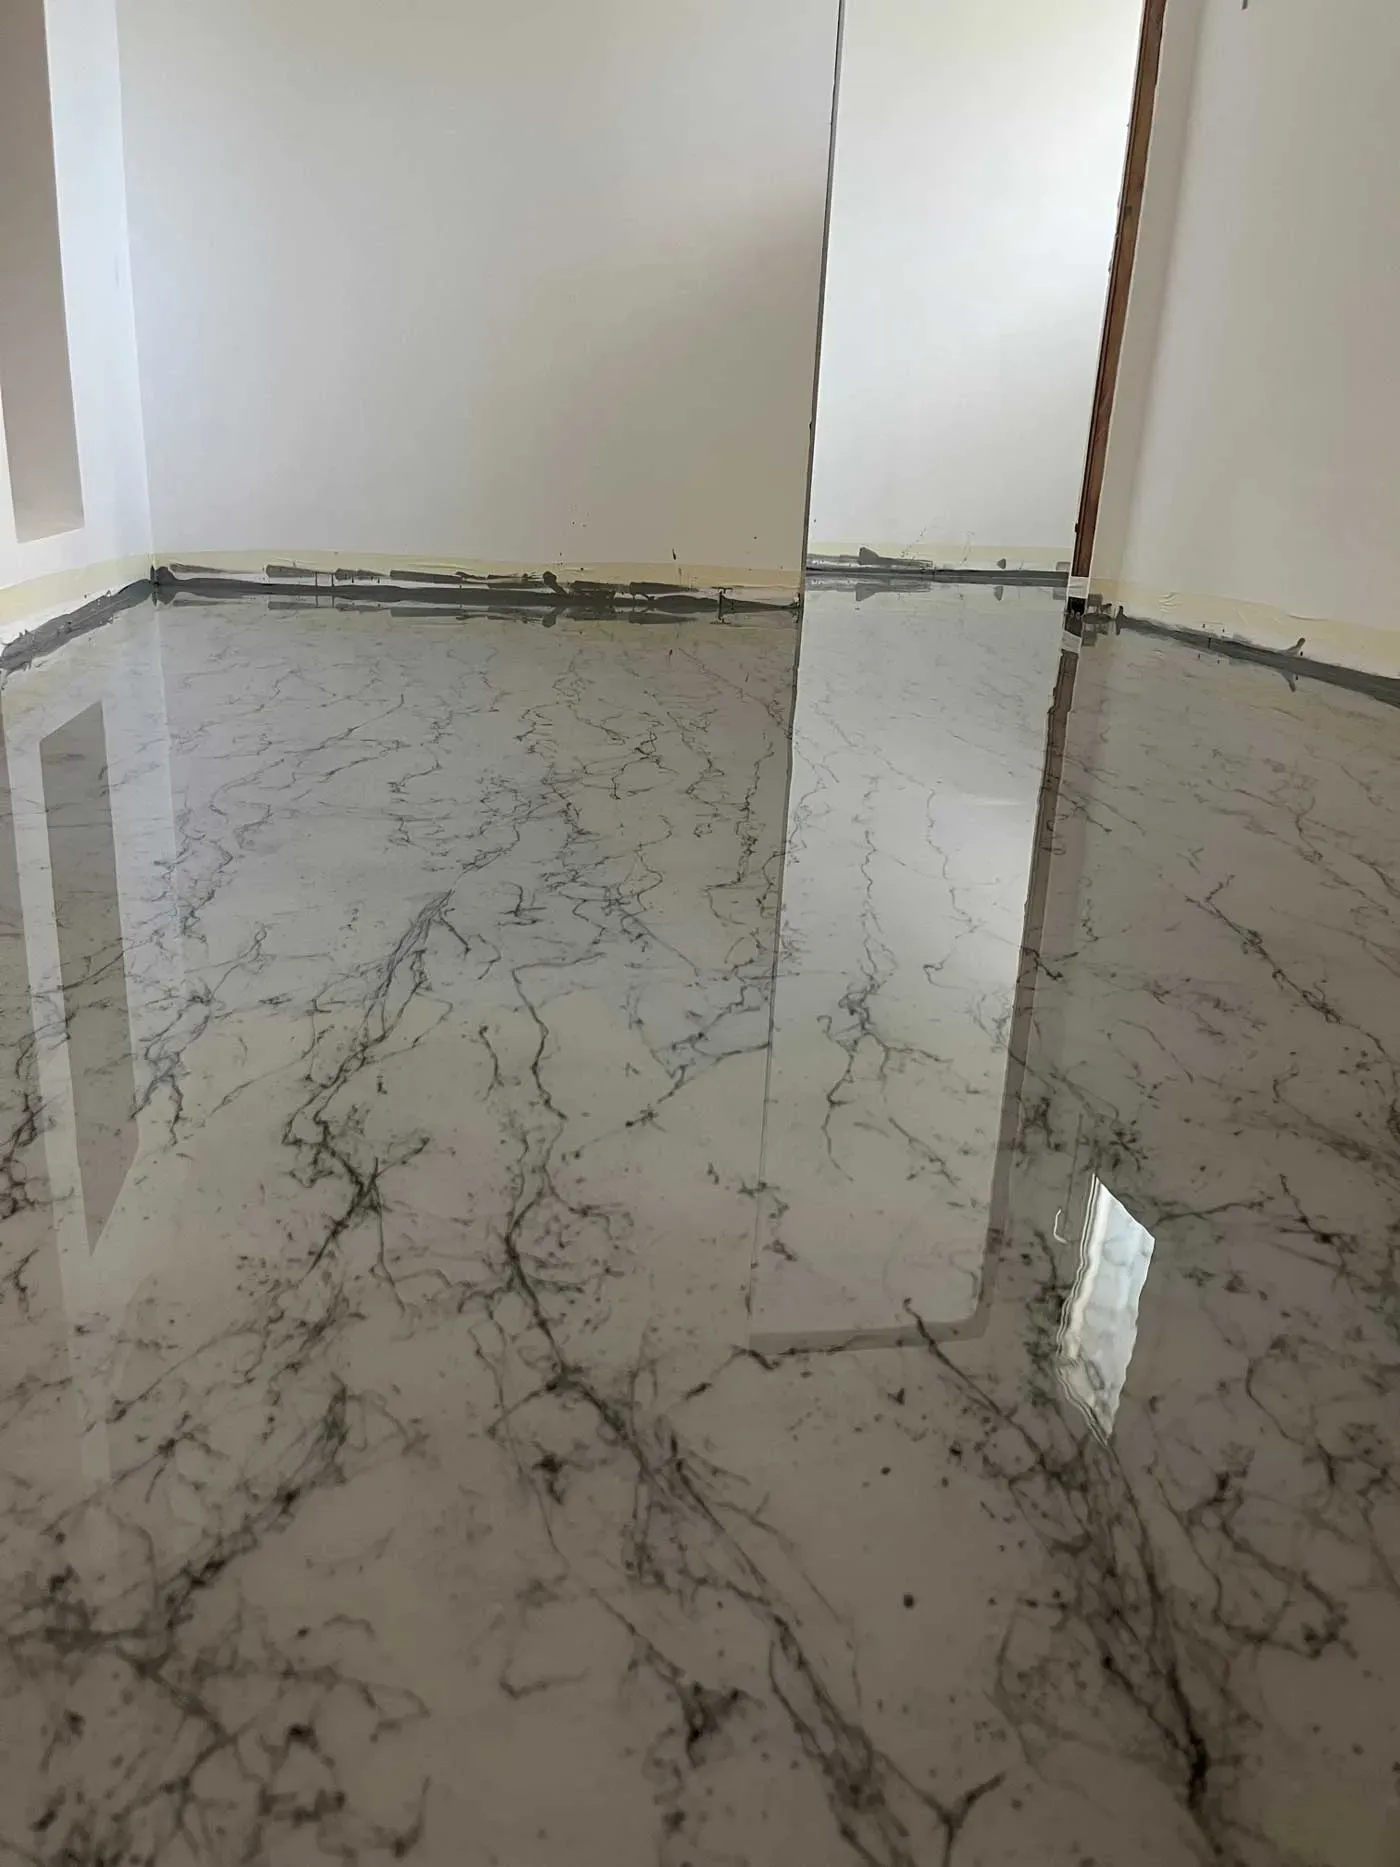
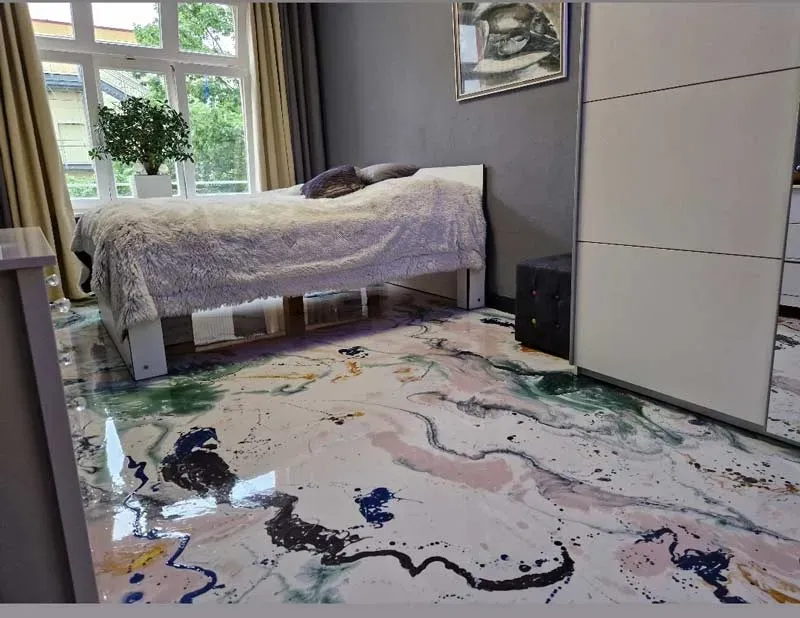
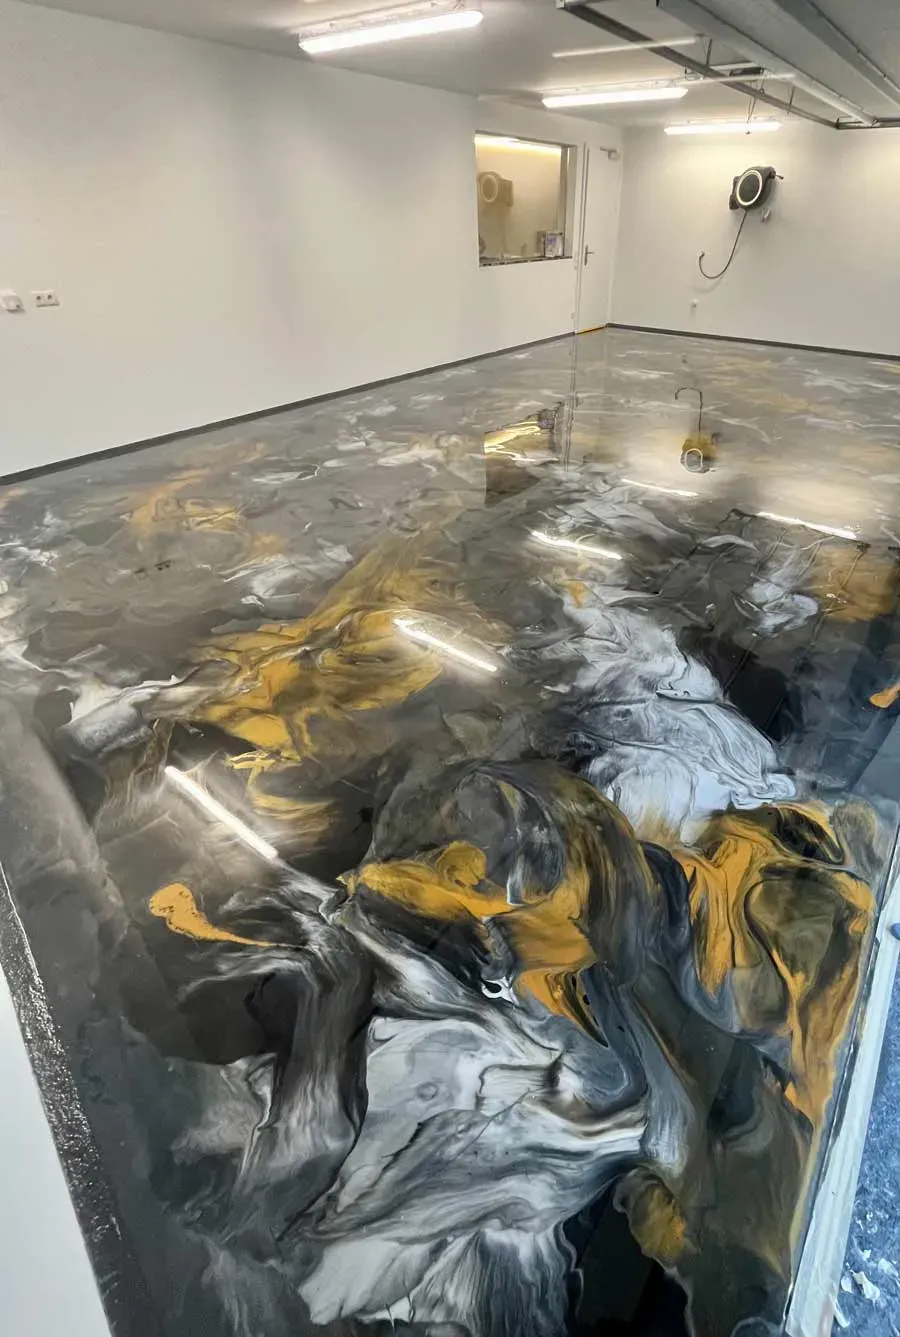
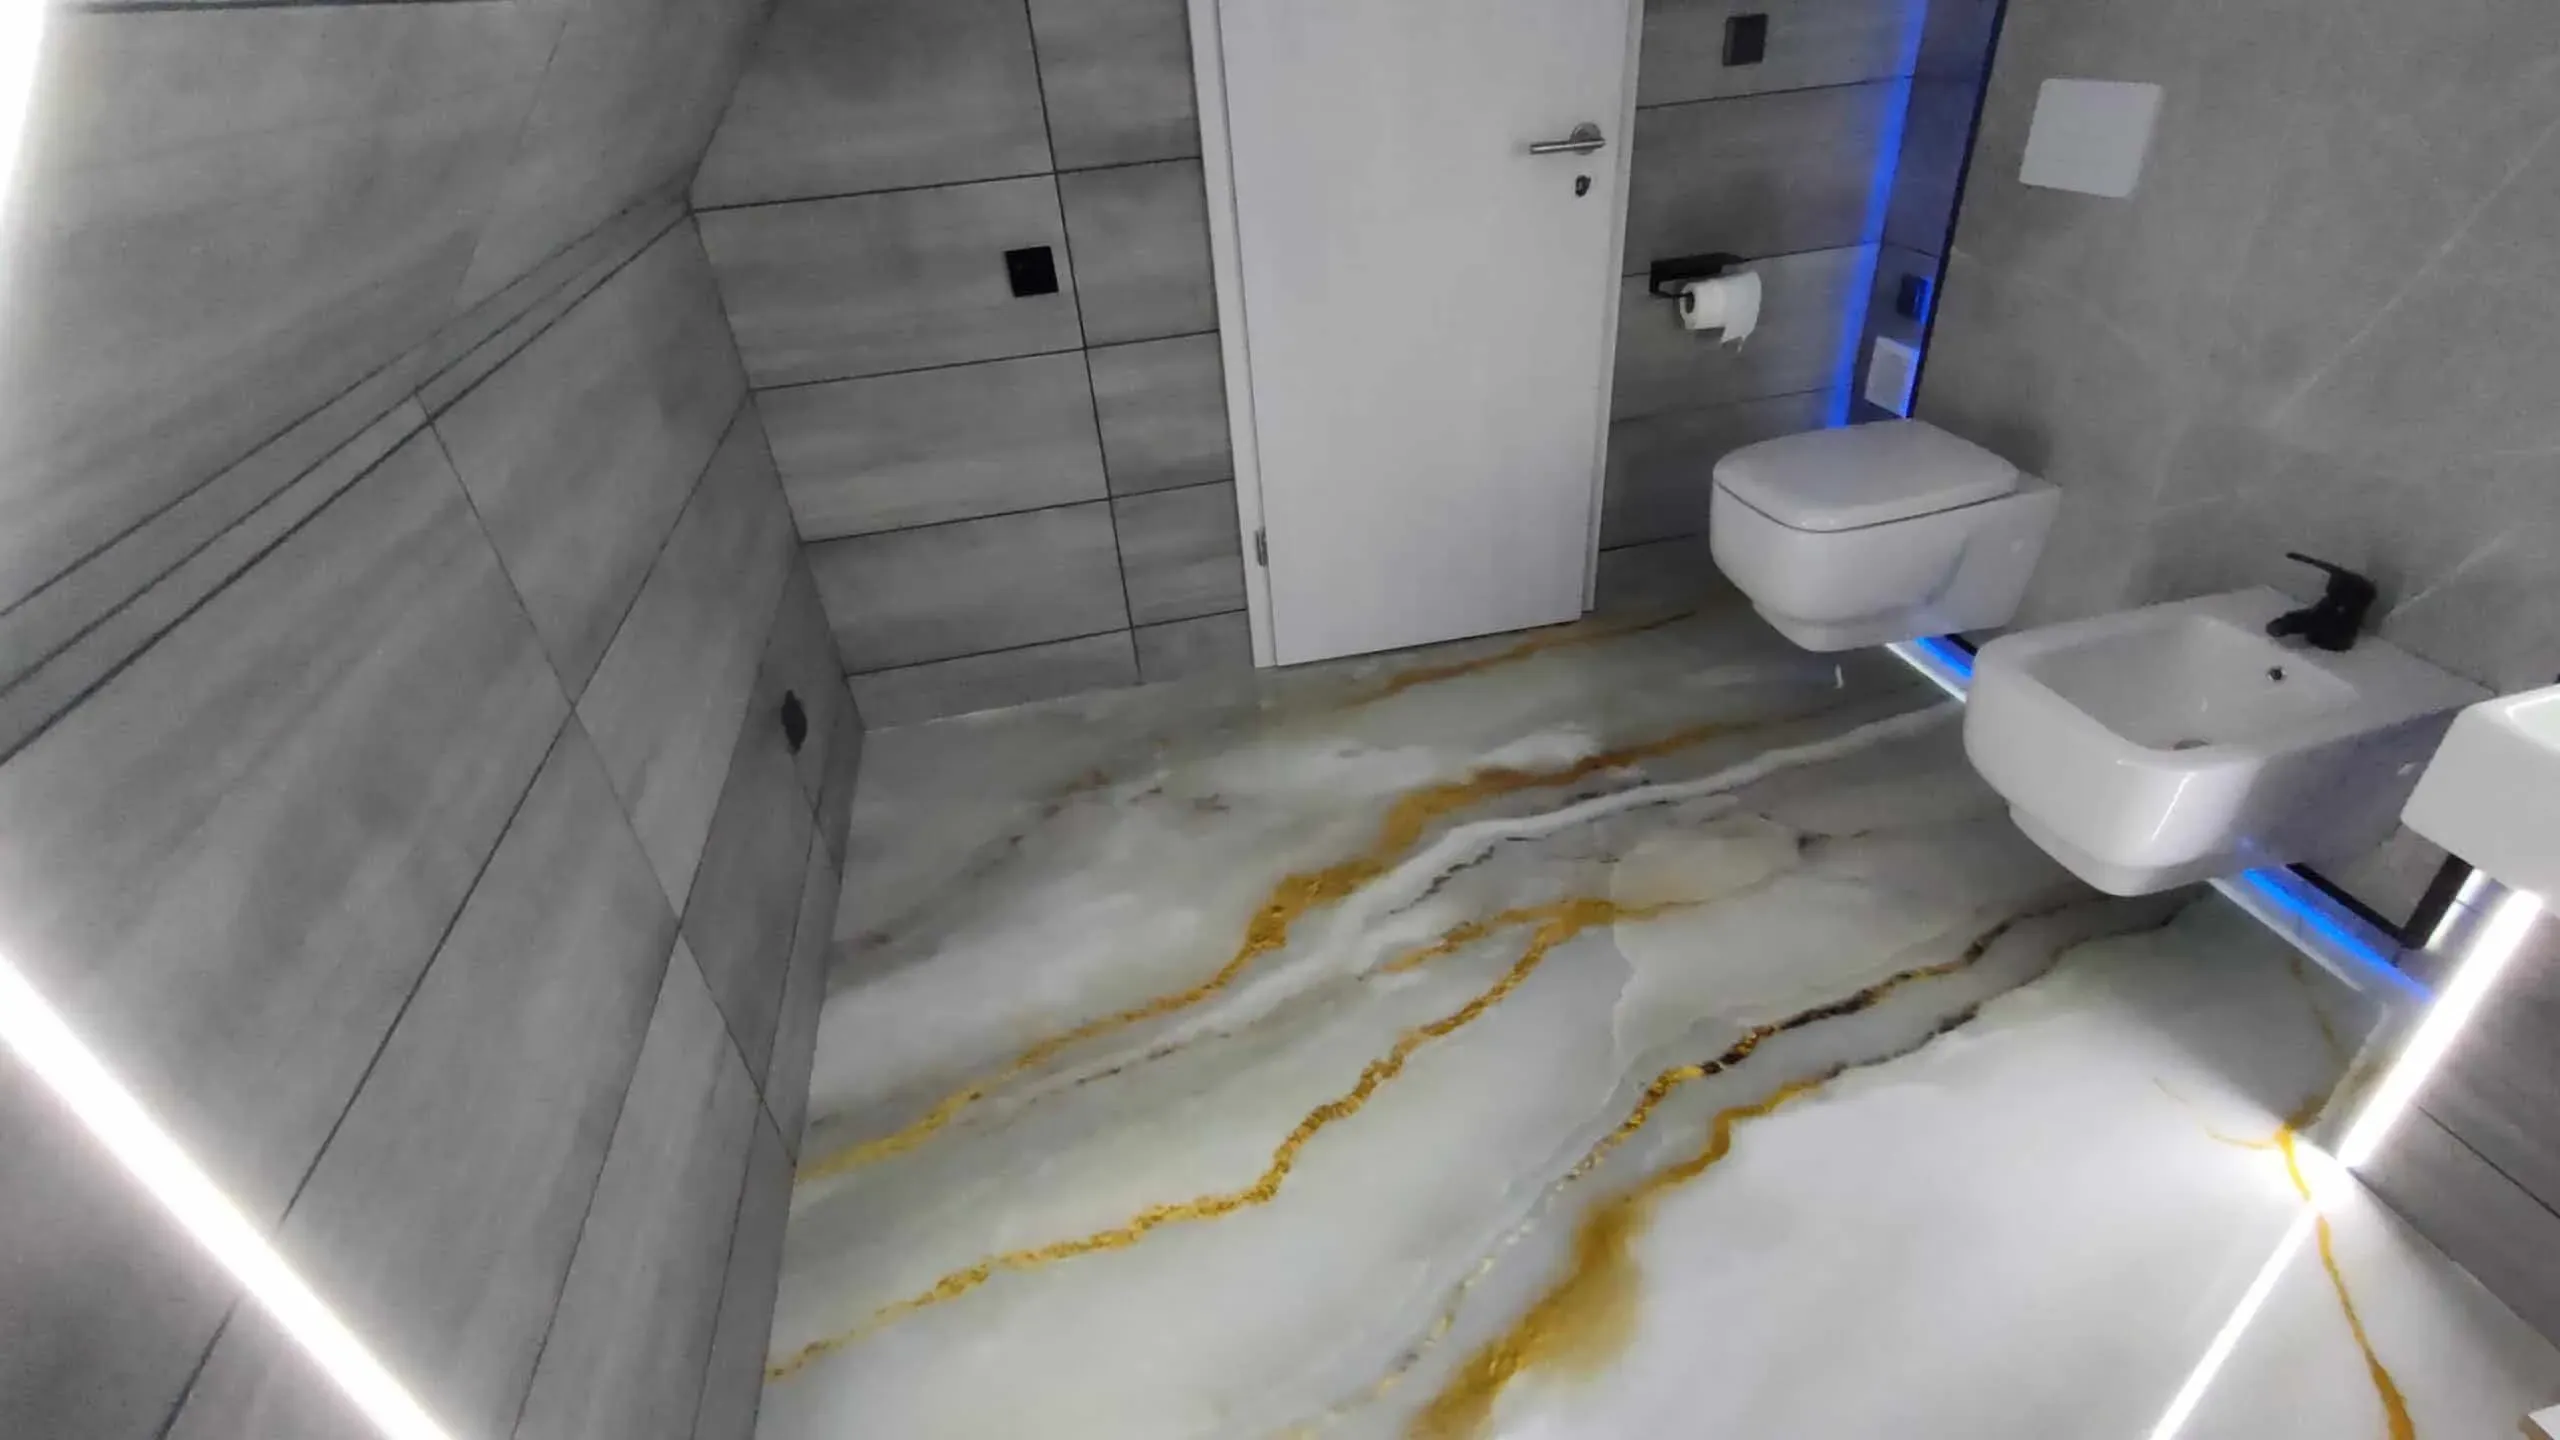
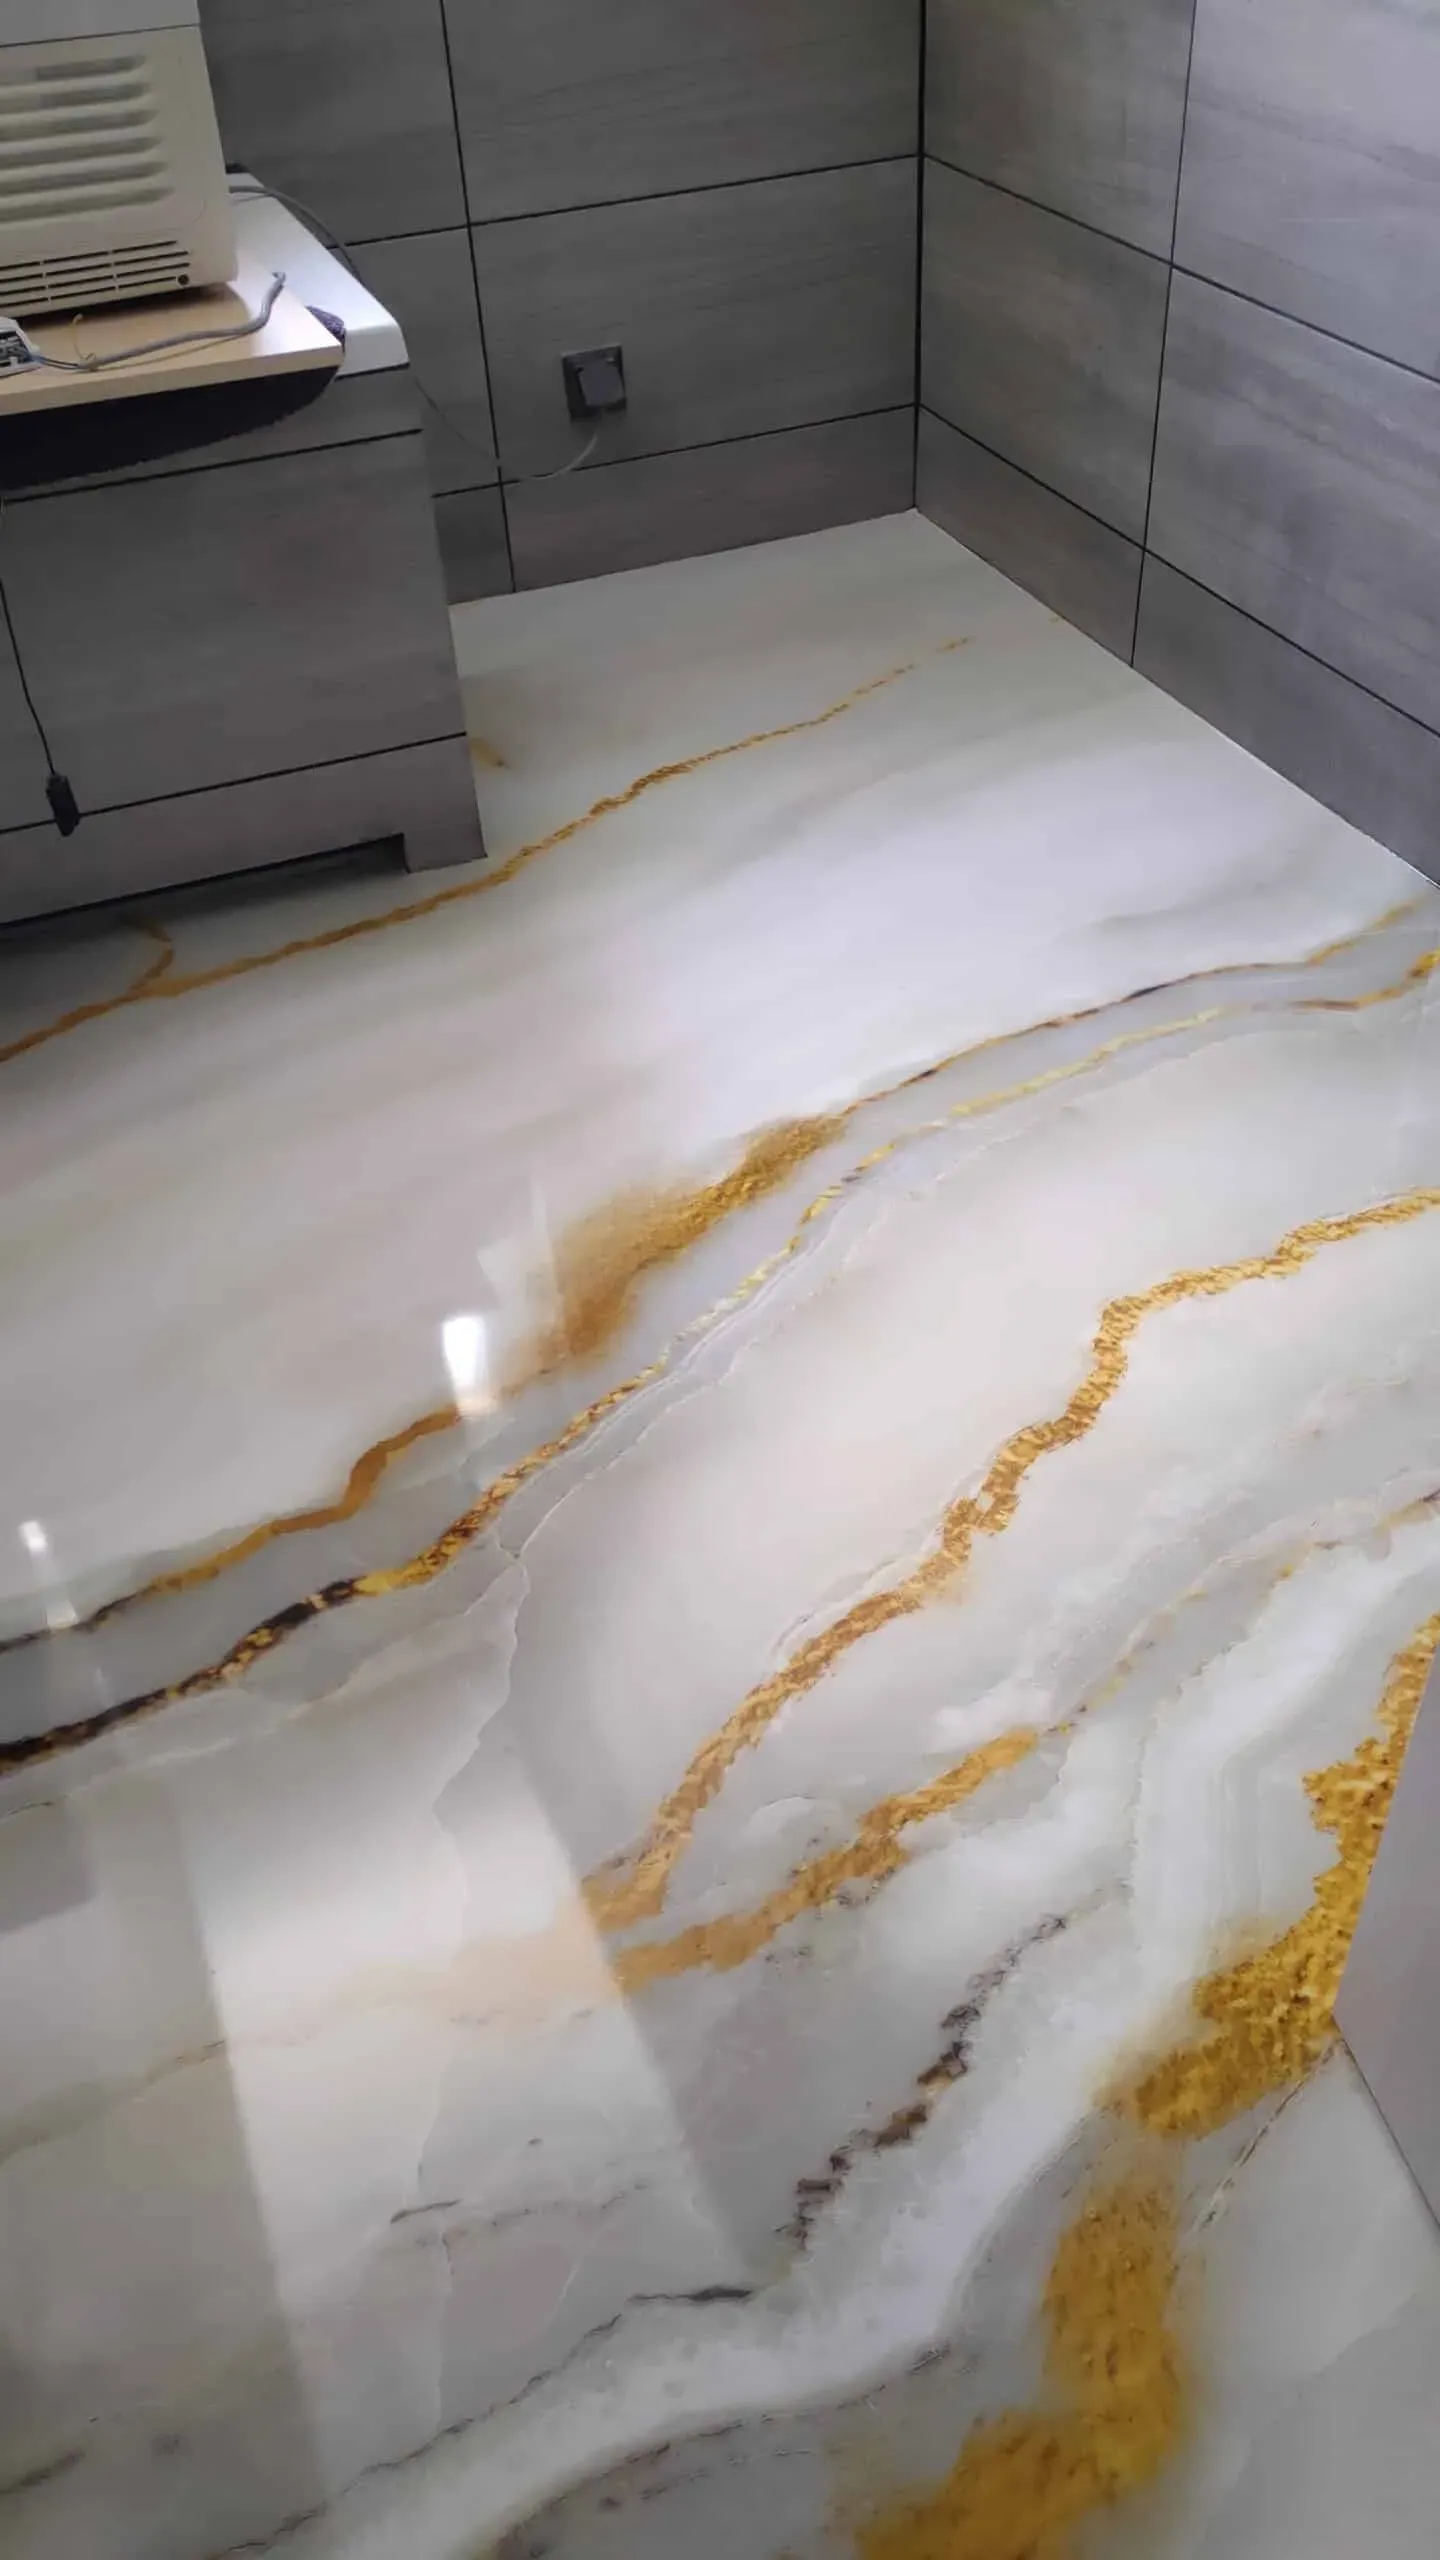
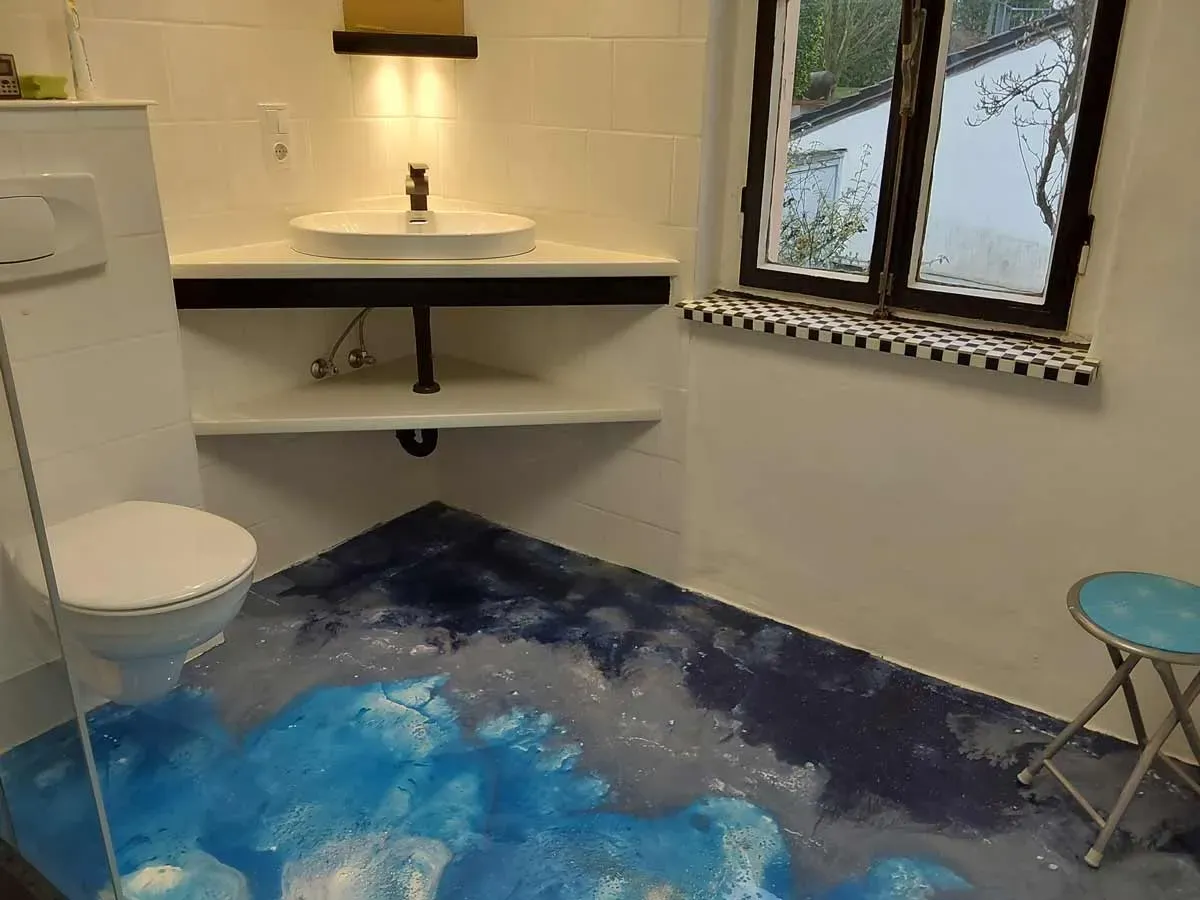
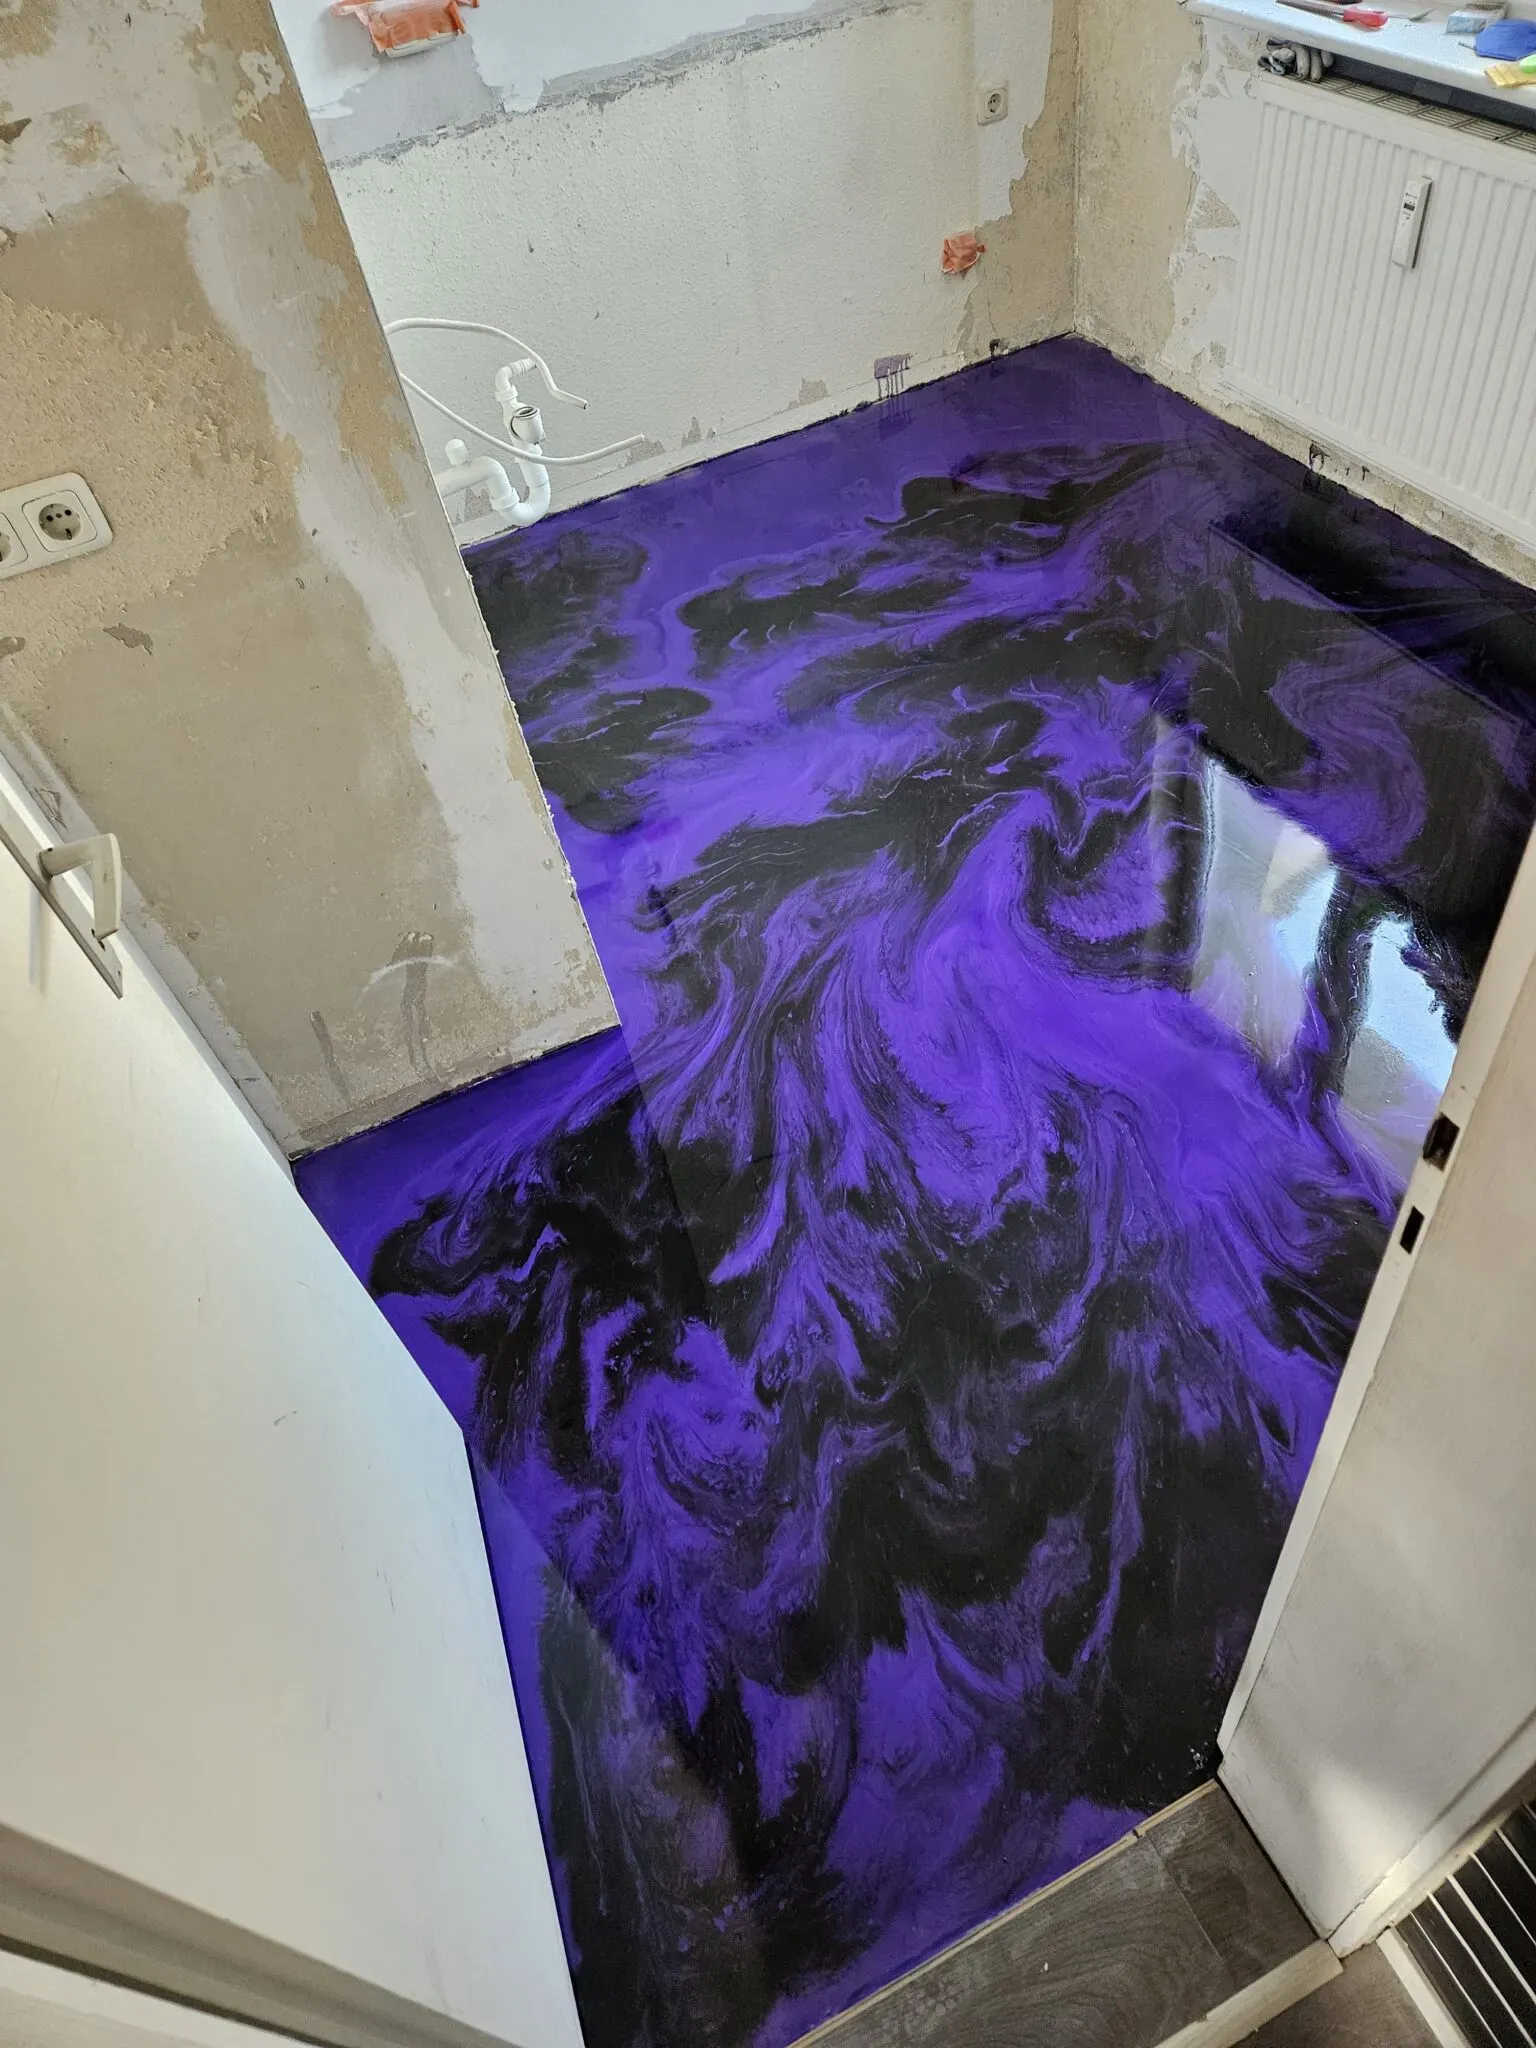
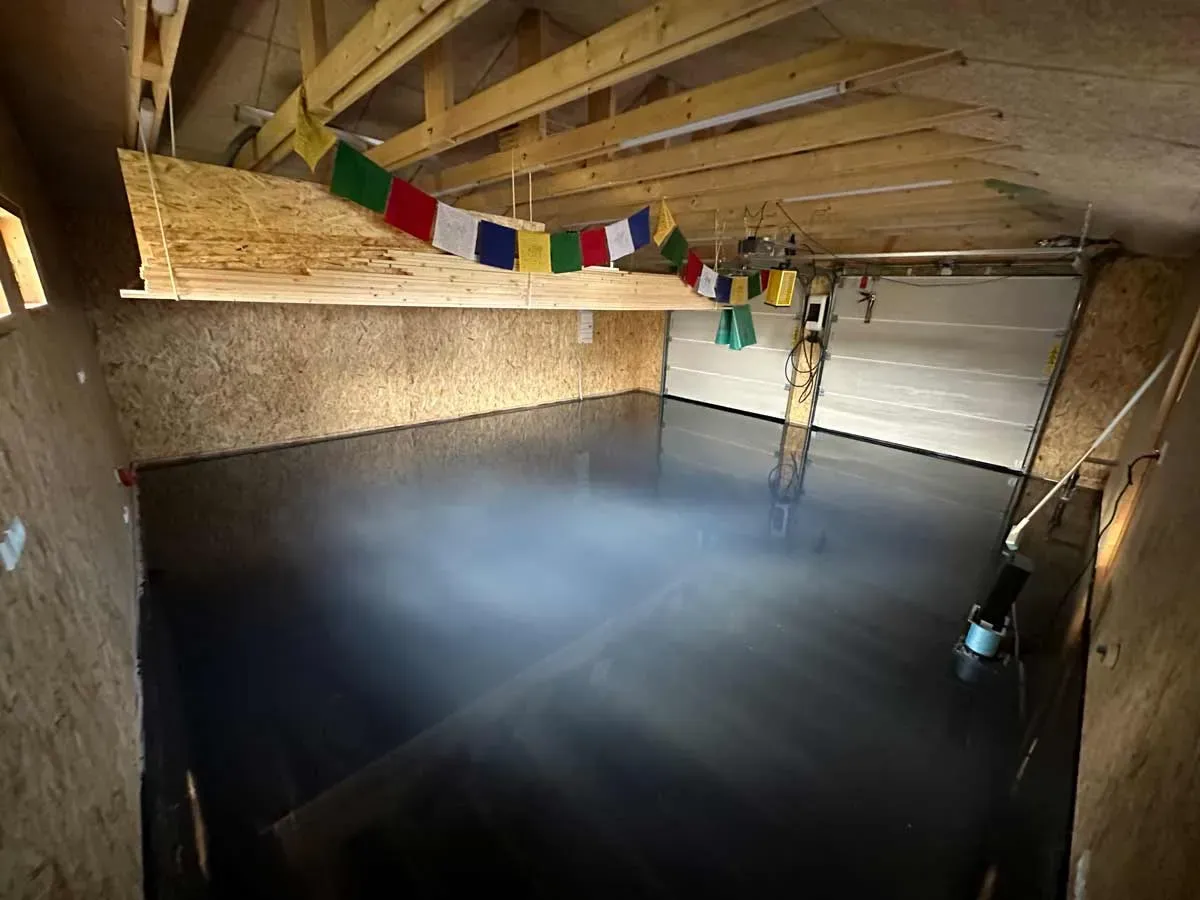
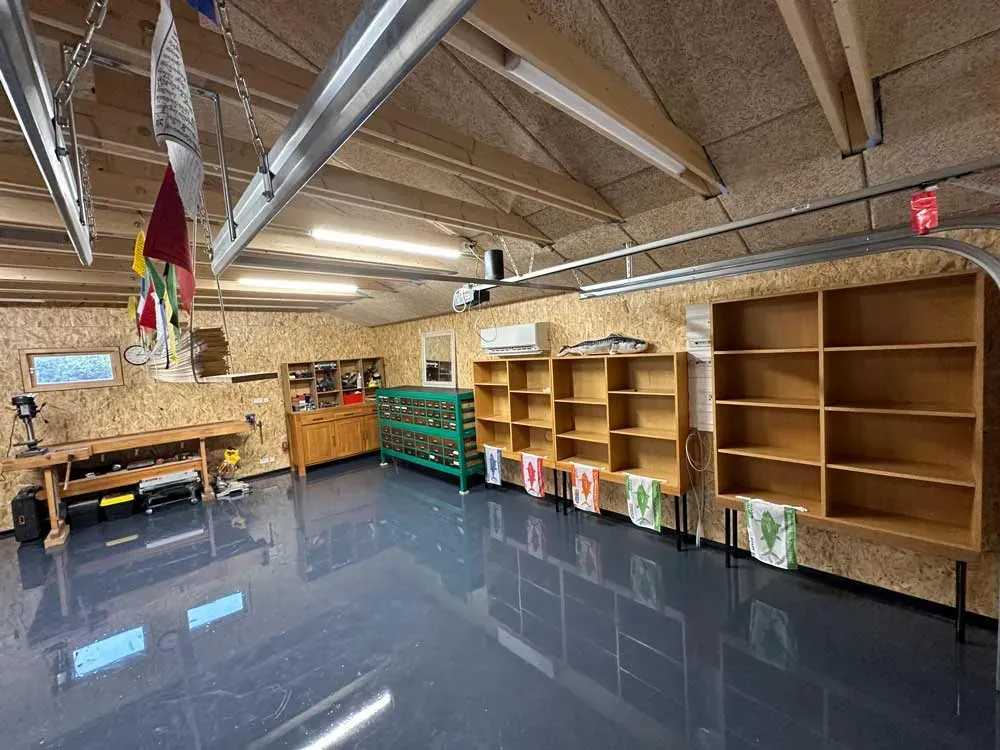
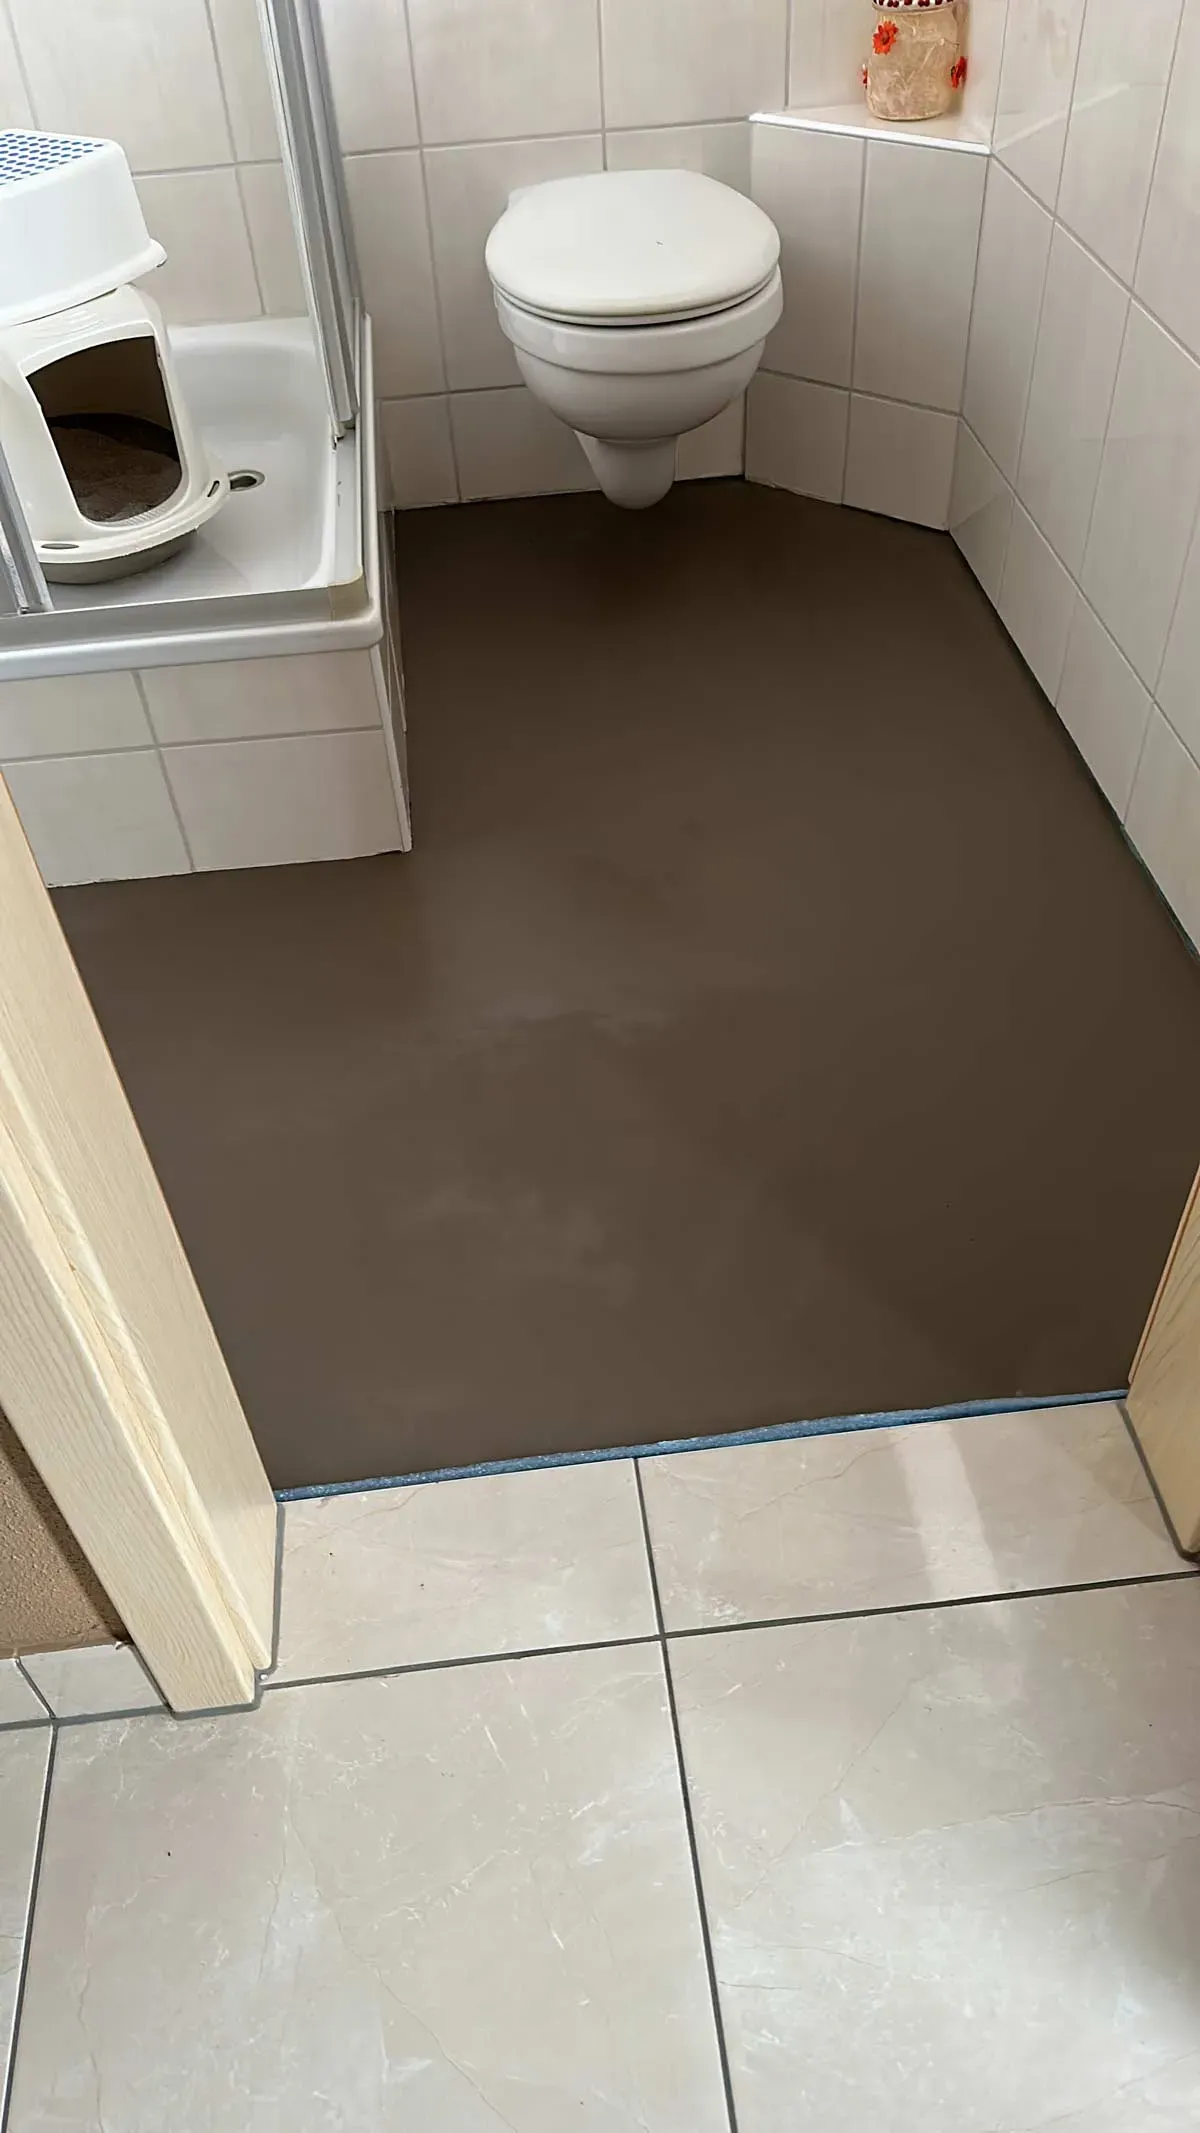
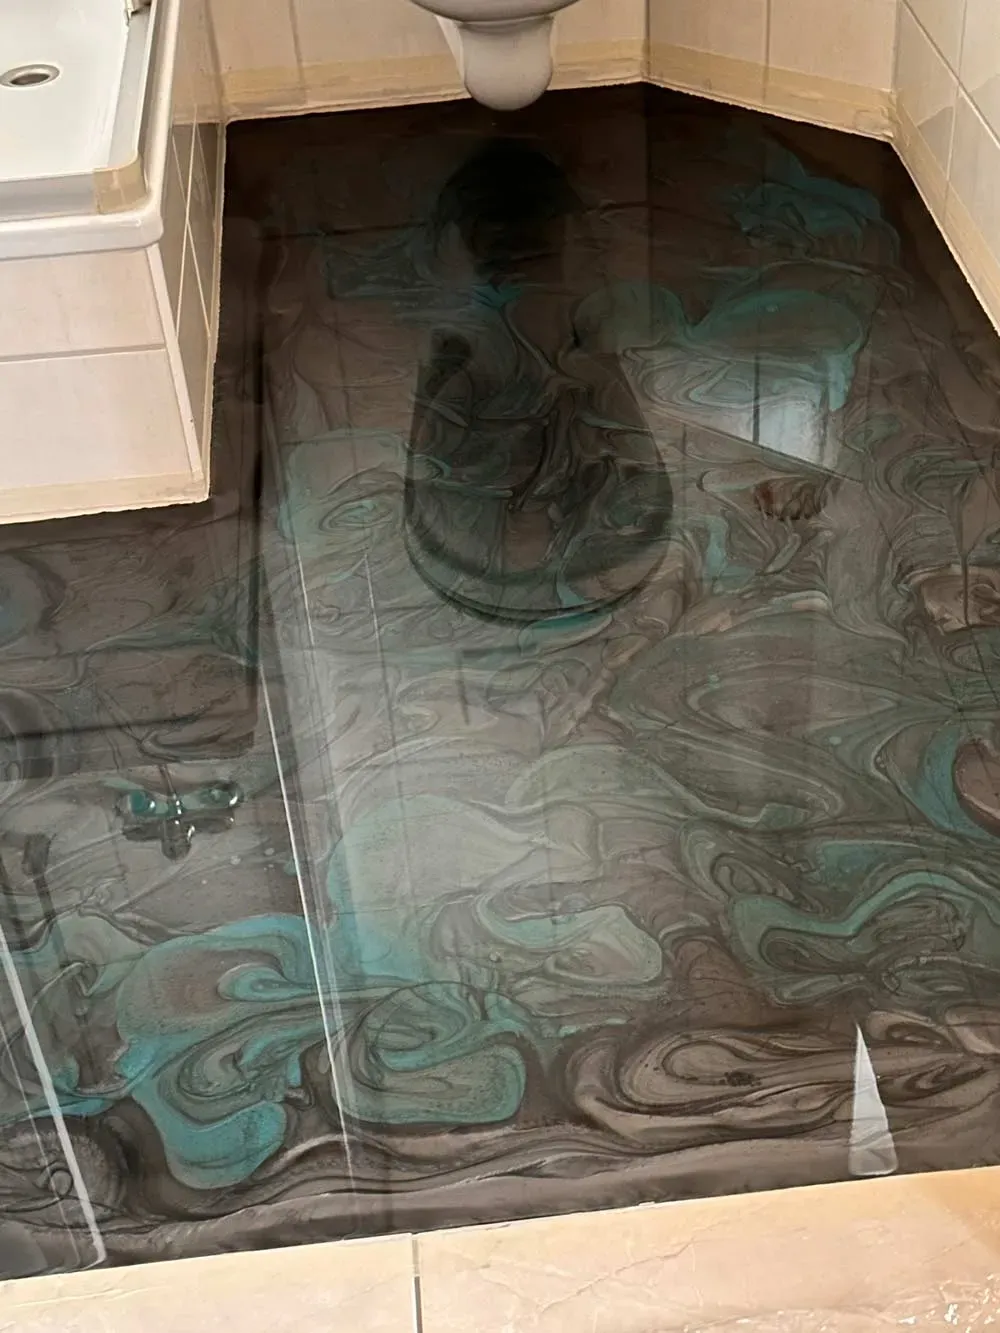
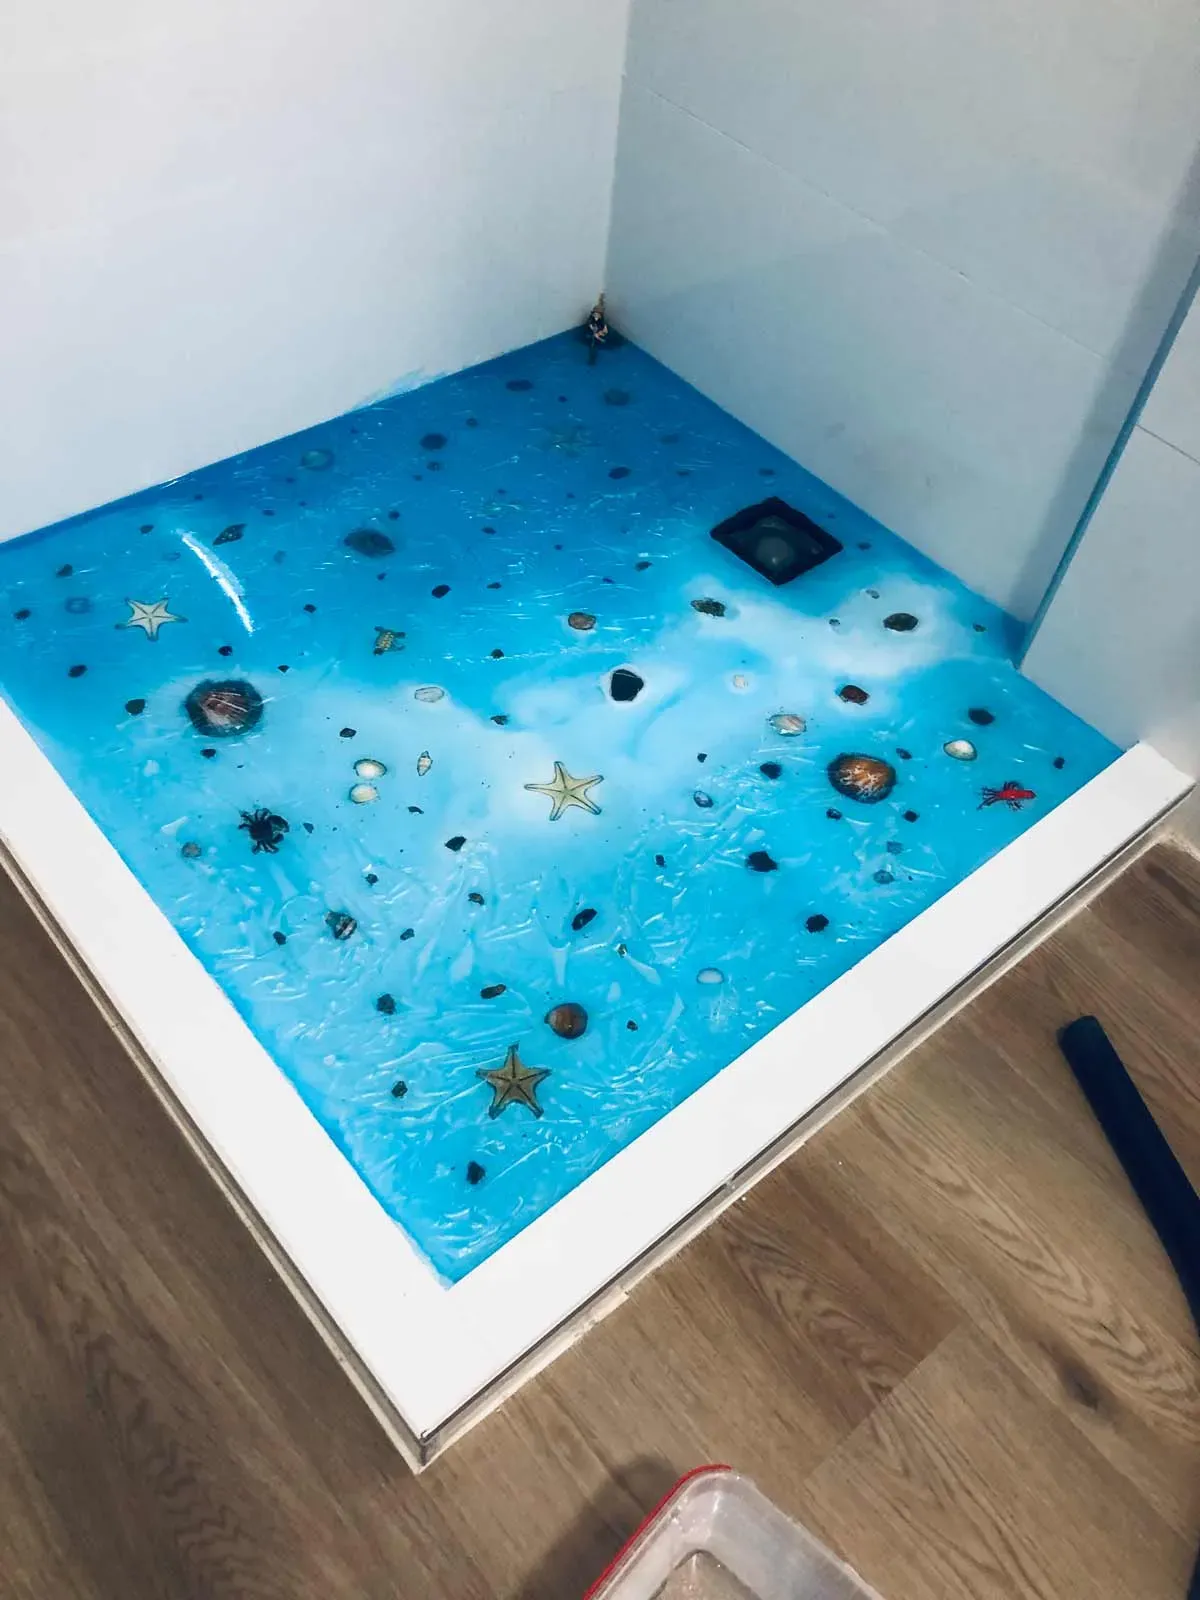
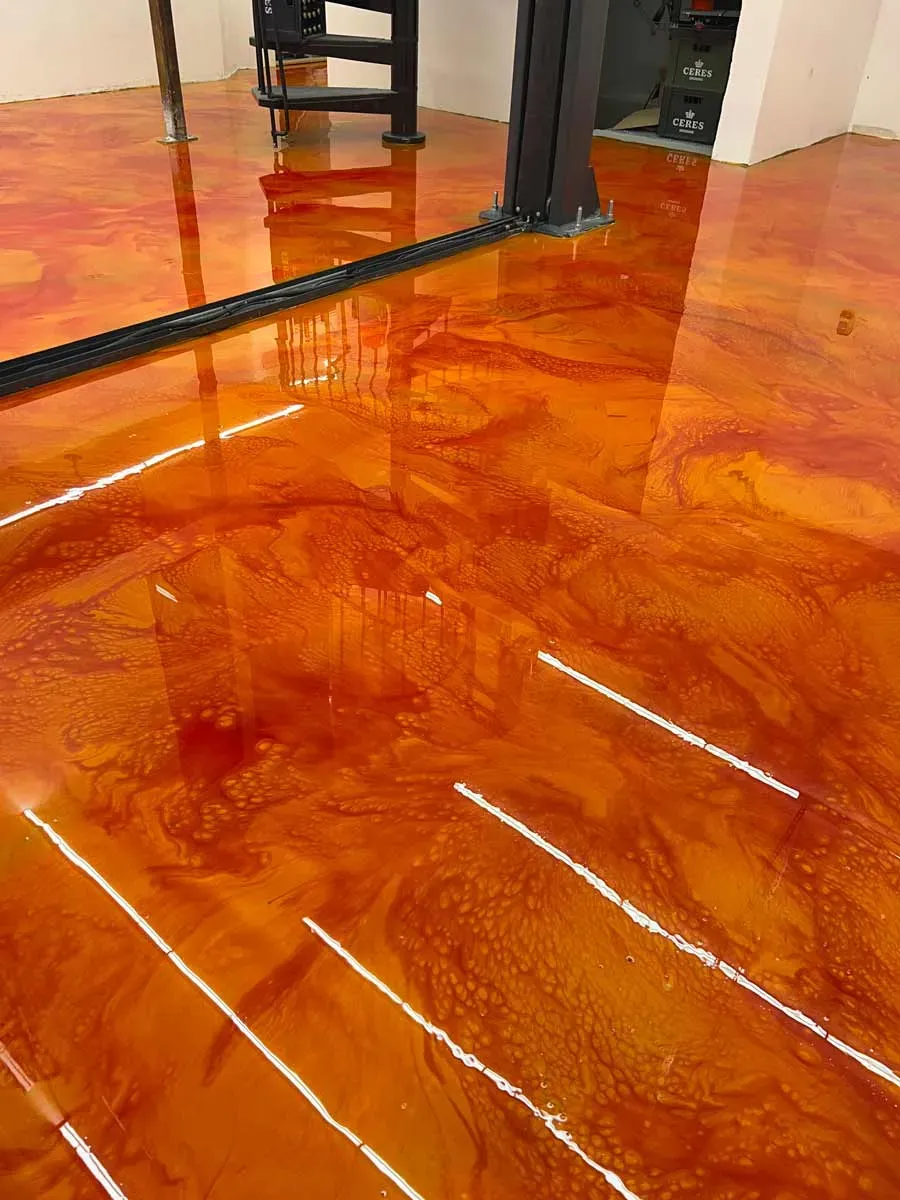
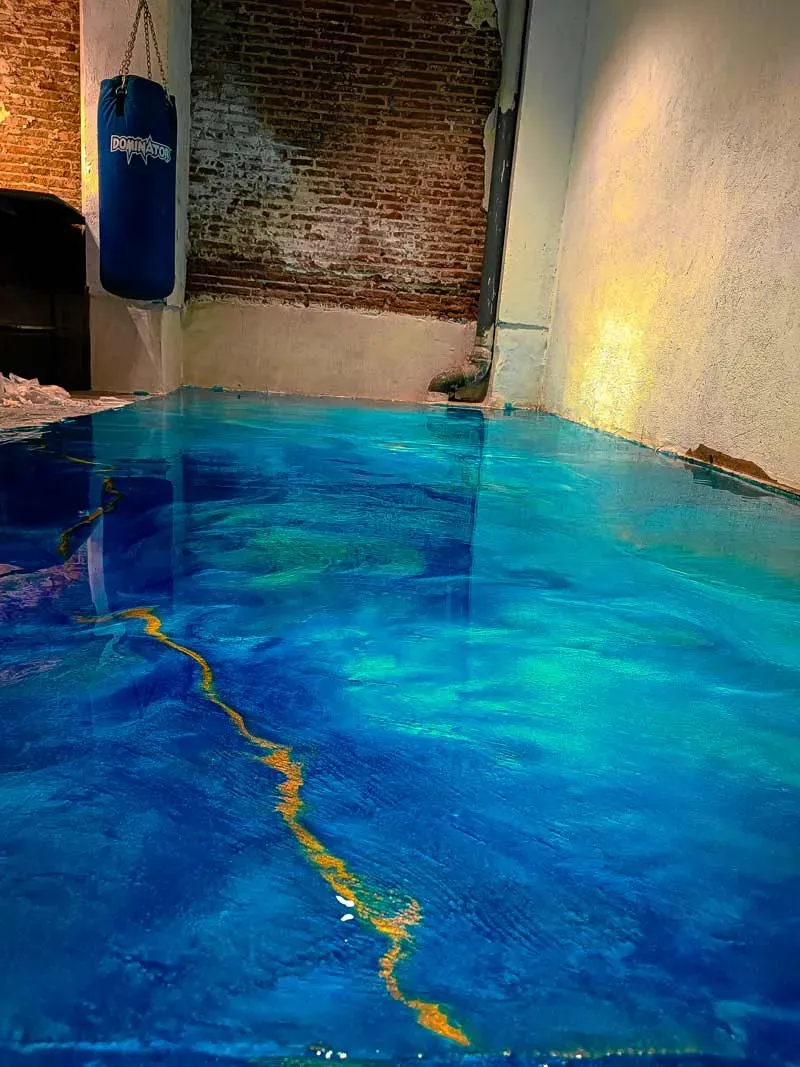
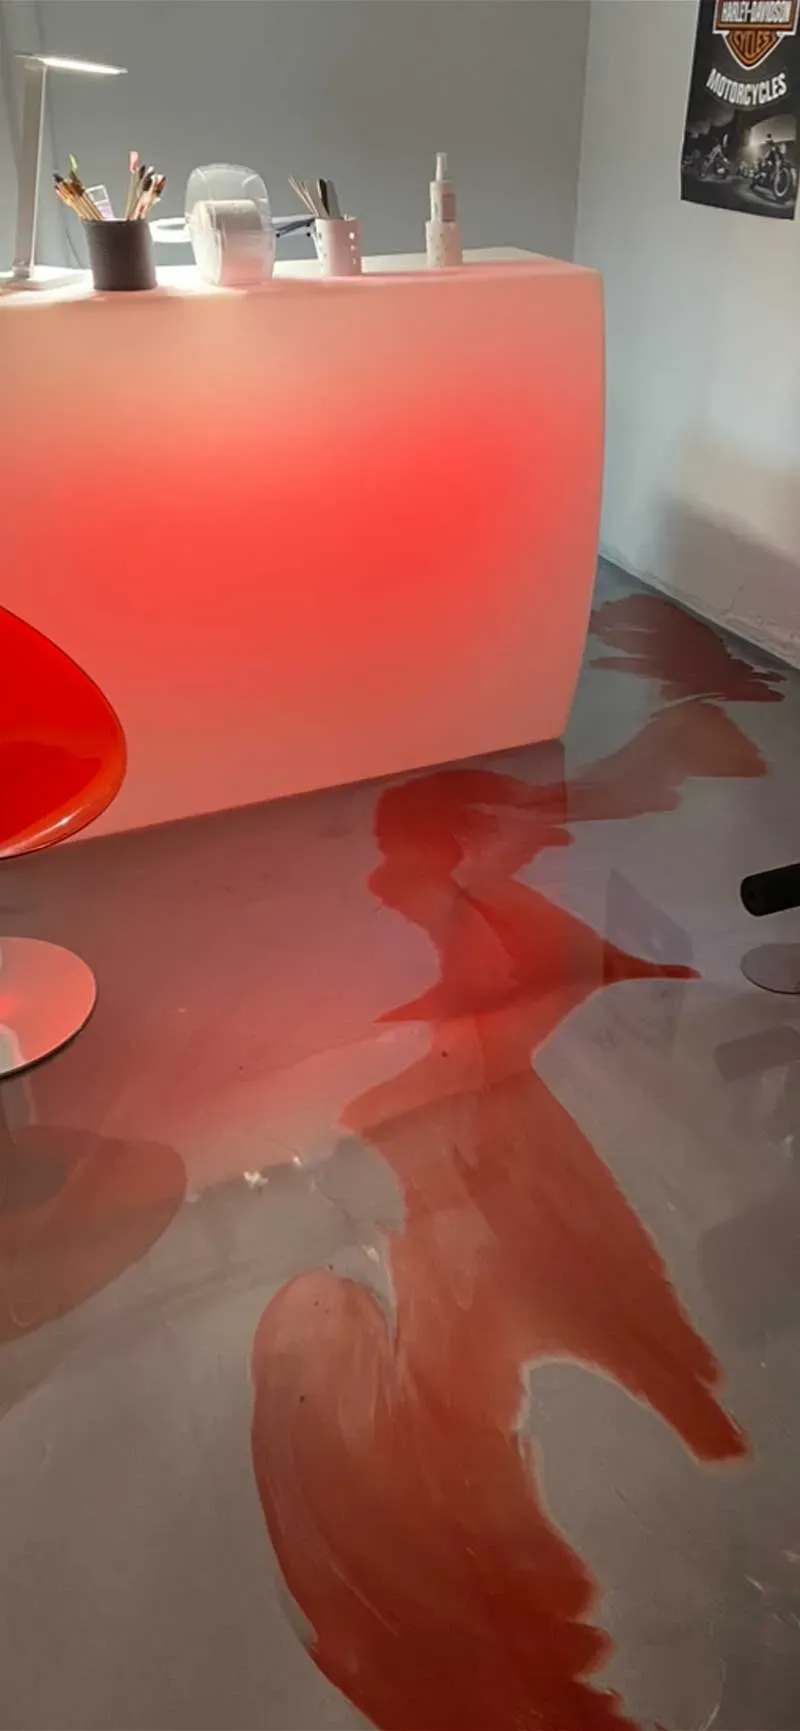
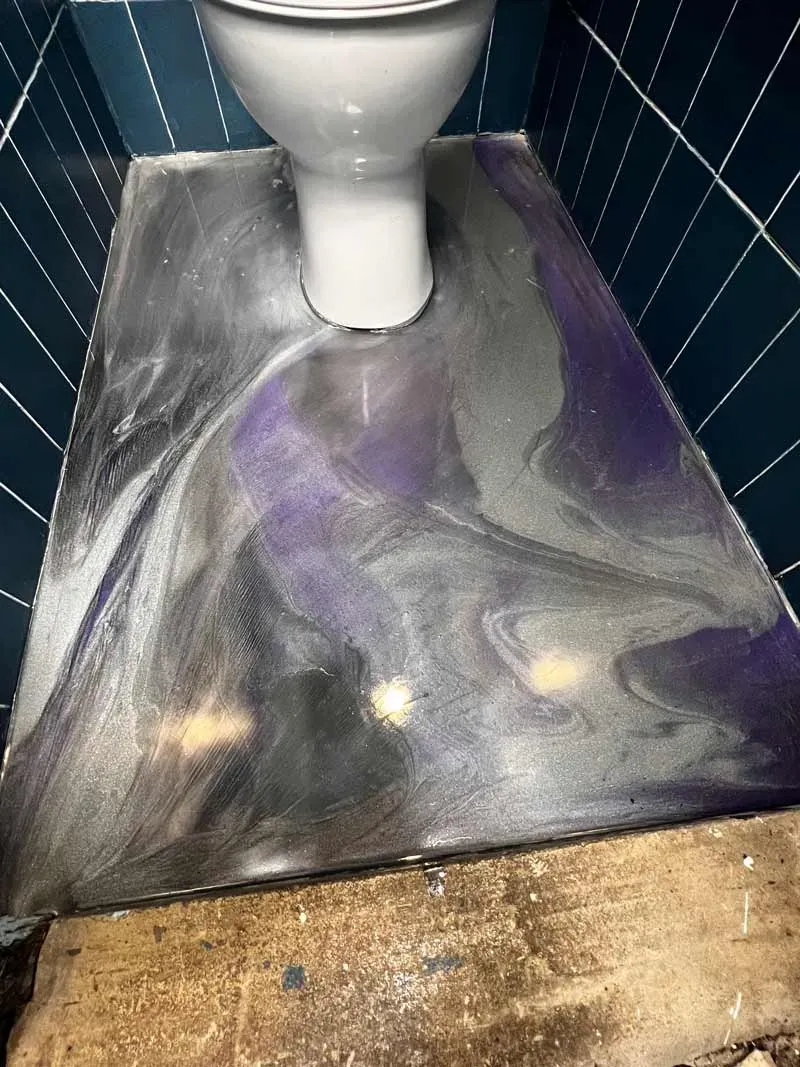
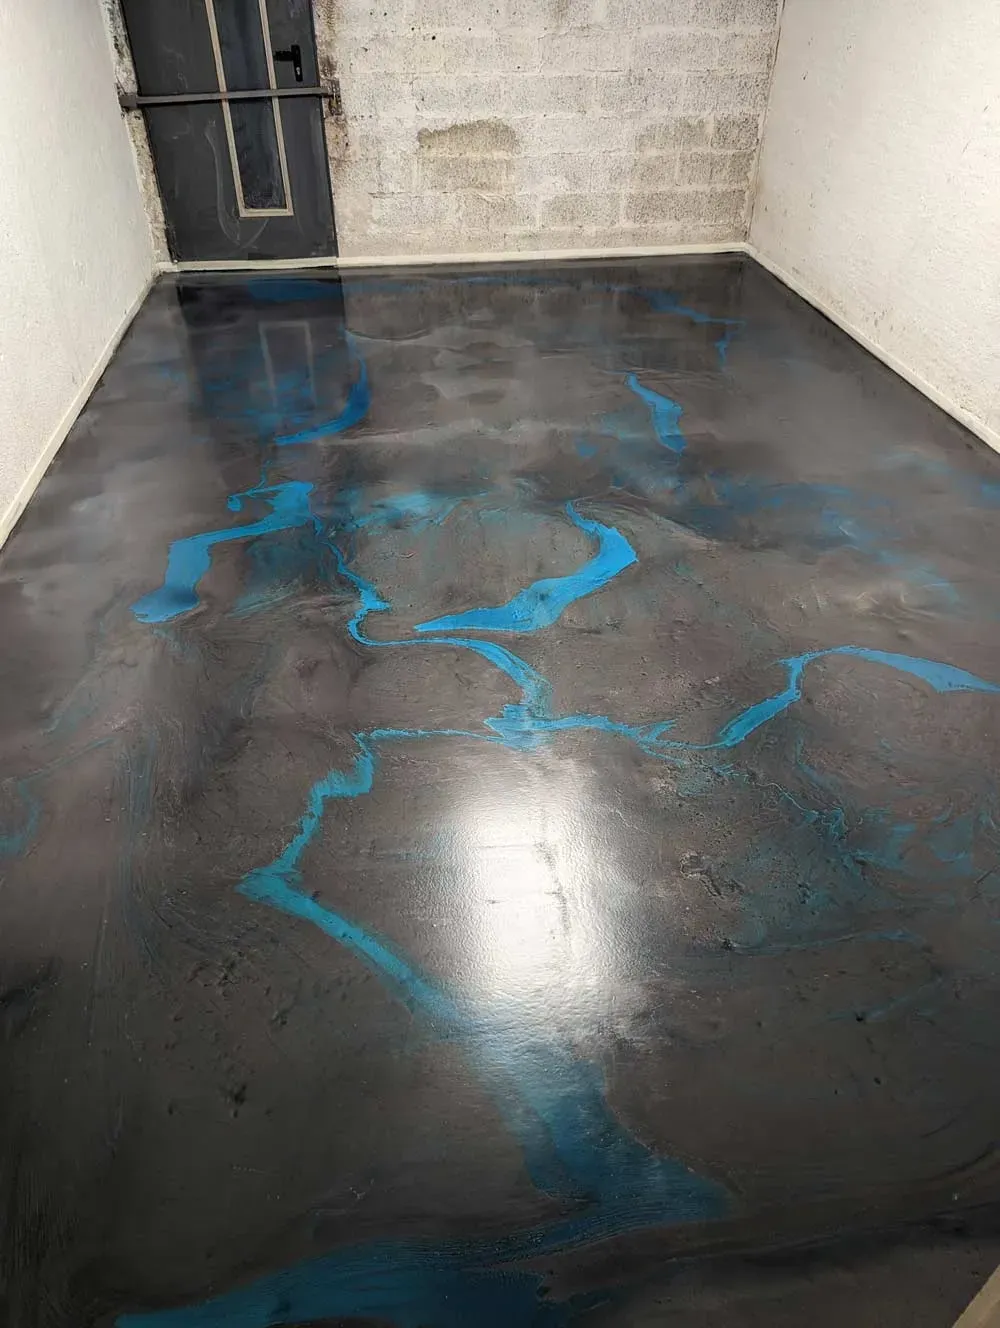
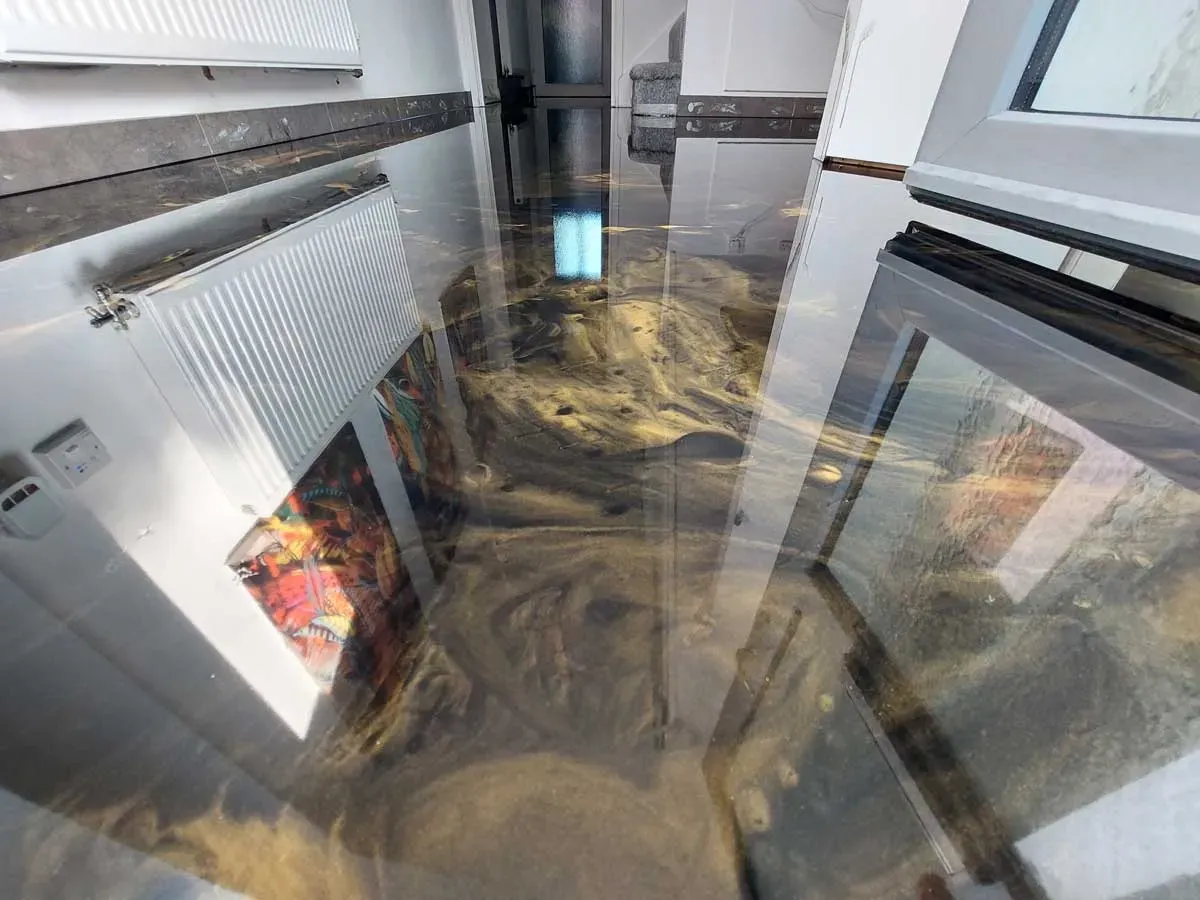
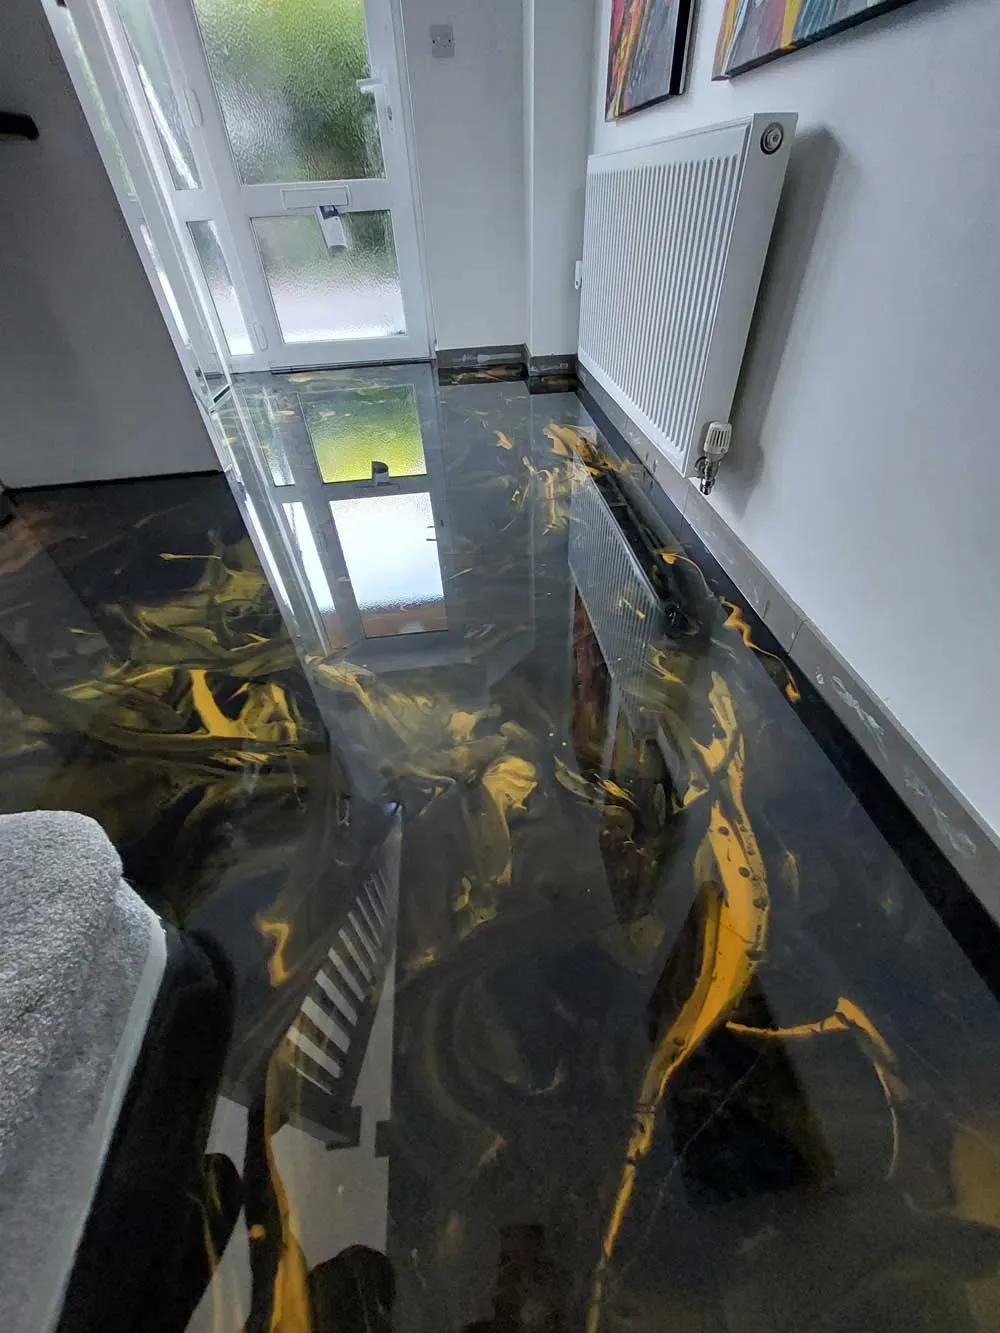
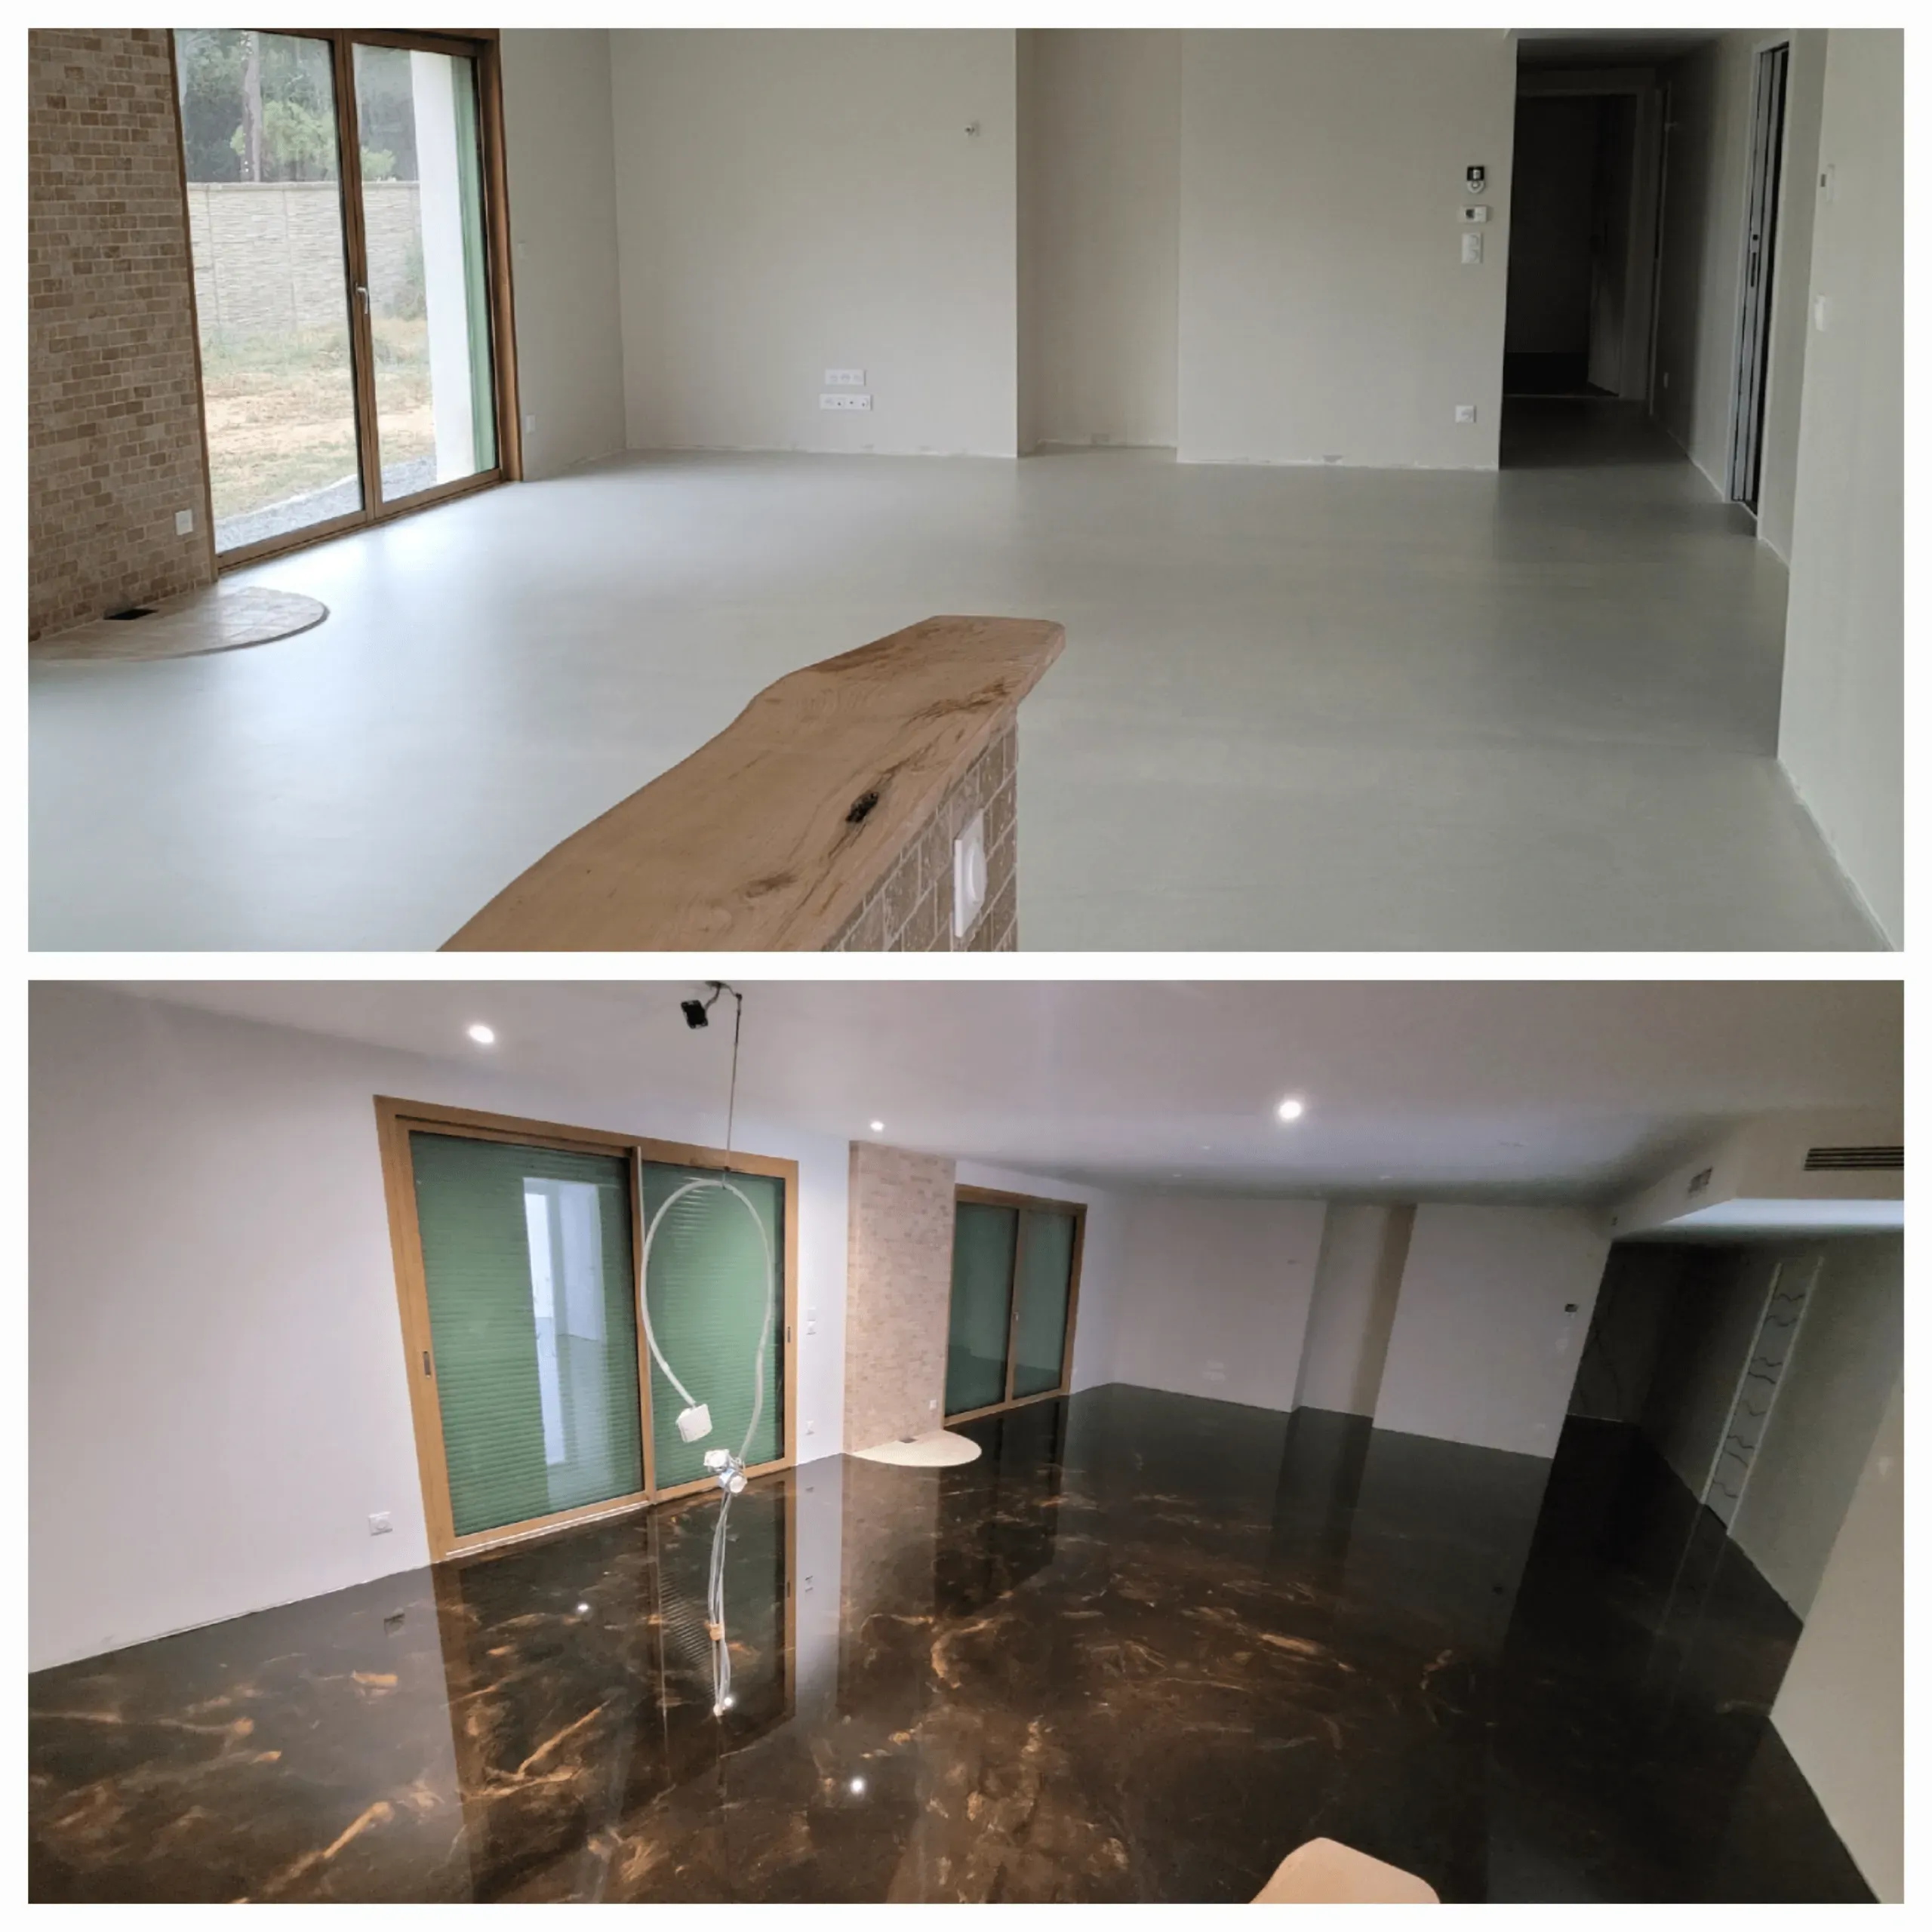
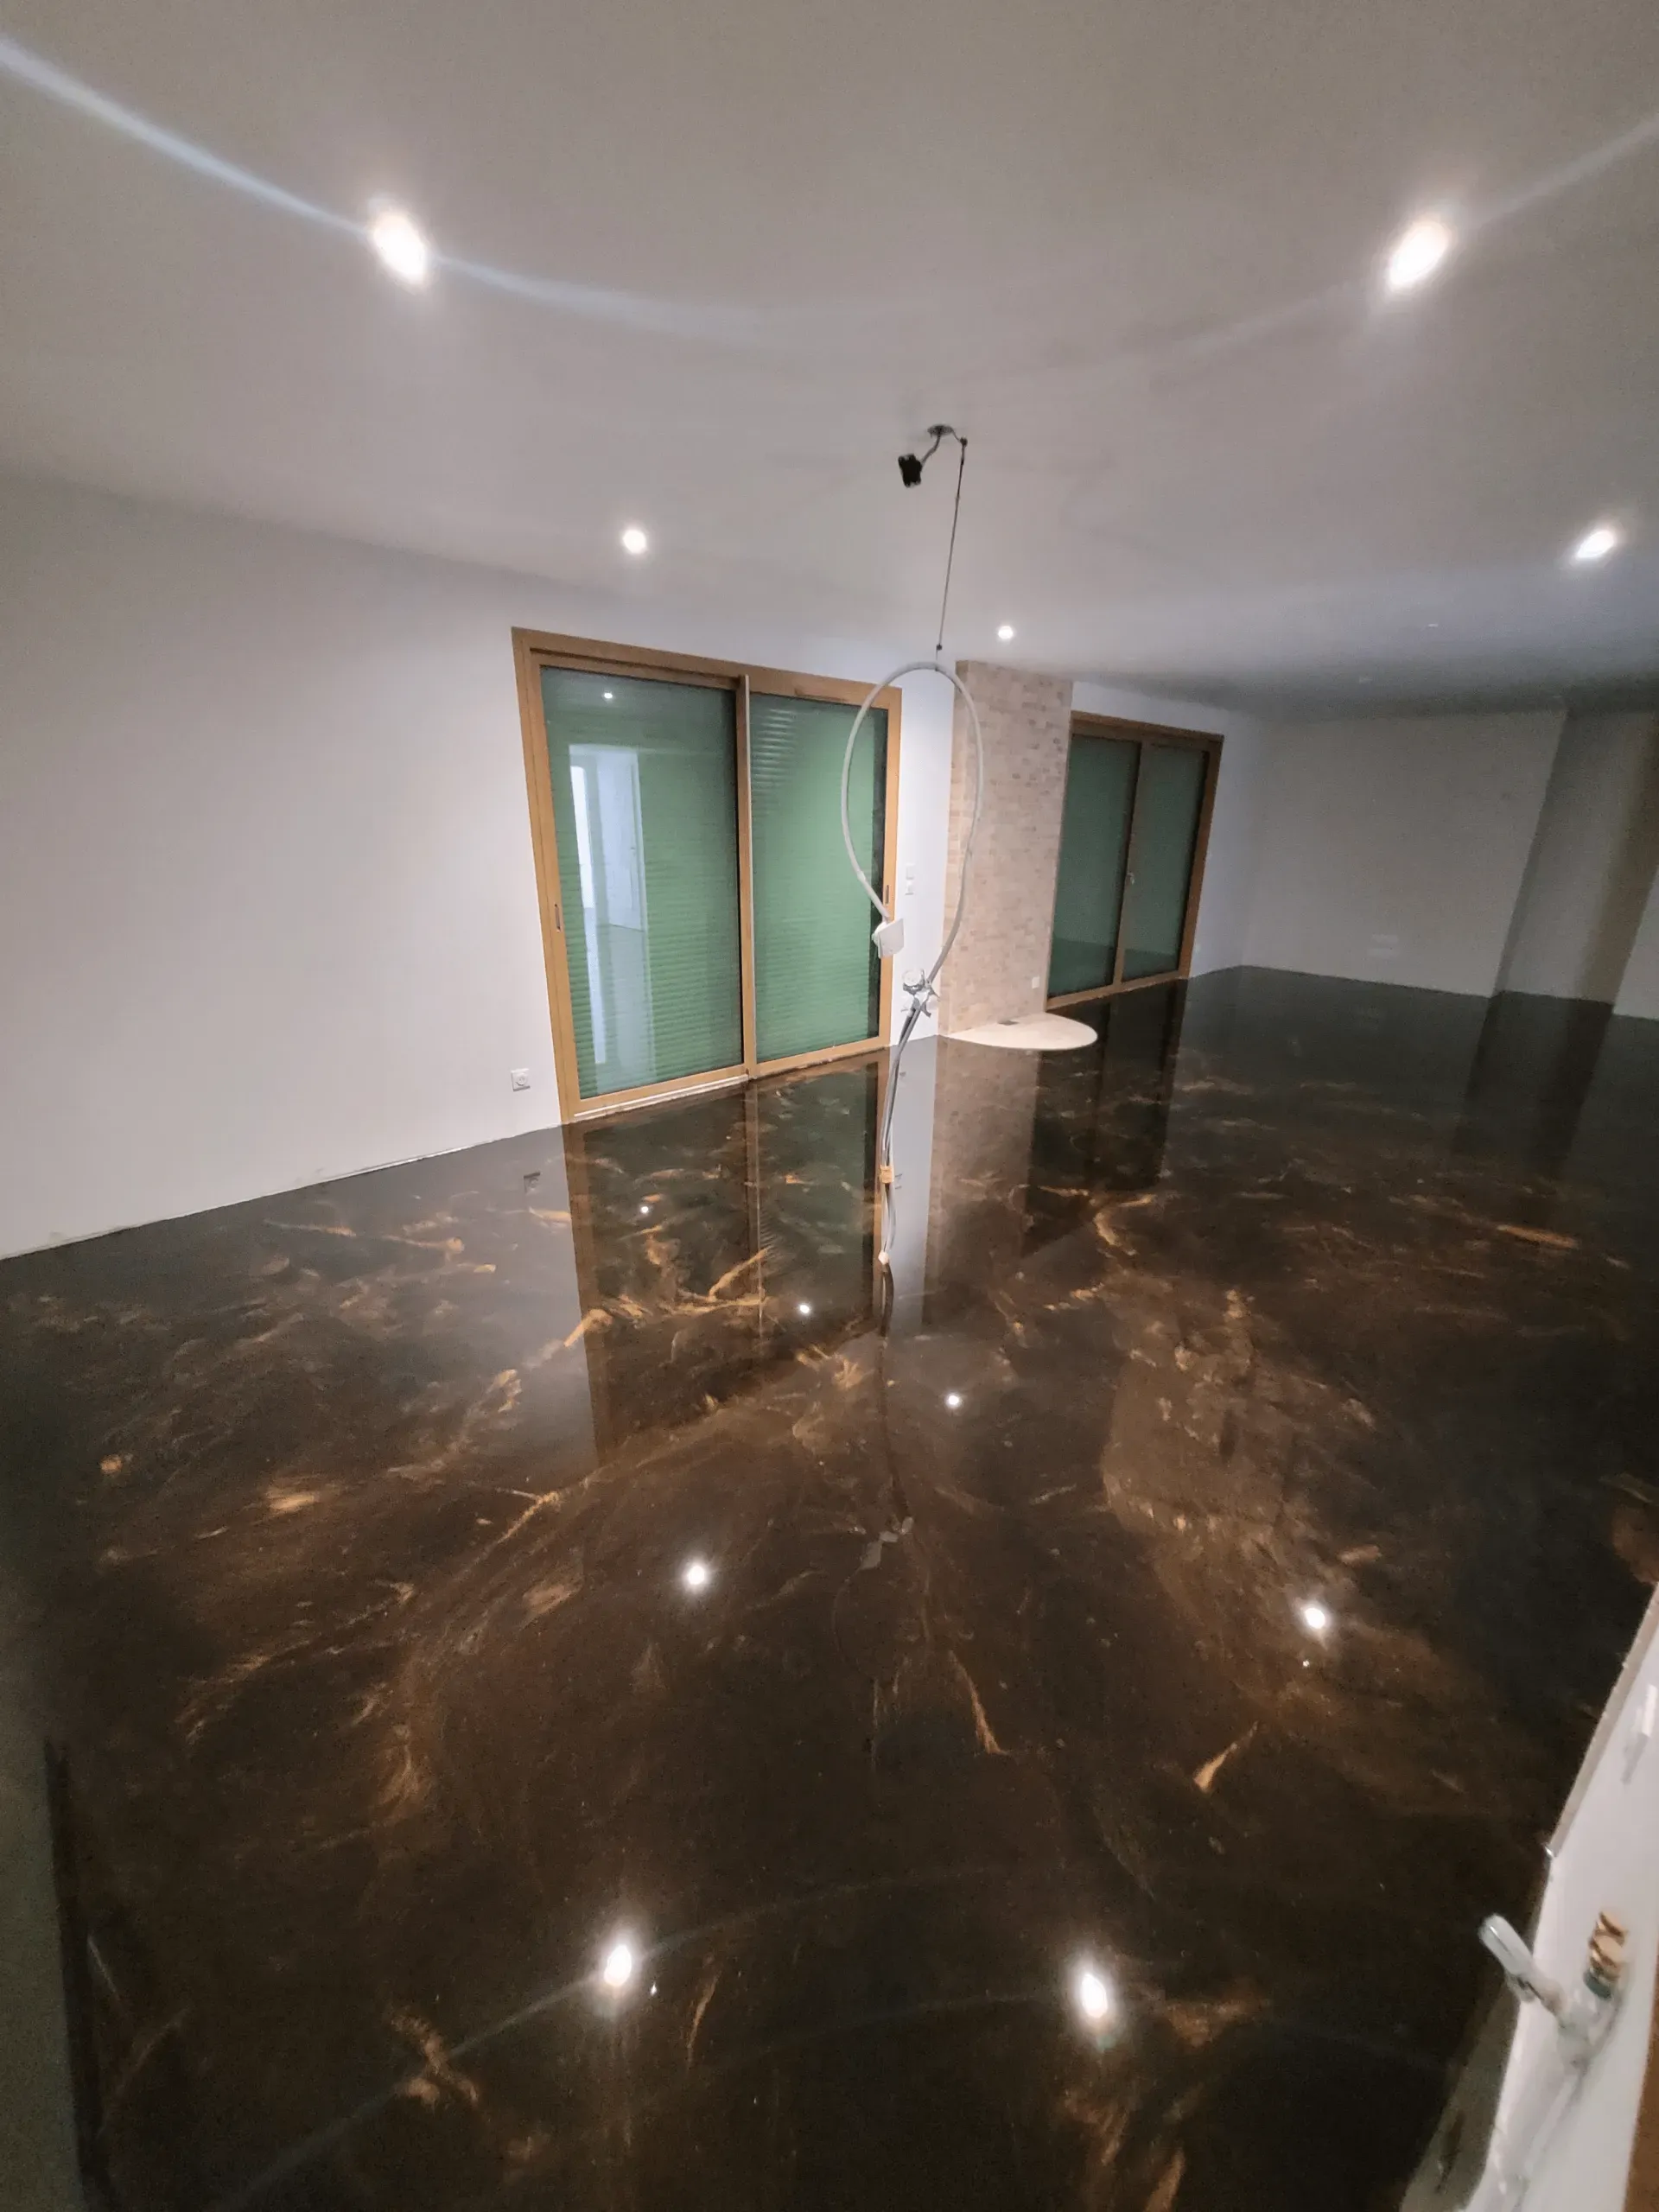
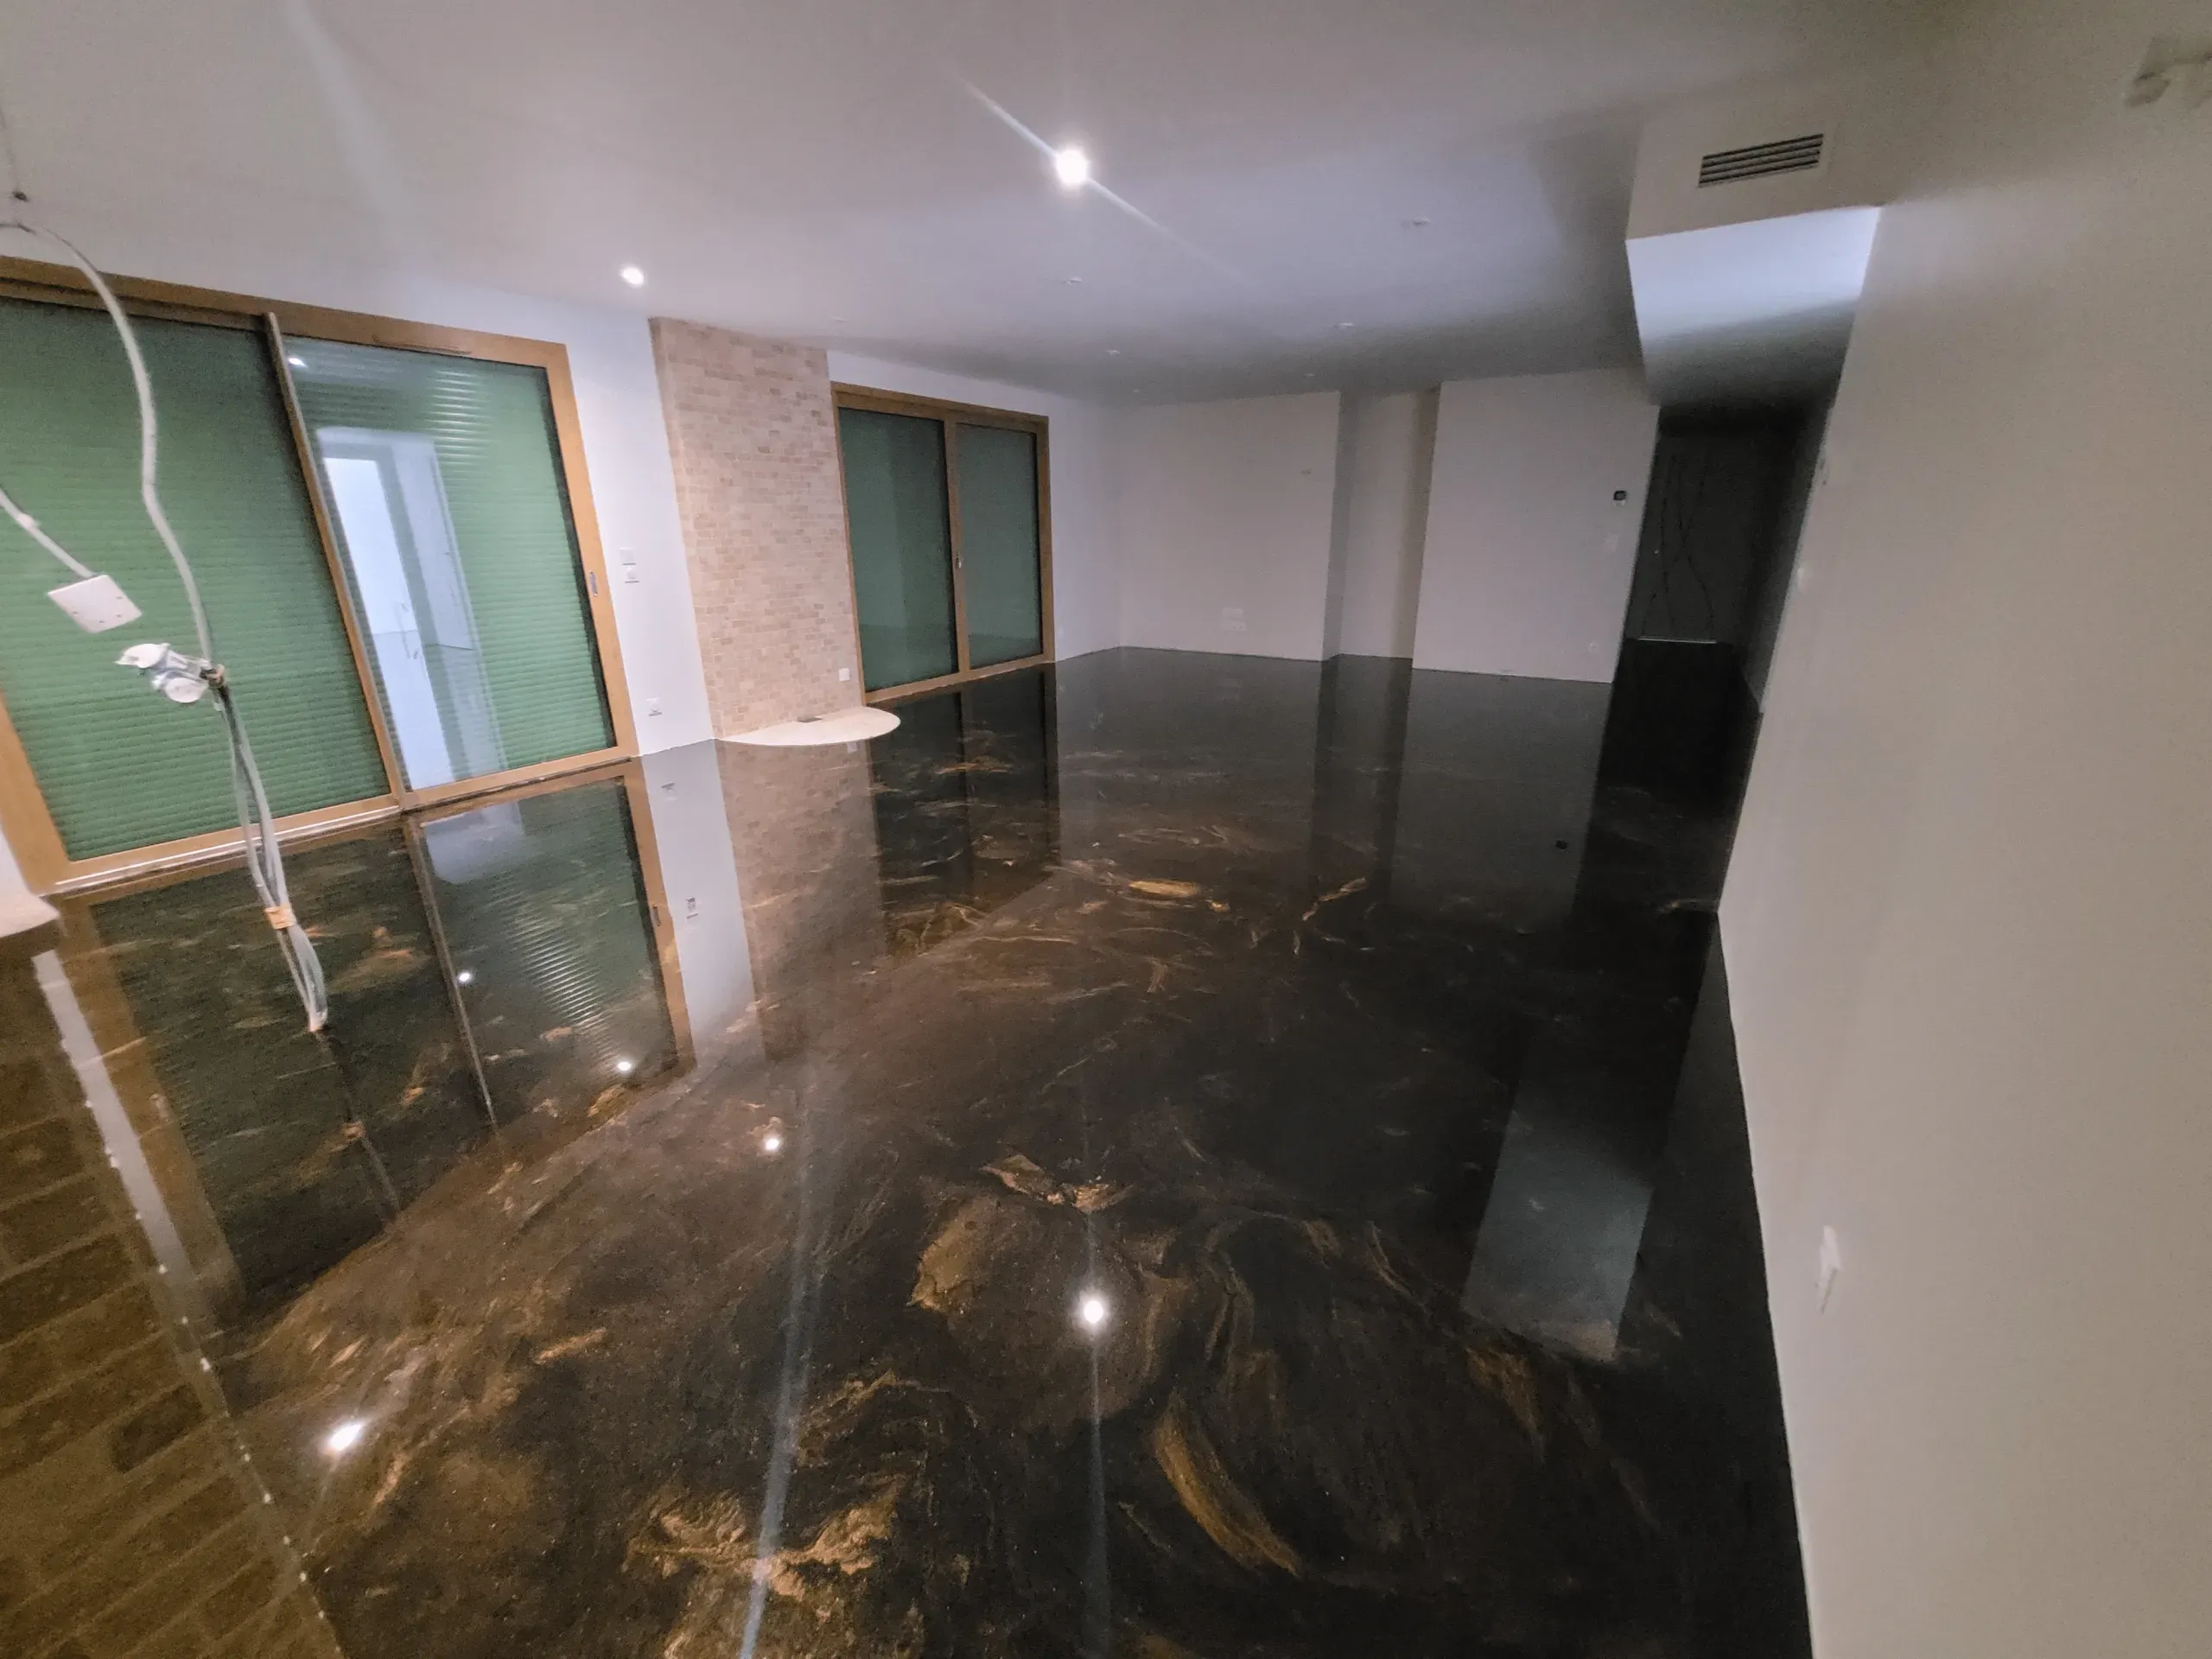
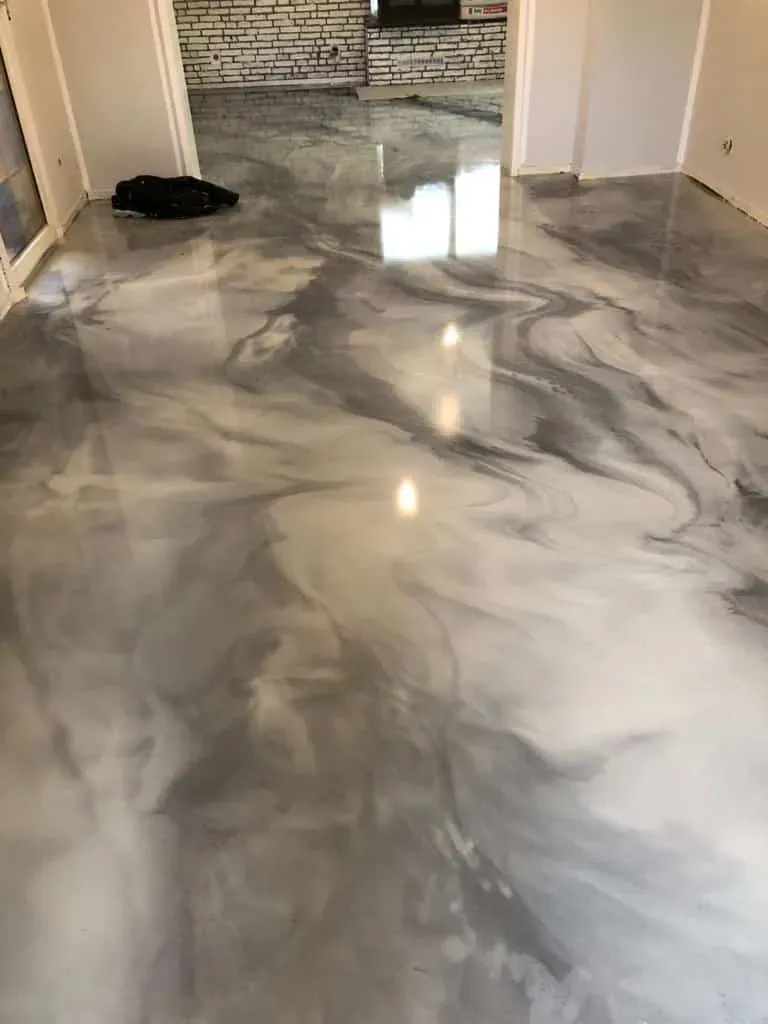
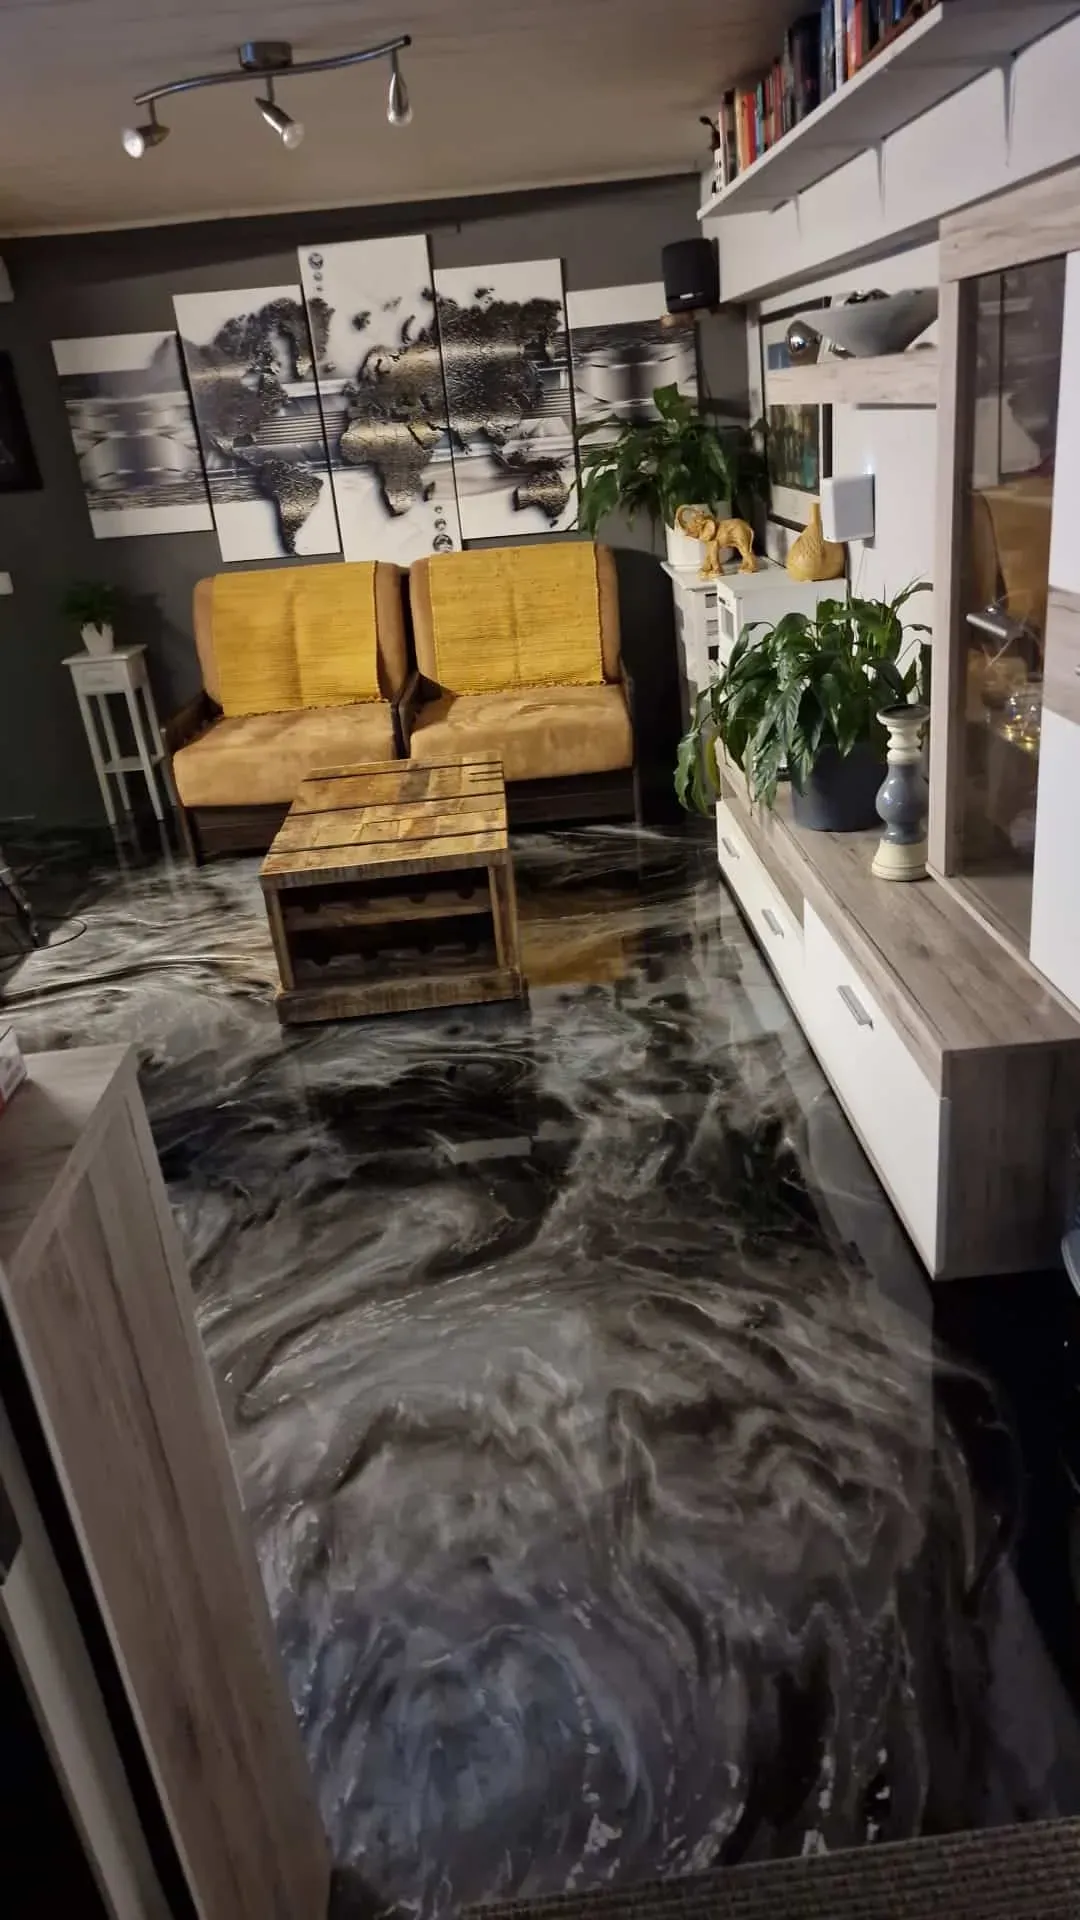
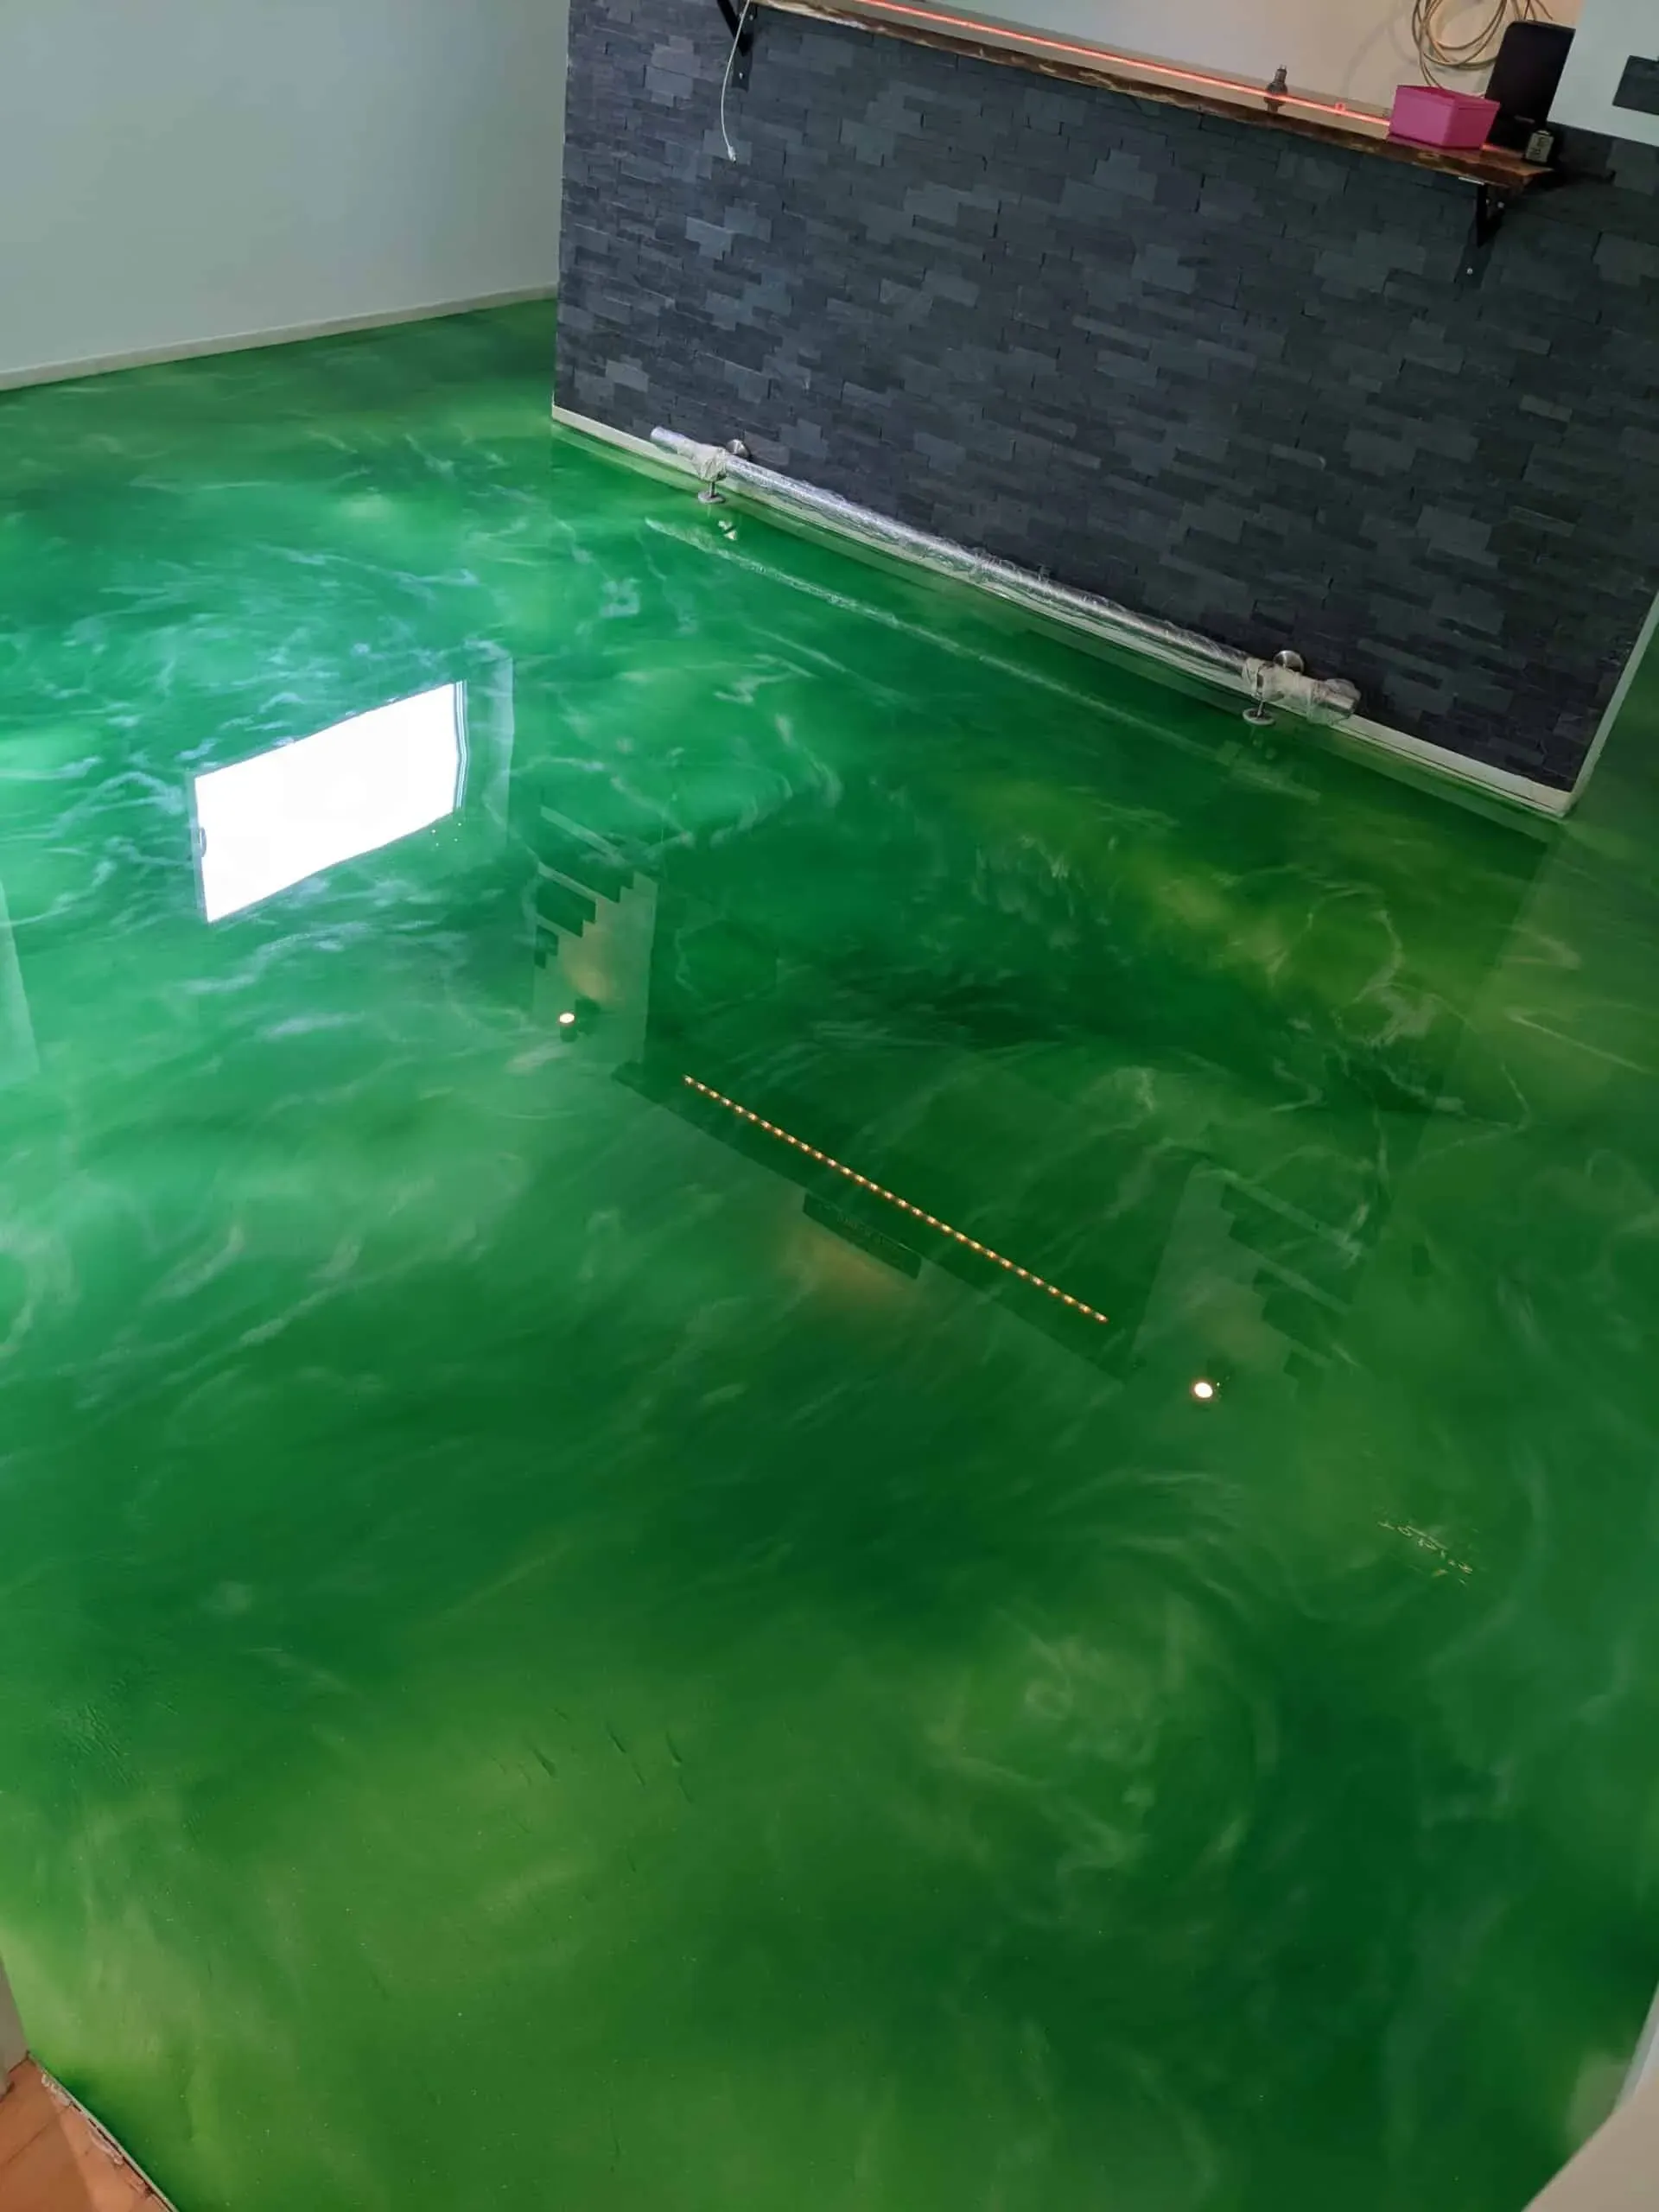
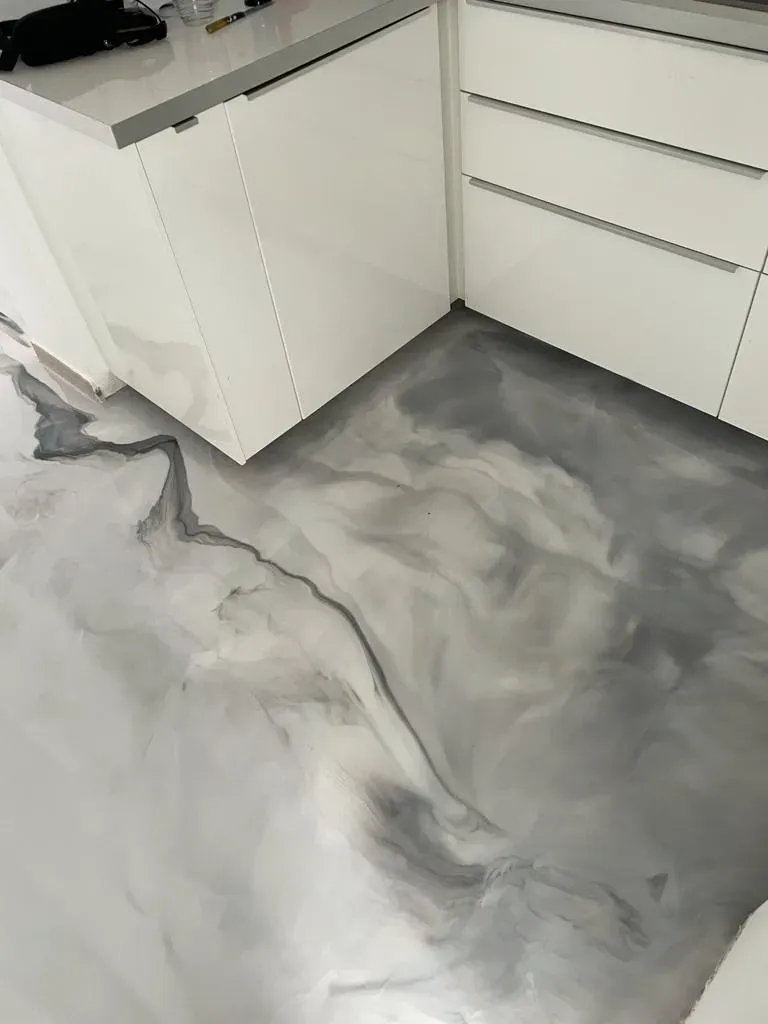
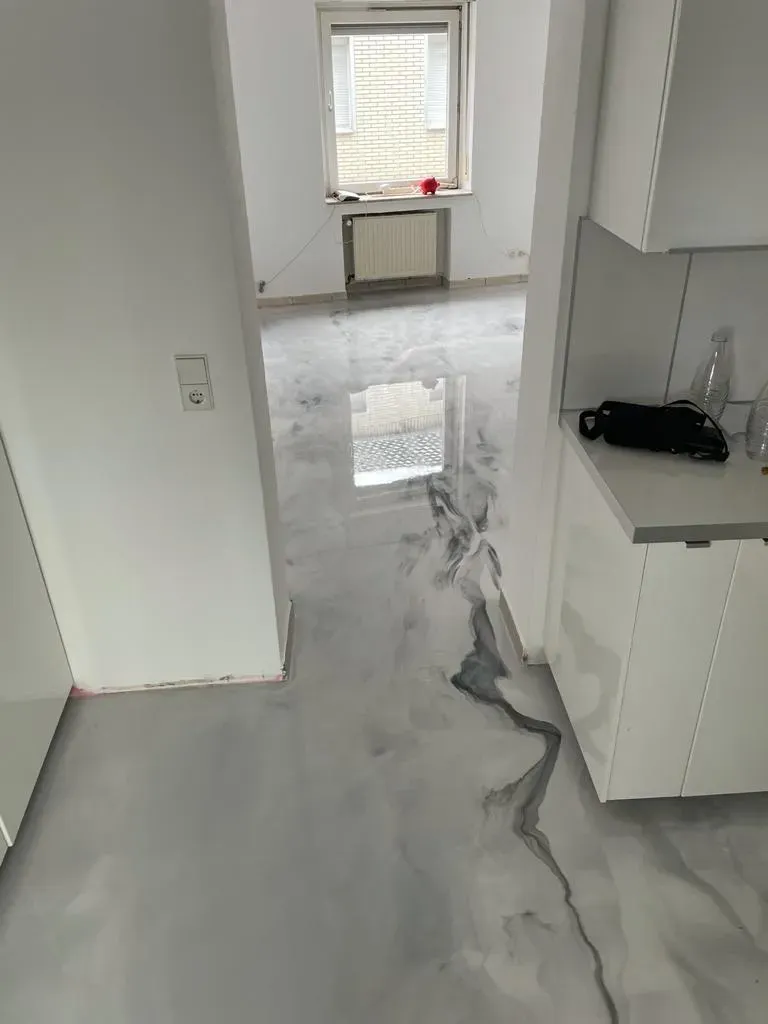
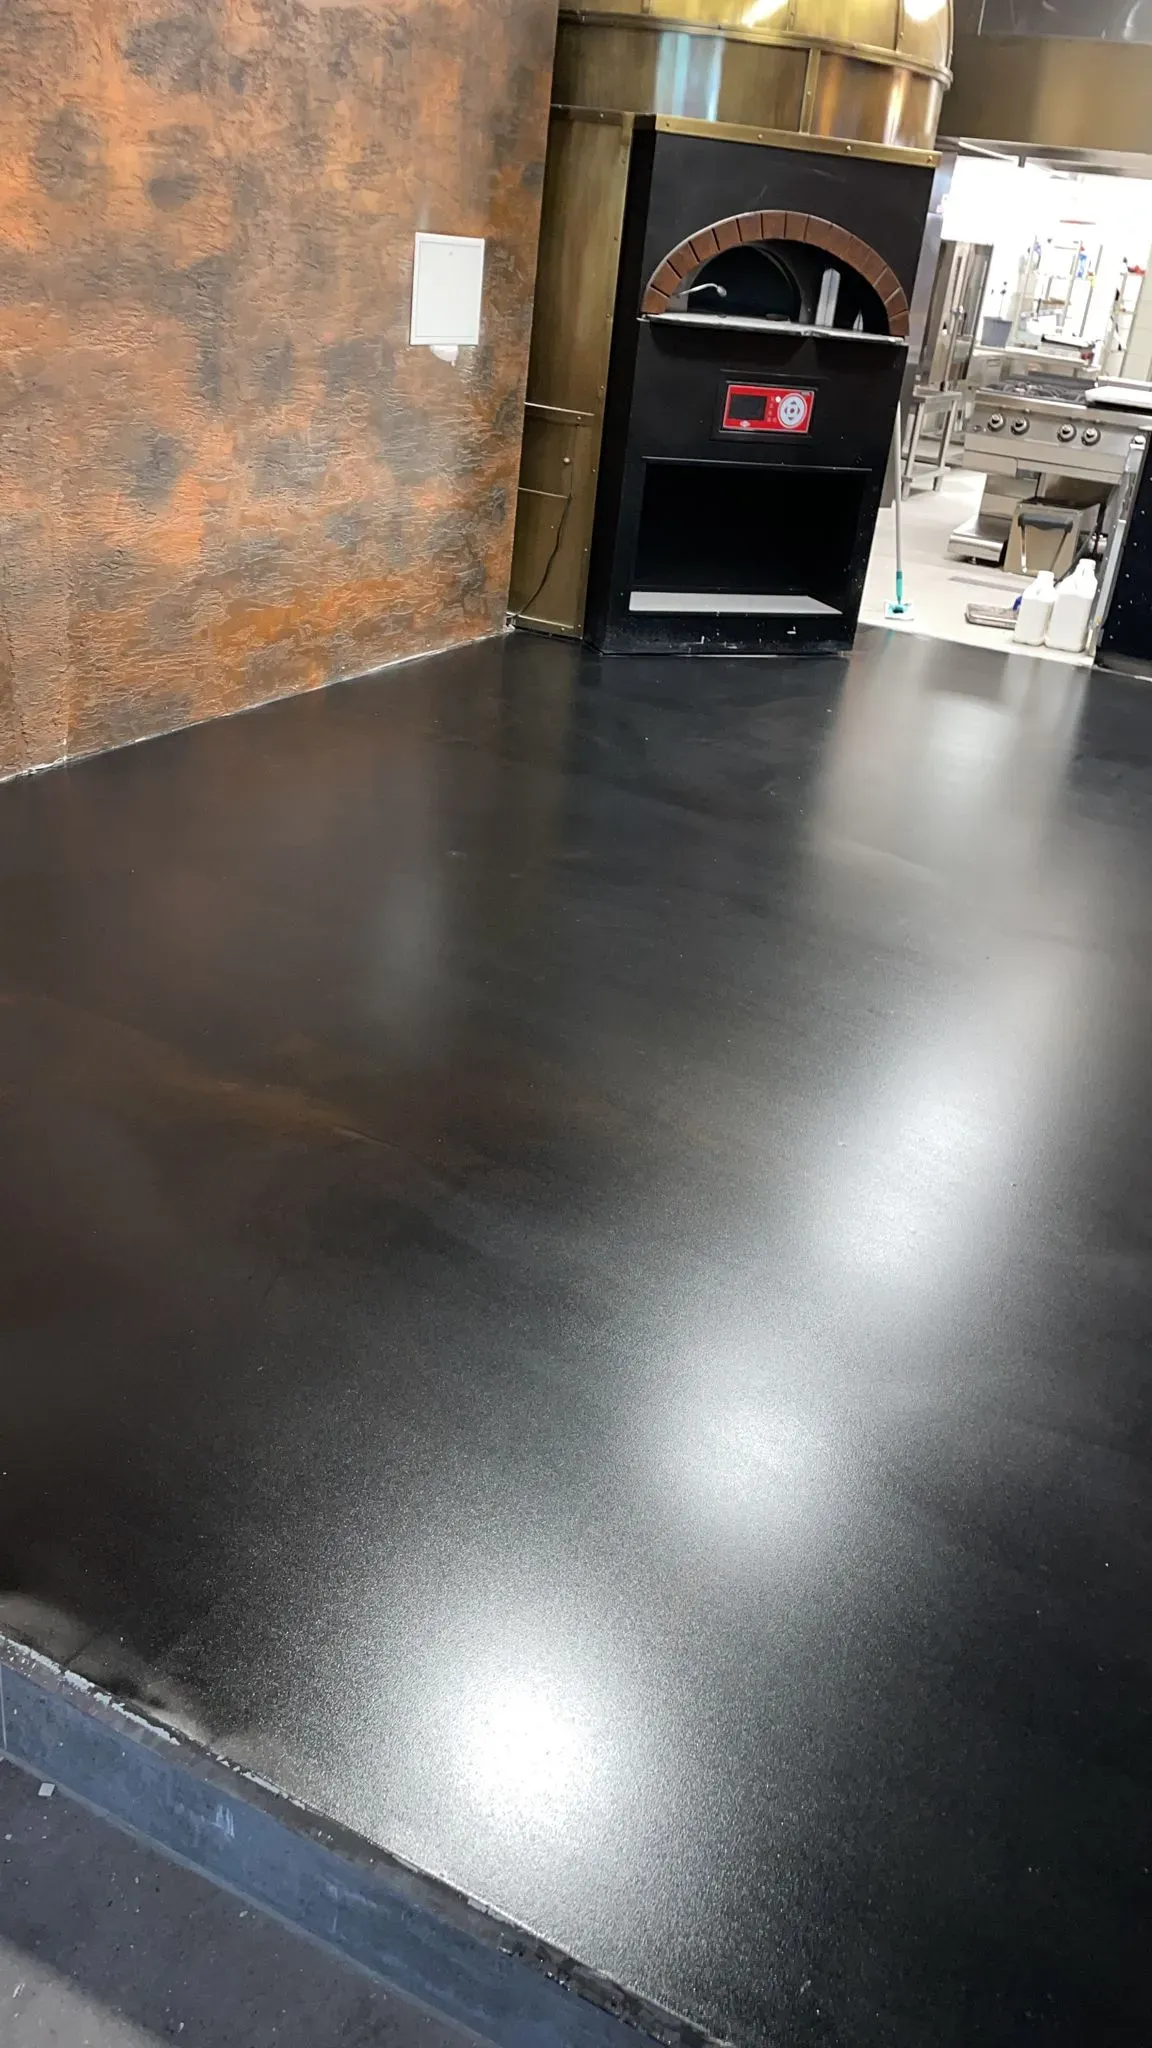
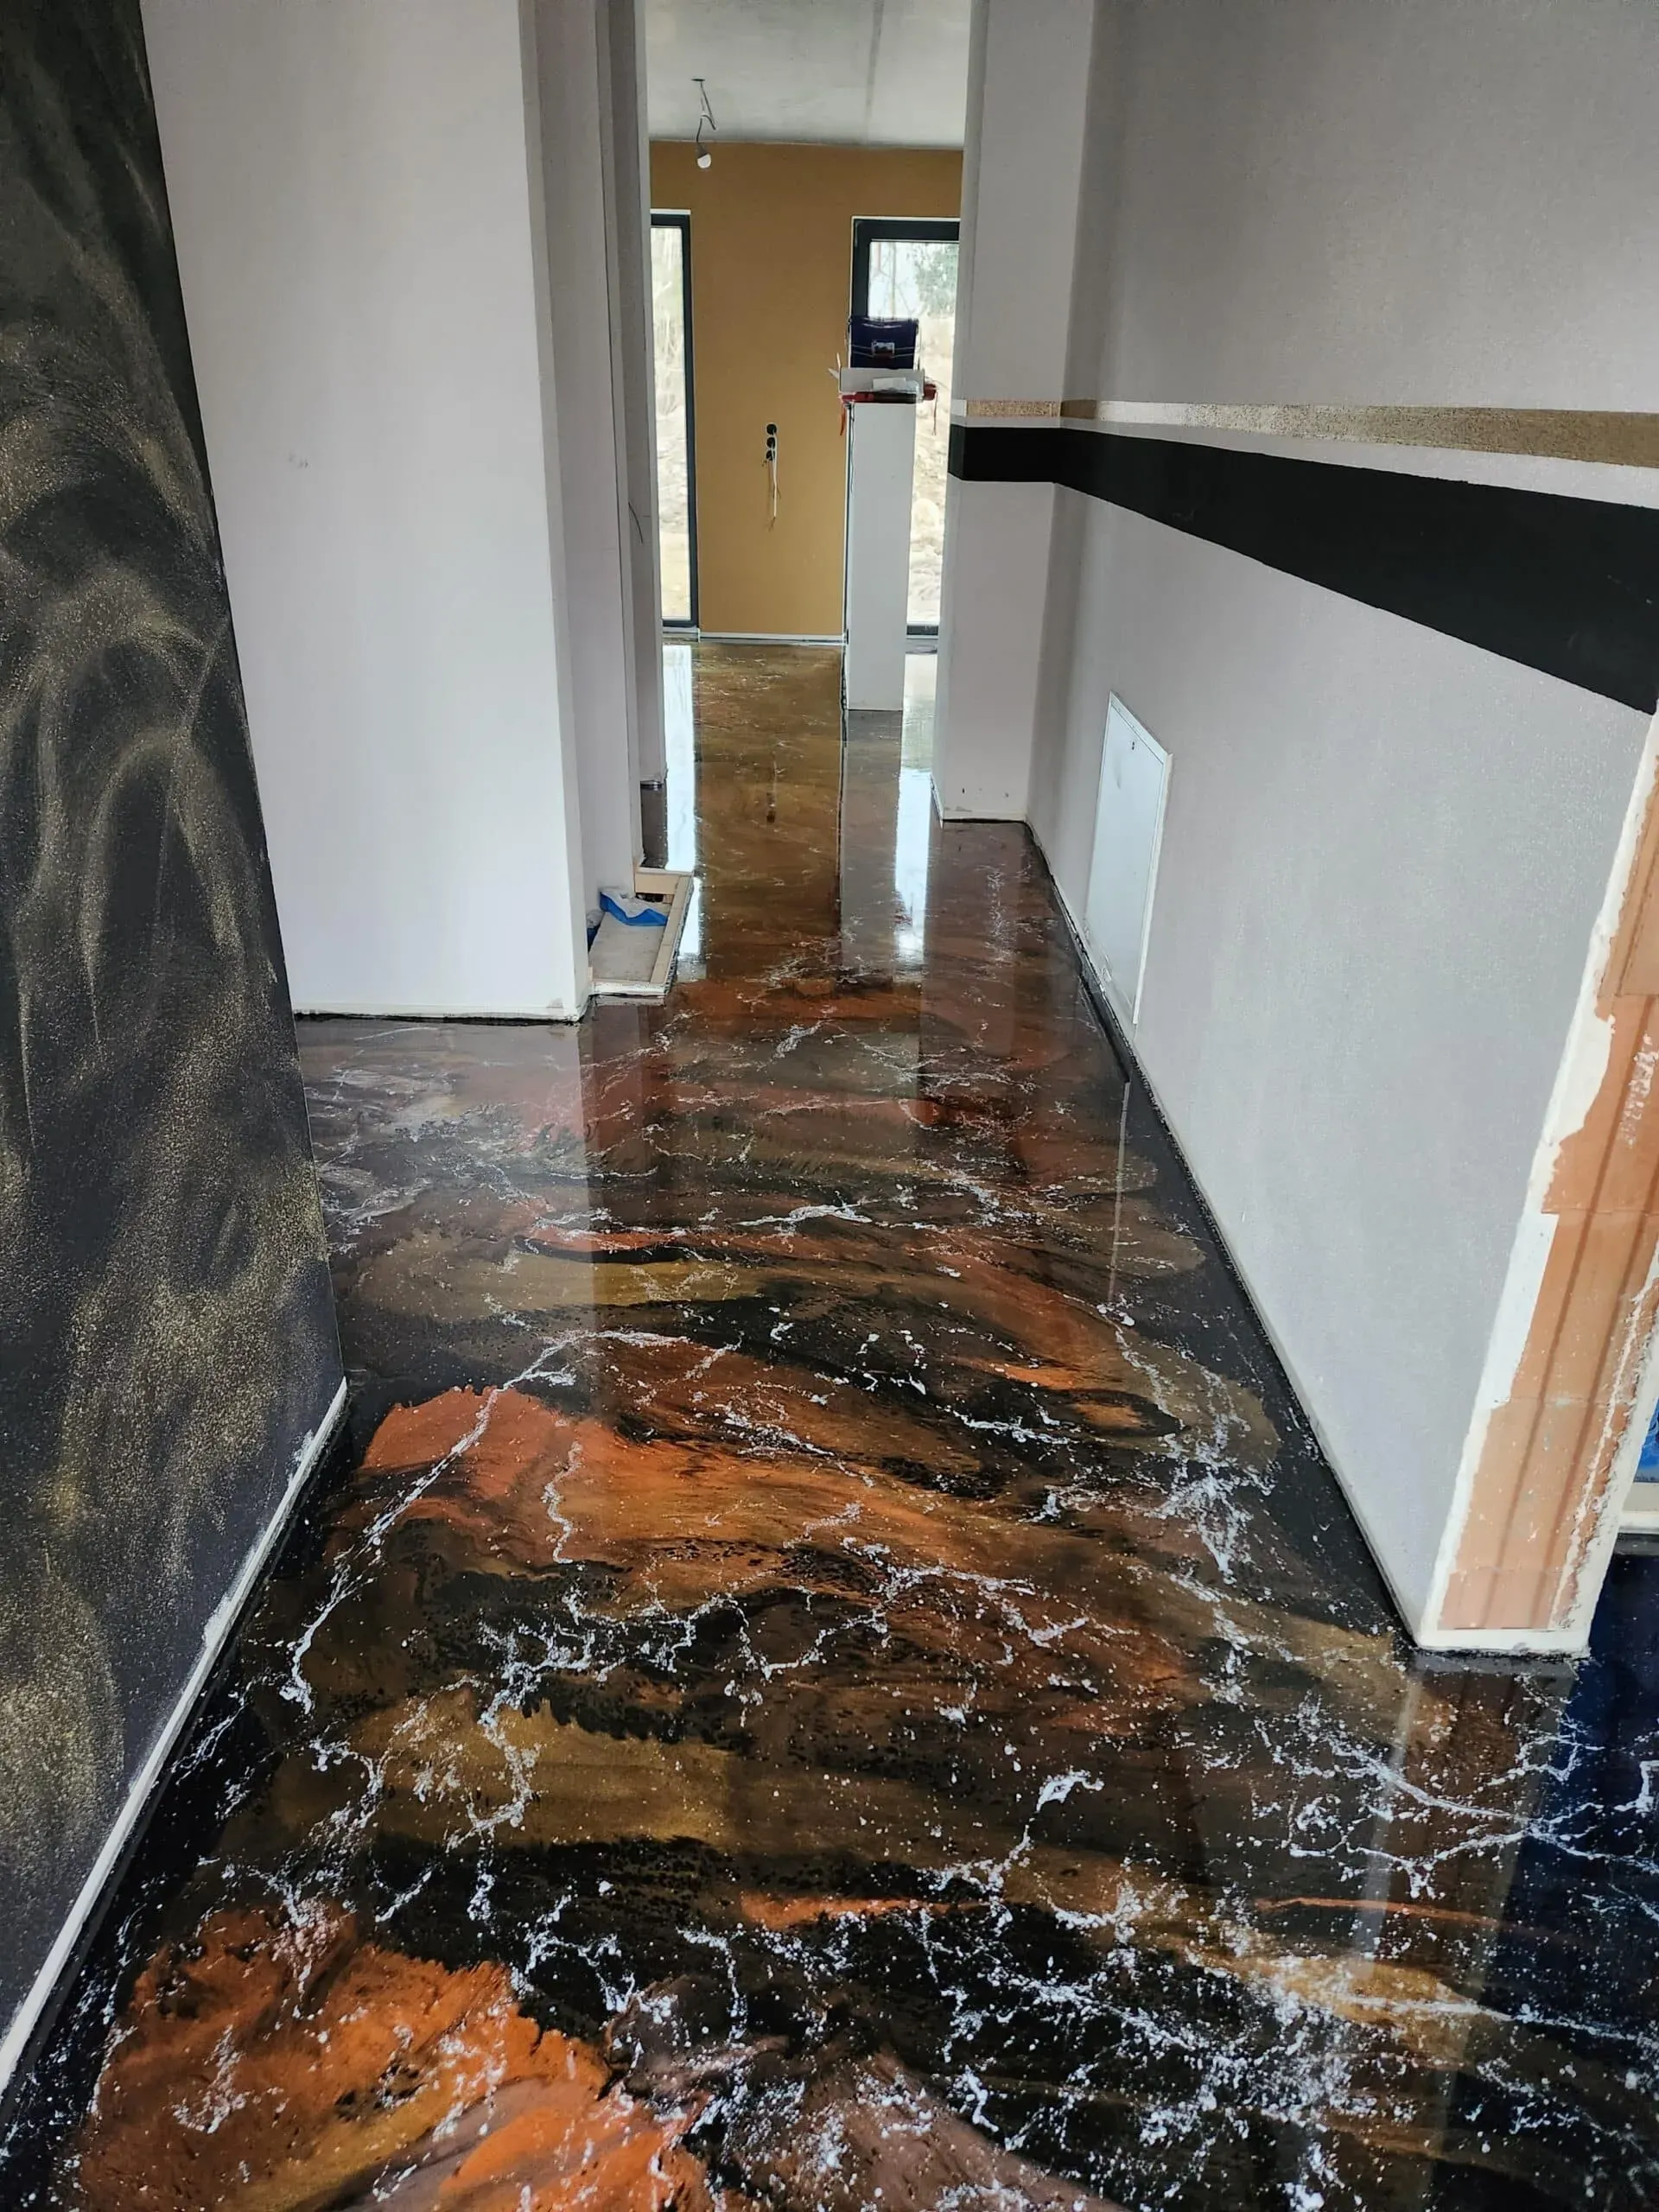
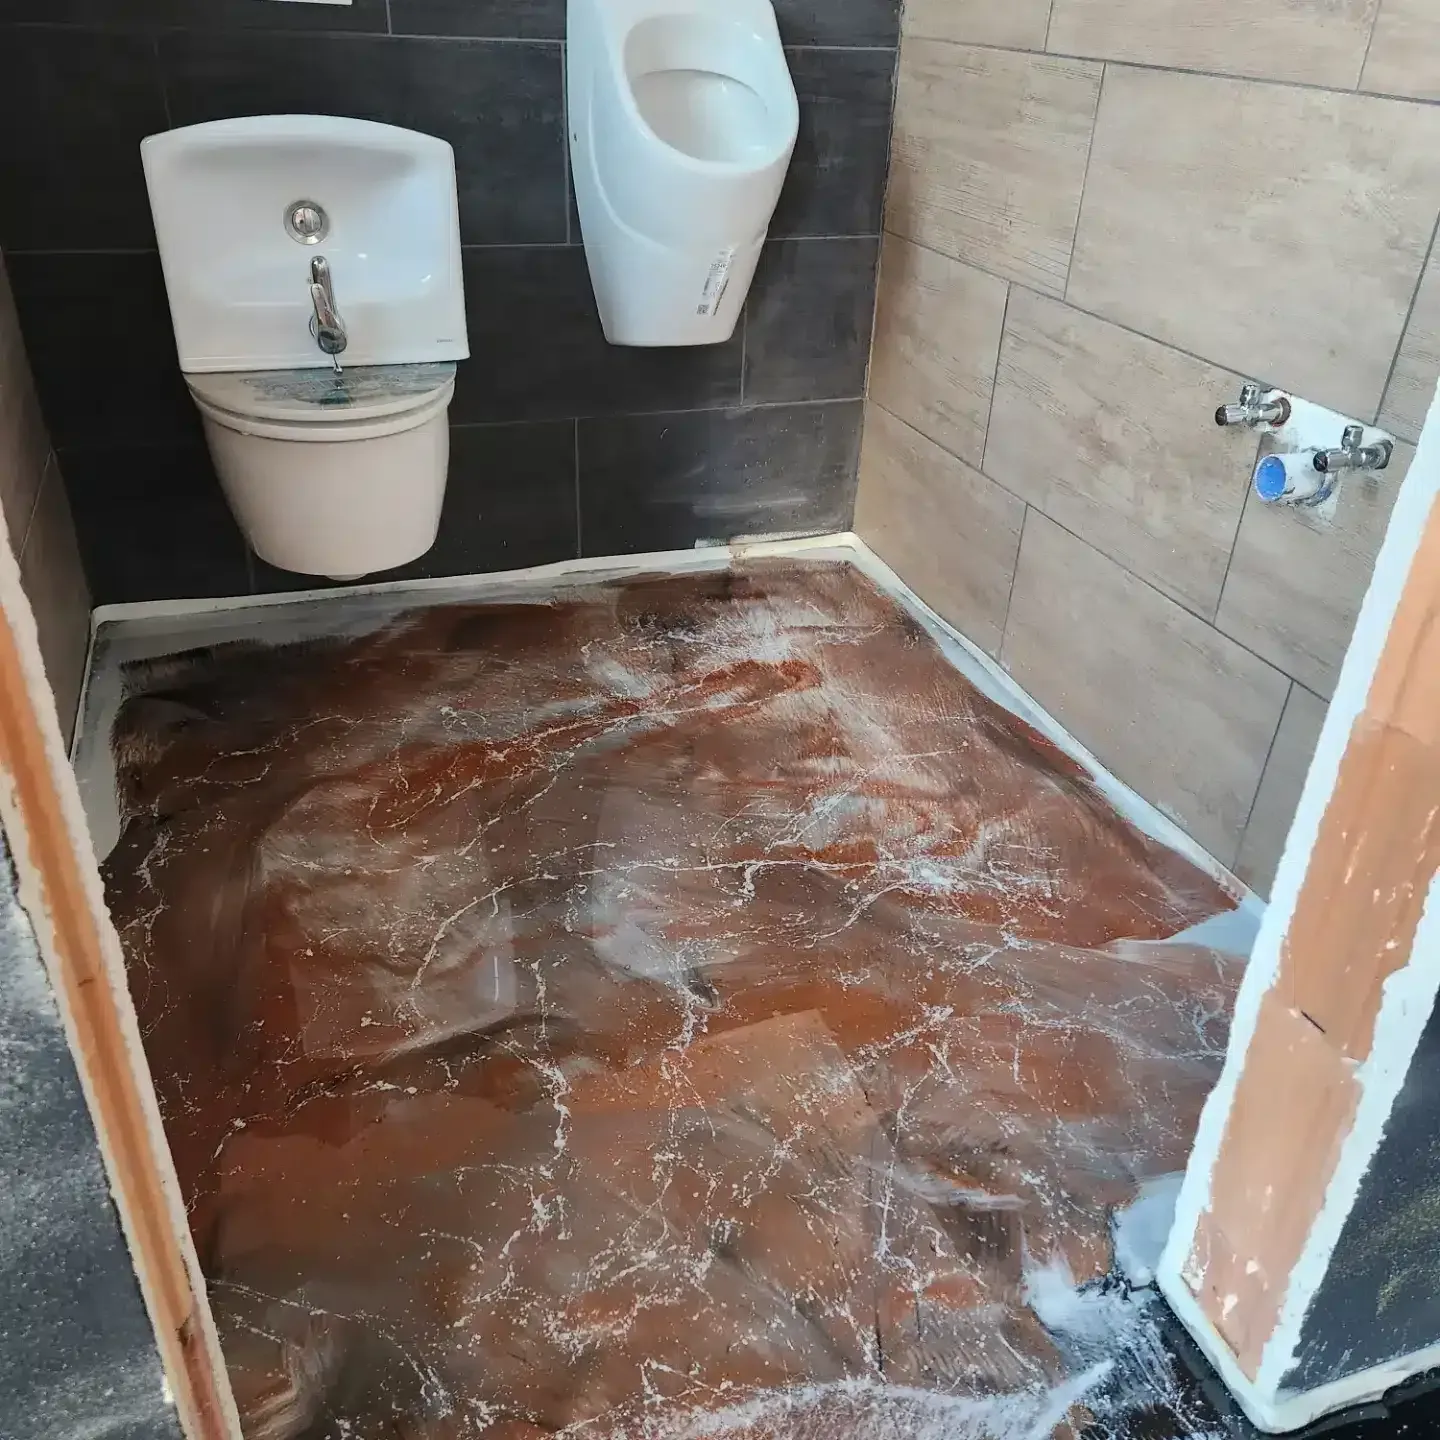
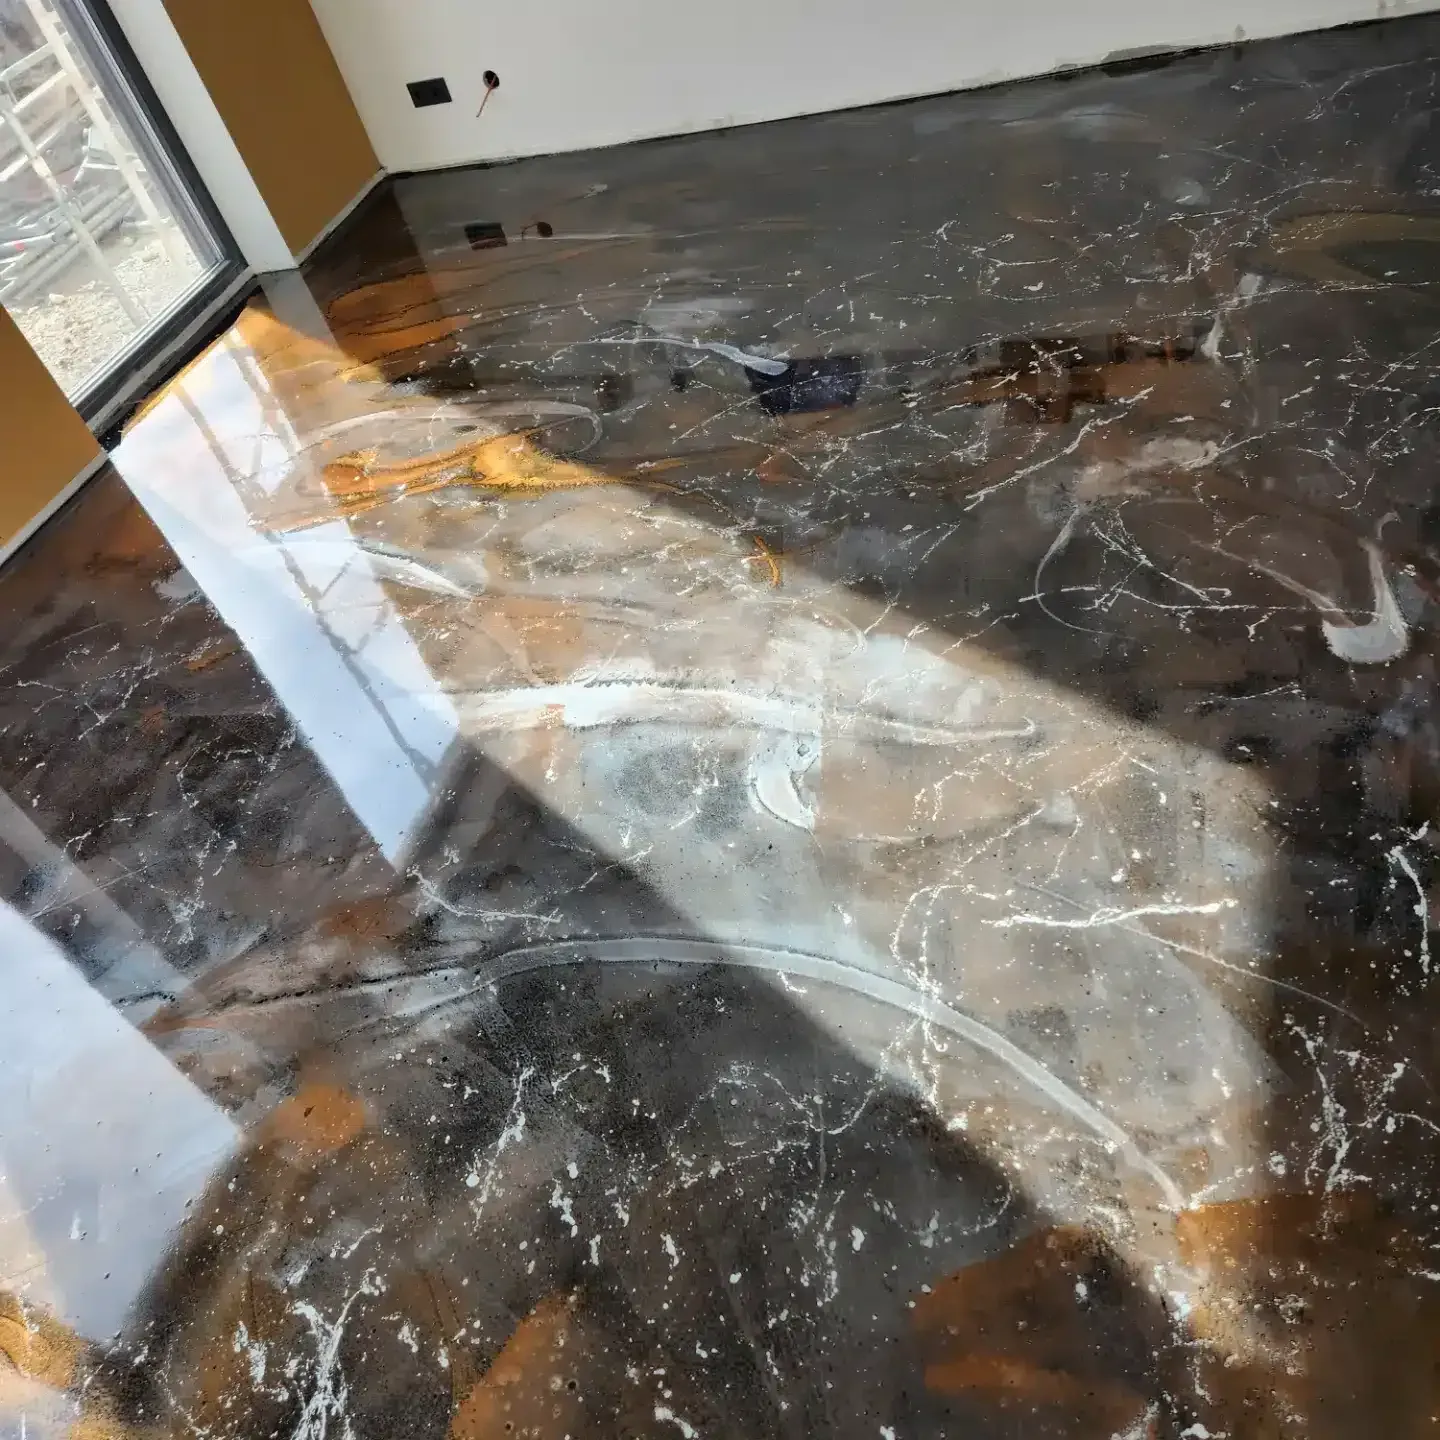
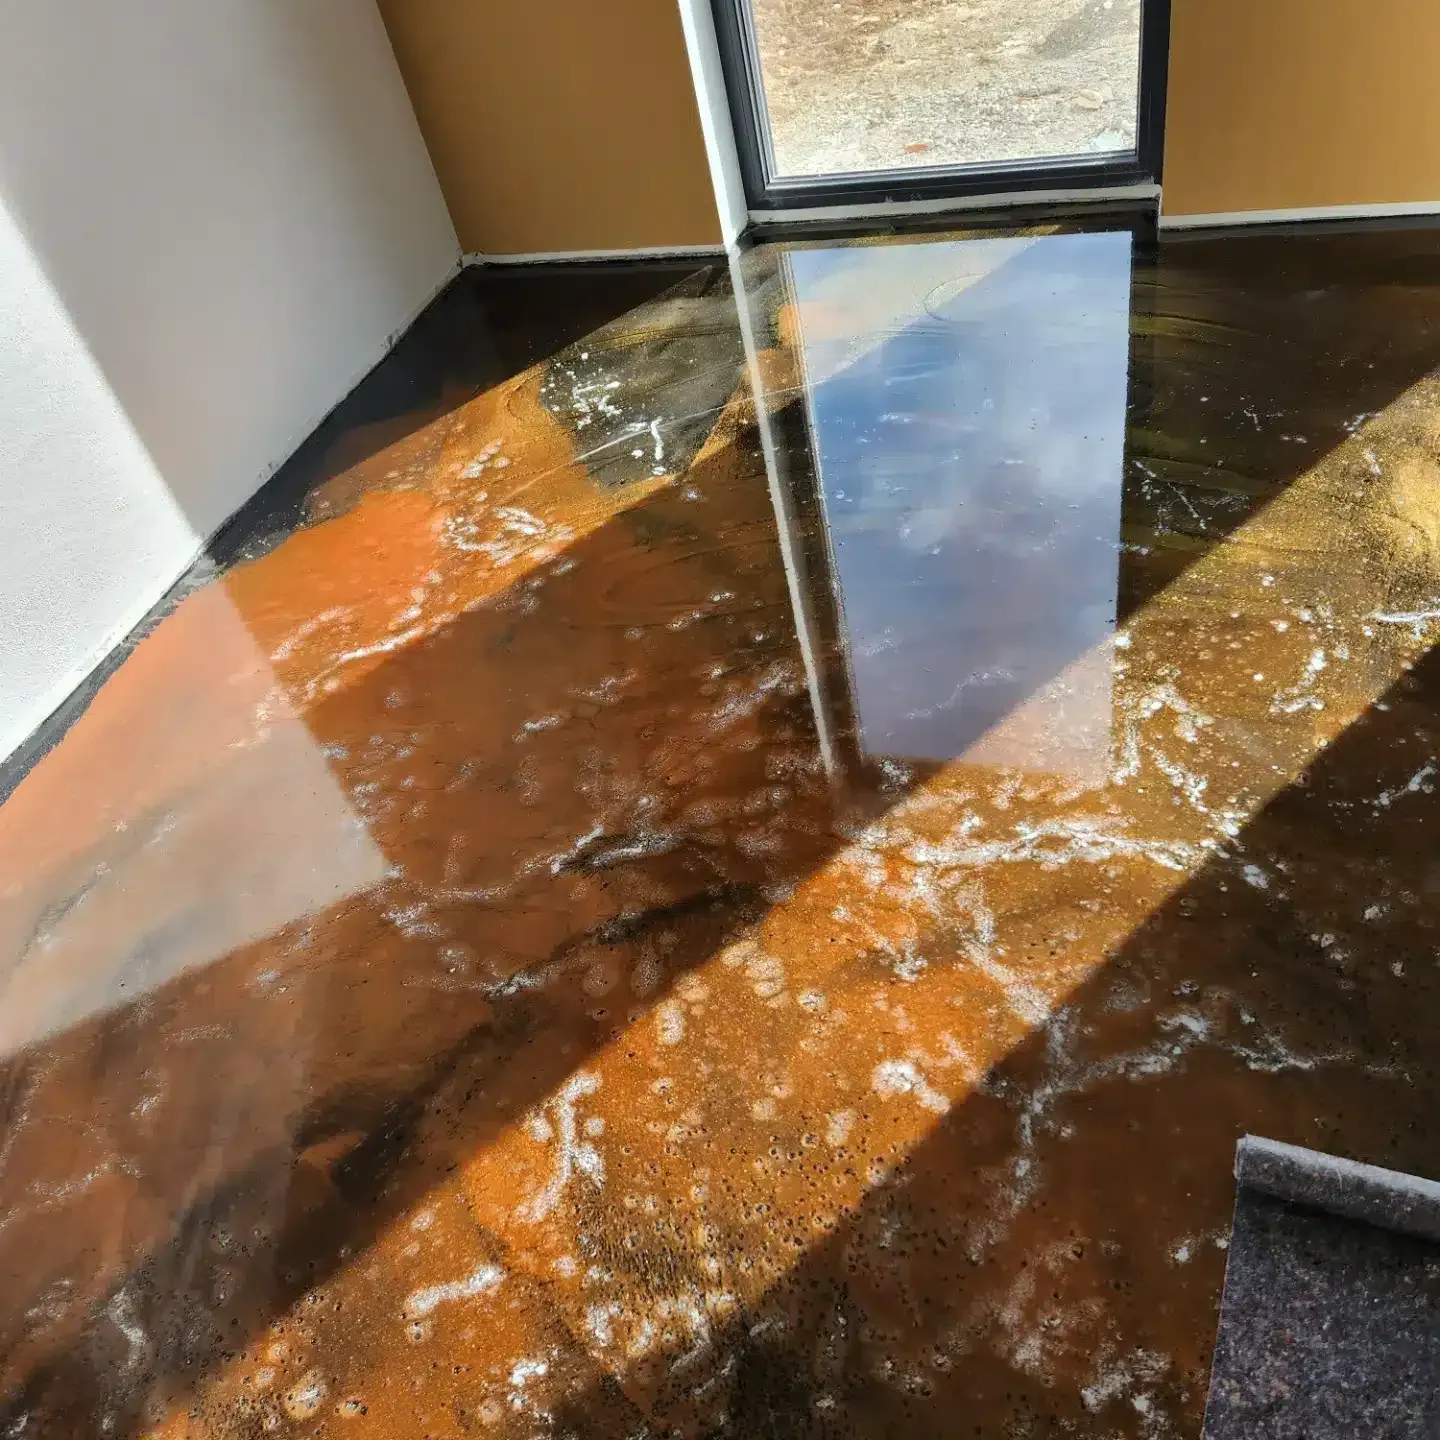
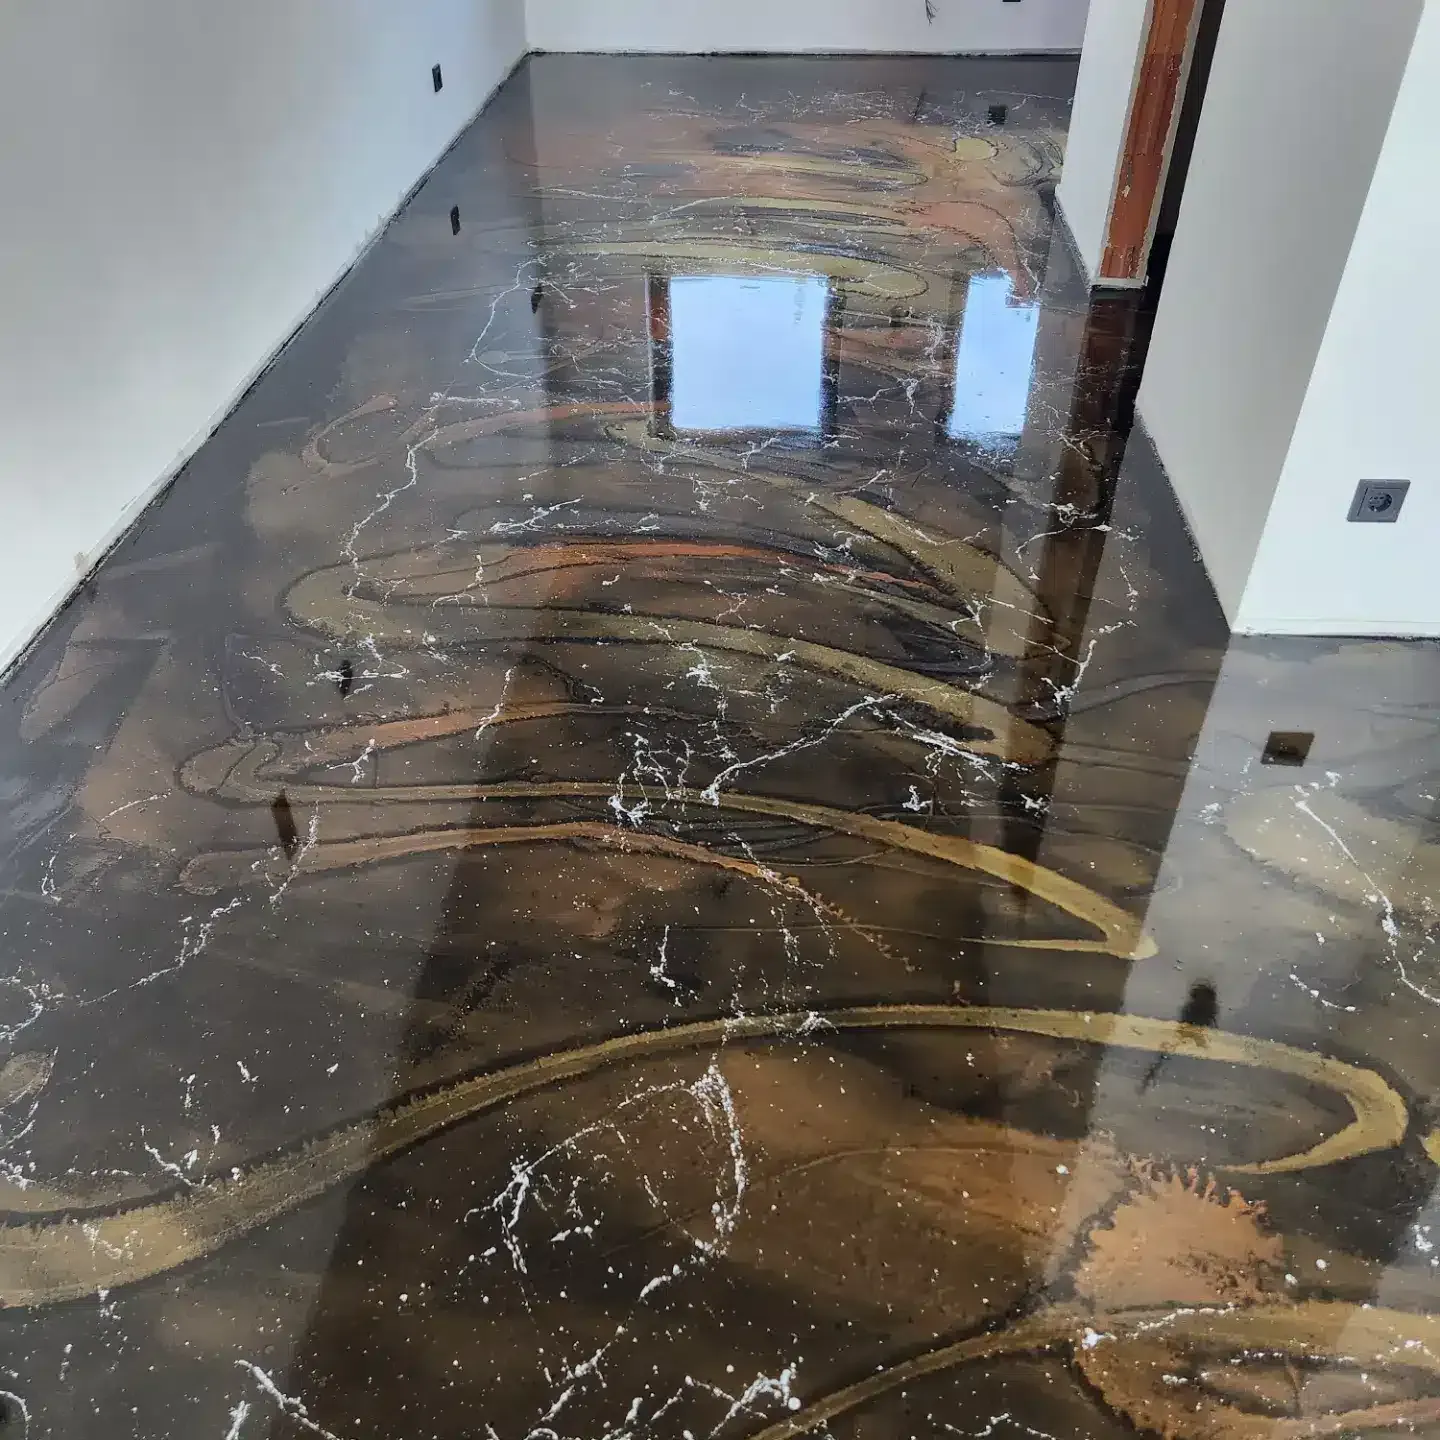
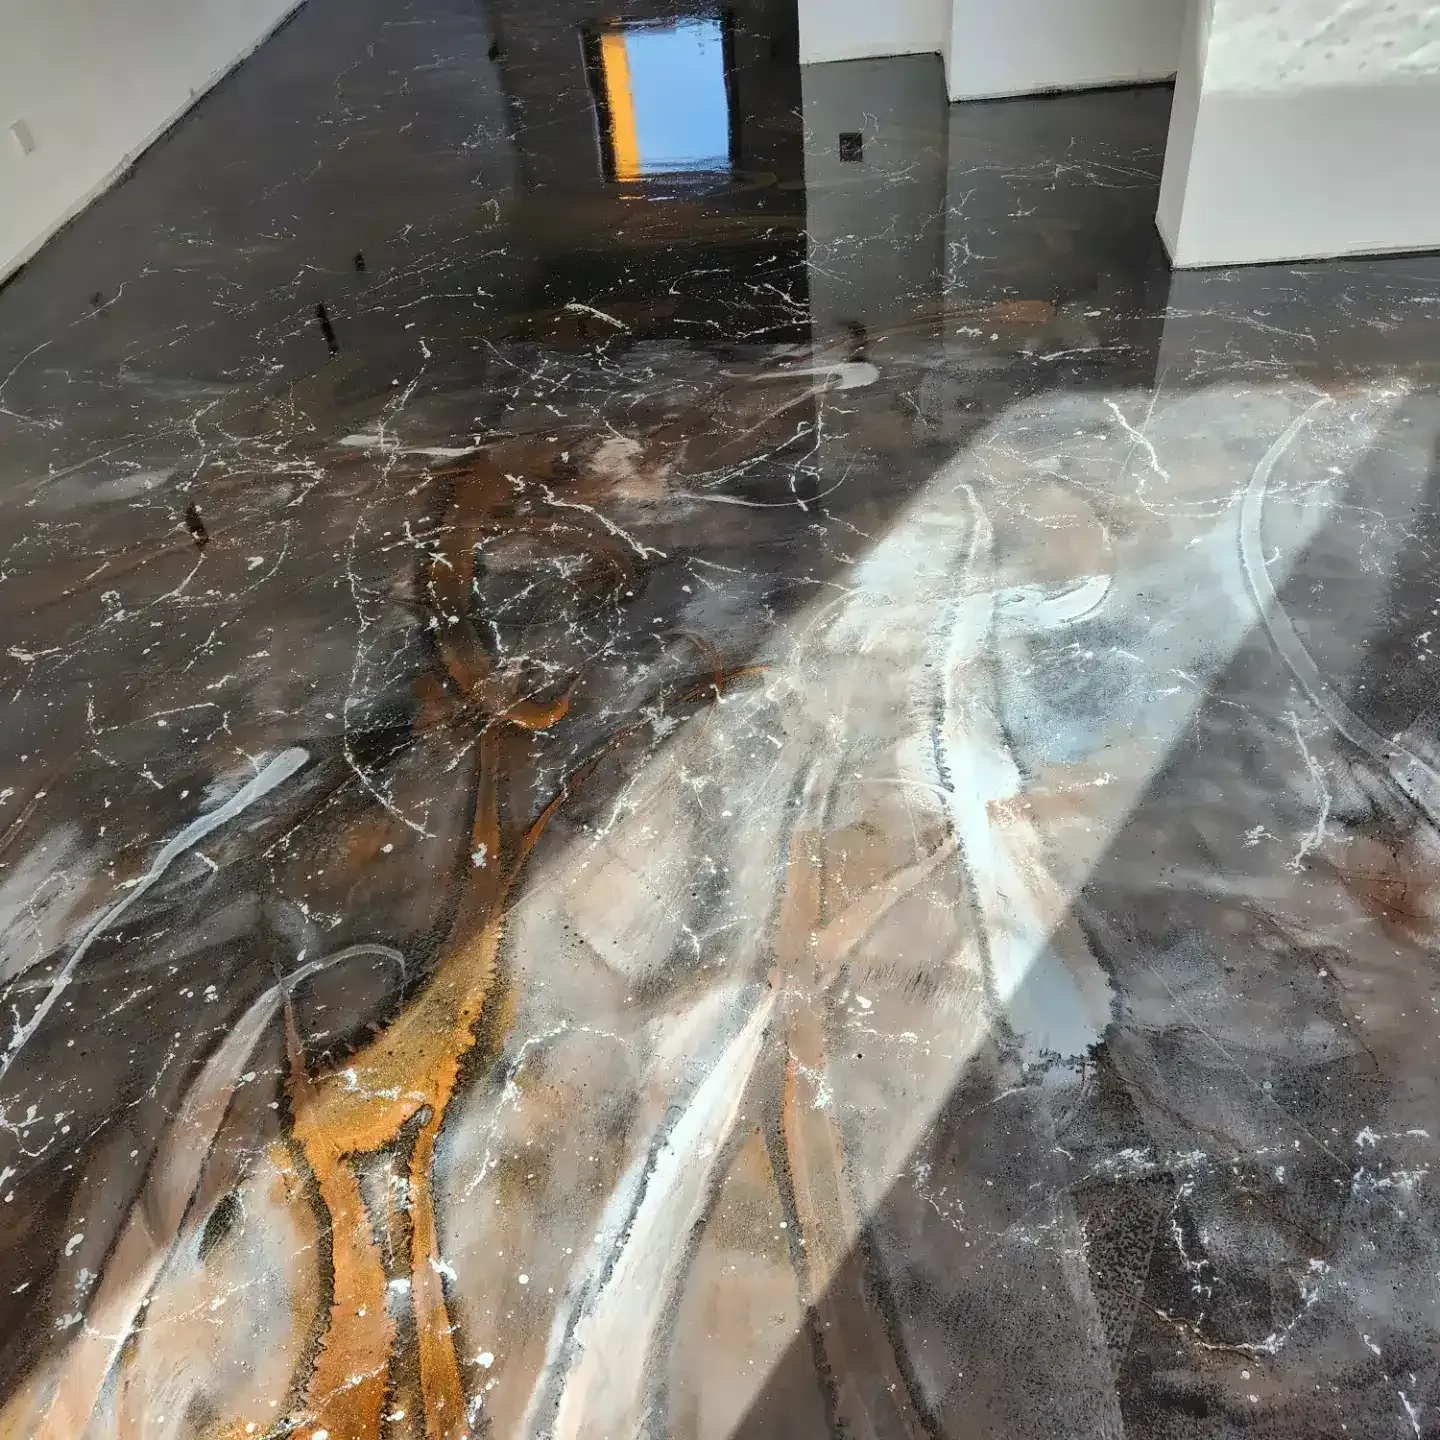
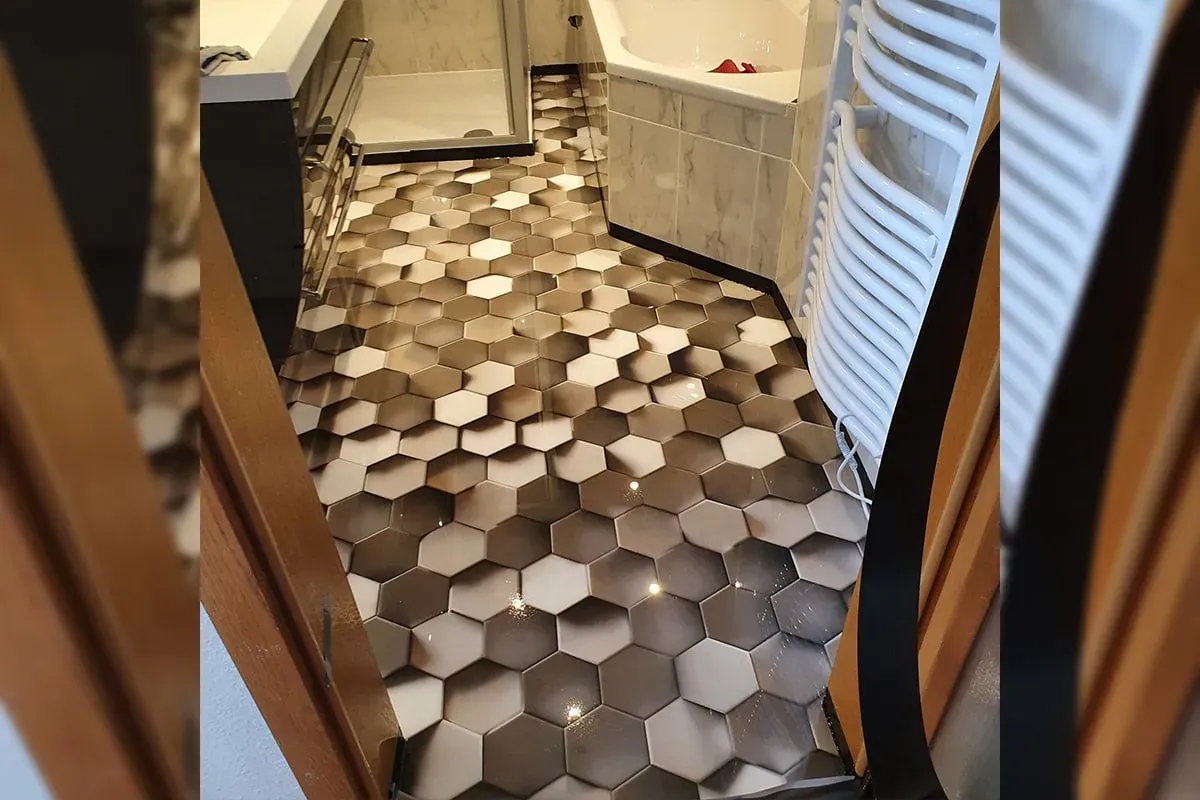
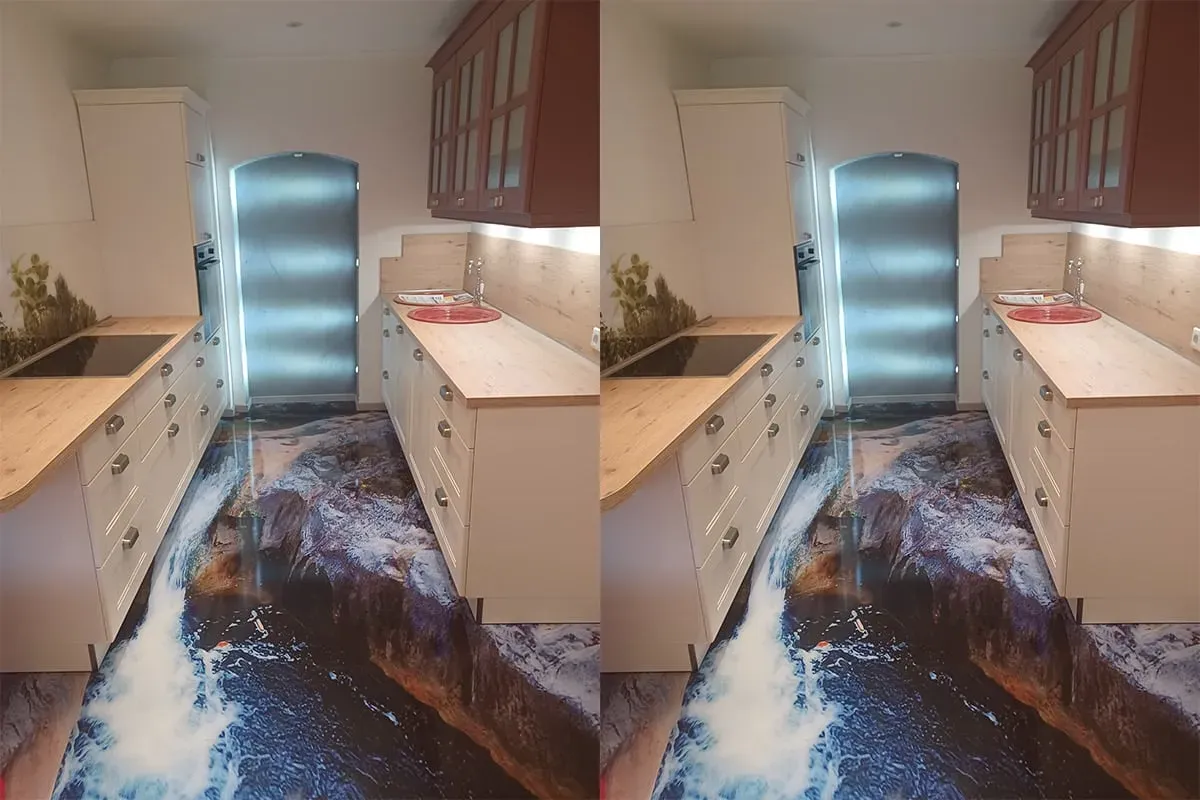
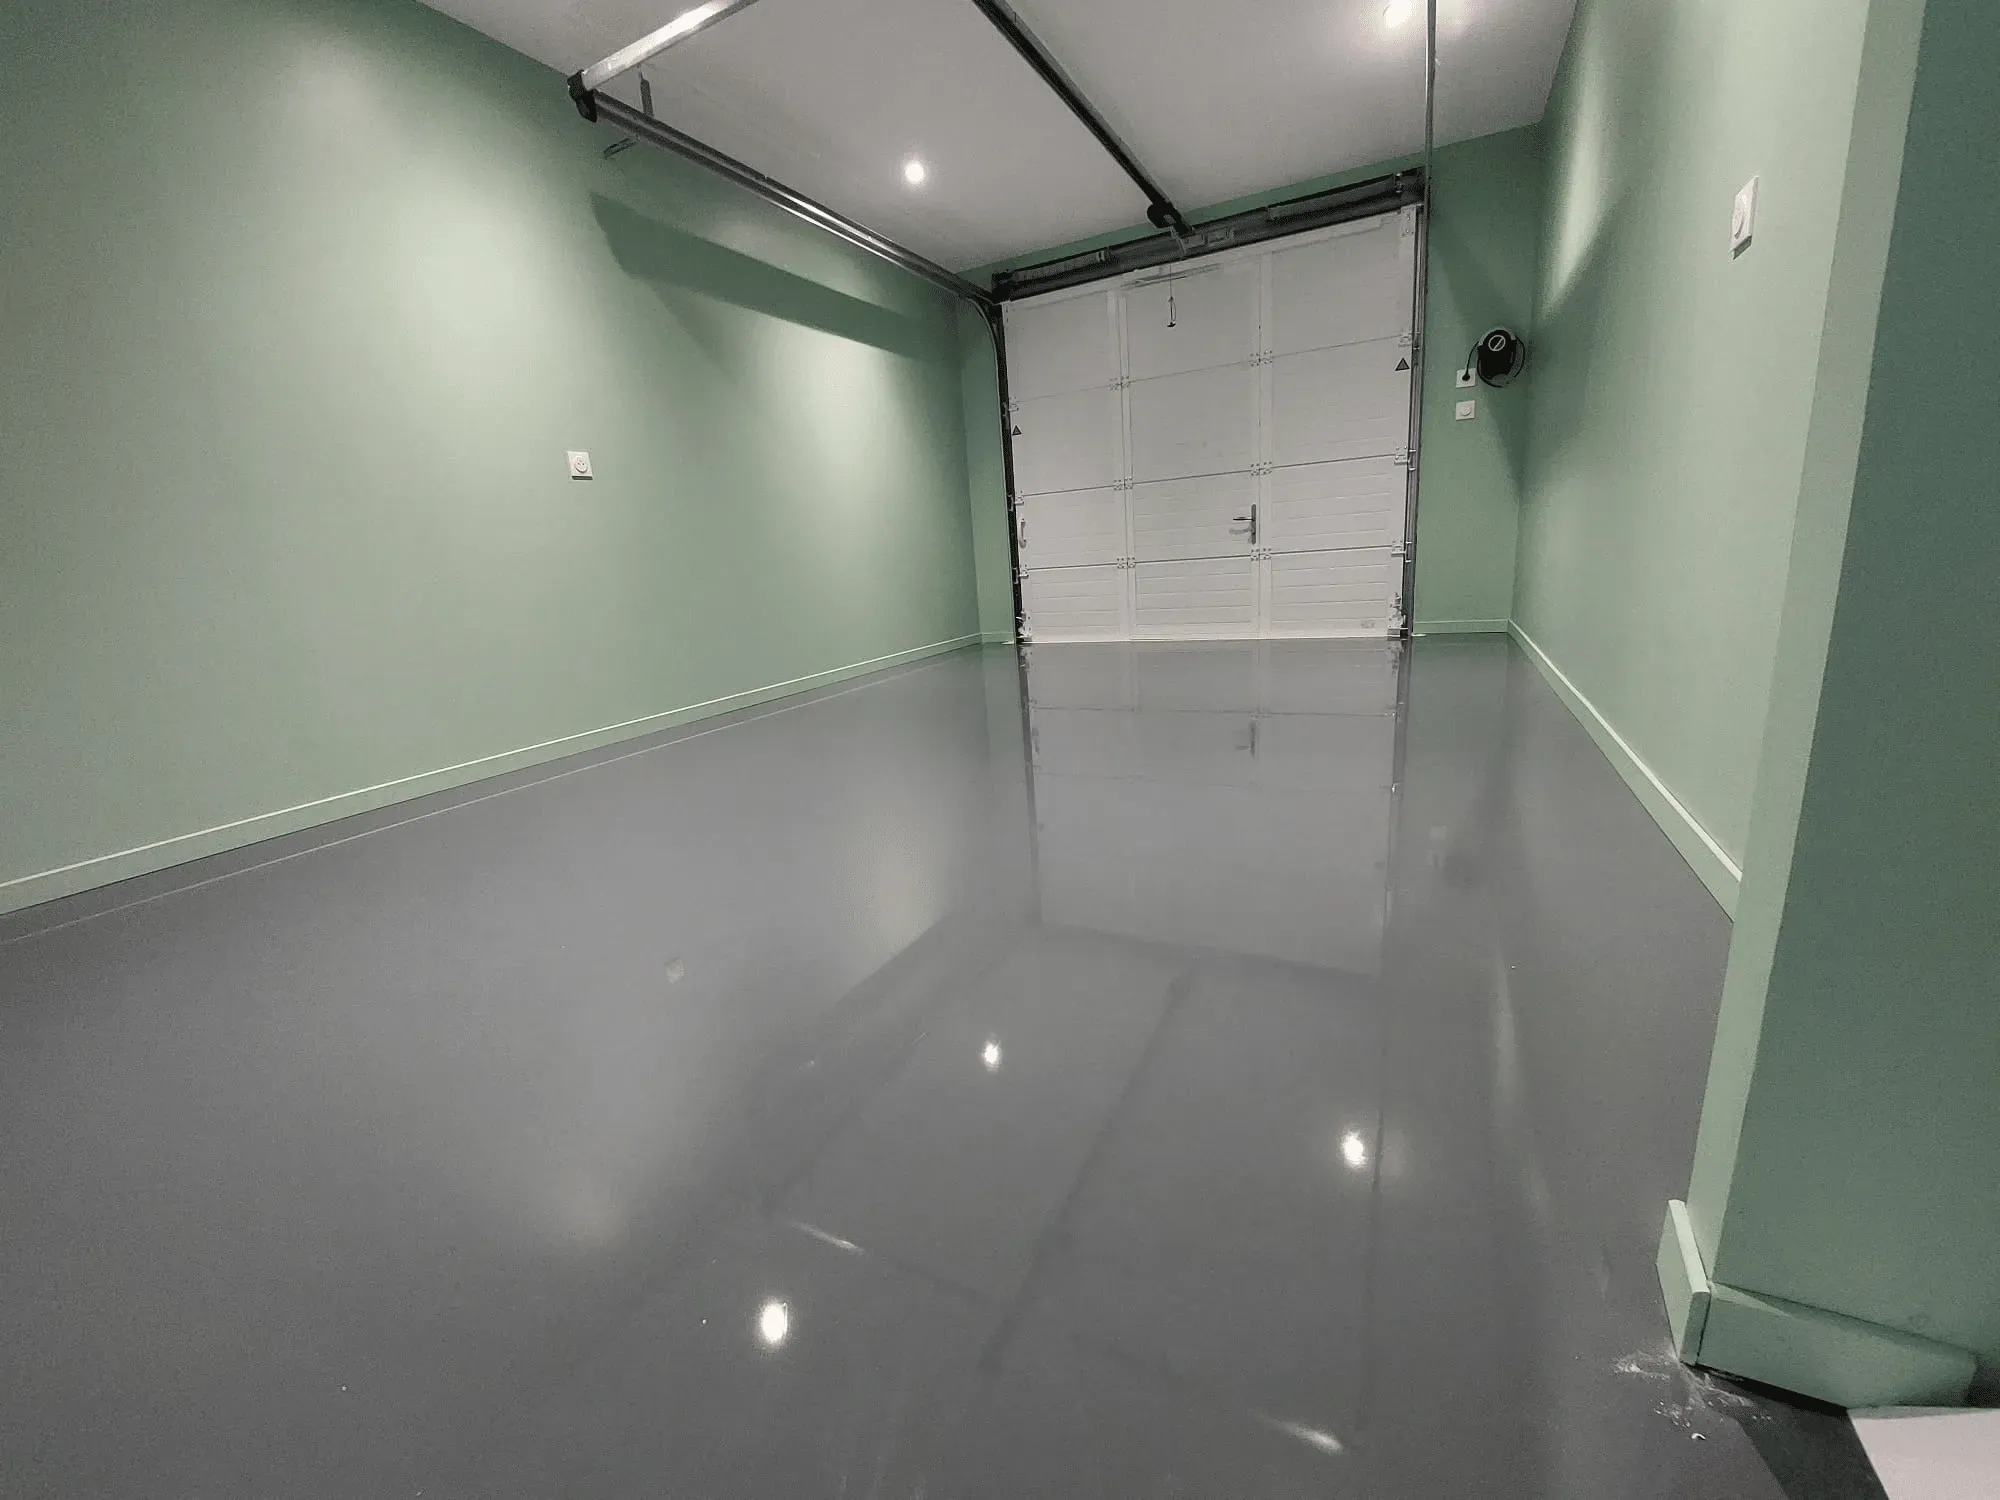
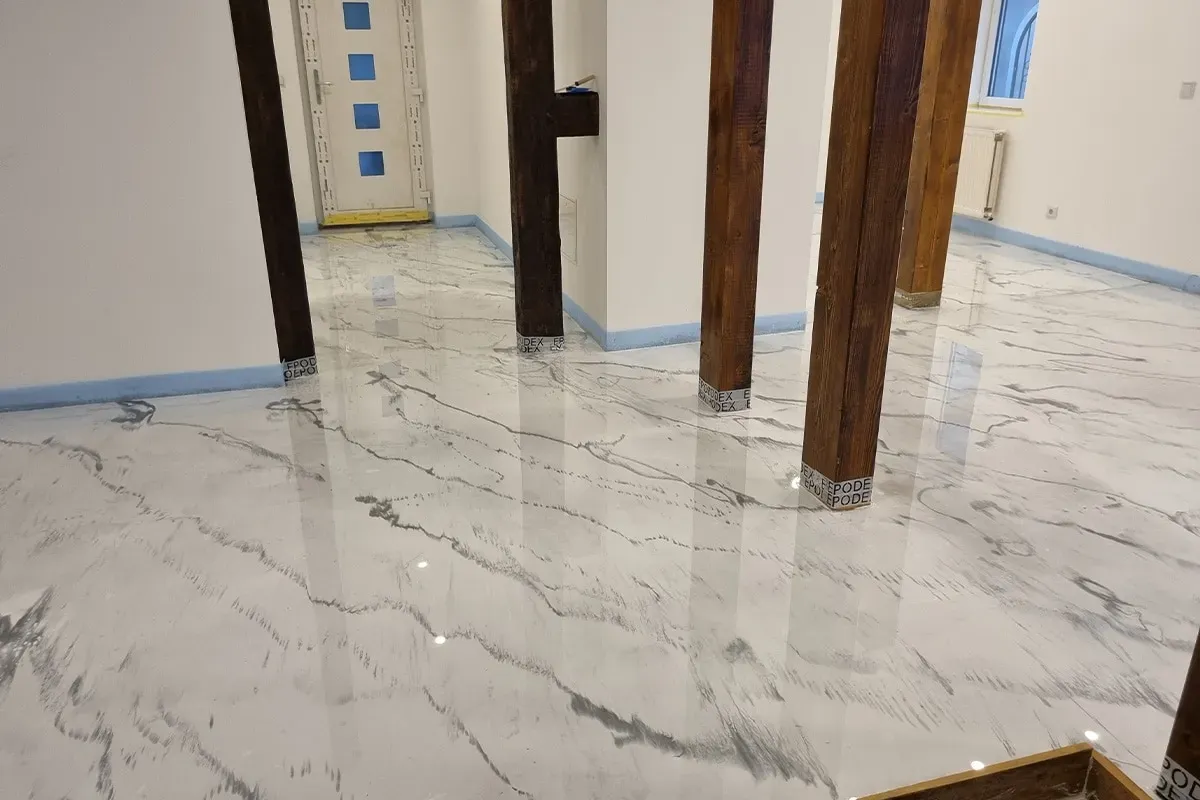
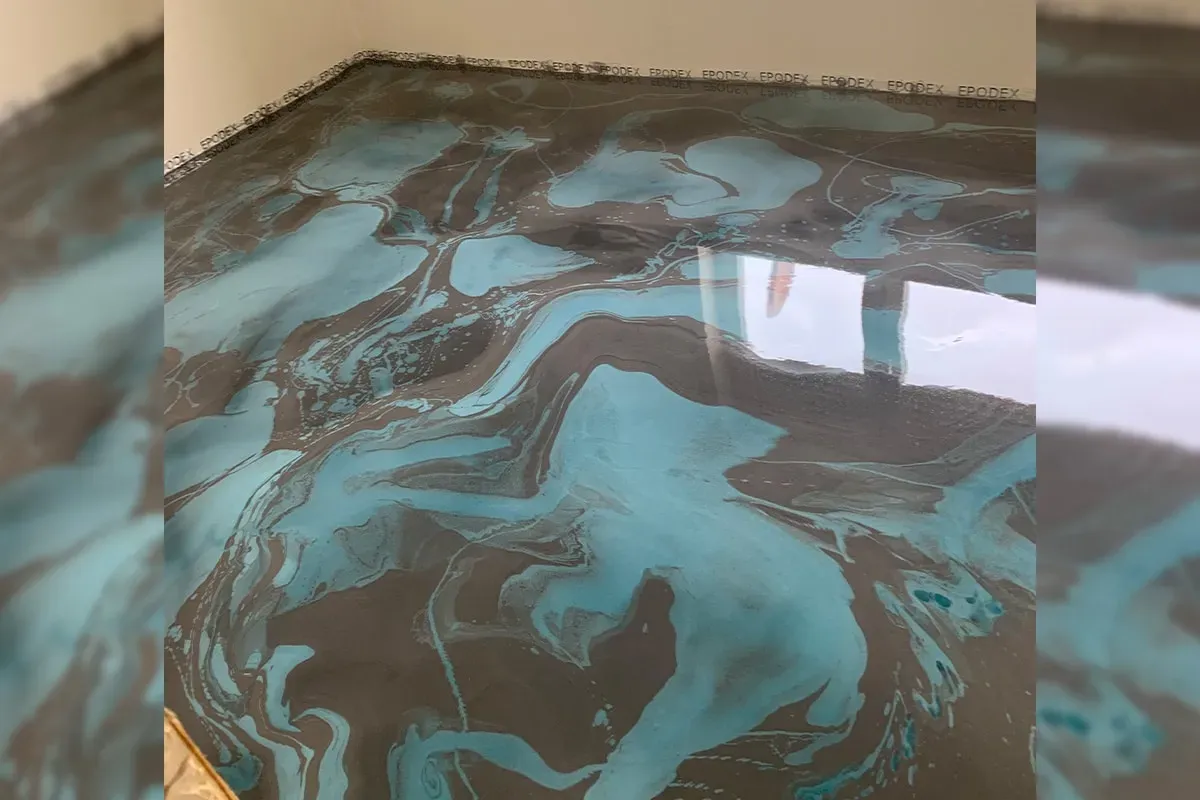
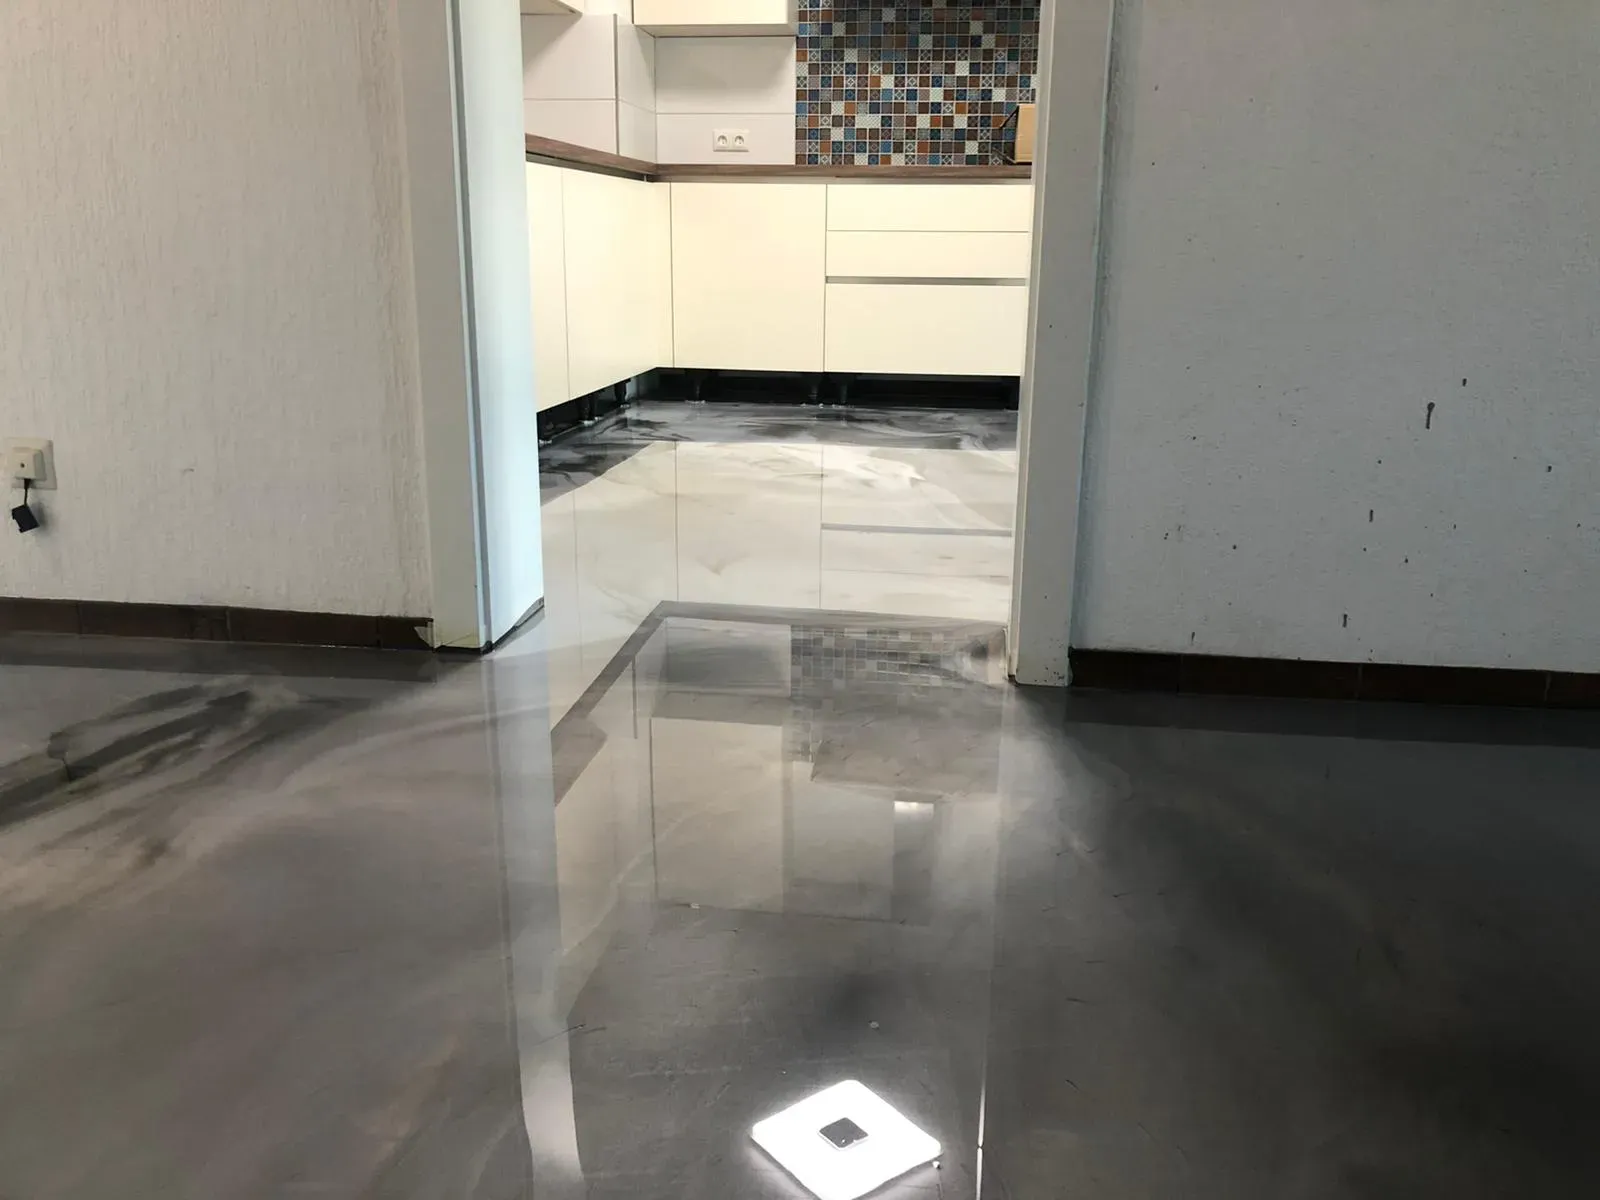
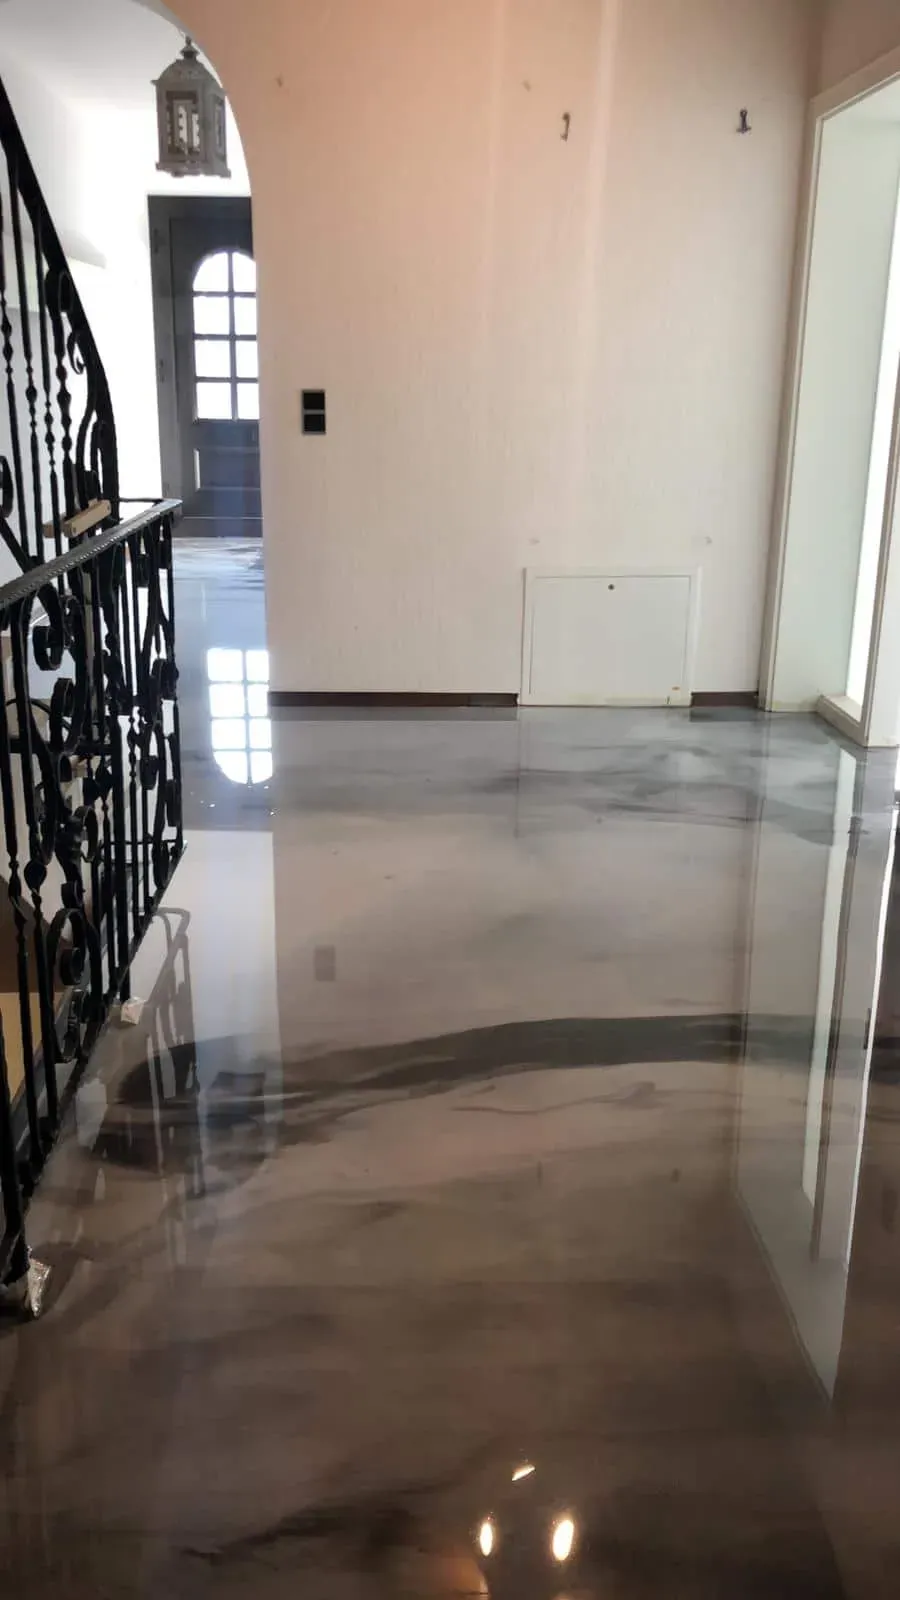
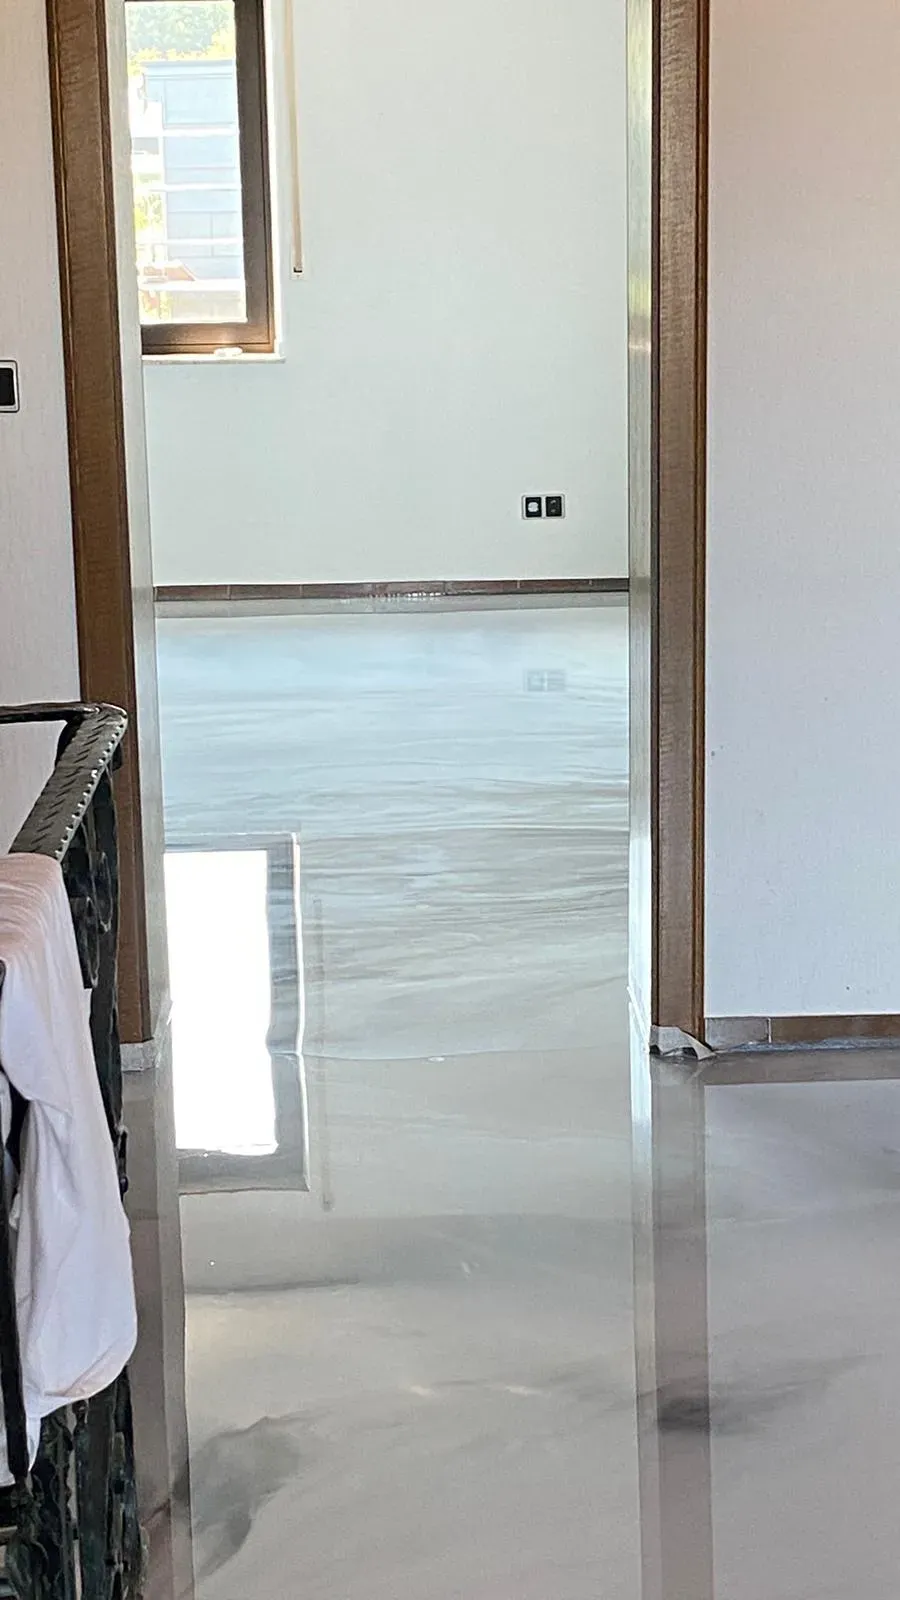
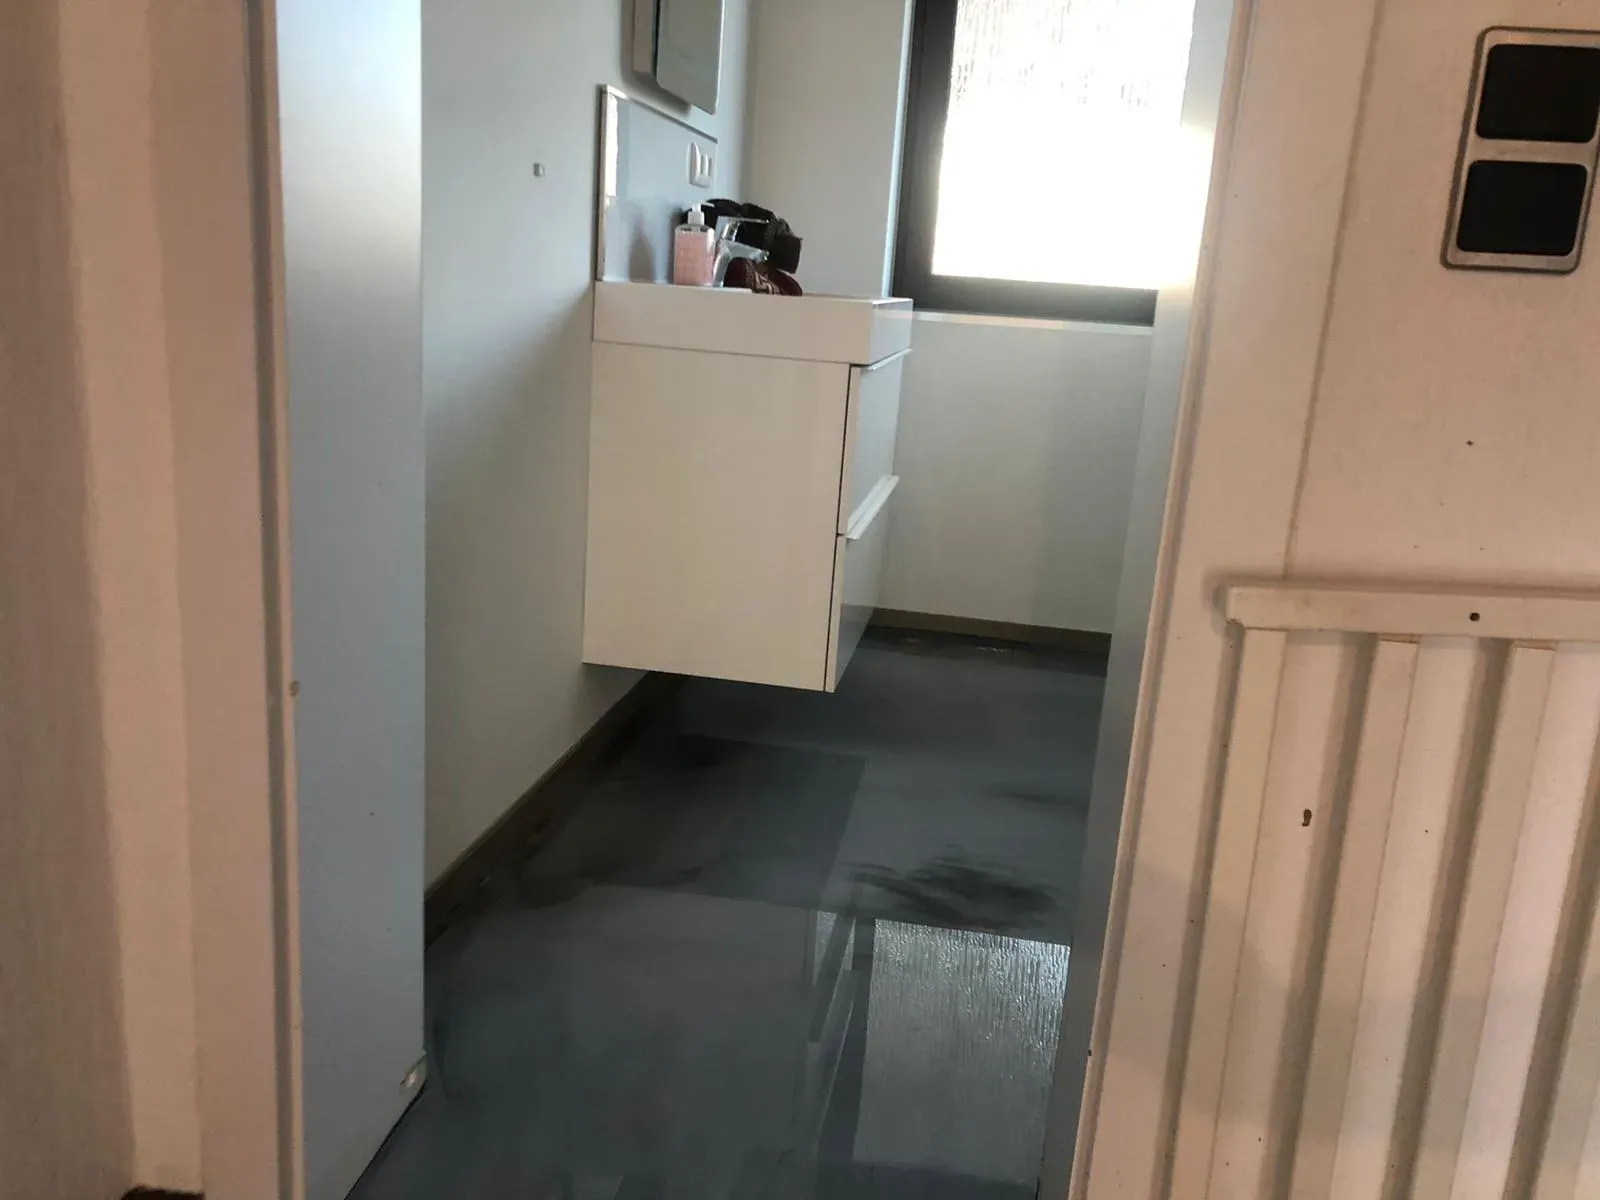
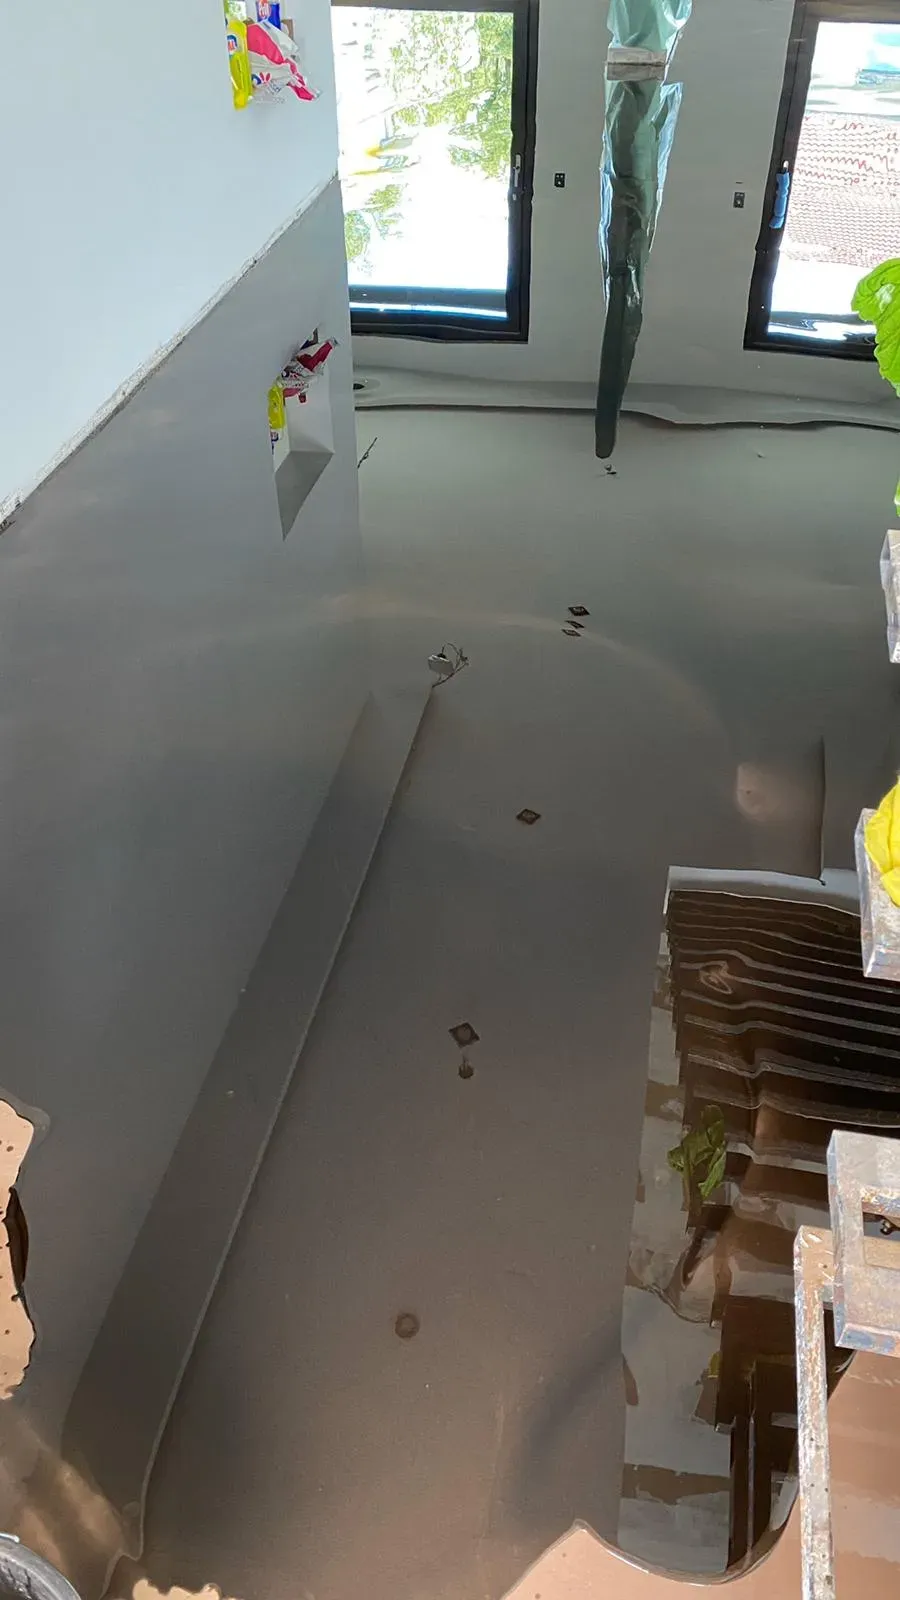
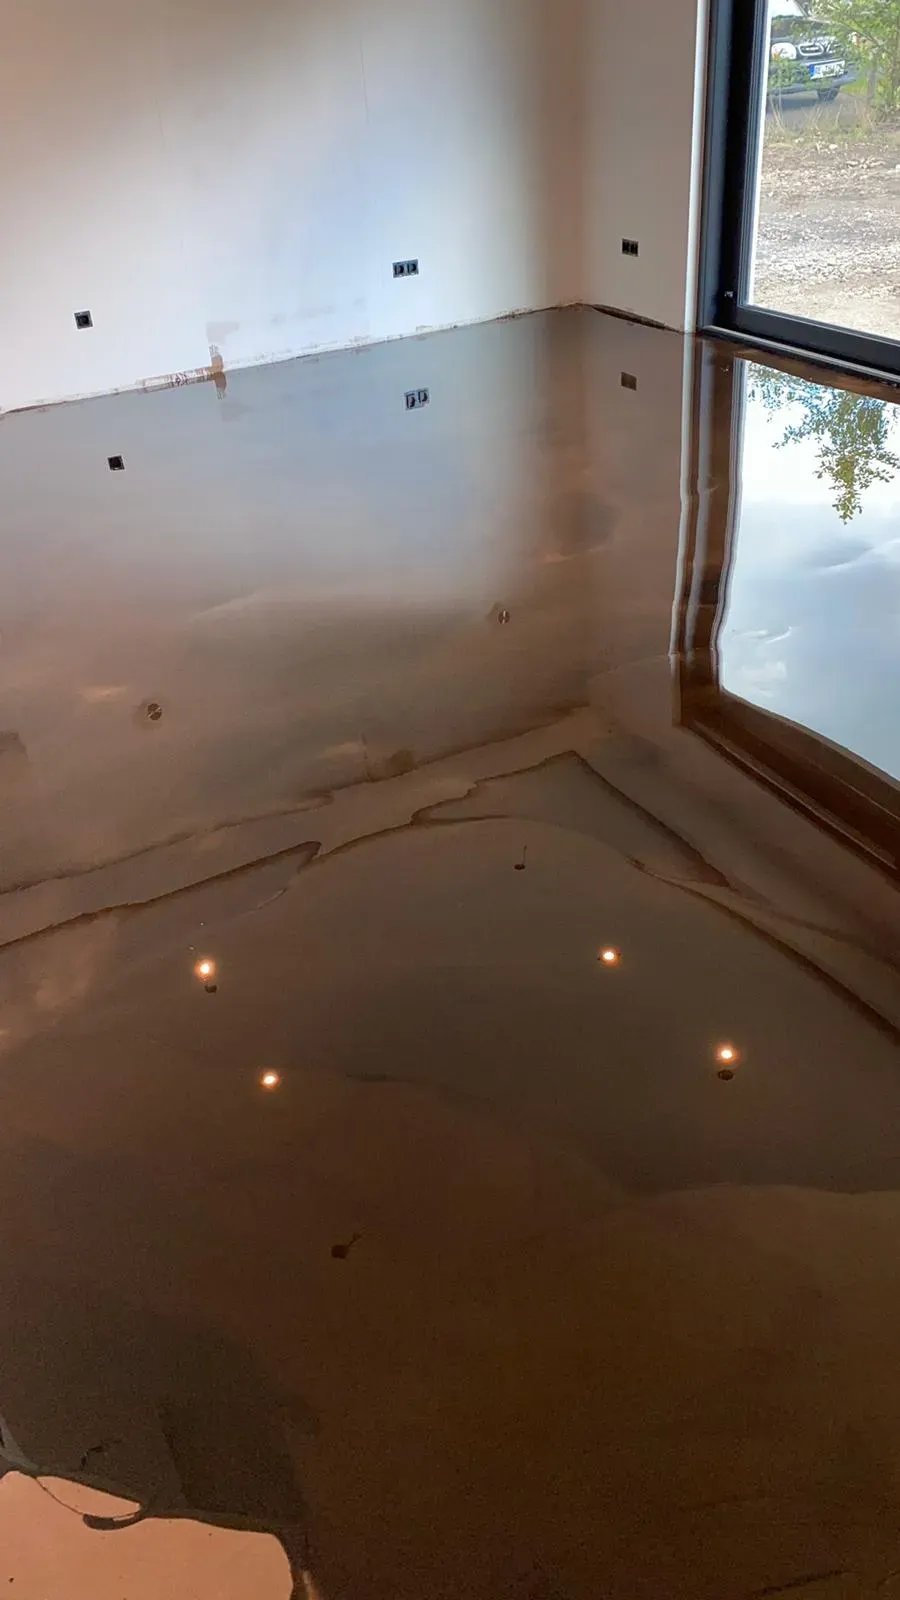
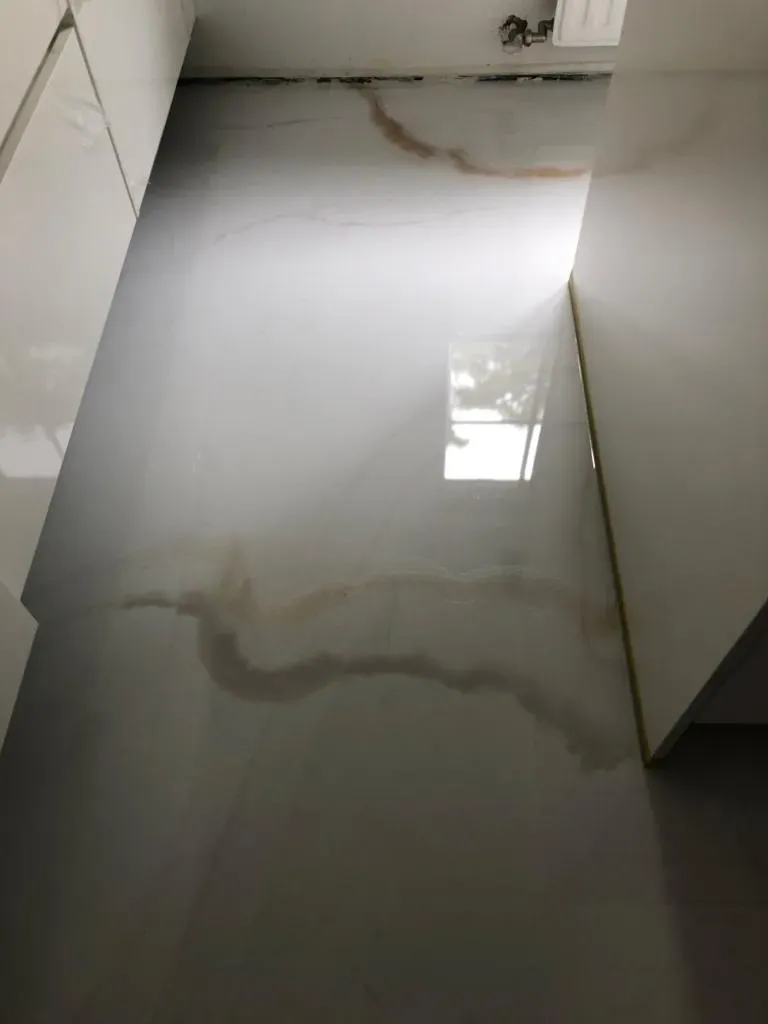
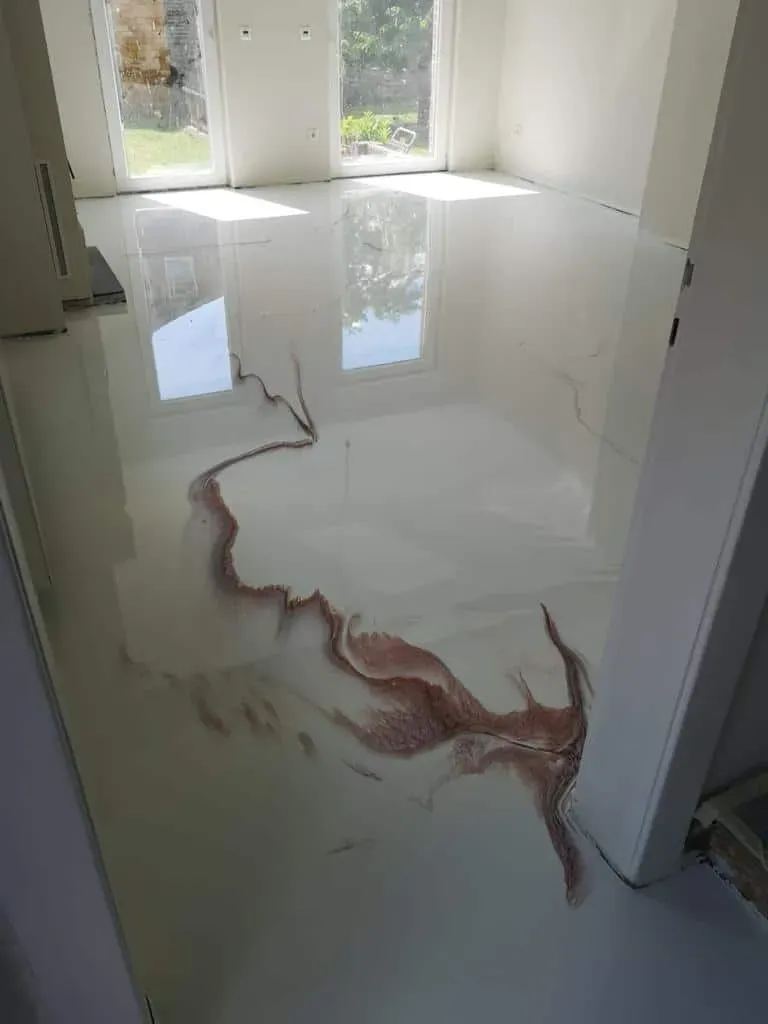
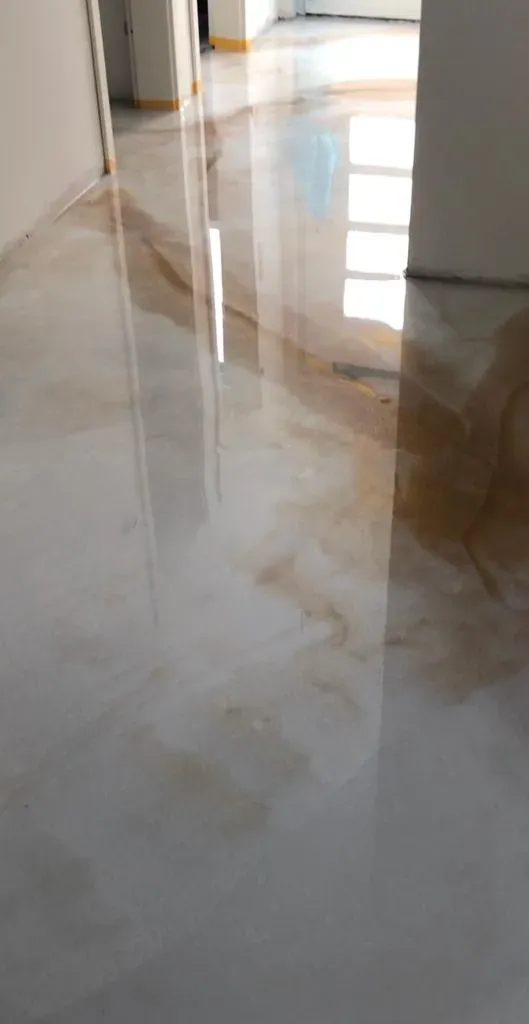
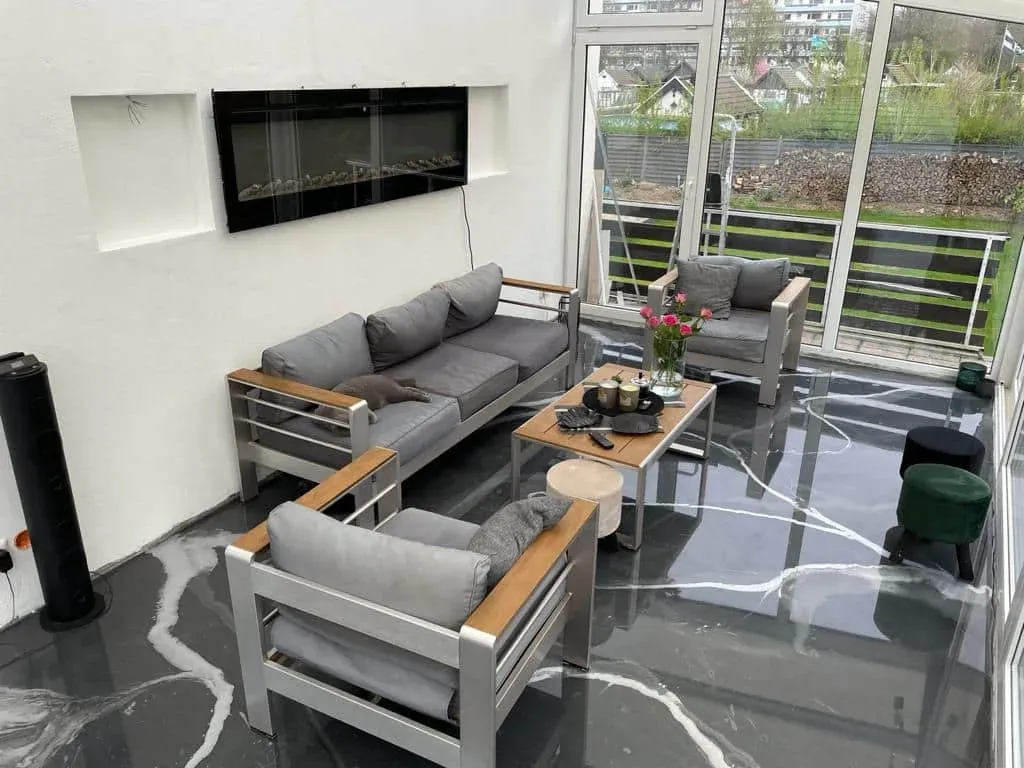
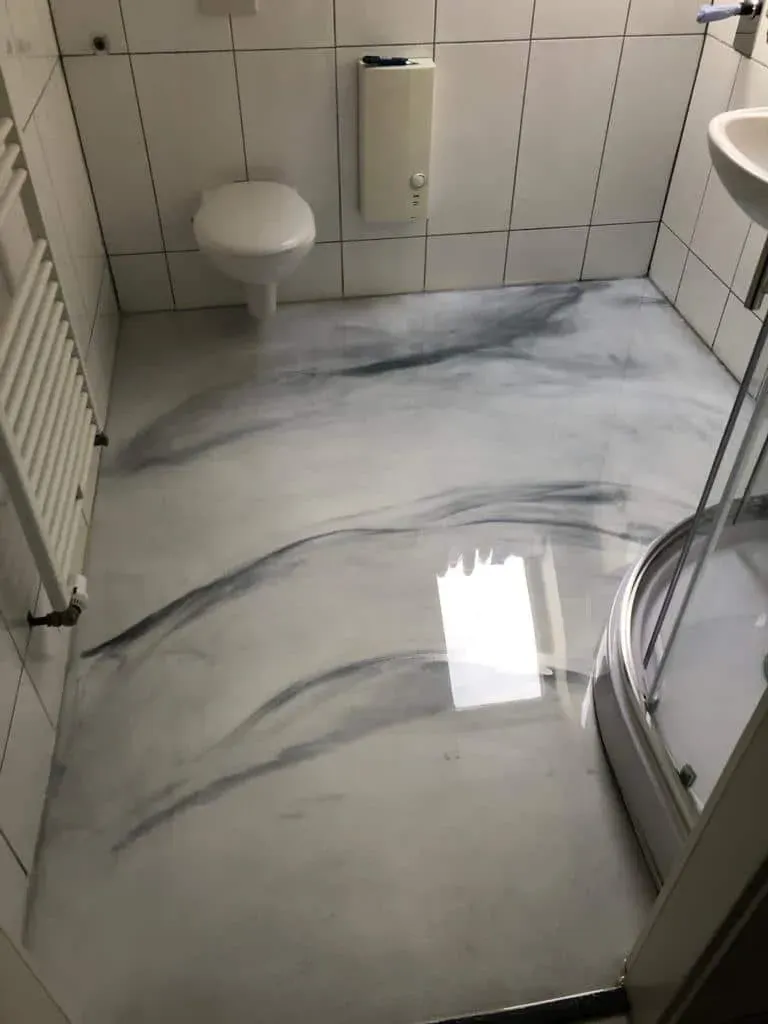
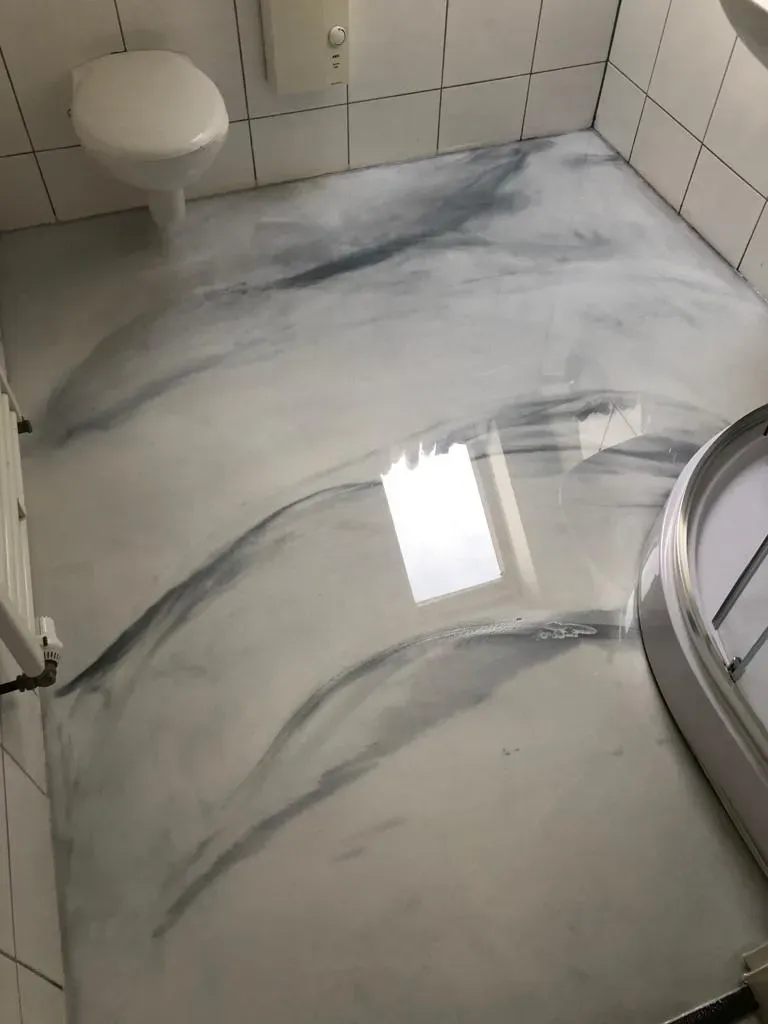
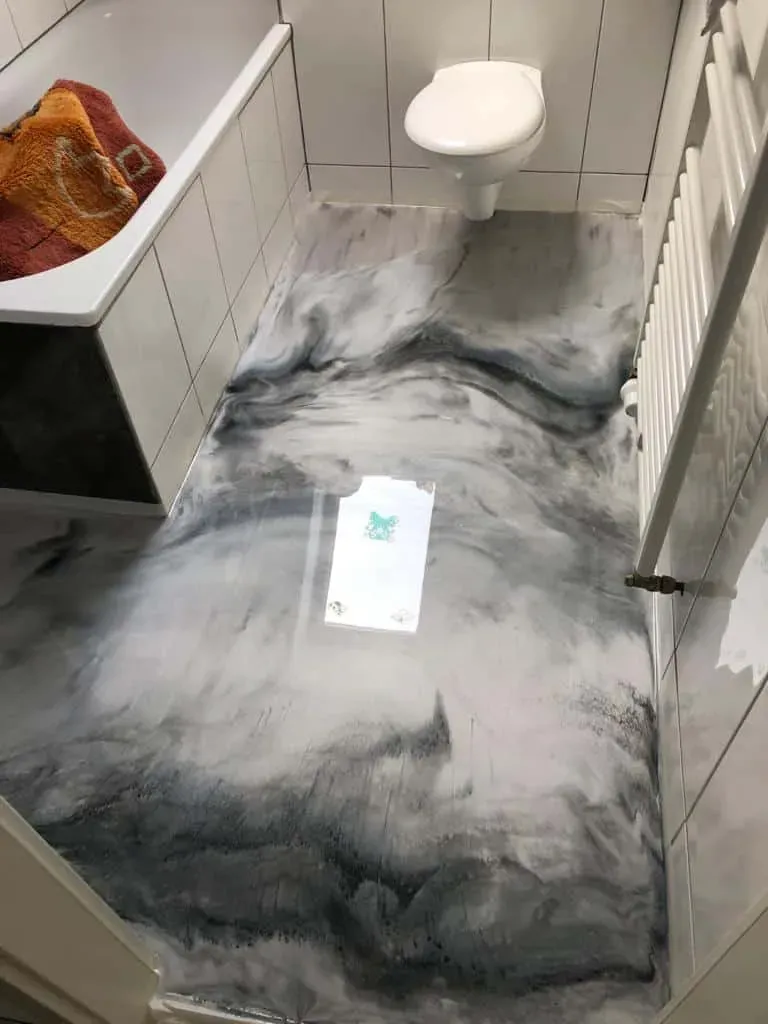
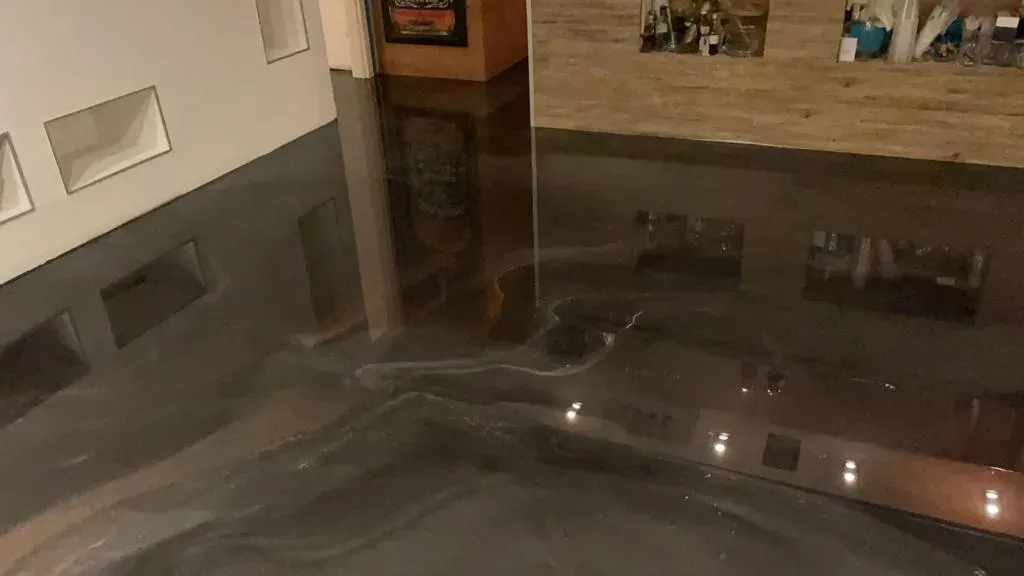
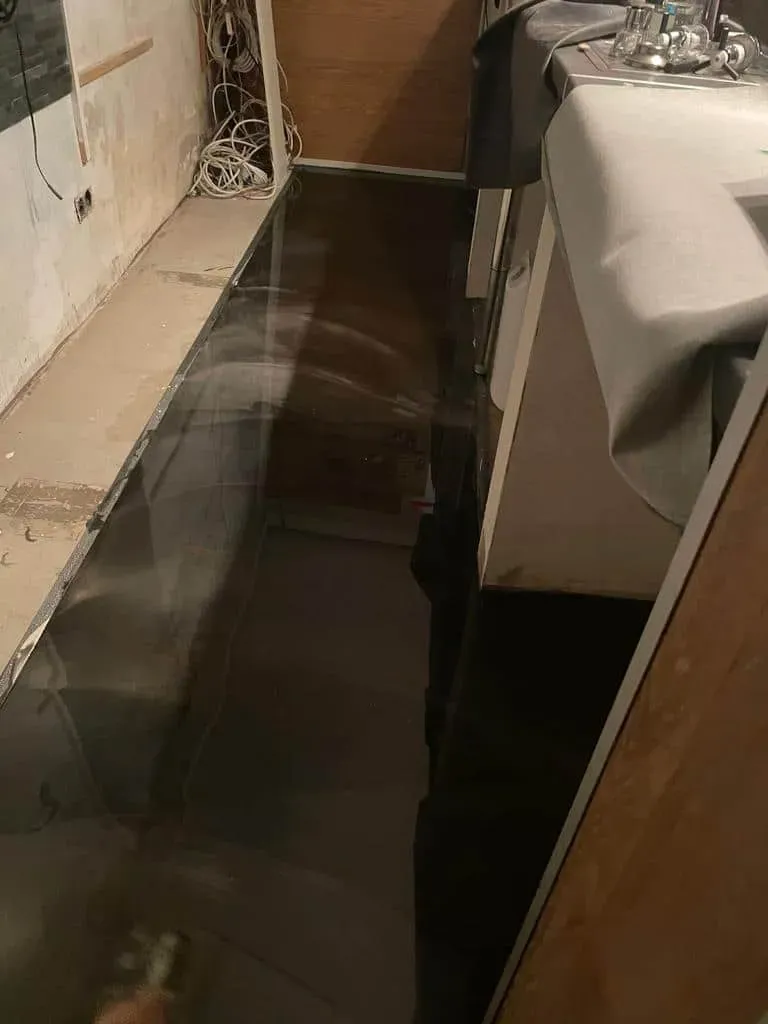
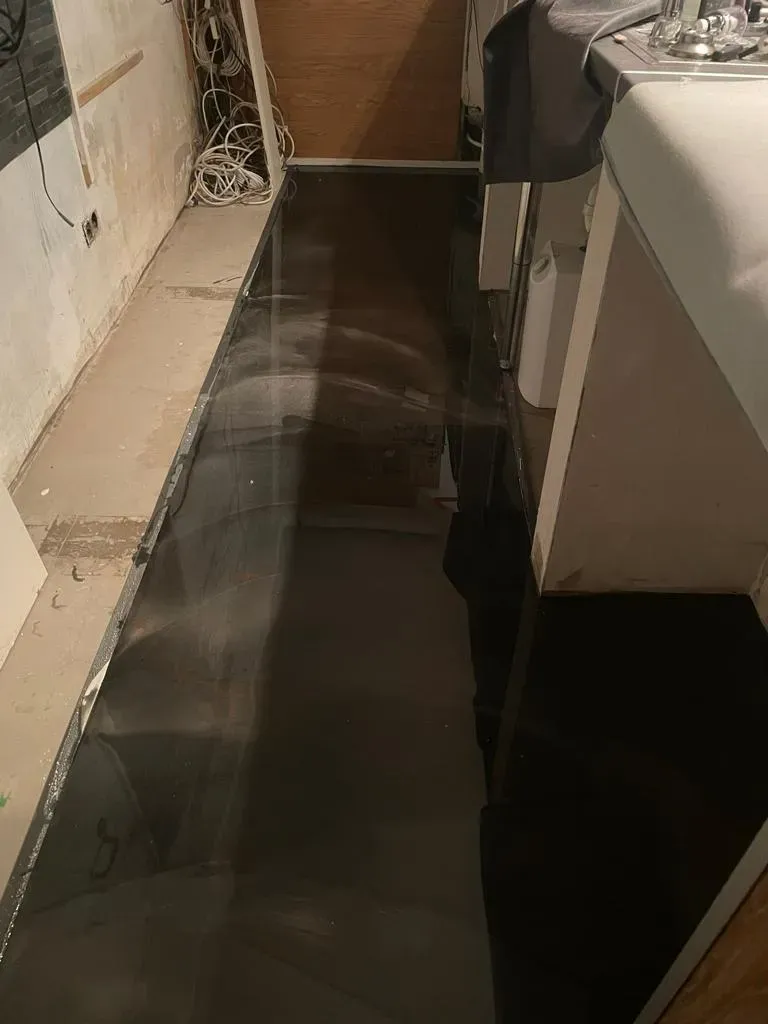
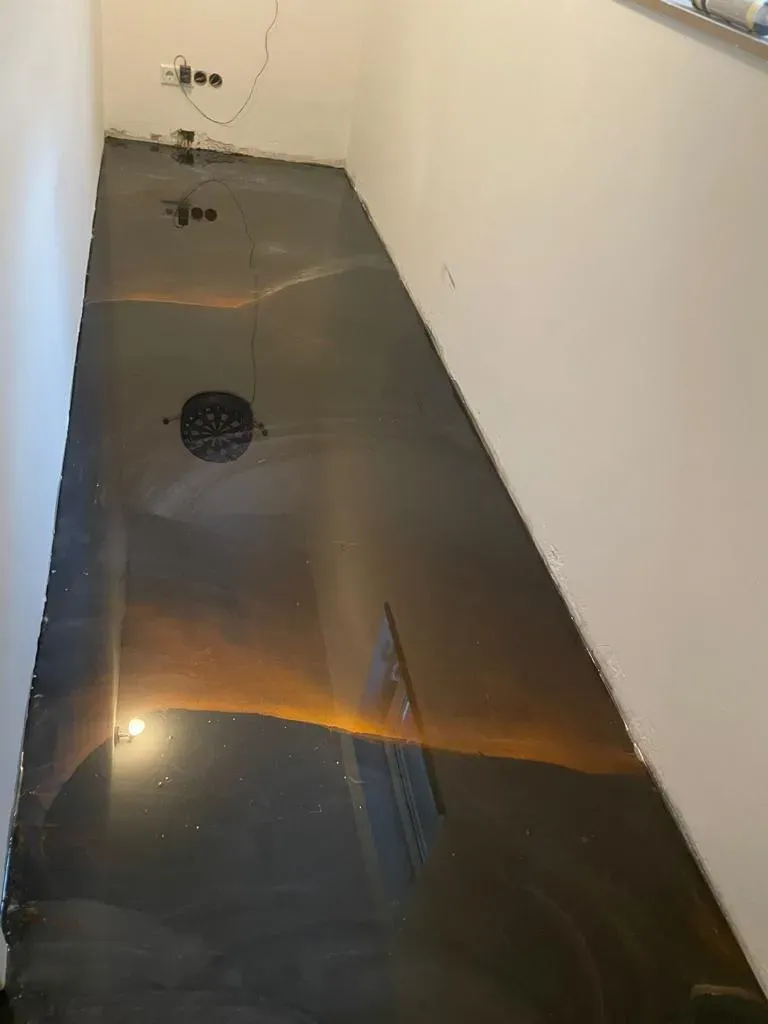
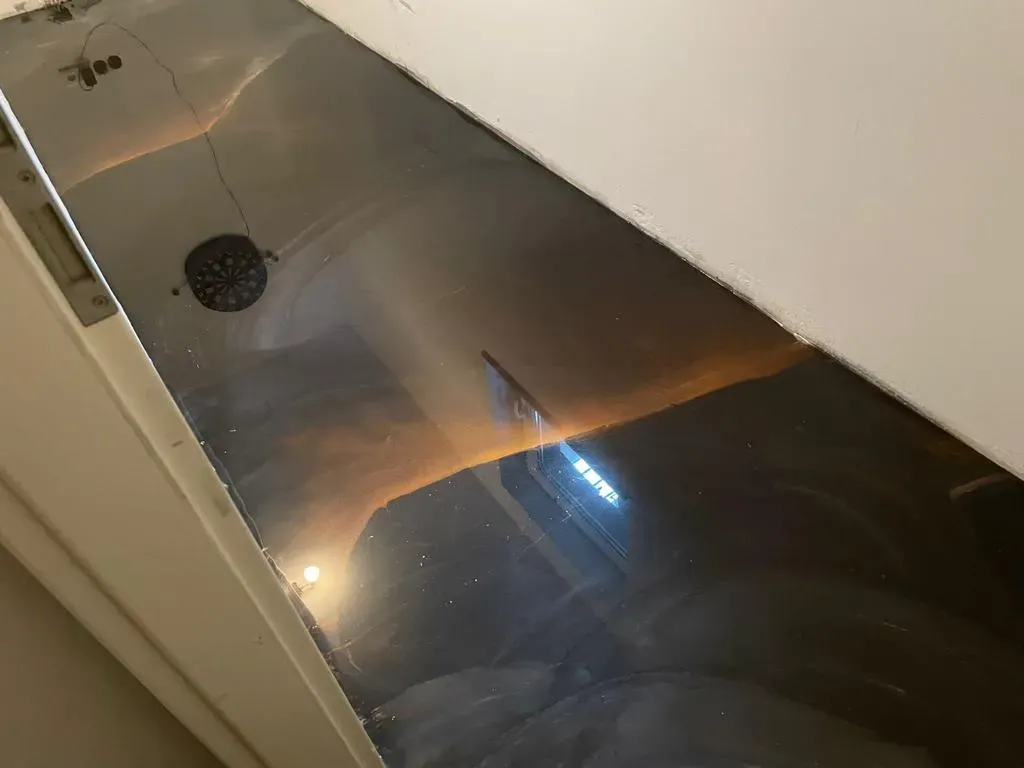
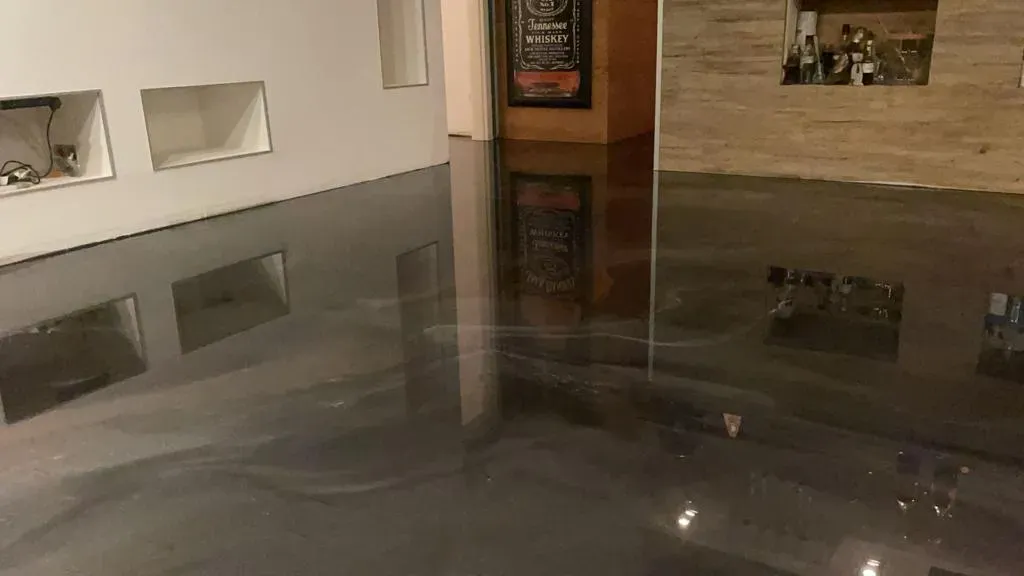
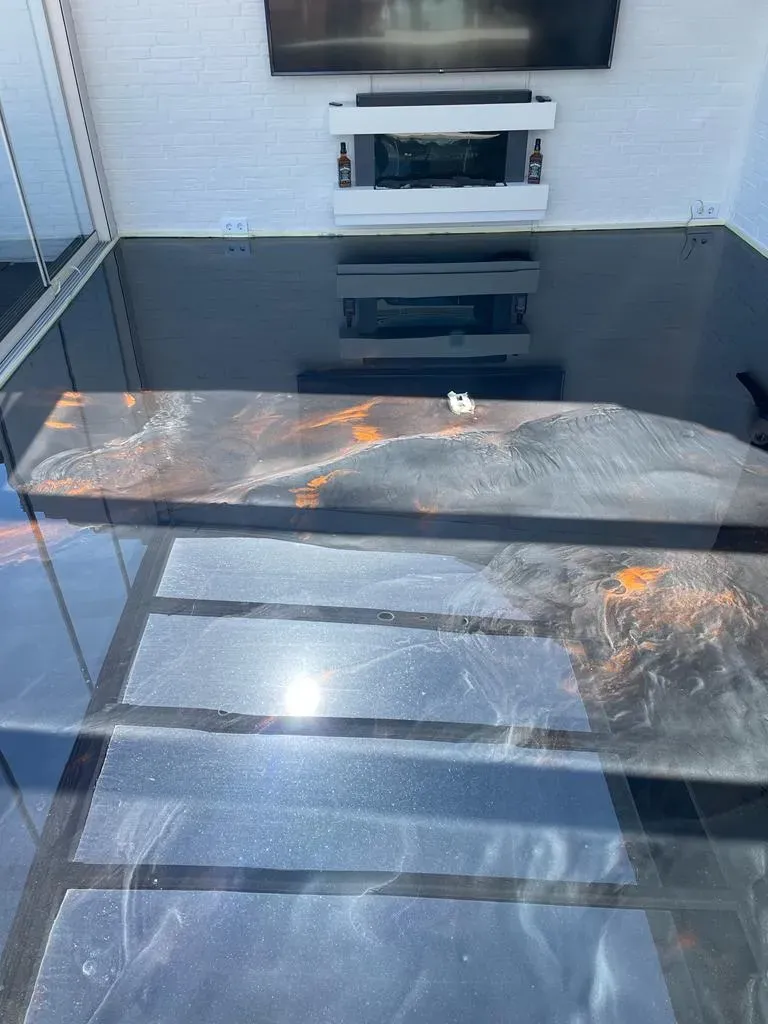
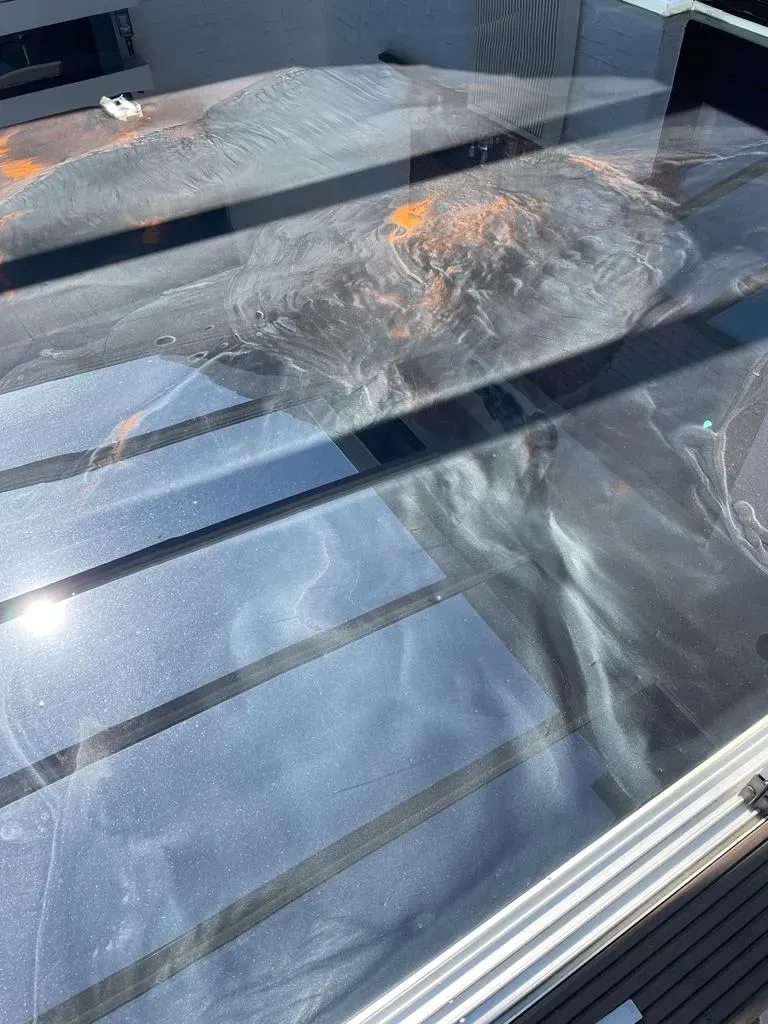
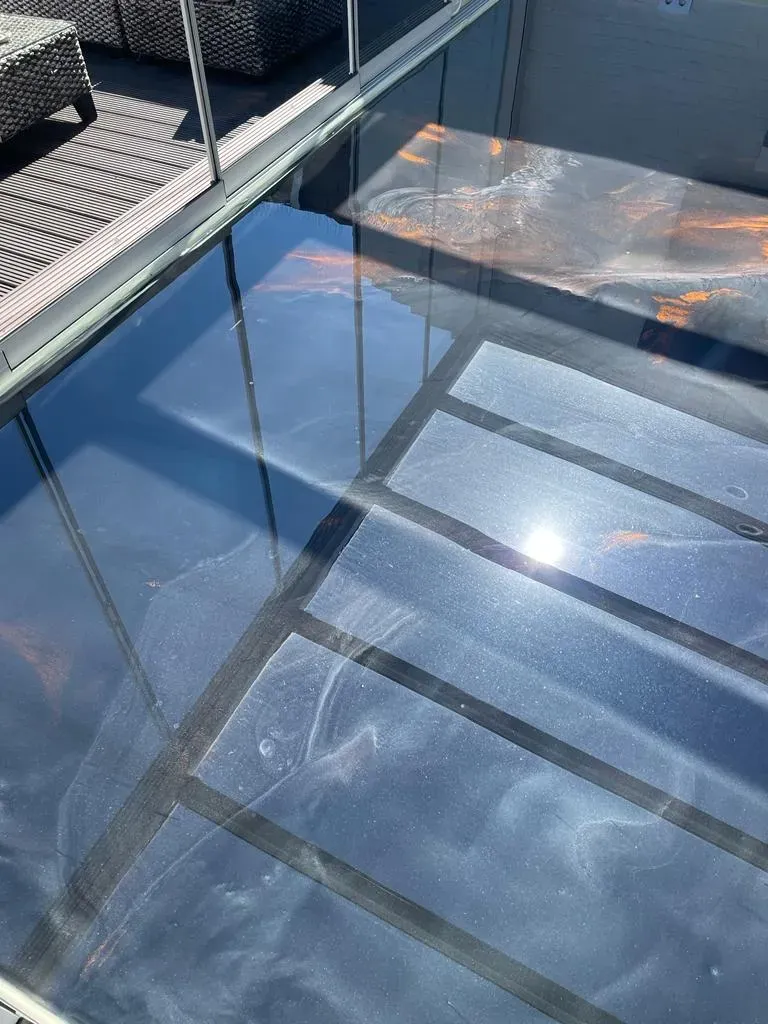
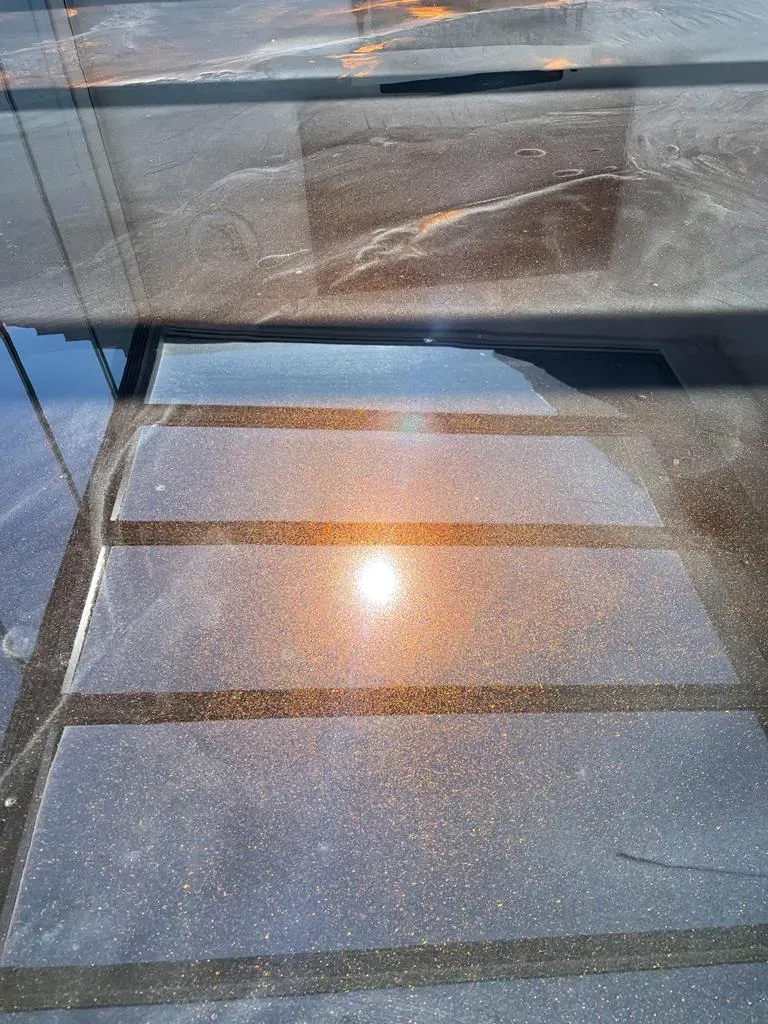
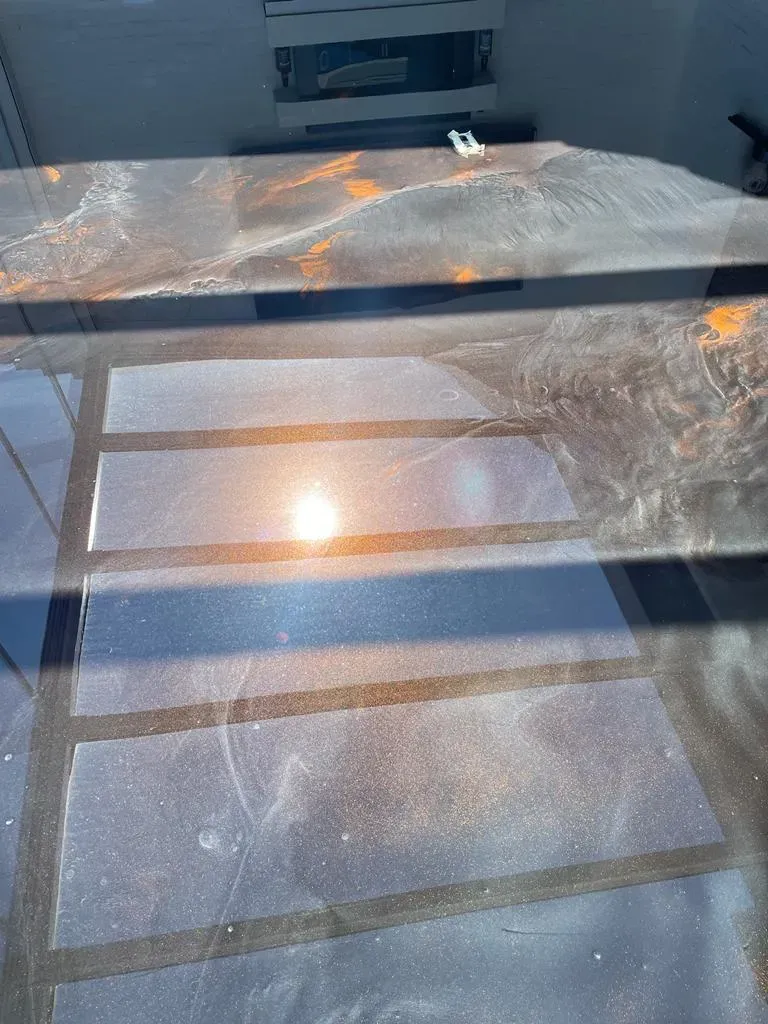
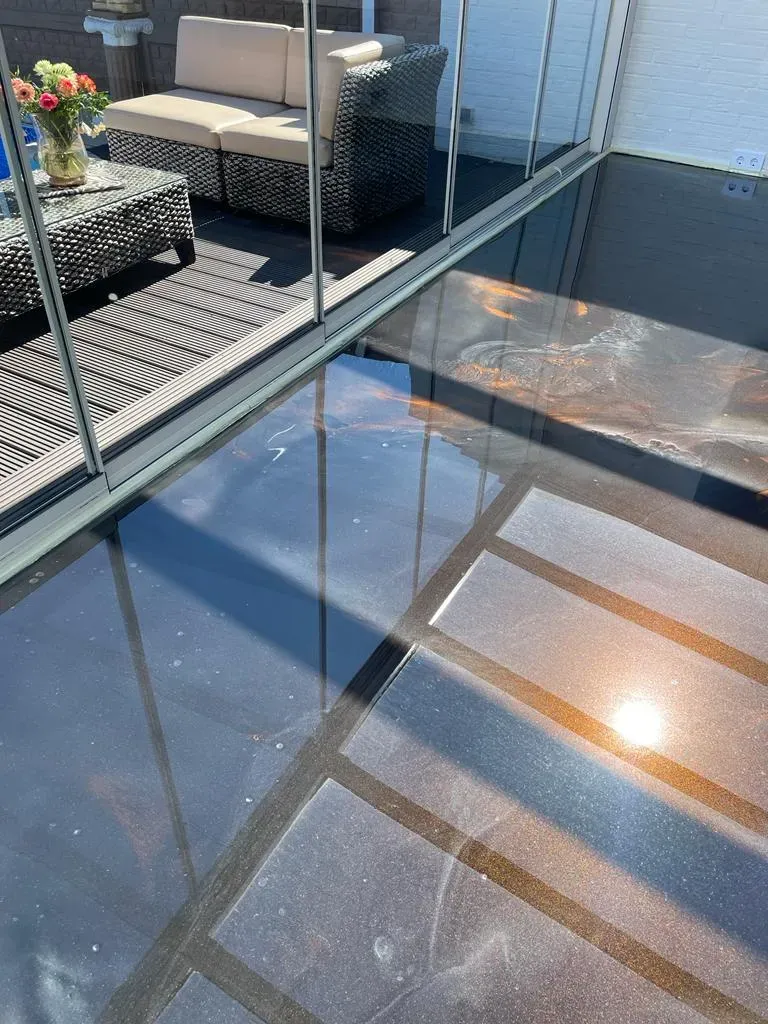
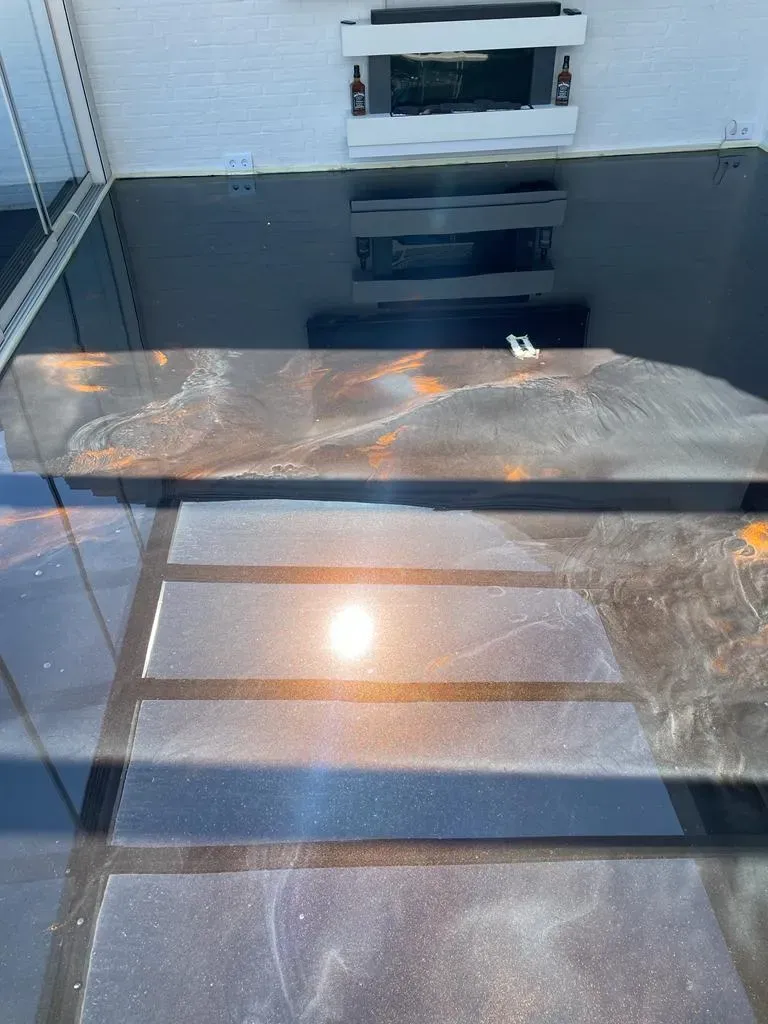
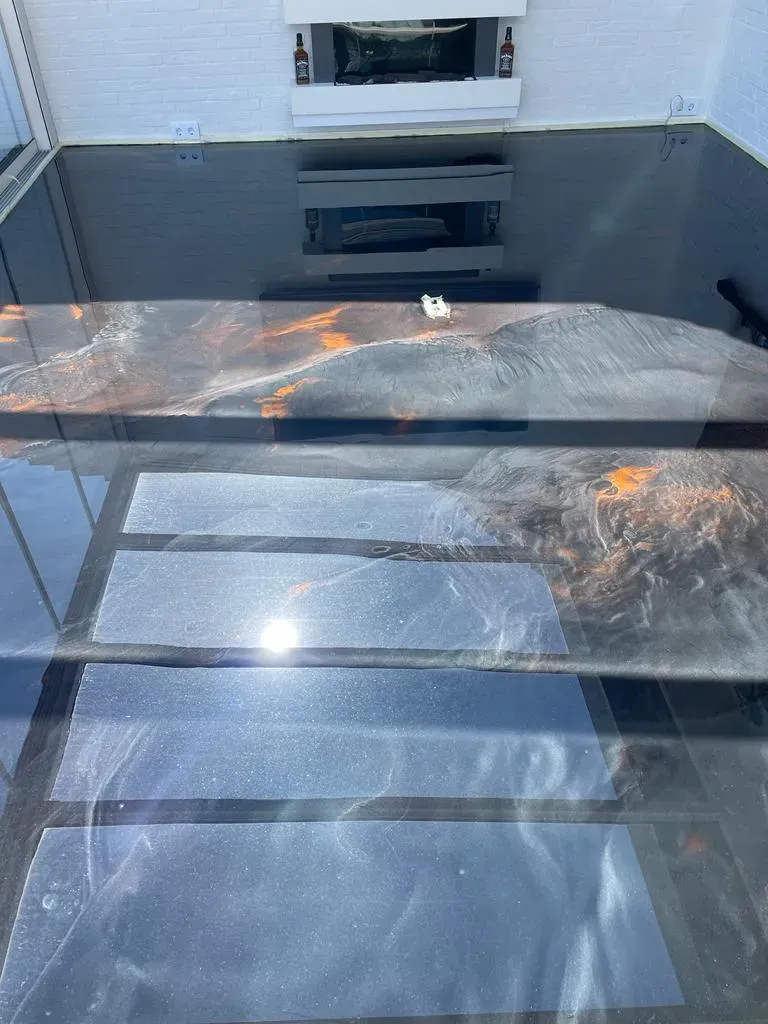
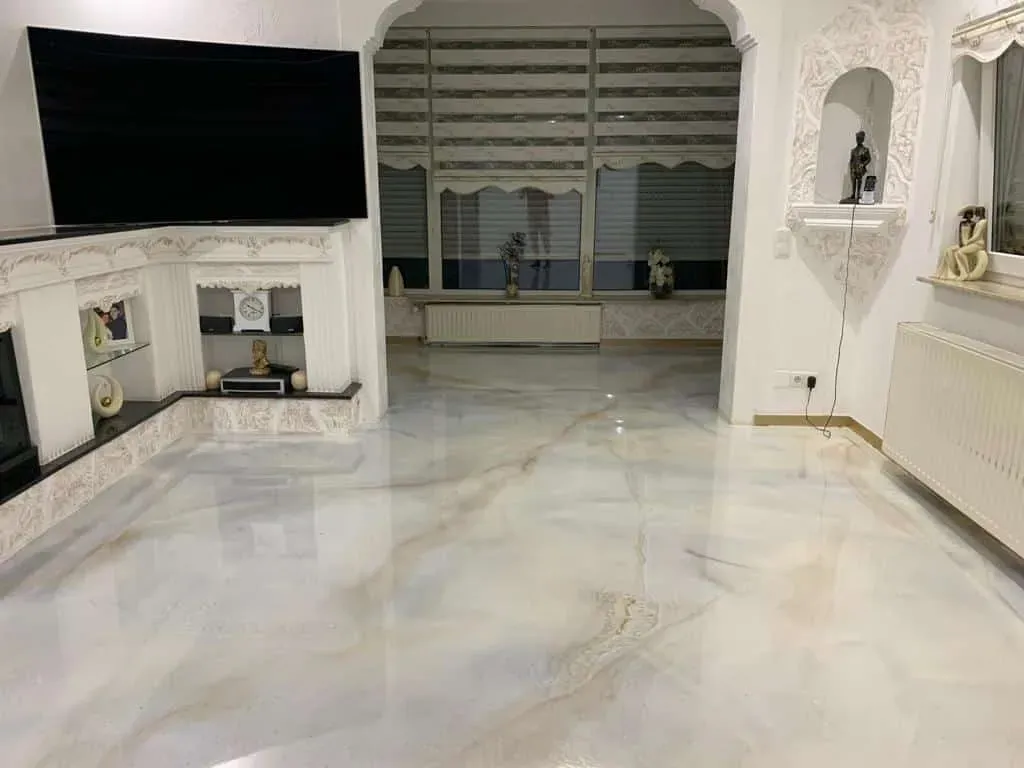
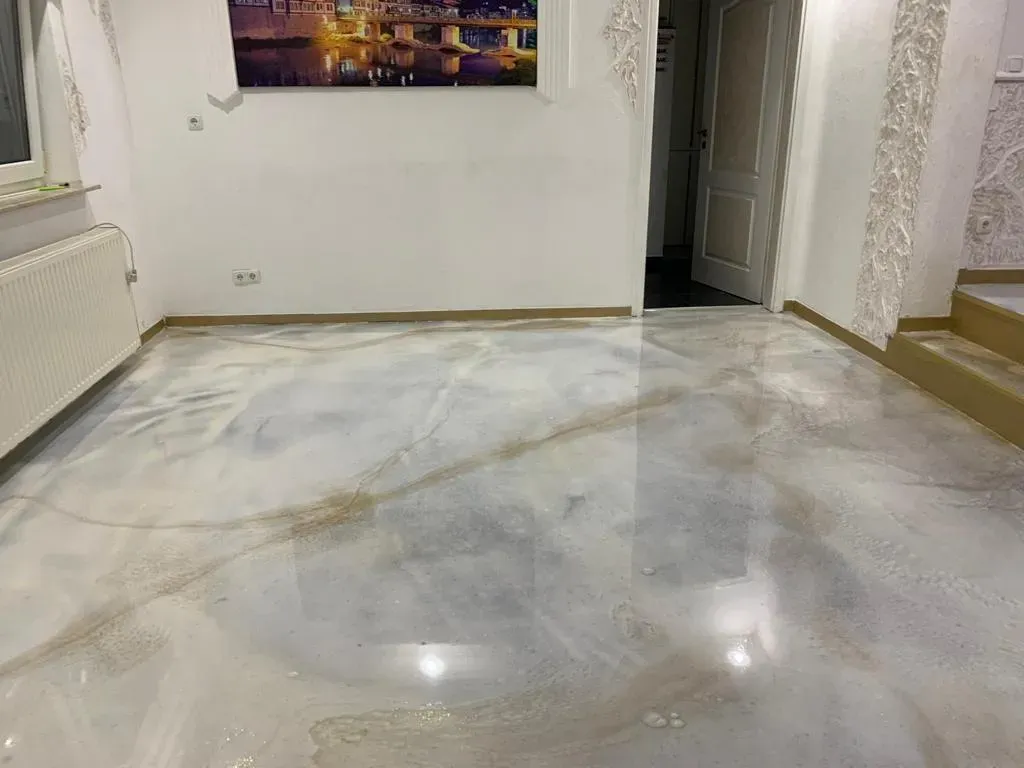
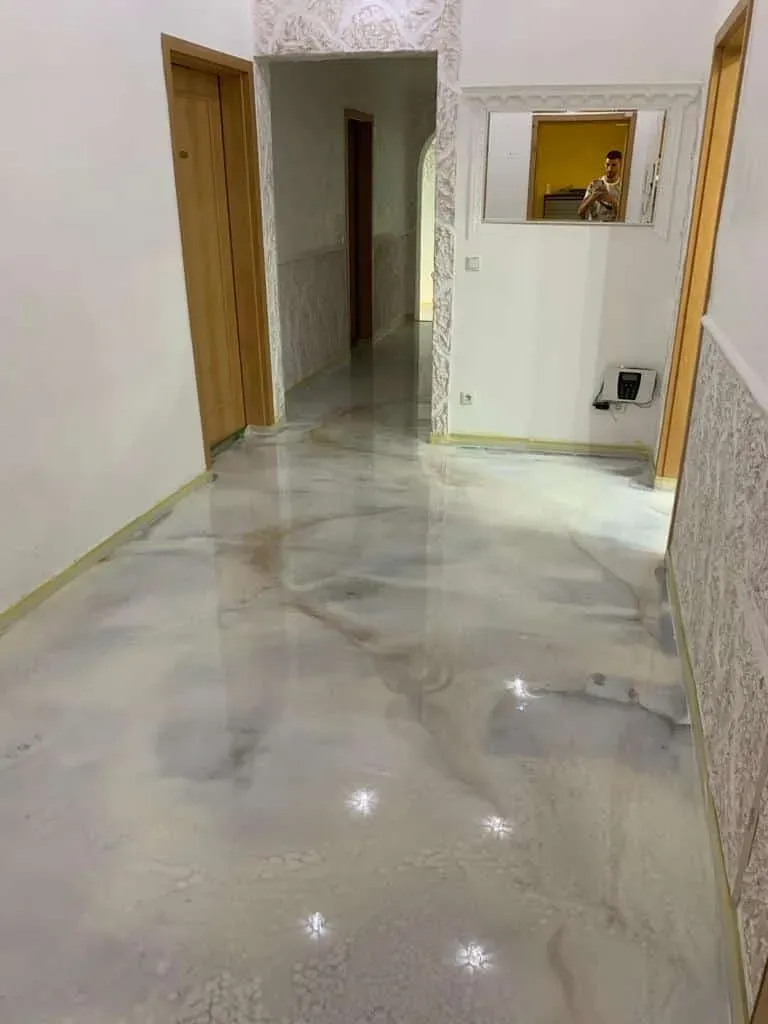
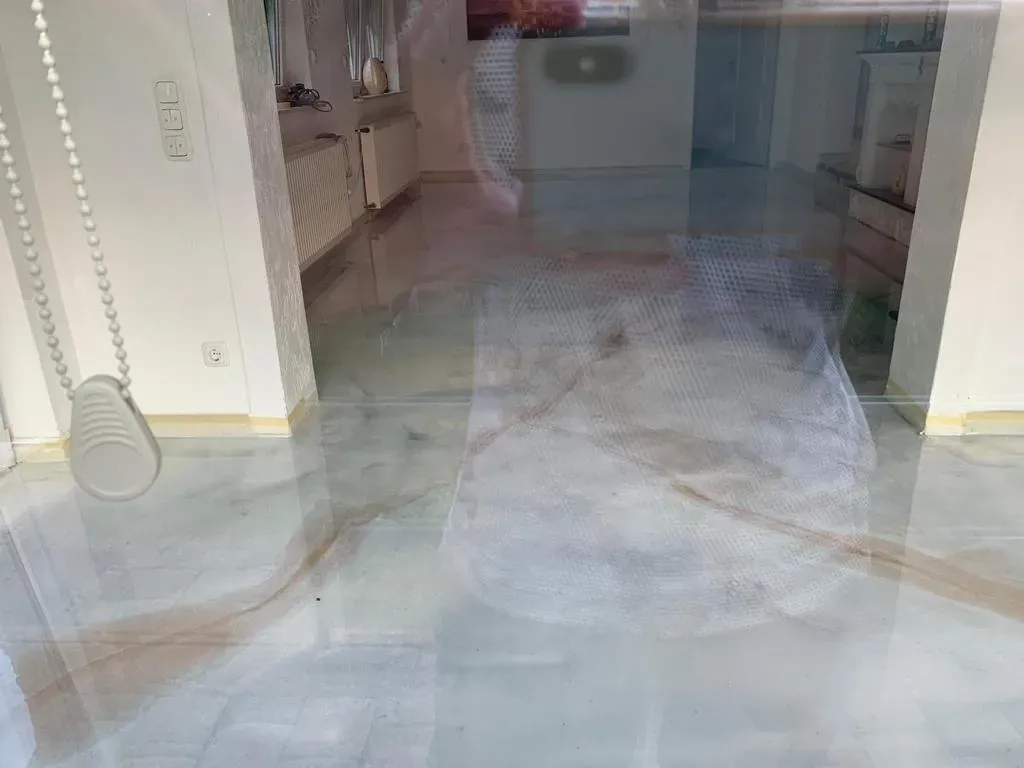
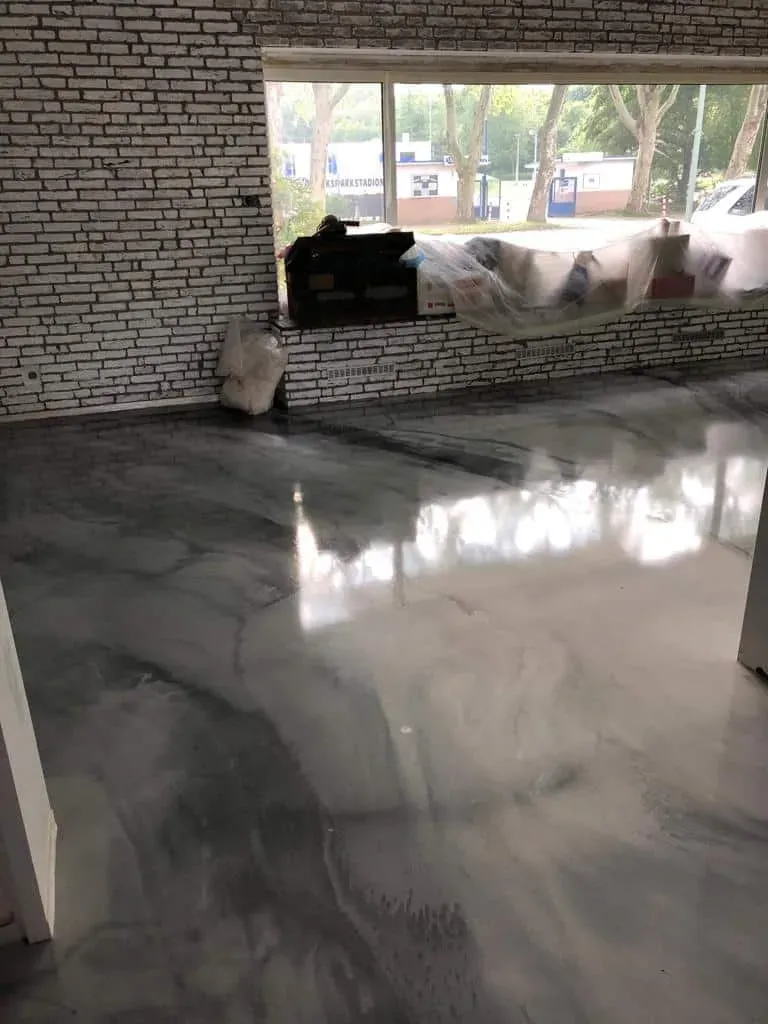
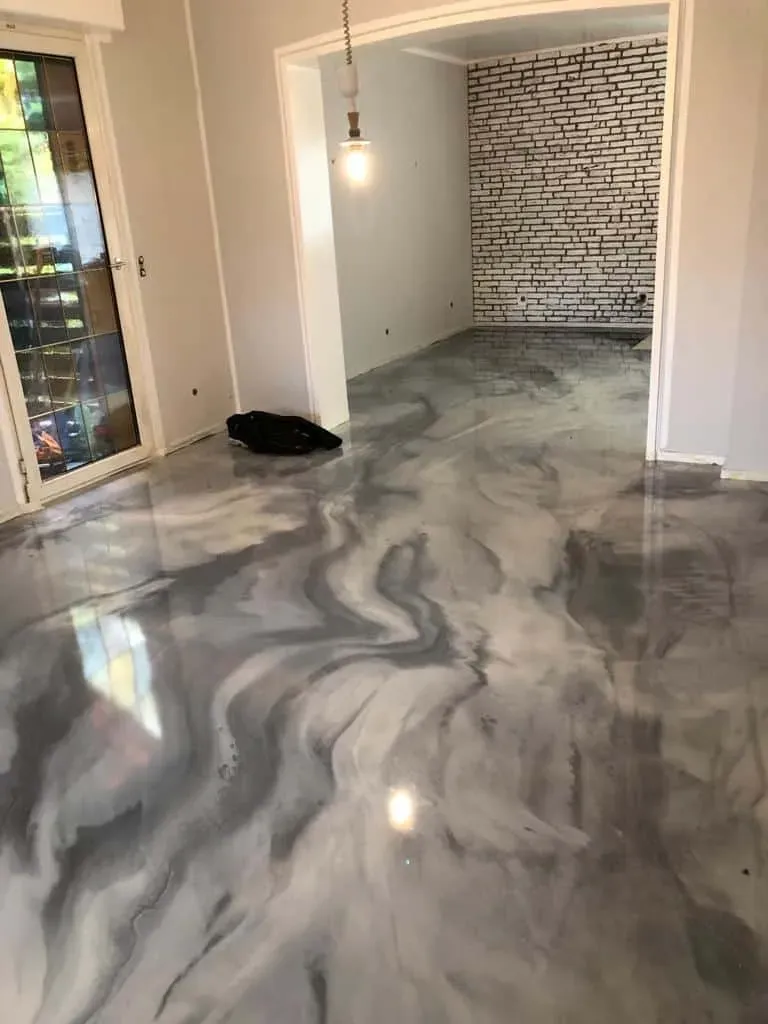
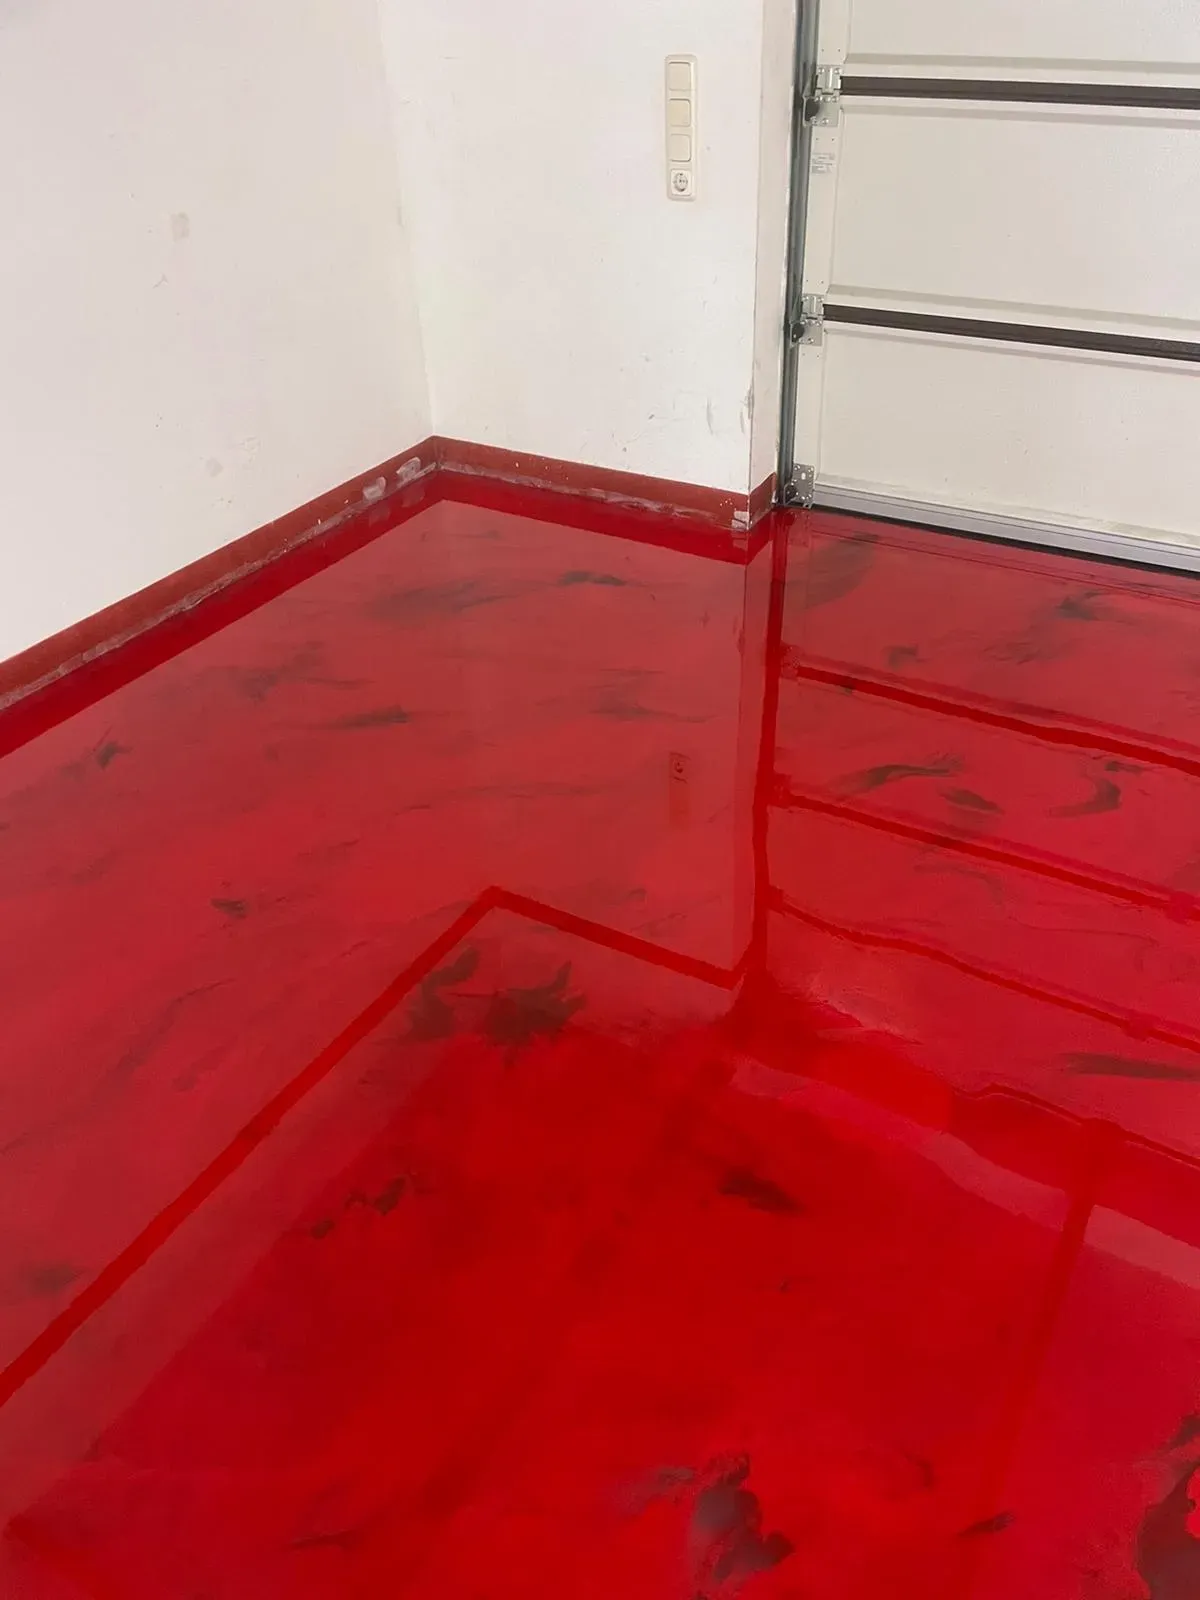
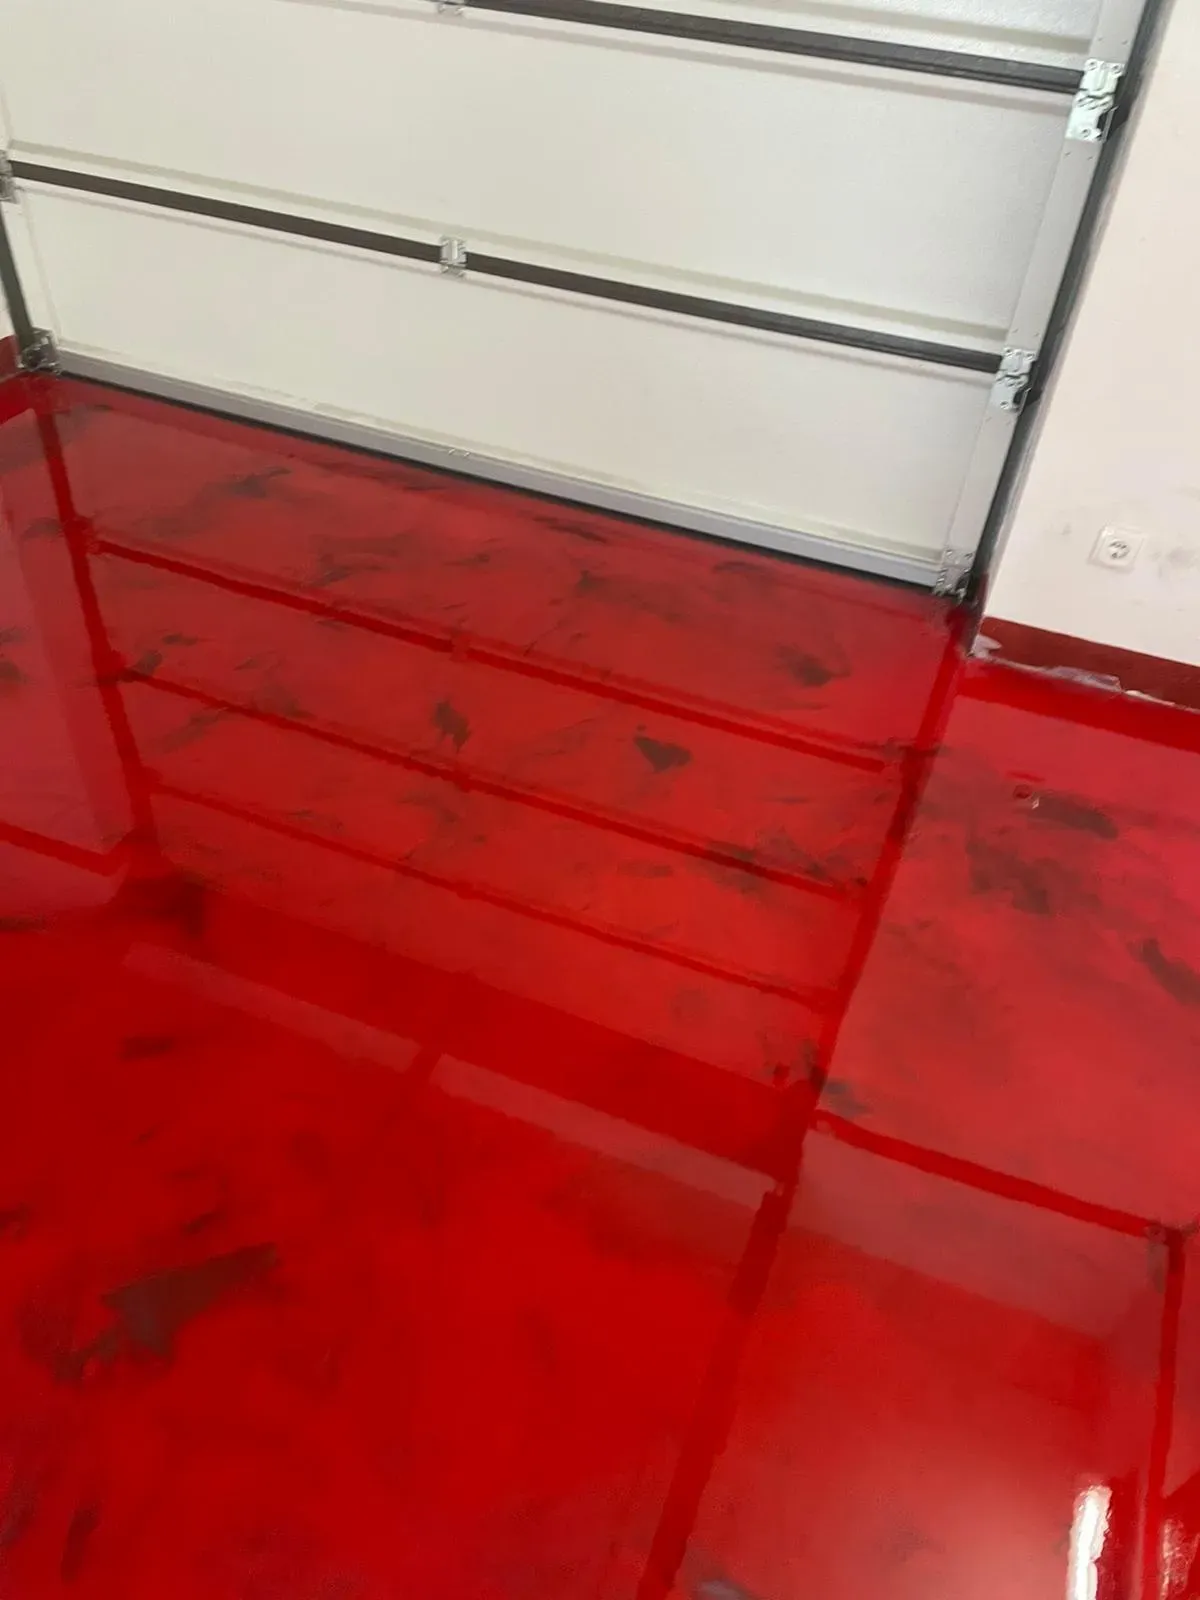
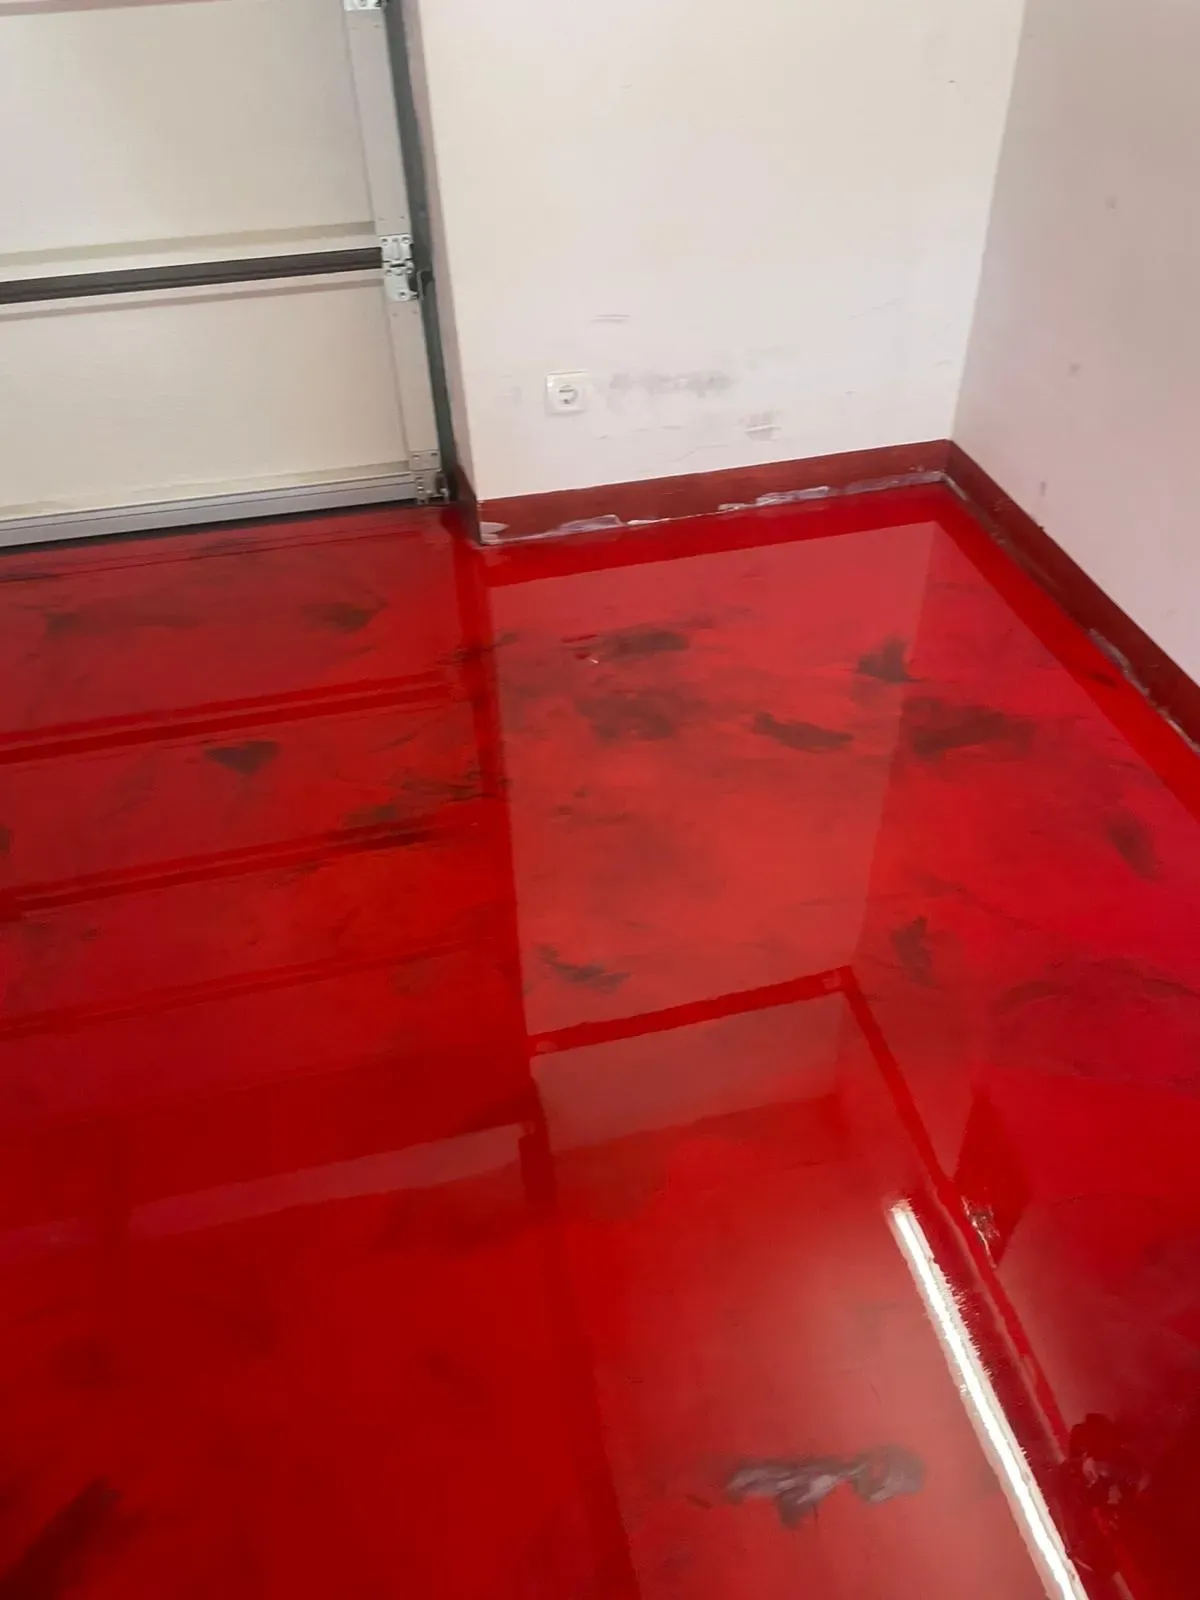
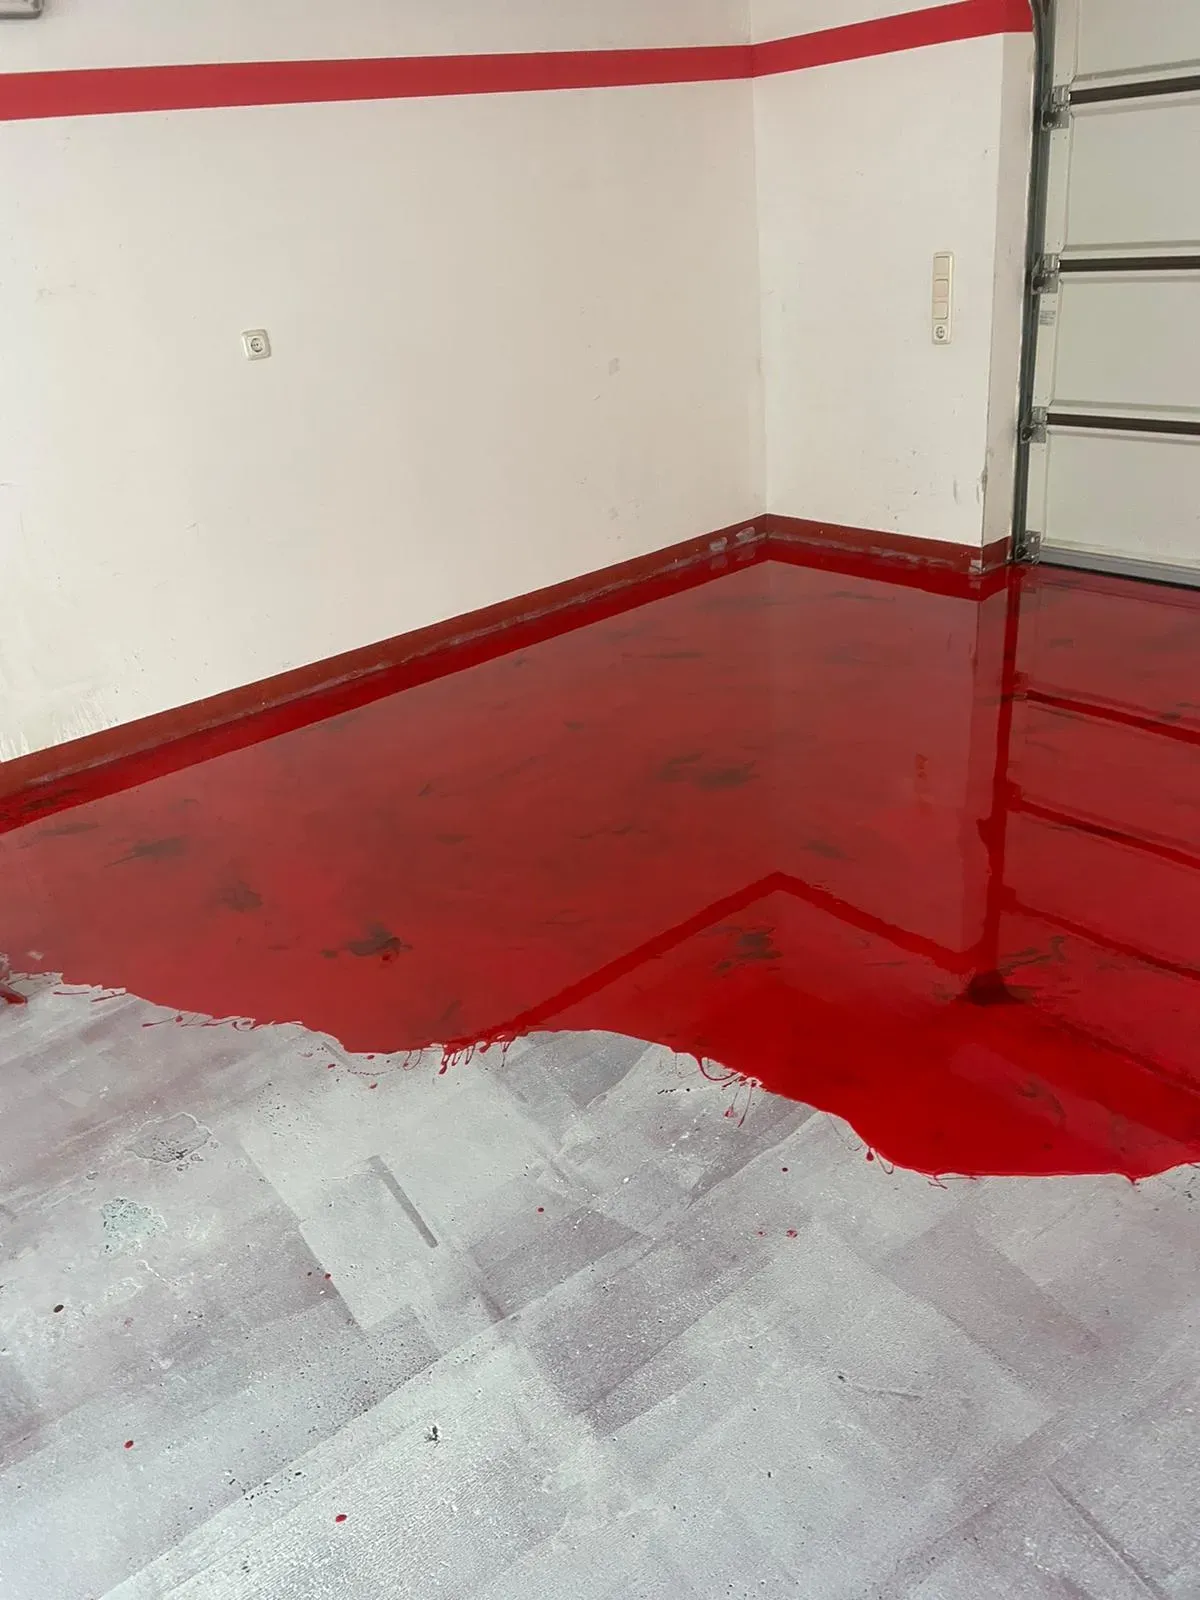
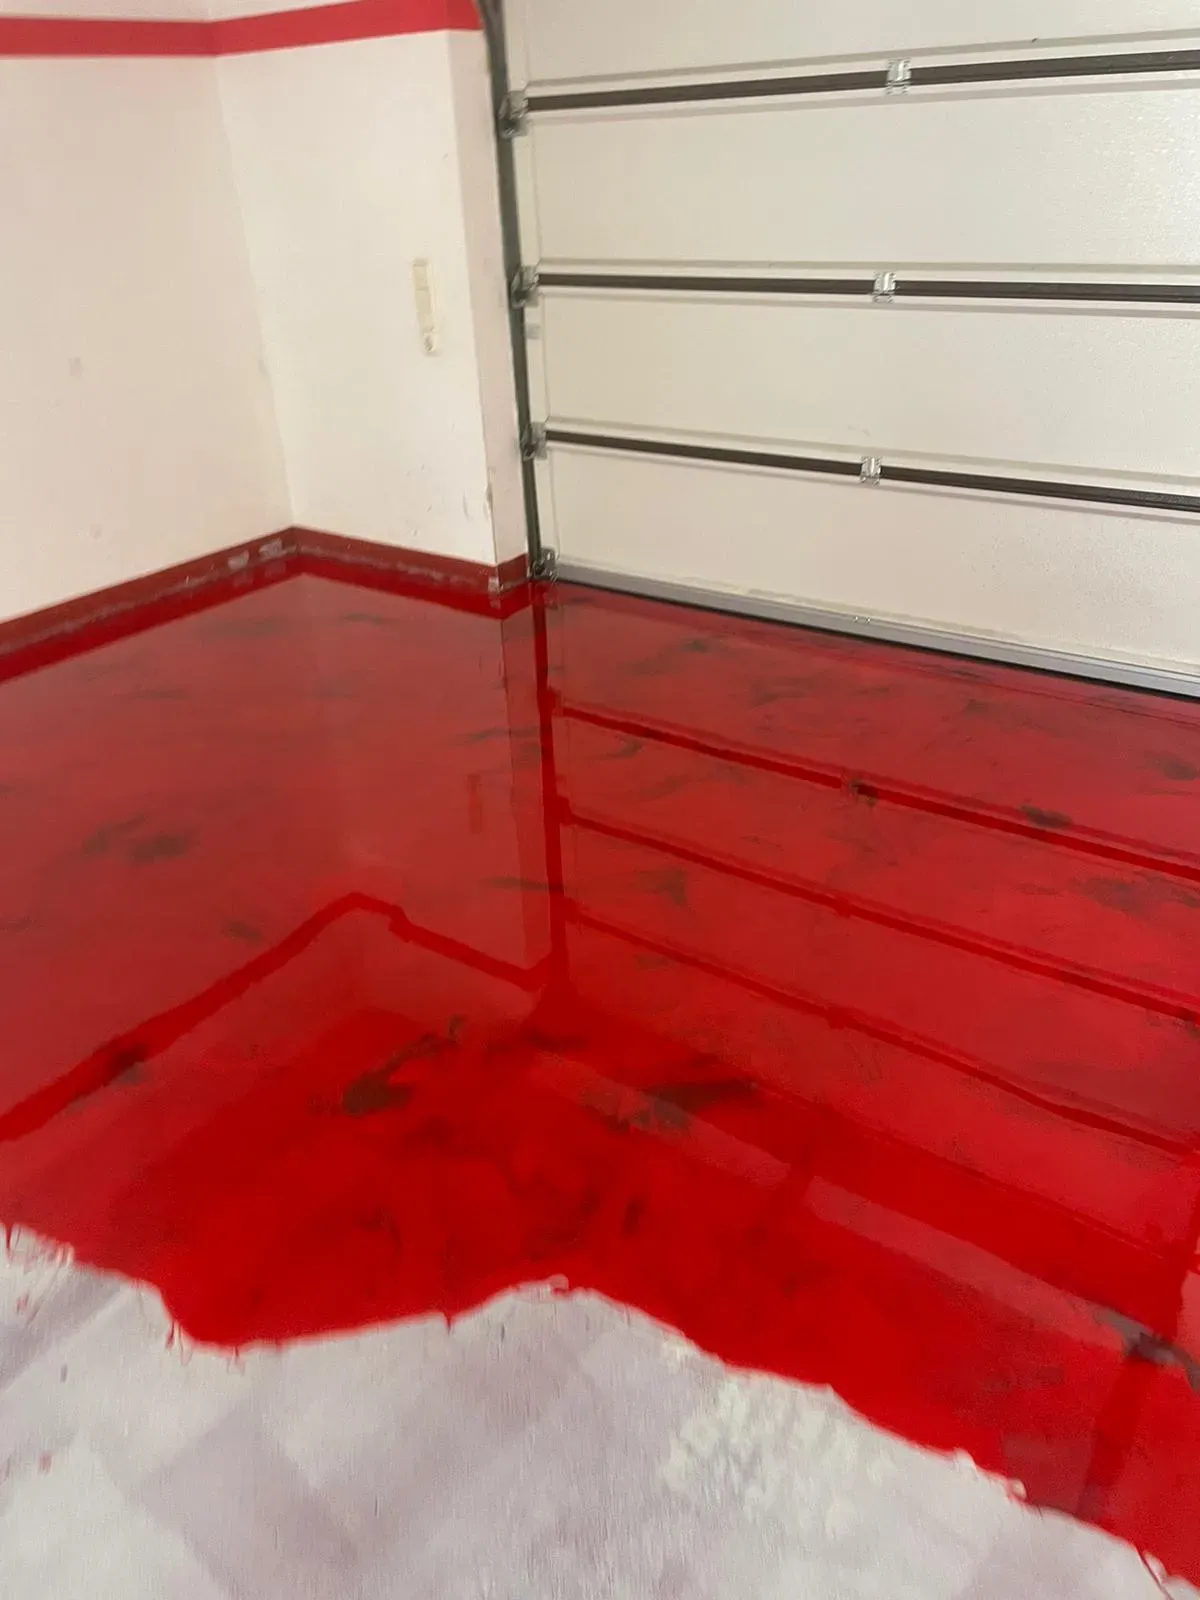
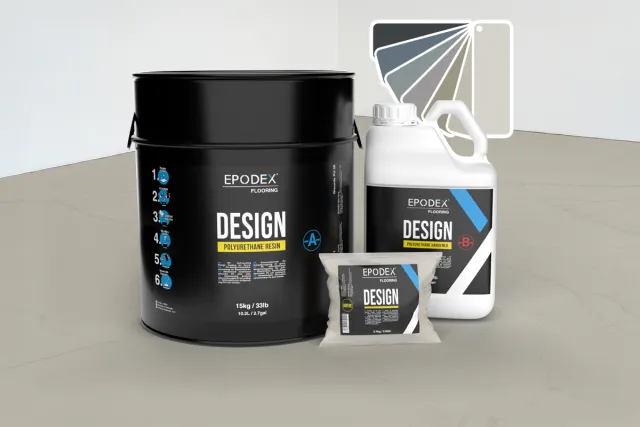
EP Design - 2K Epoxy Resin Flooring for Pouring and Spreading
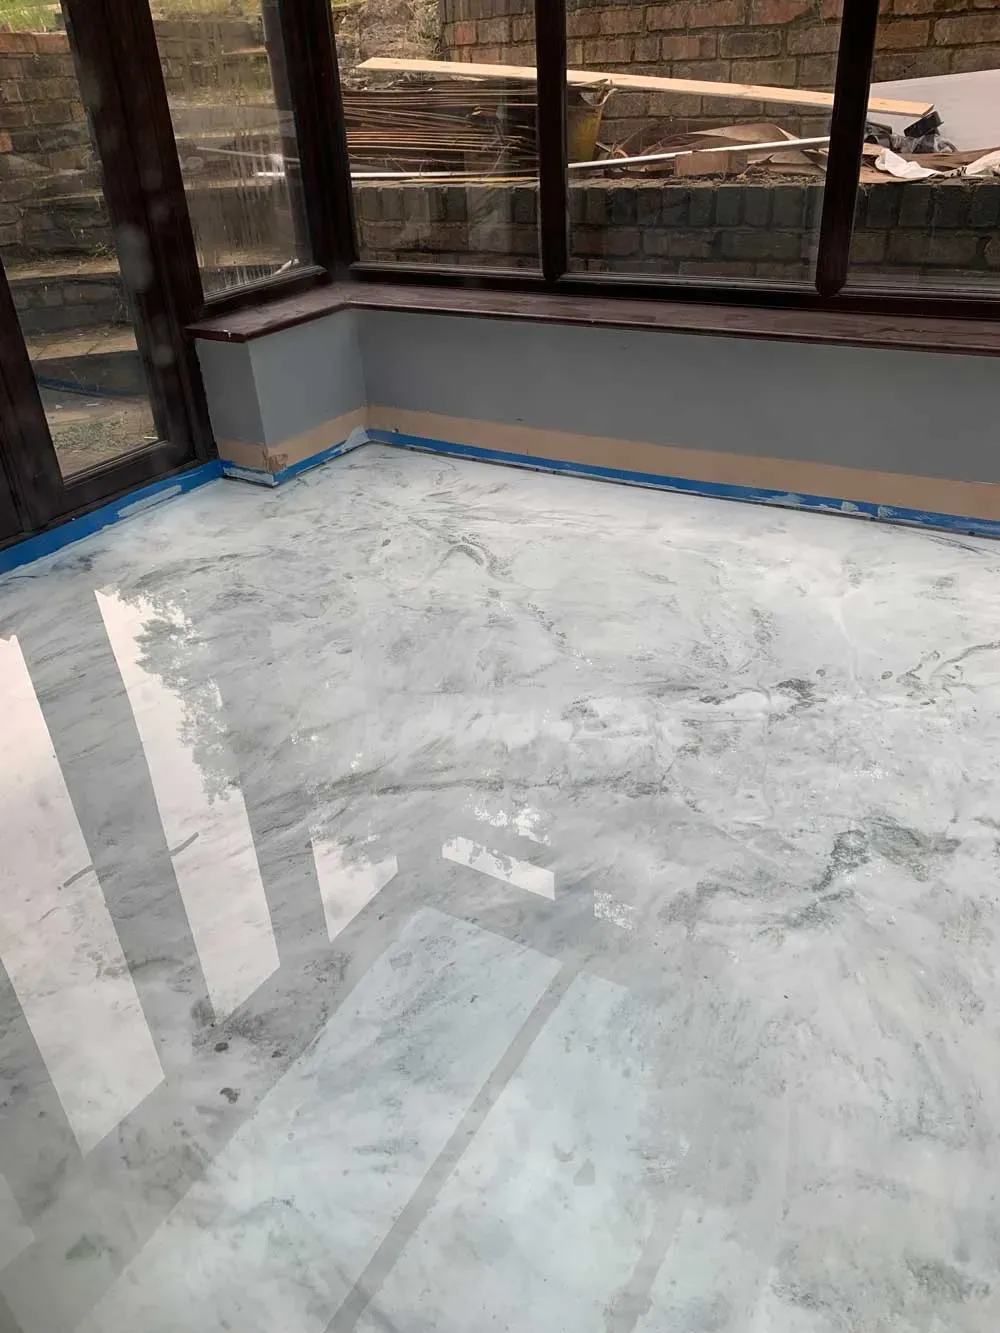
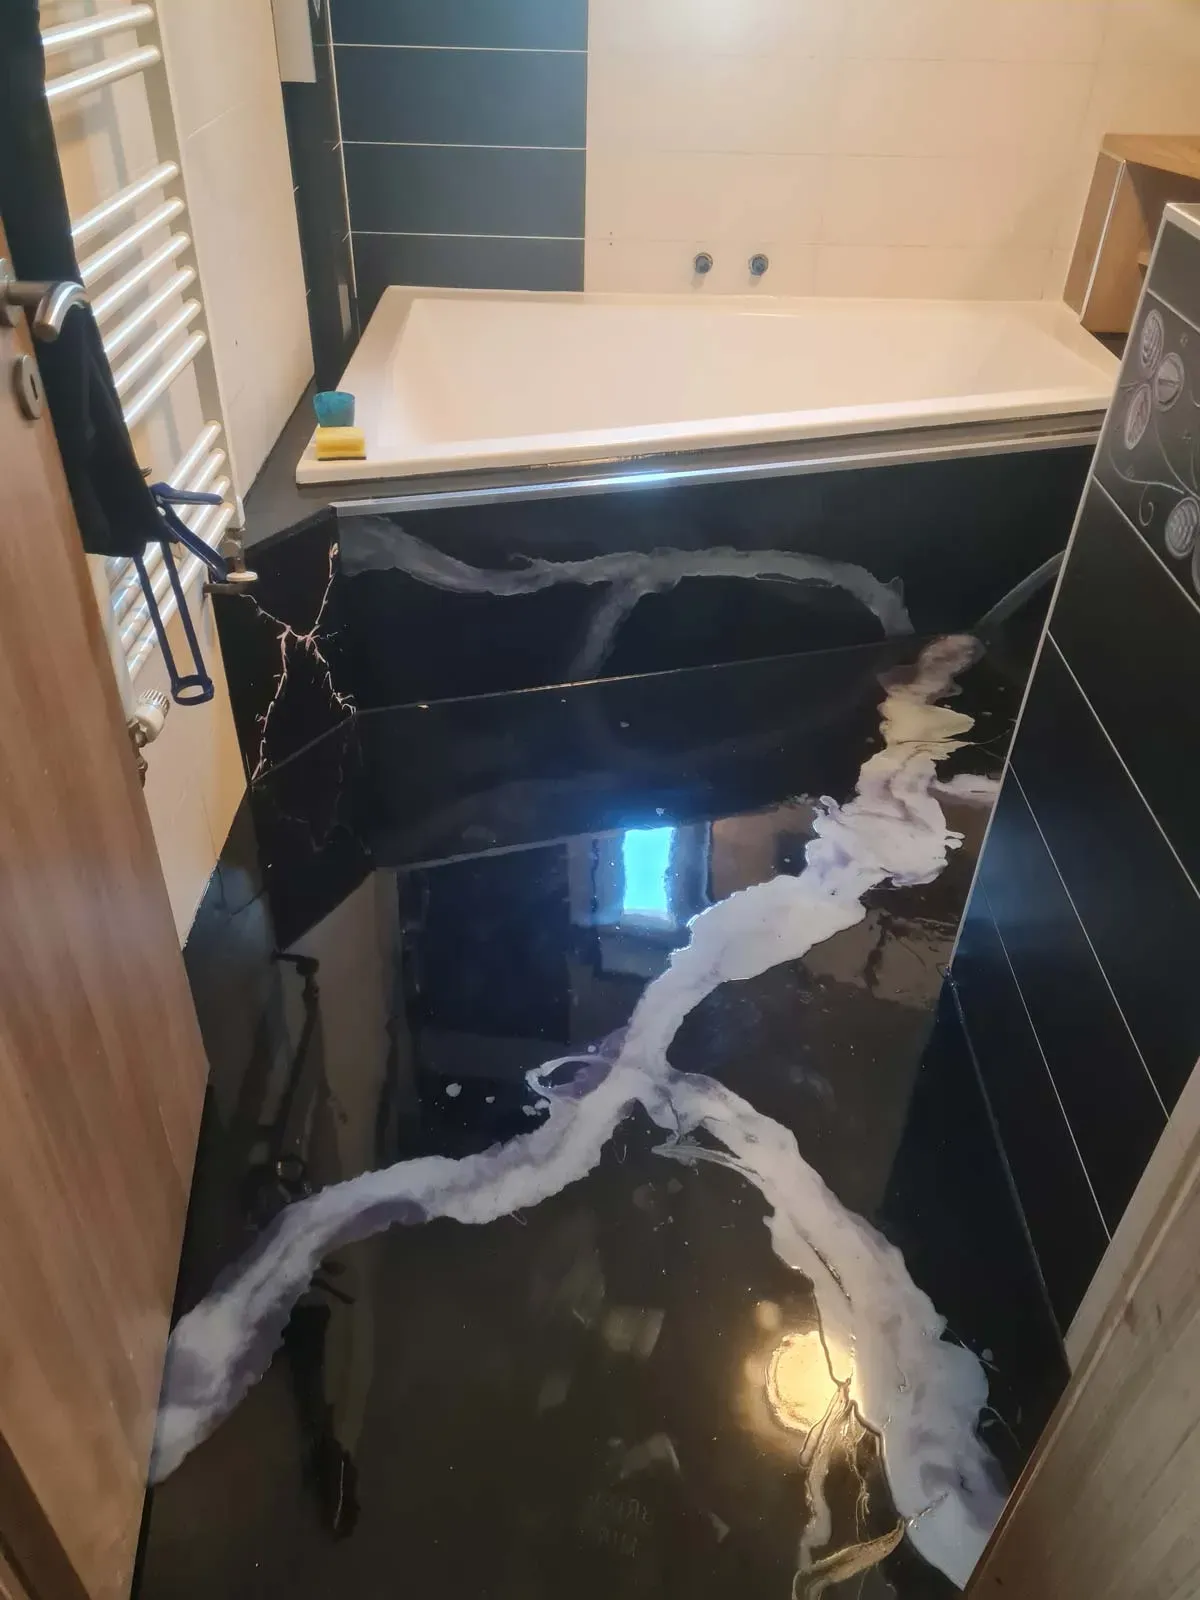
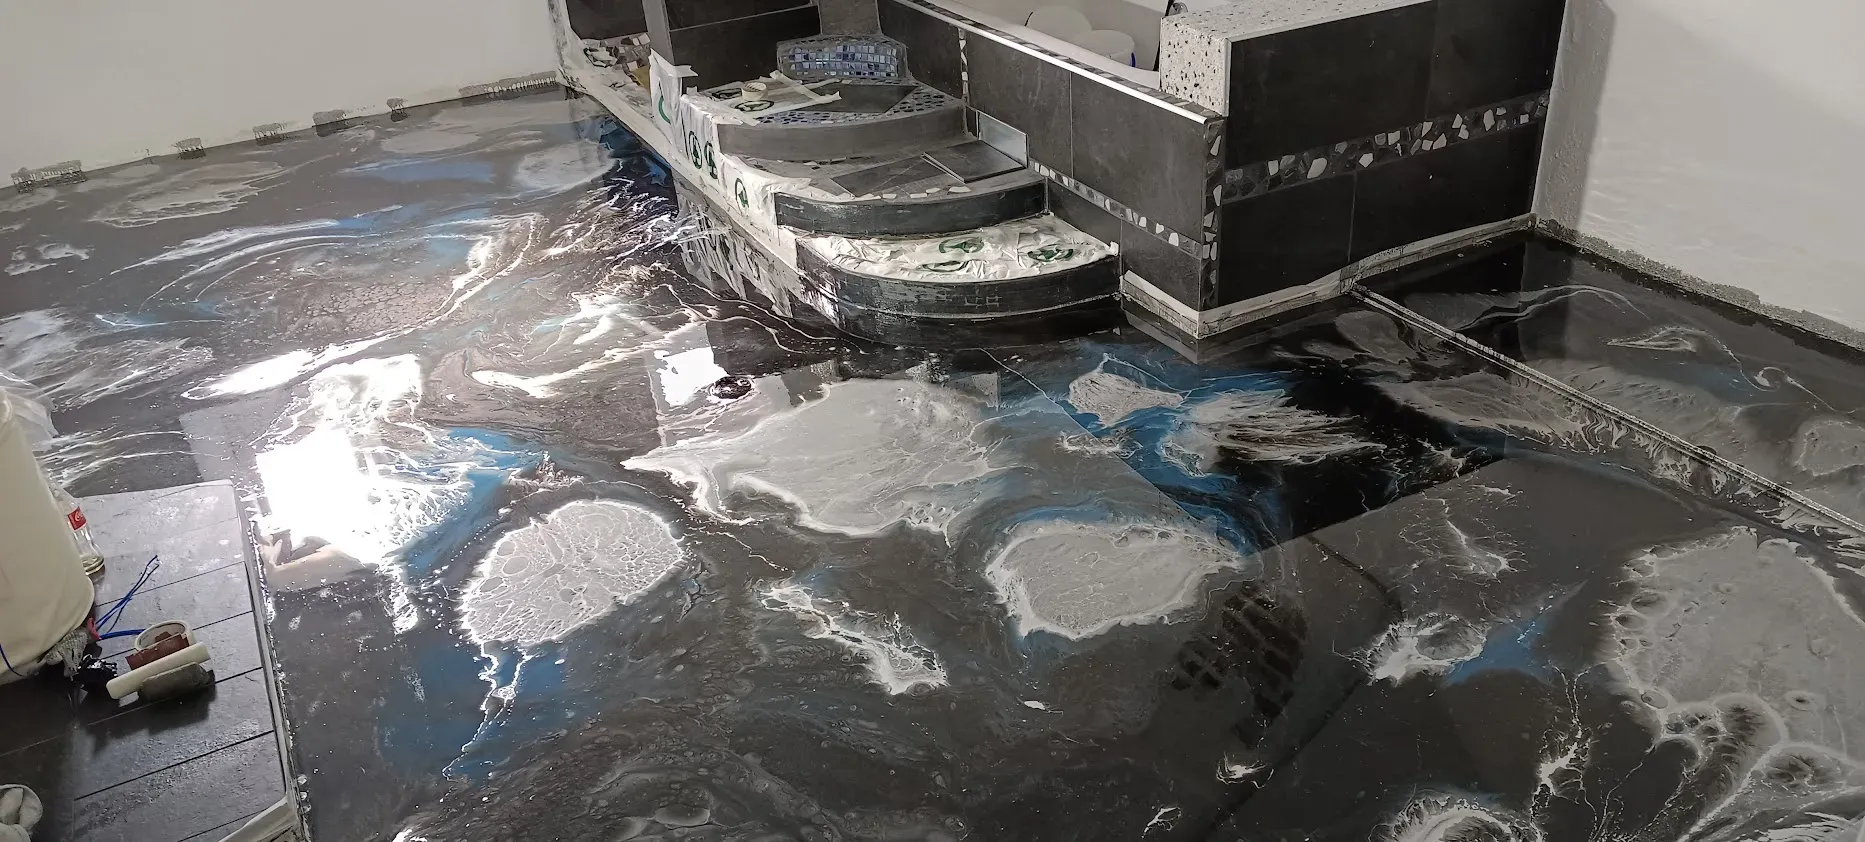
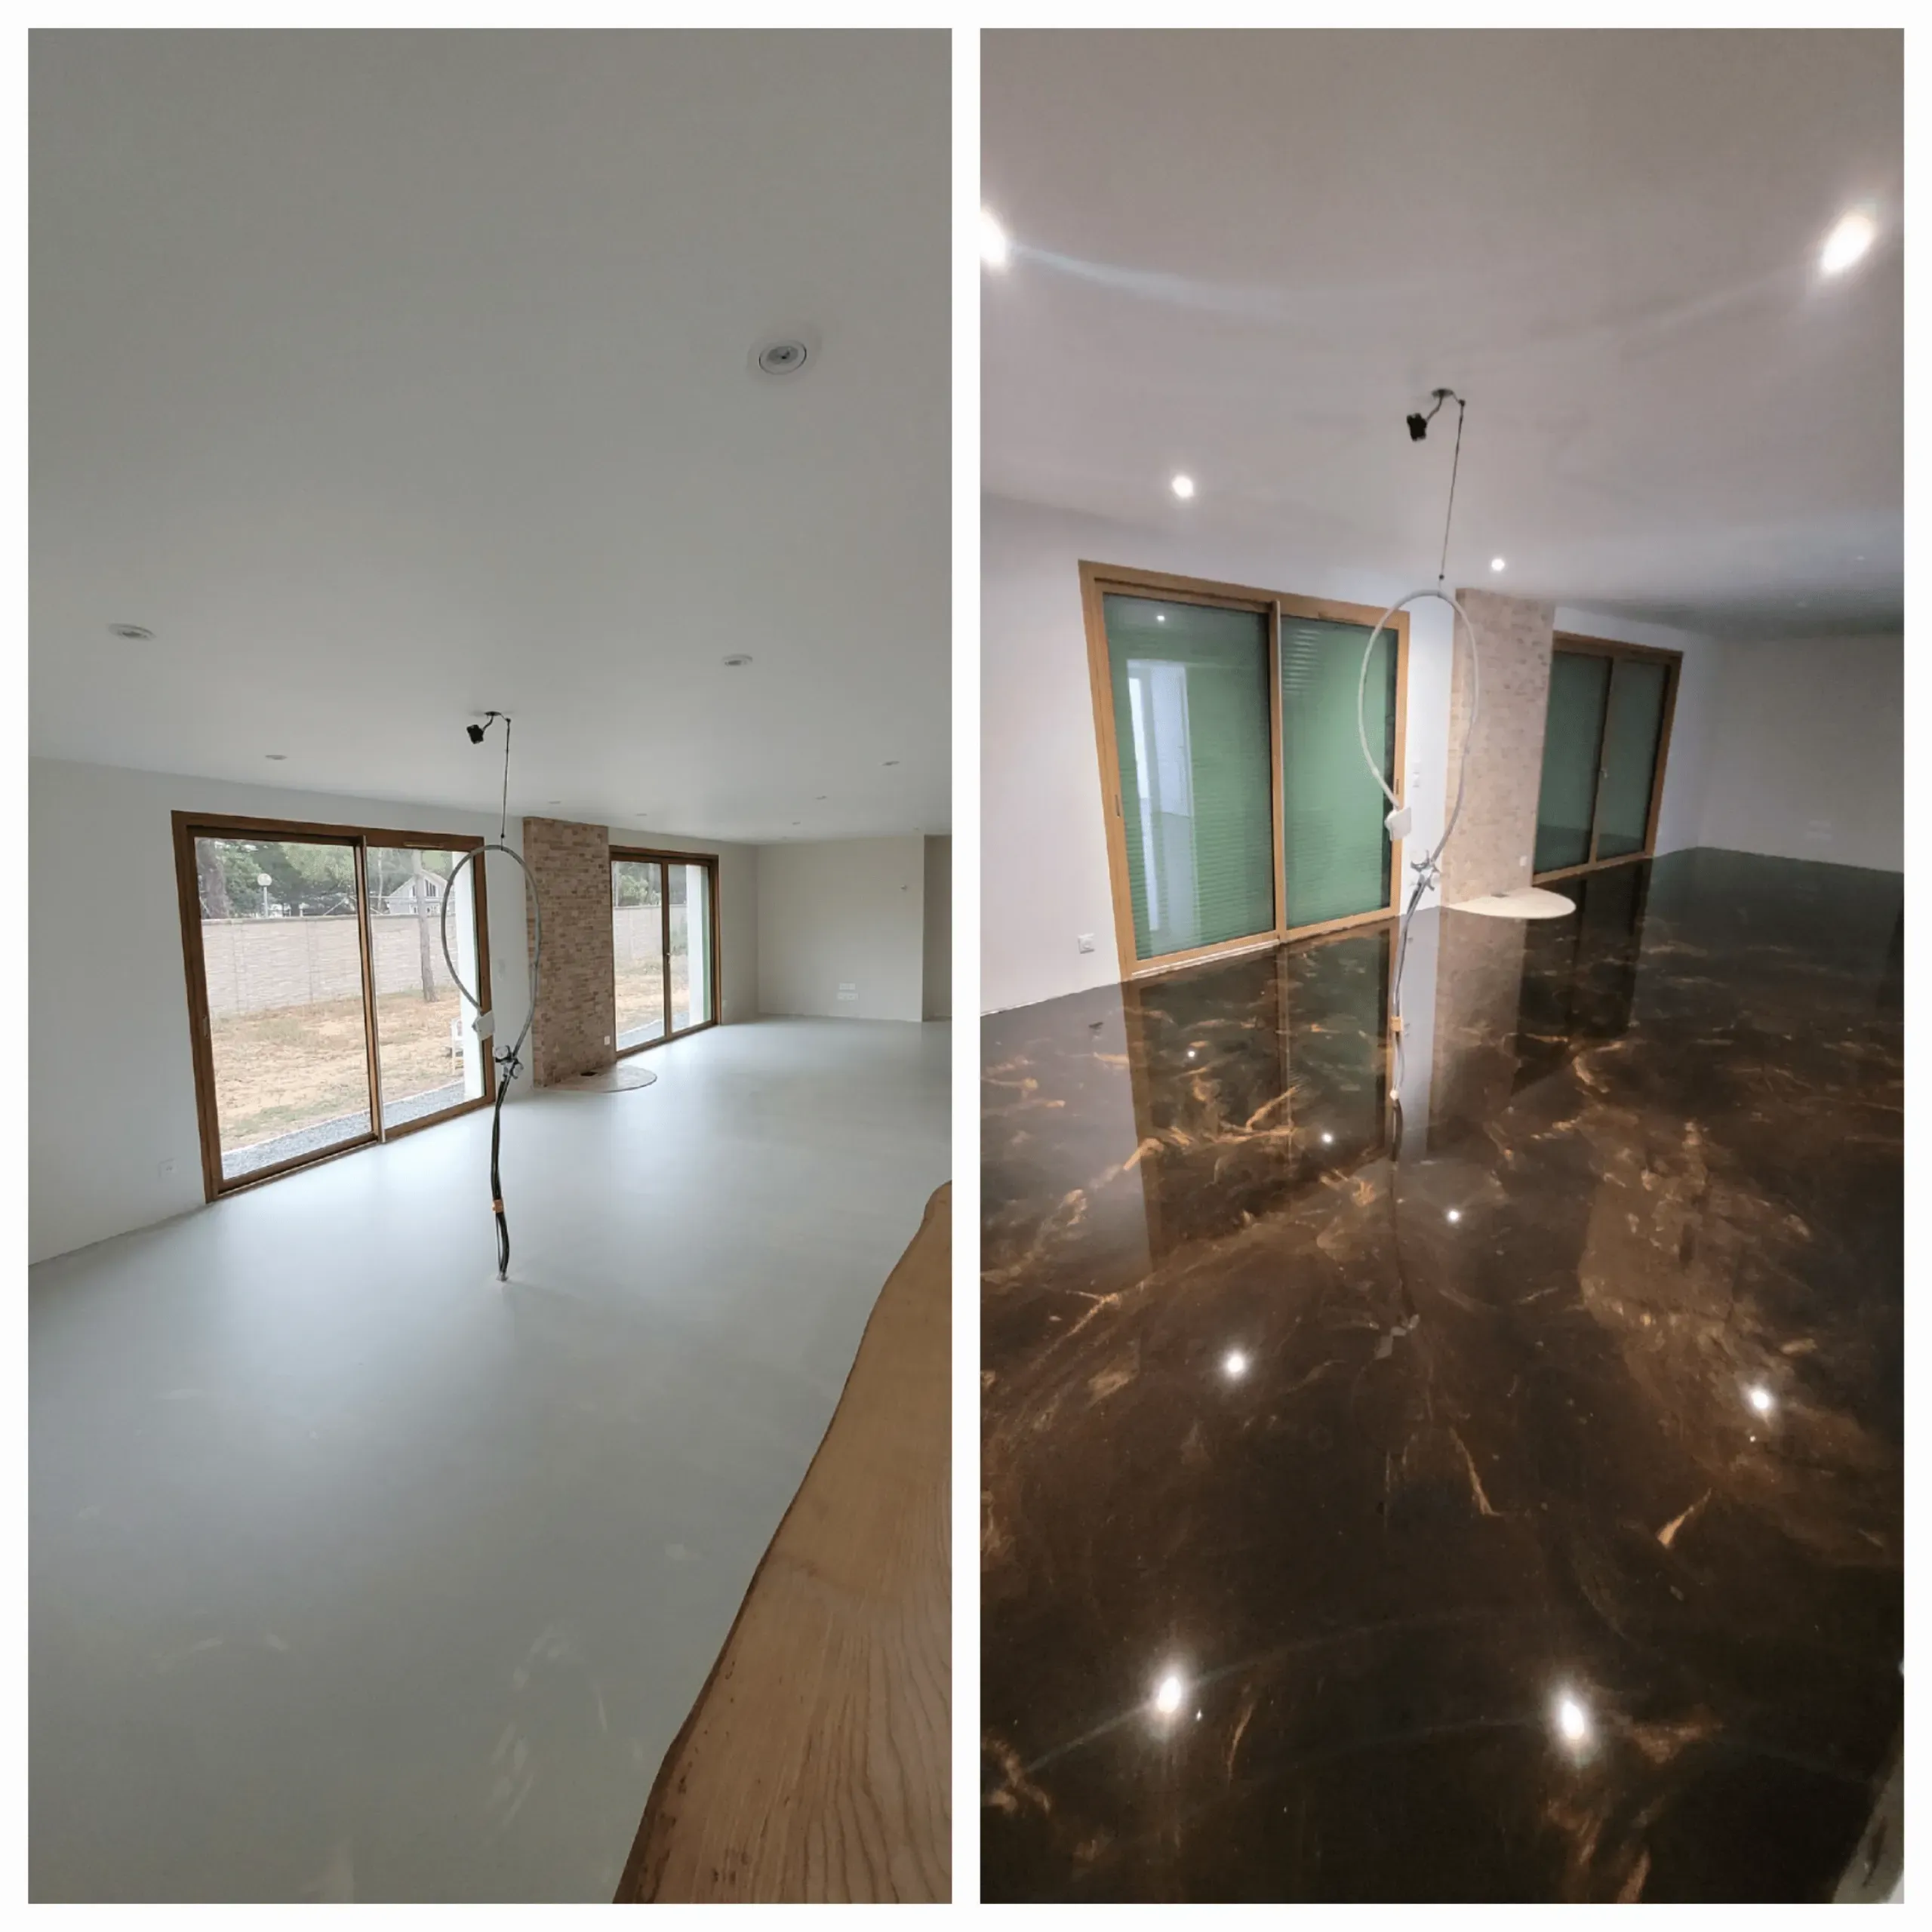
Self-levelling 2K epoxy resin coating for indoor floor surfaces (decorative coating)
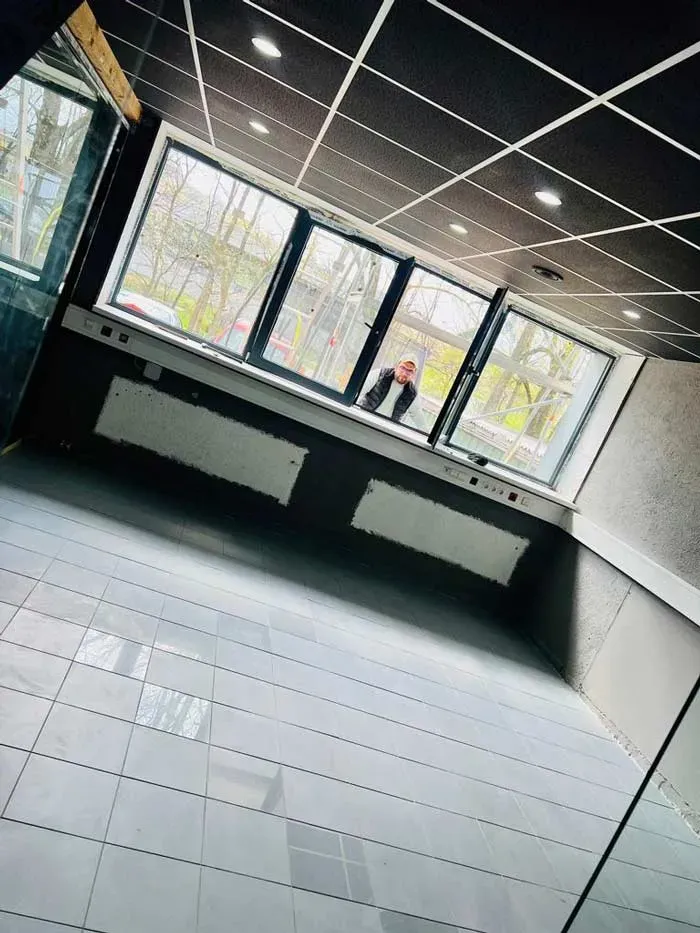
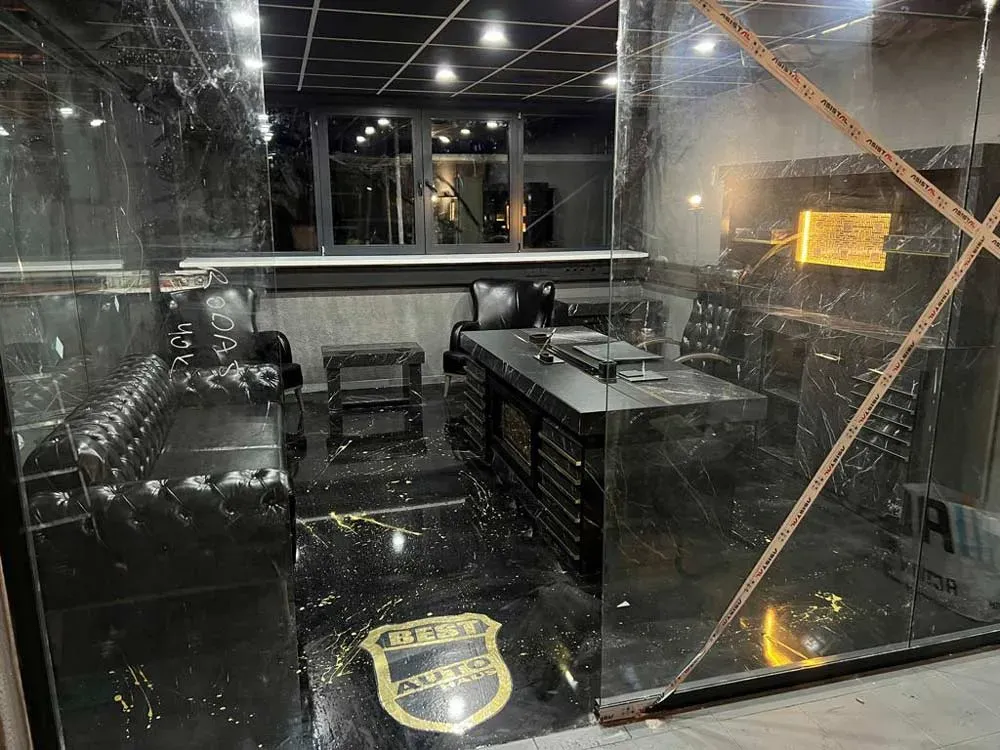
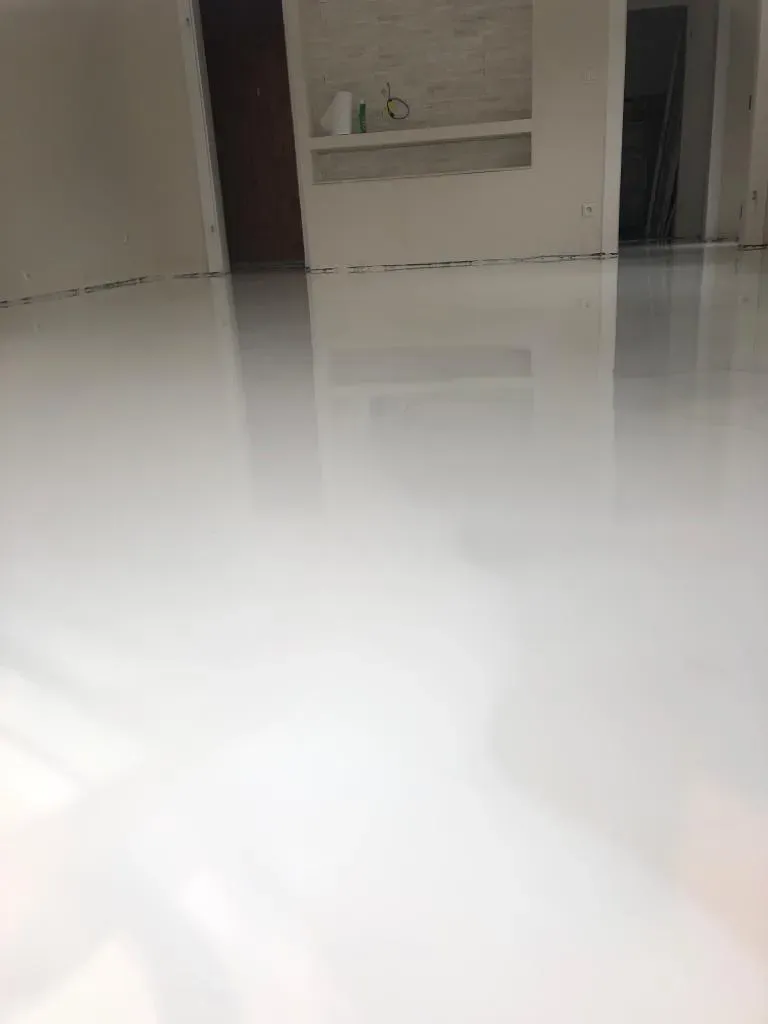
- Suitable for almost all substrates and applications such as living areas, architectural offices, showrooms and exhibition spaces
- Applied as a self-levelling coating
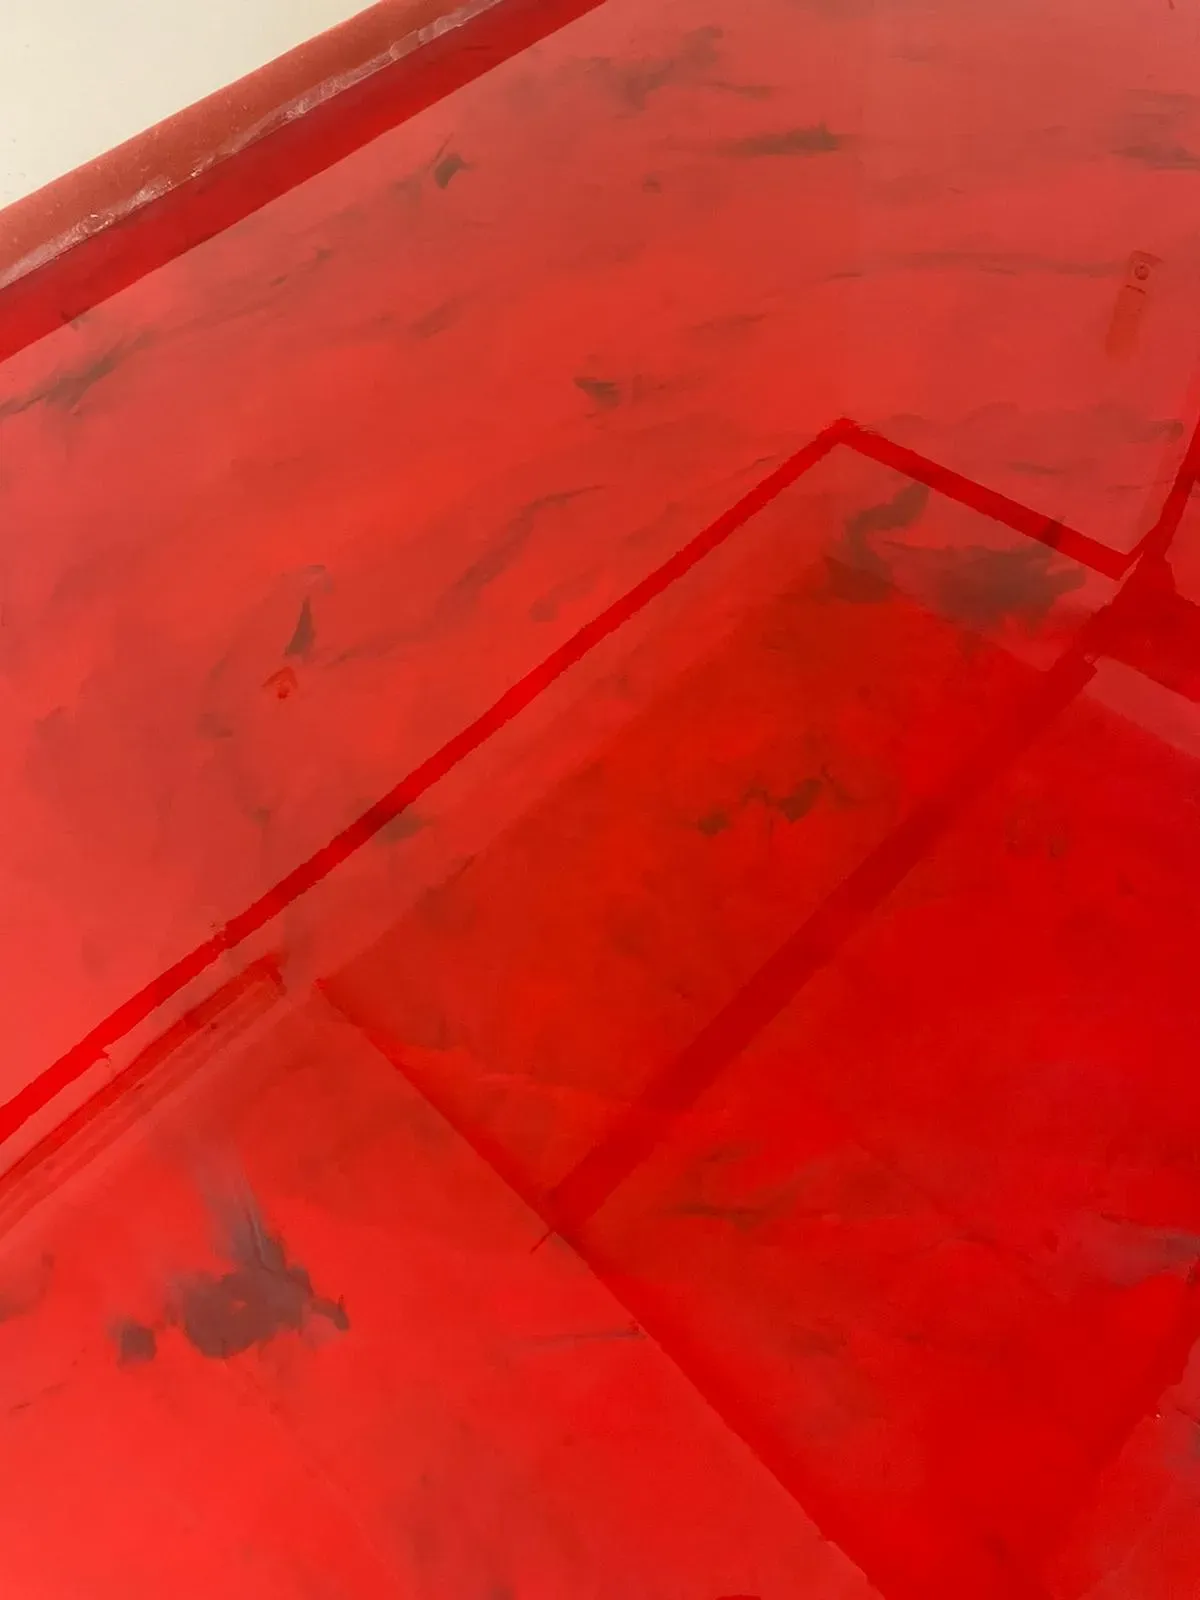
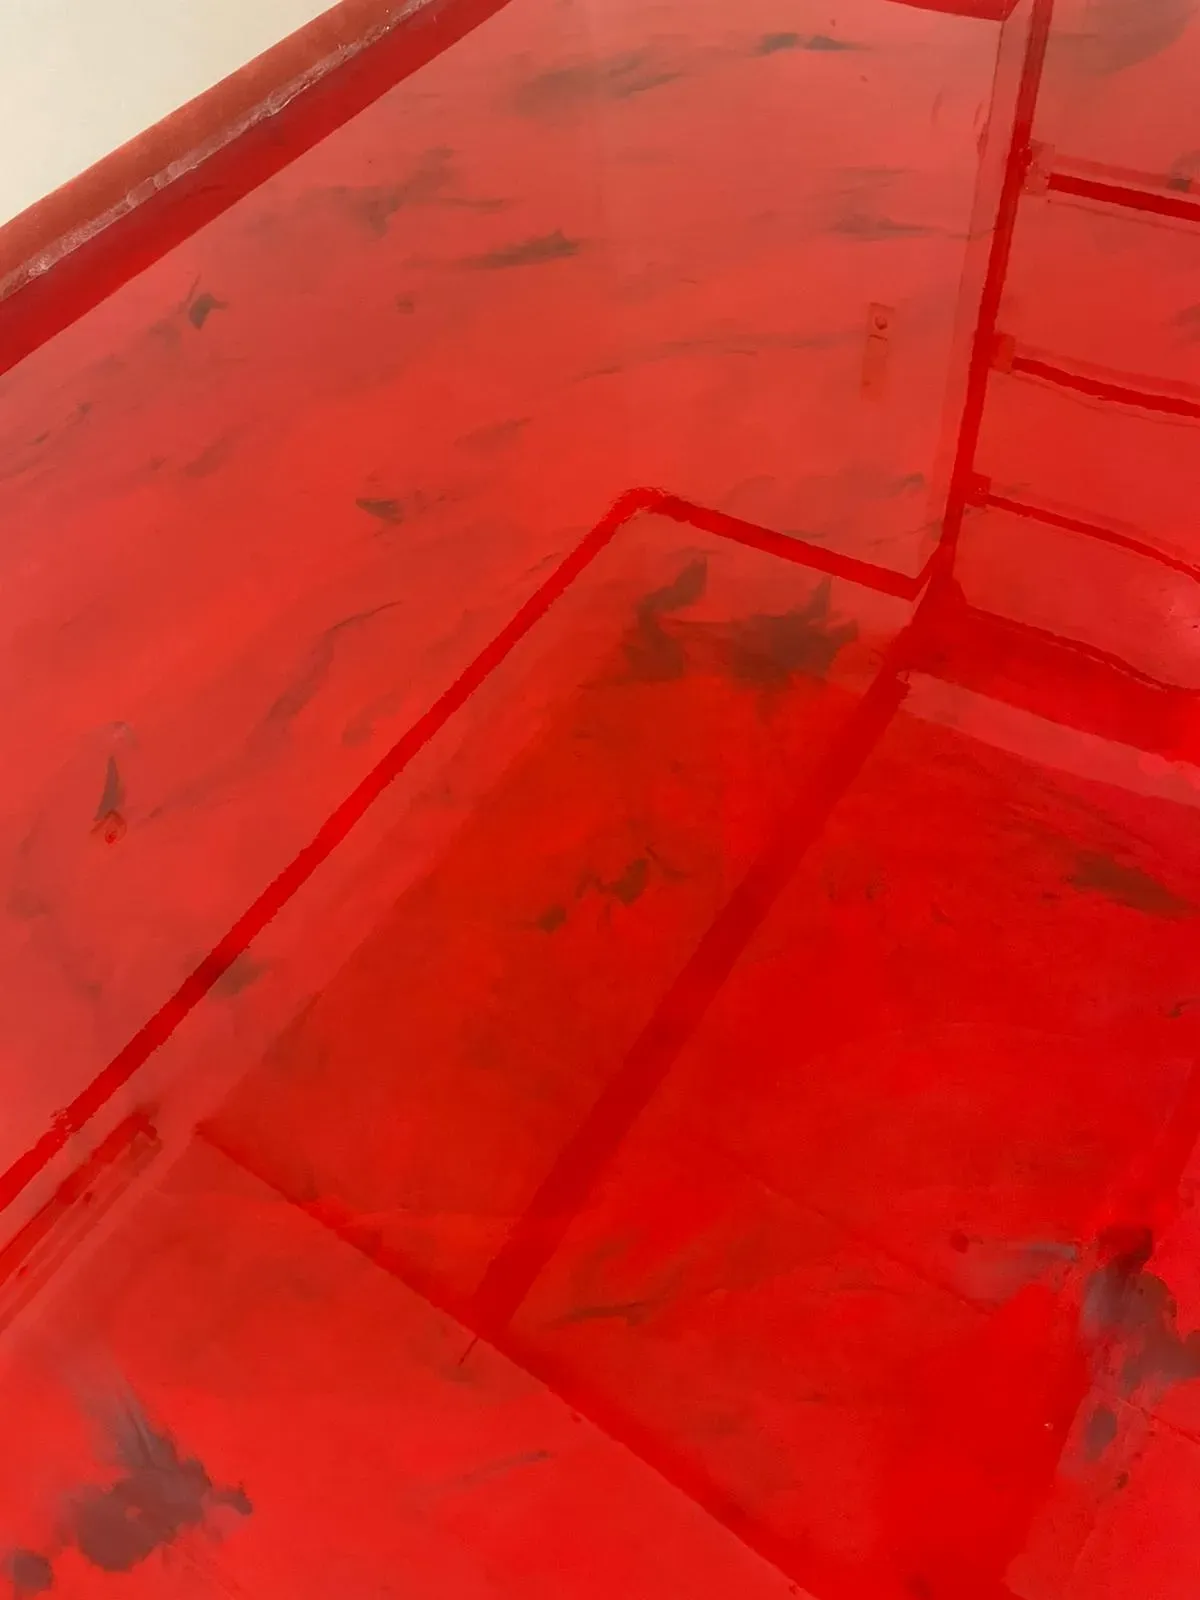
- Results in an even, seamless, mirror-smooth, high-gloss surface
- Consumption: primer with EP Primer approx. 330 g/m² (except for EP Design transparent), coating with EP Design approx. 1,800 g/m², and optional additional protection with PU Topcoat approx. 100 g/m² per coat
- Walkable after approx. 24 hours, fully load-bearing after approx. 7 days (at +20 °C)
- Scope of delivery: resin component A and hardener component B + EP colour pastes or metallic pigments depending on colour selection (except for EP Design transparent)
1. Select colour


2. Select quantity
Add a suitable primer? (EP Primer) (Optional)
Universal Sealer for 2 coats (Optional) ![]()

Application Instructions
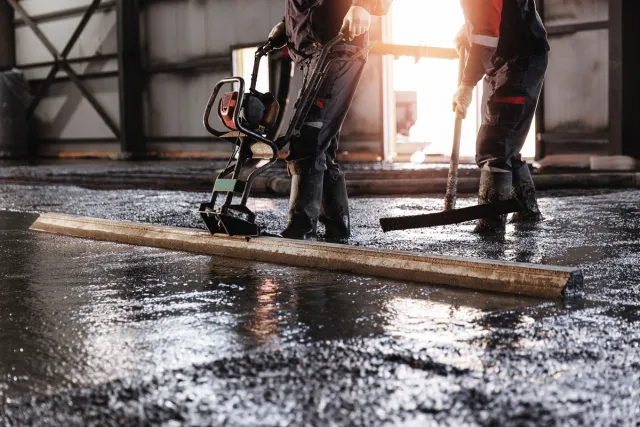
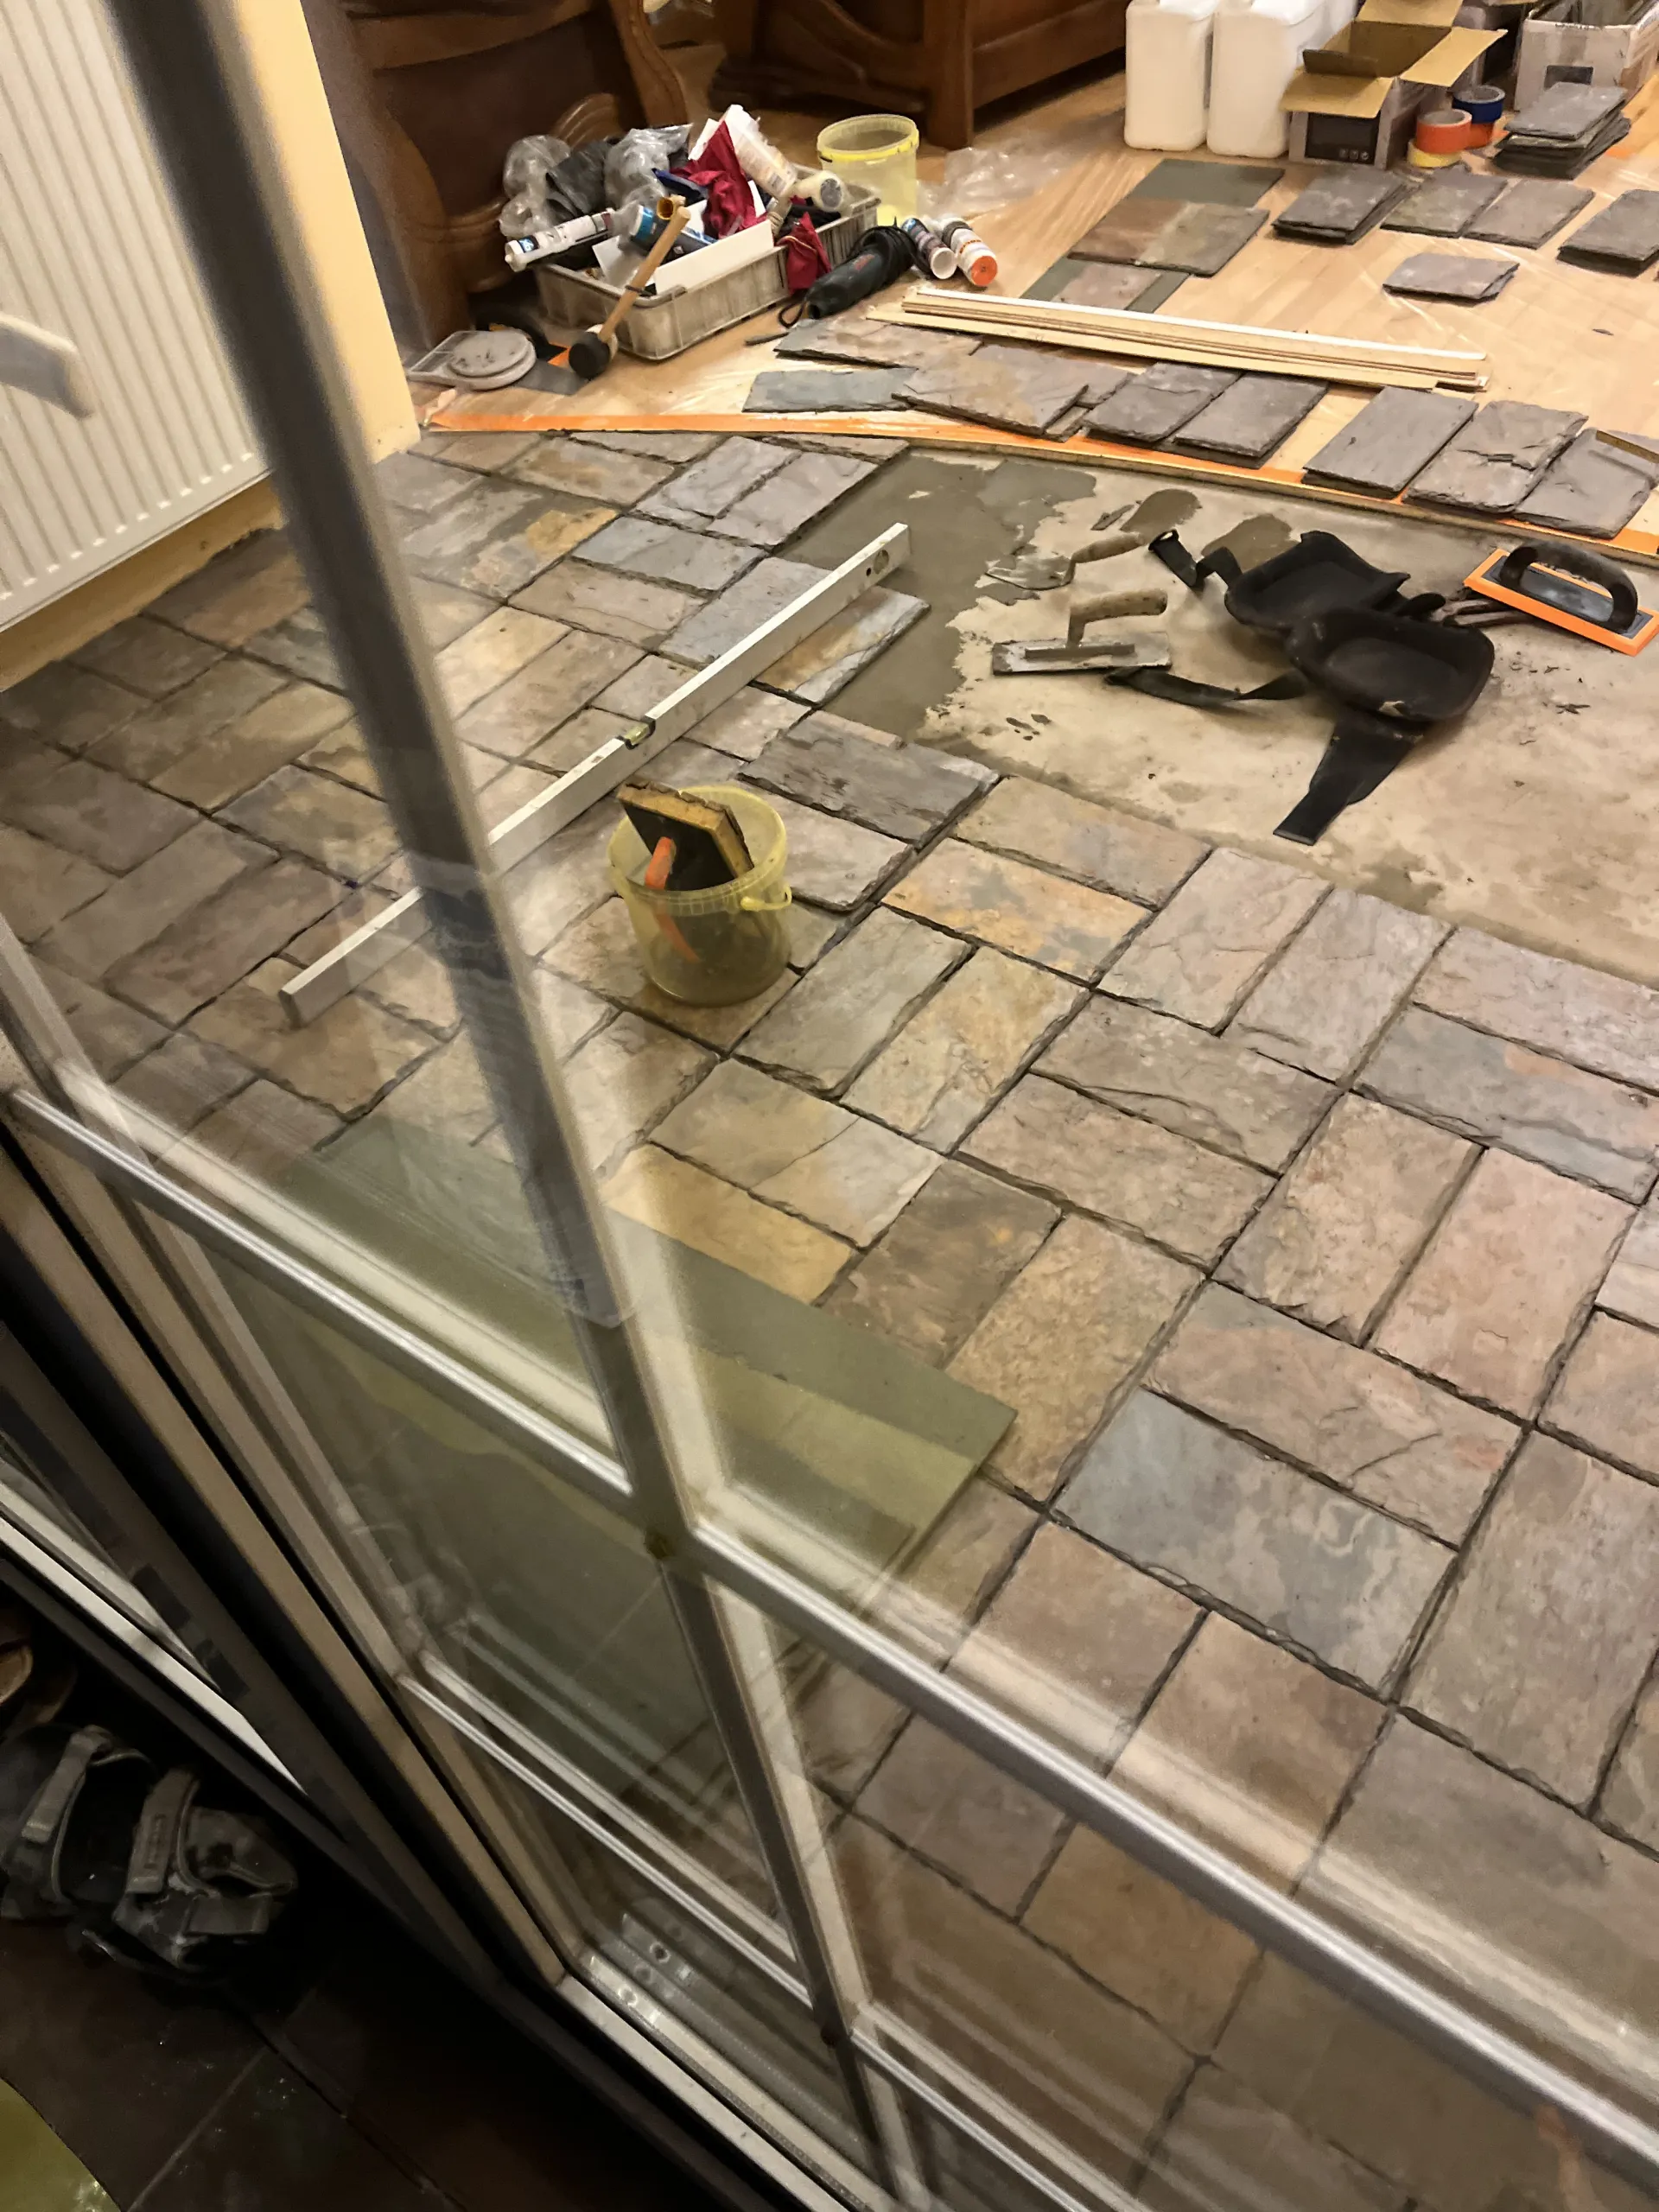
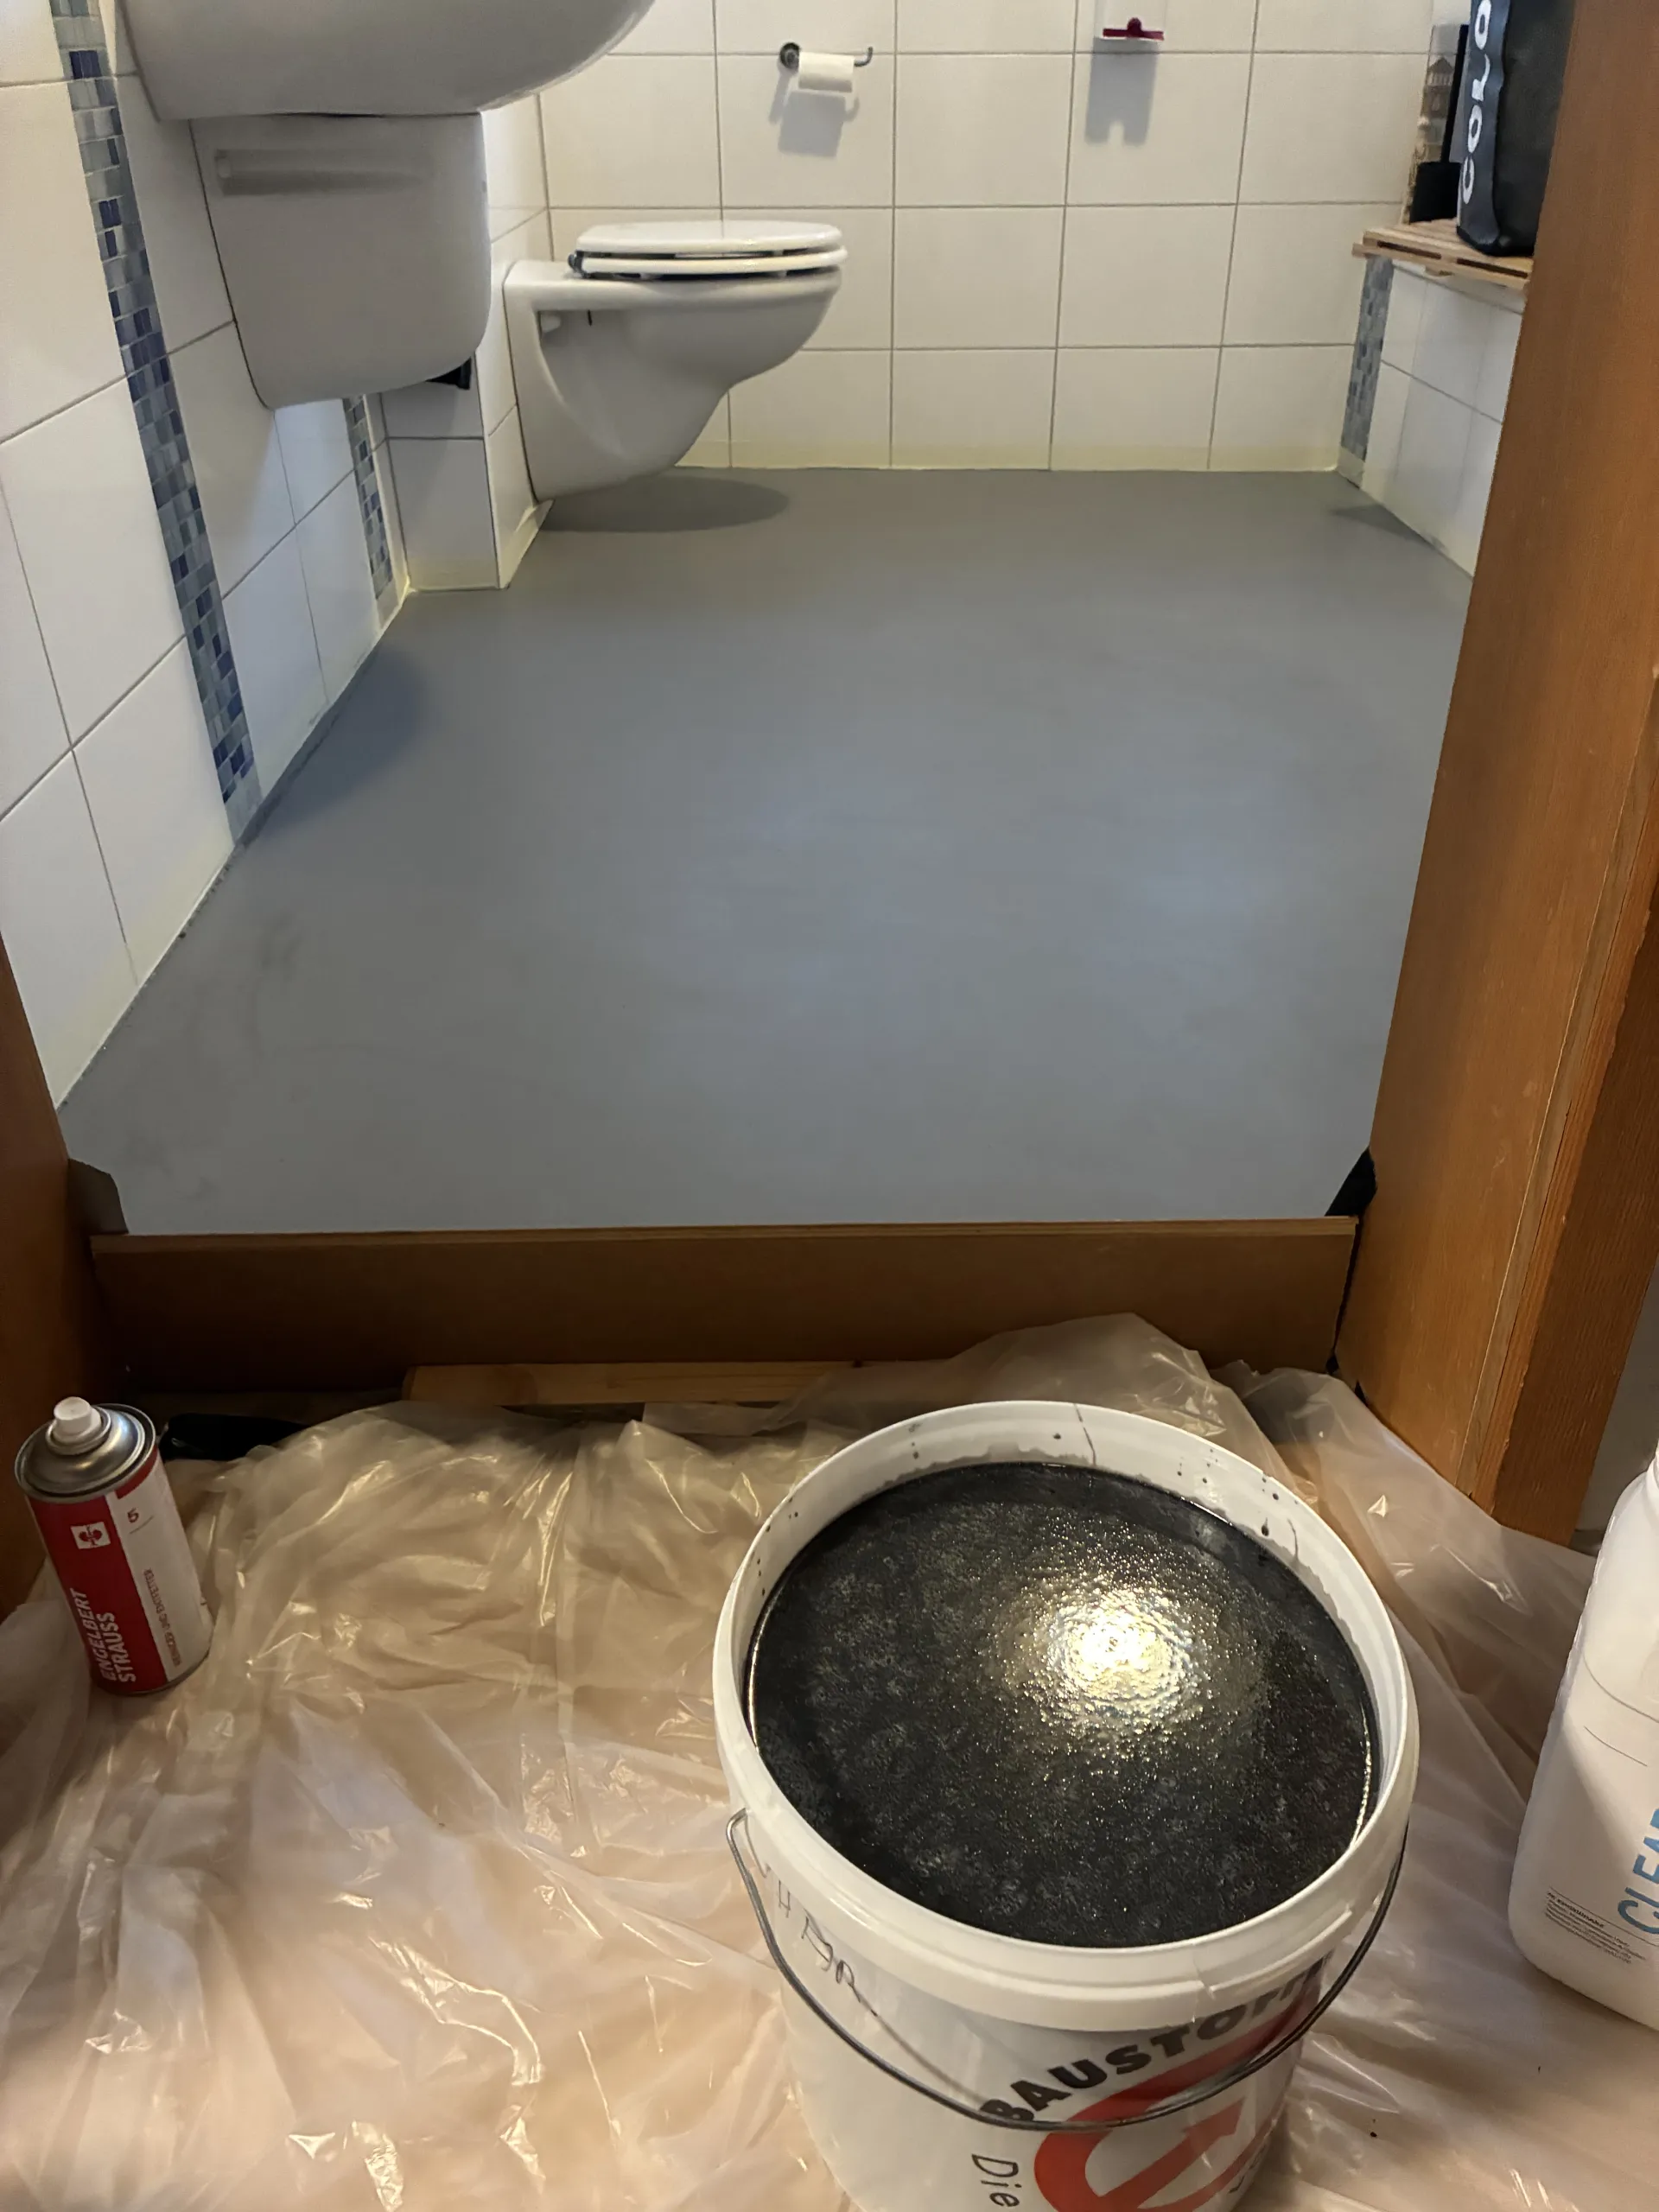
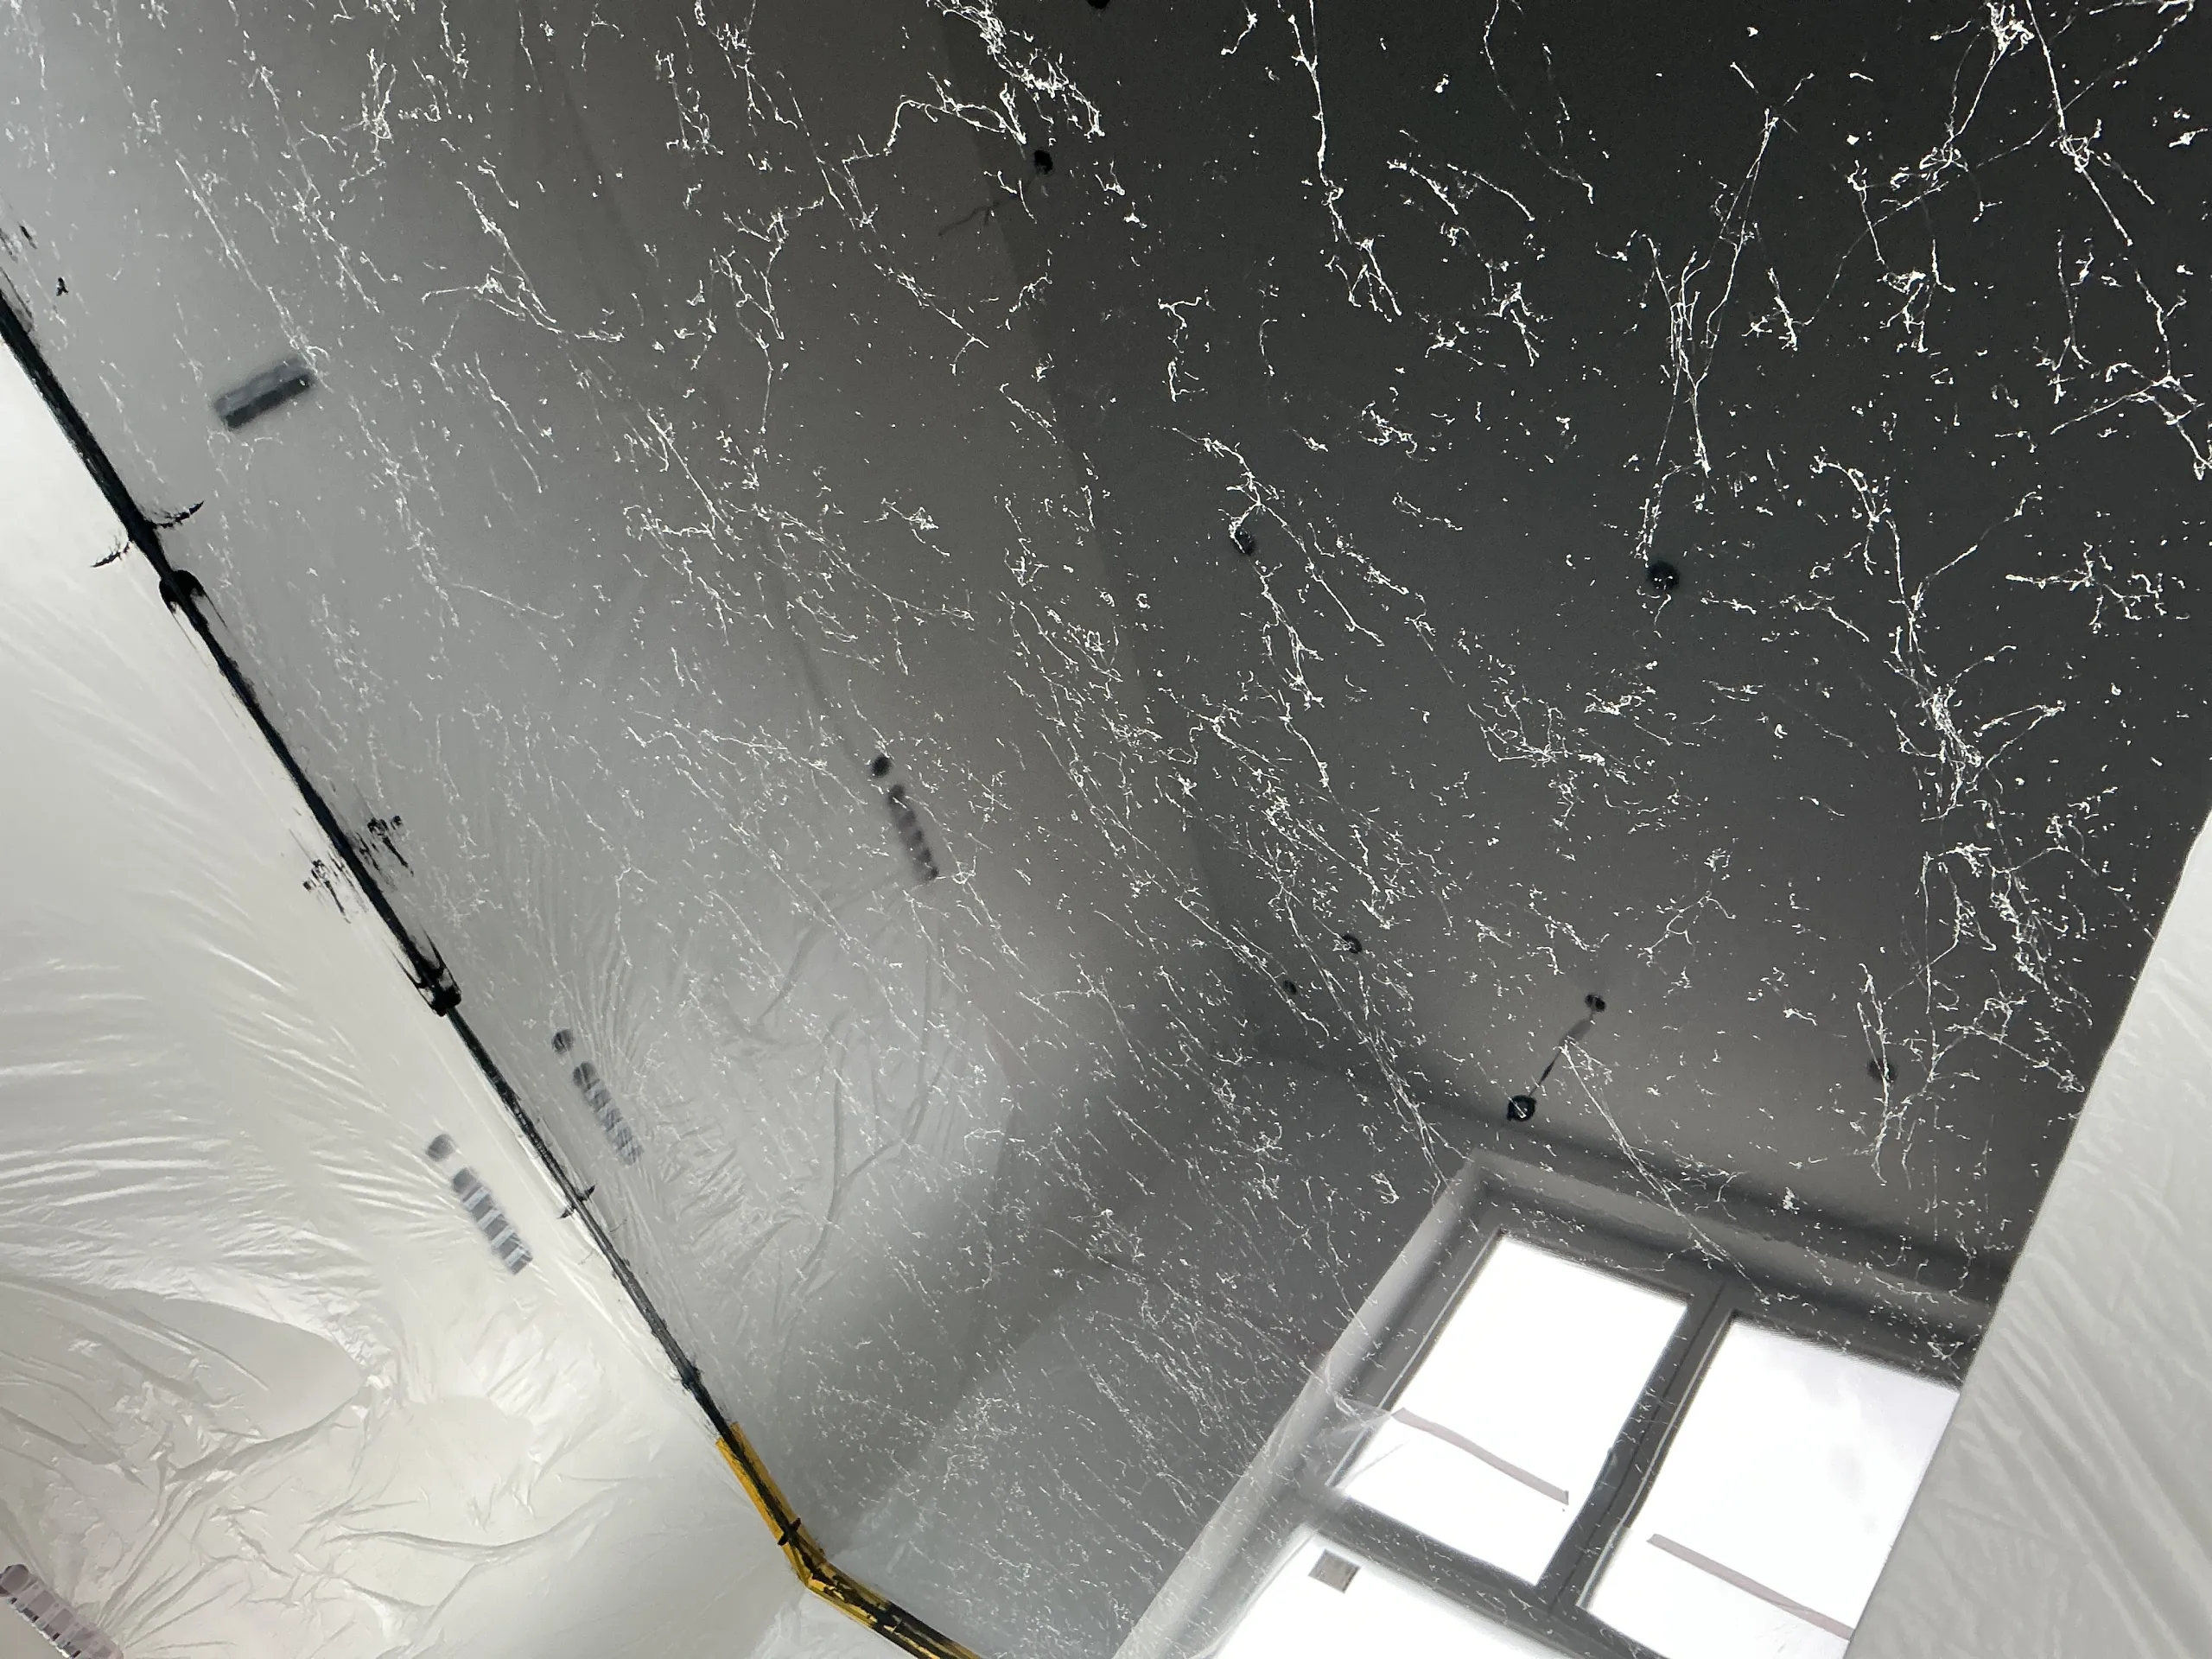
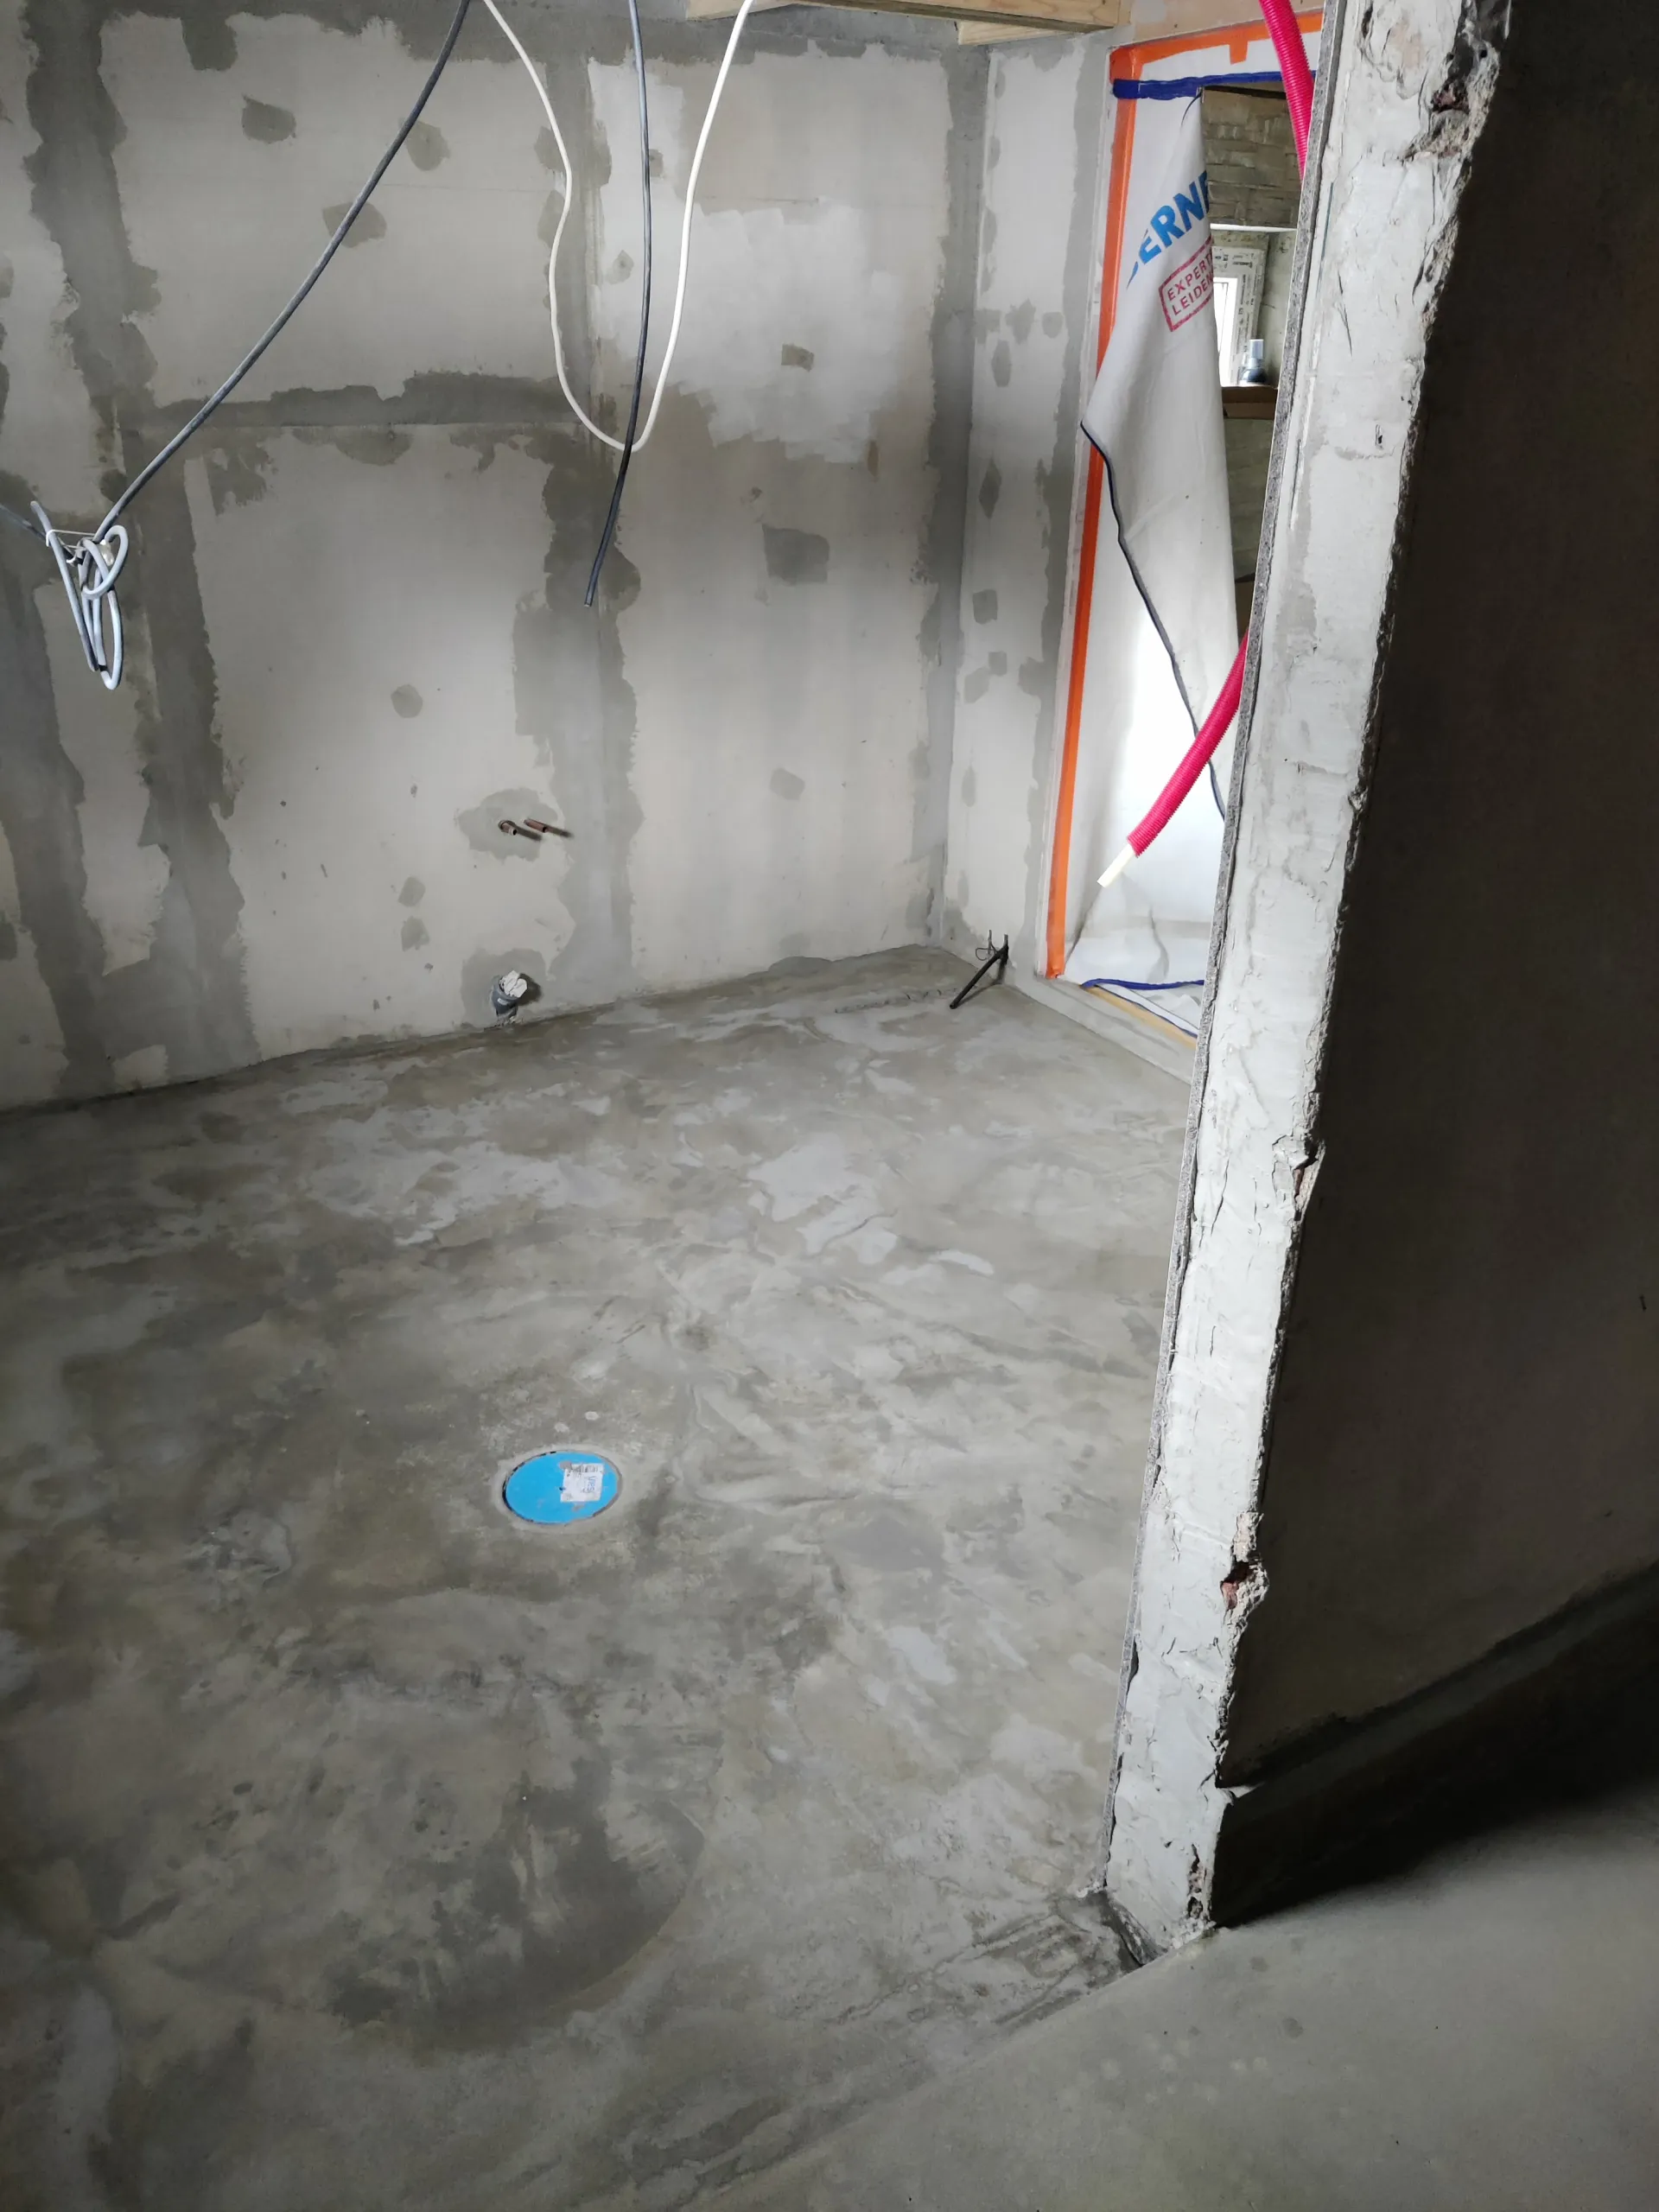
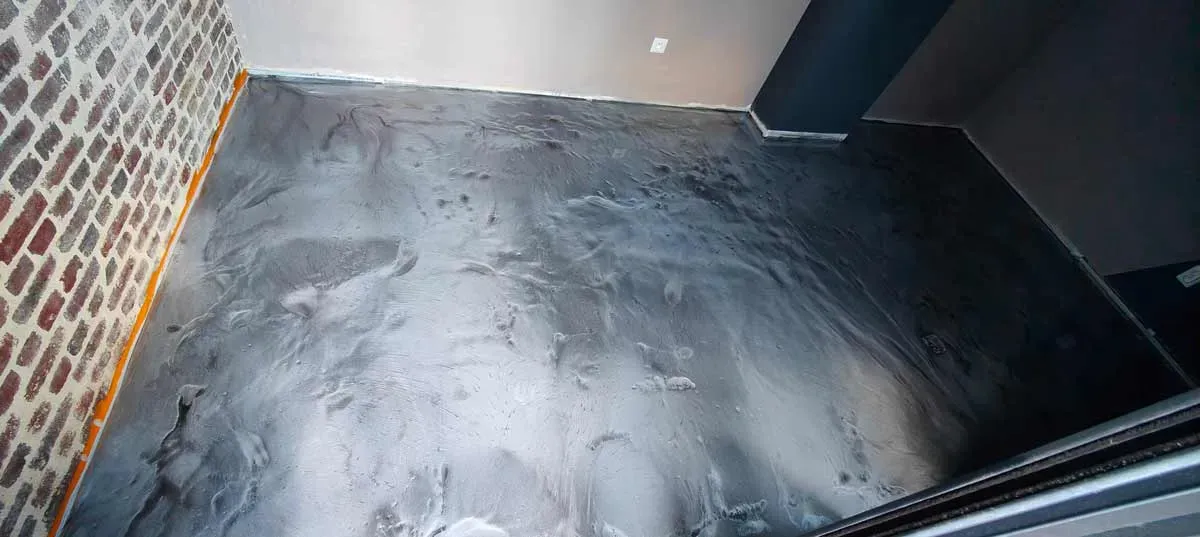
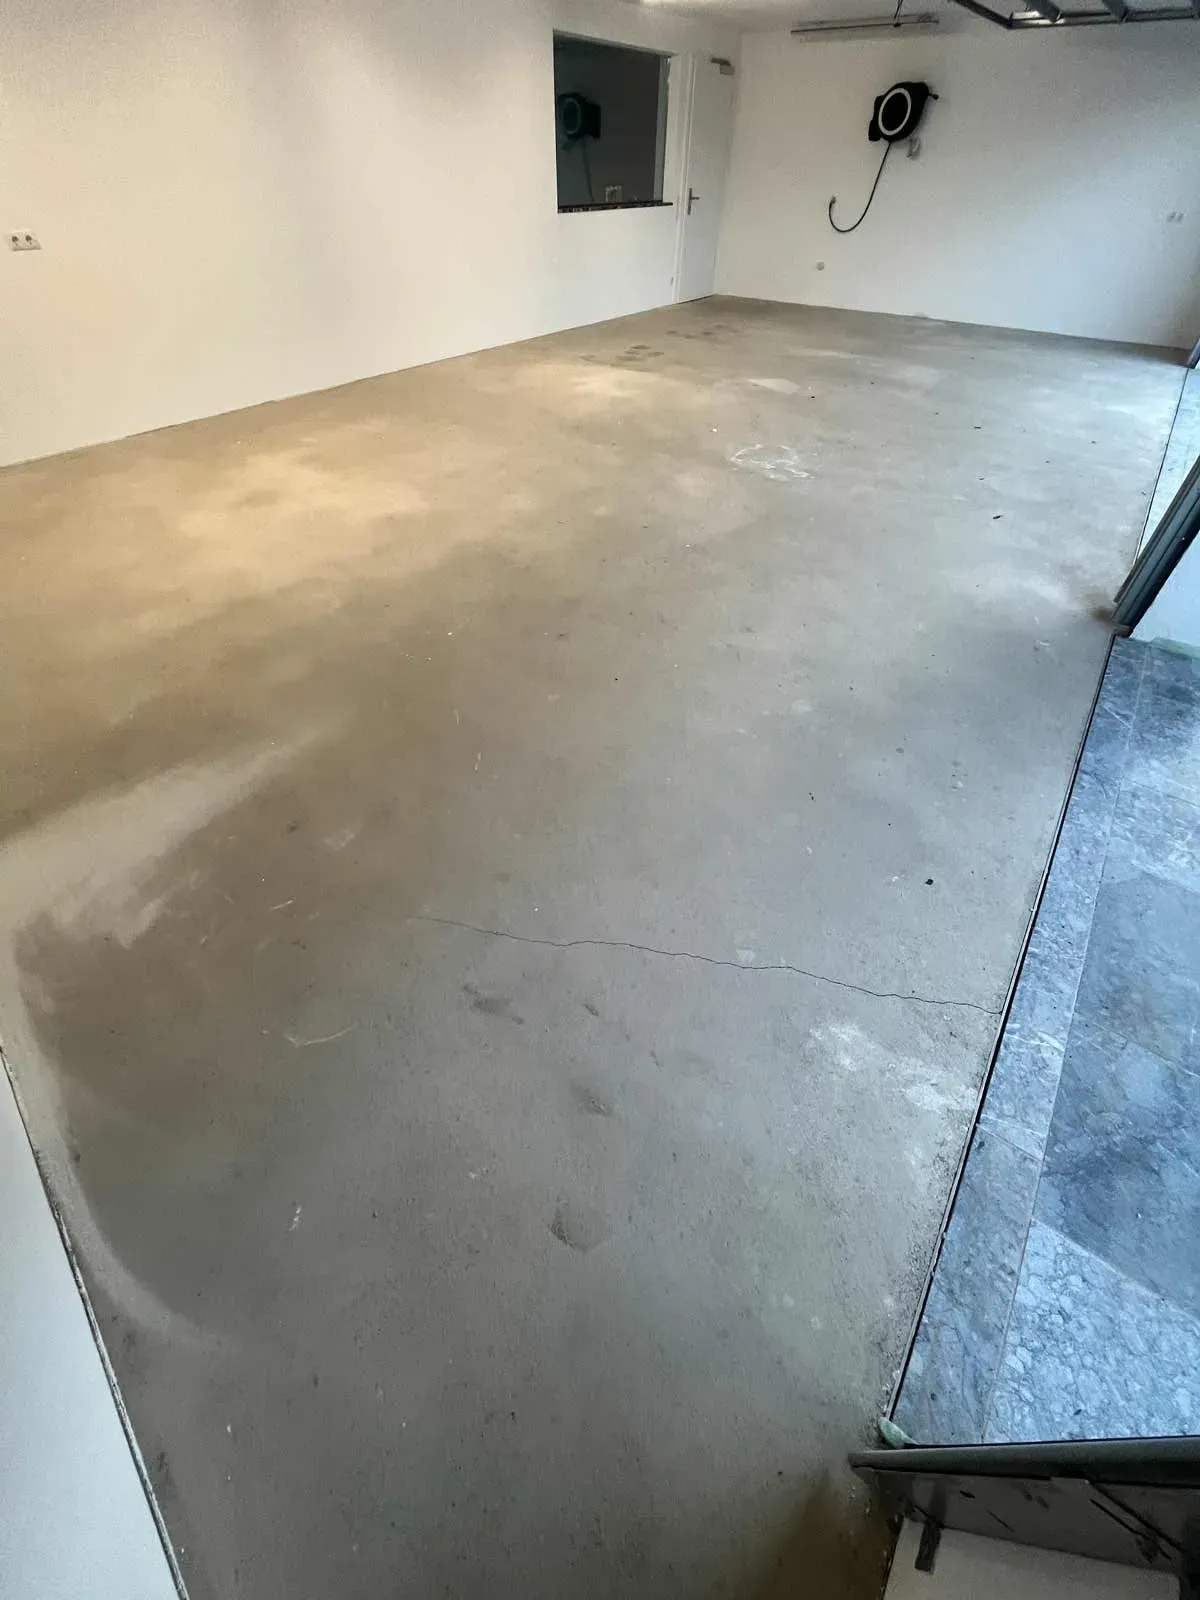
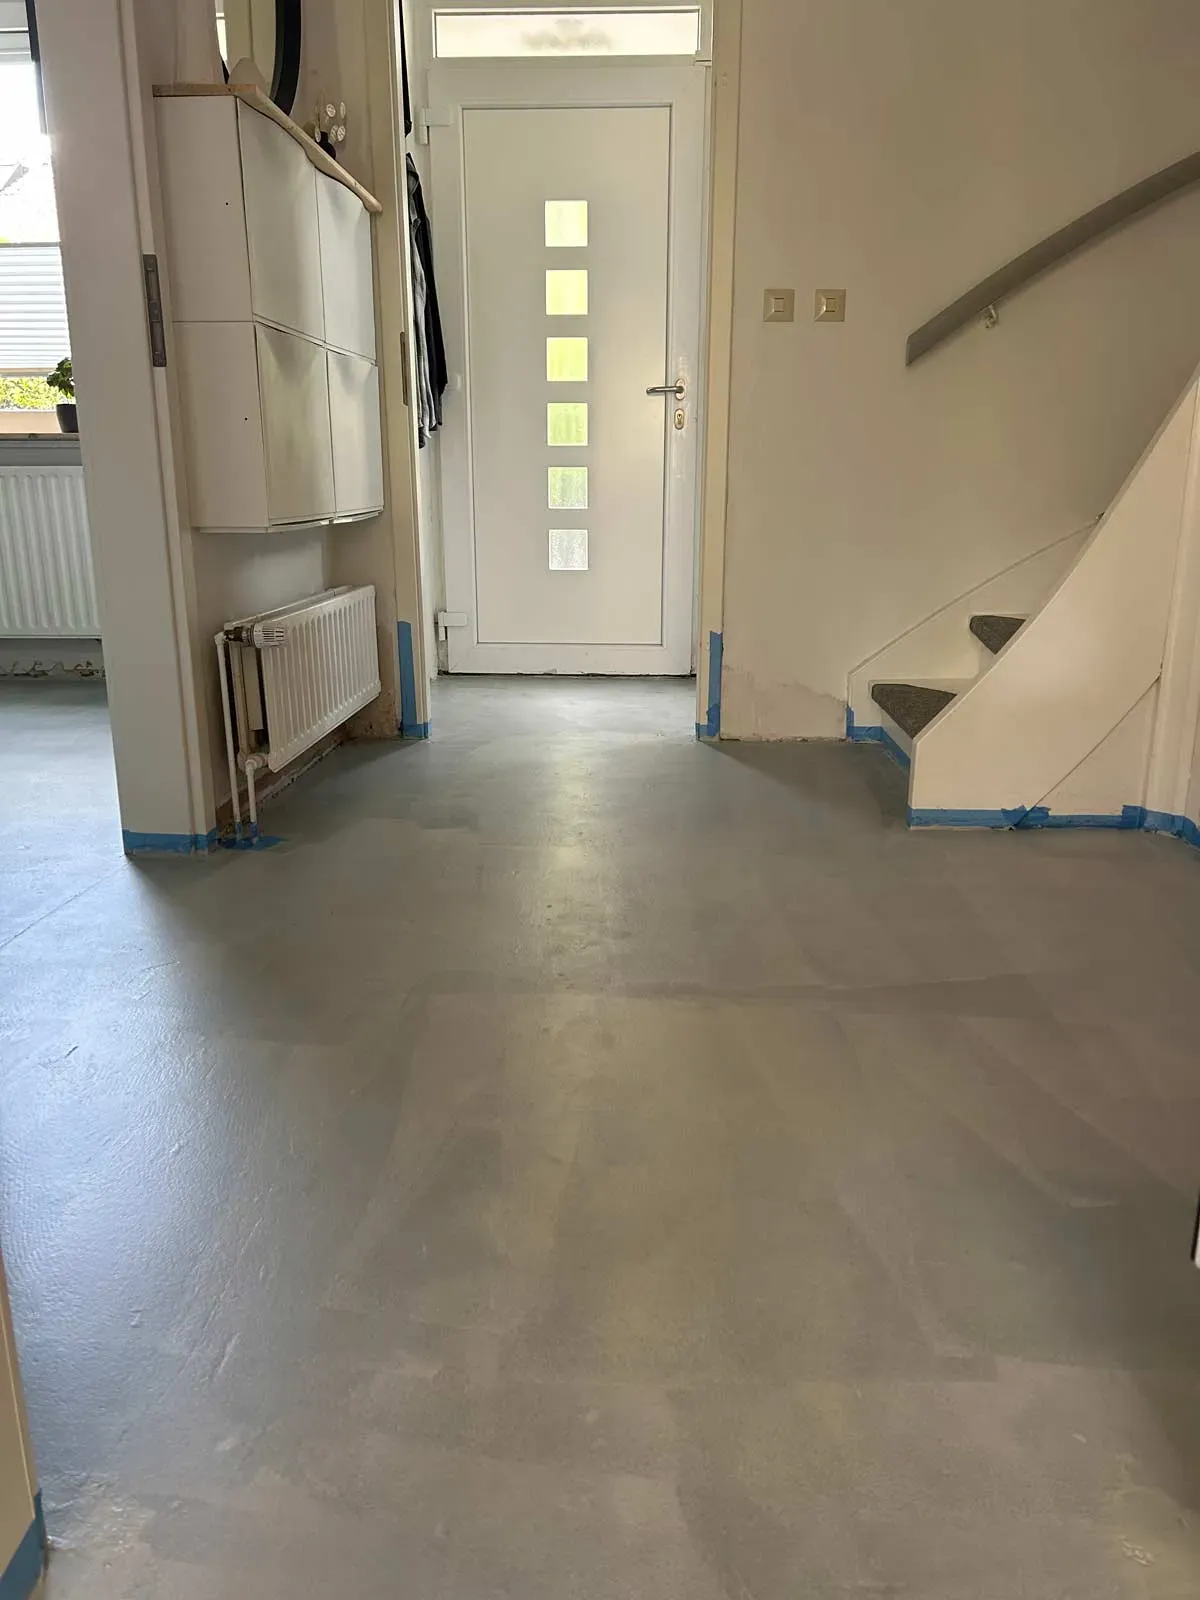
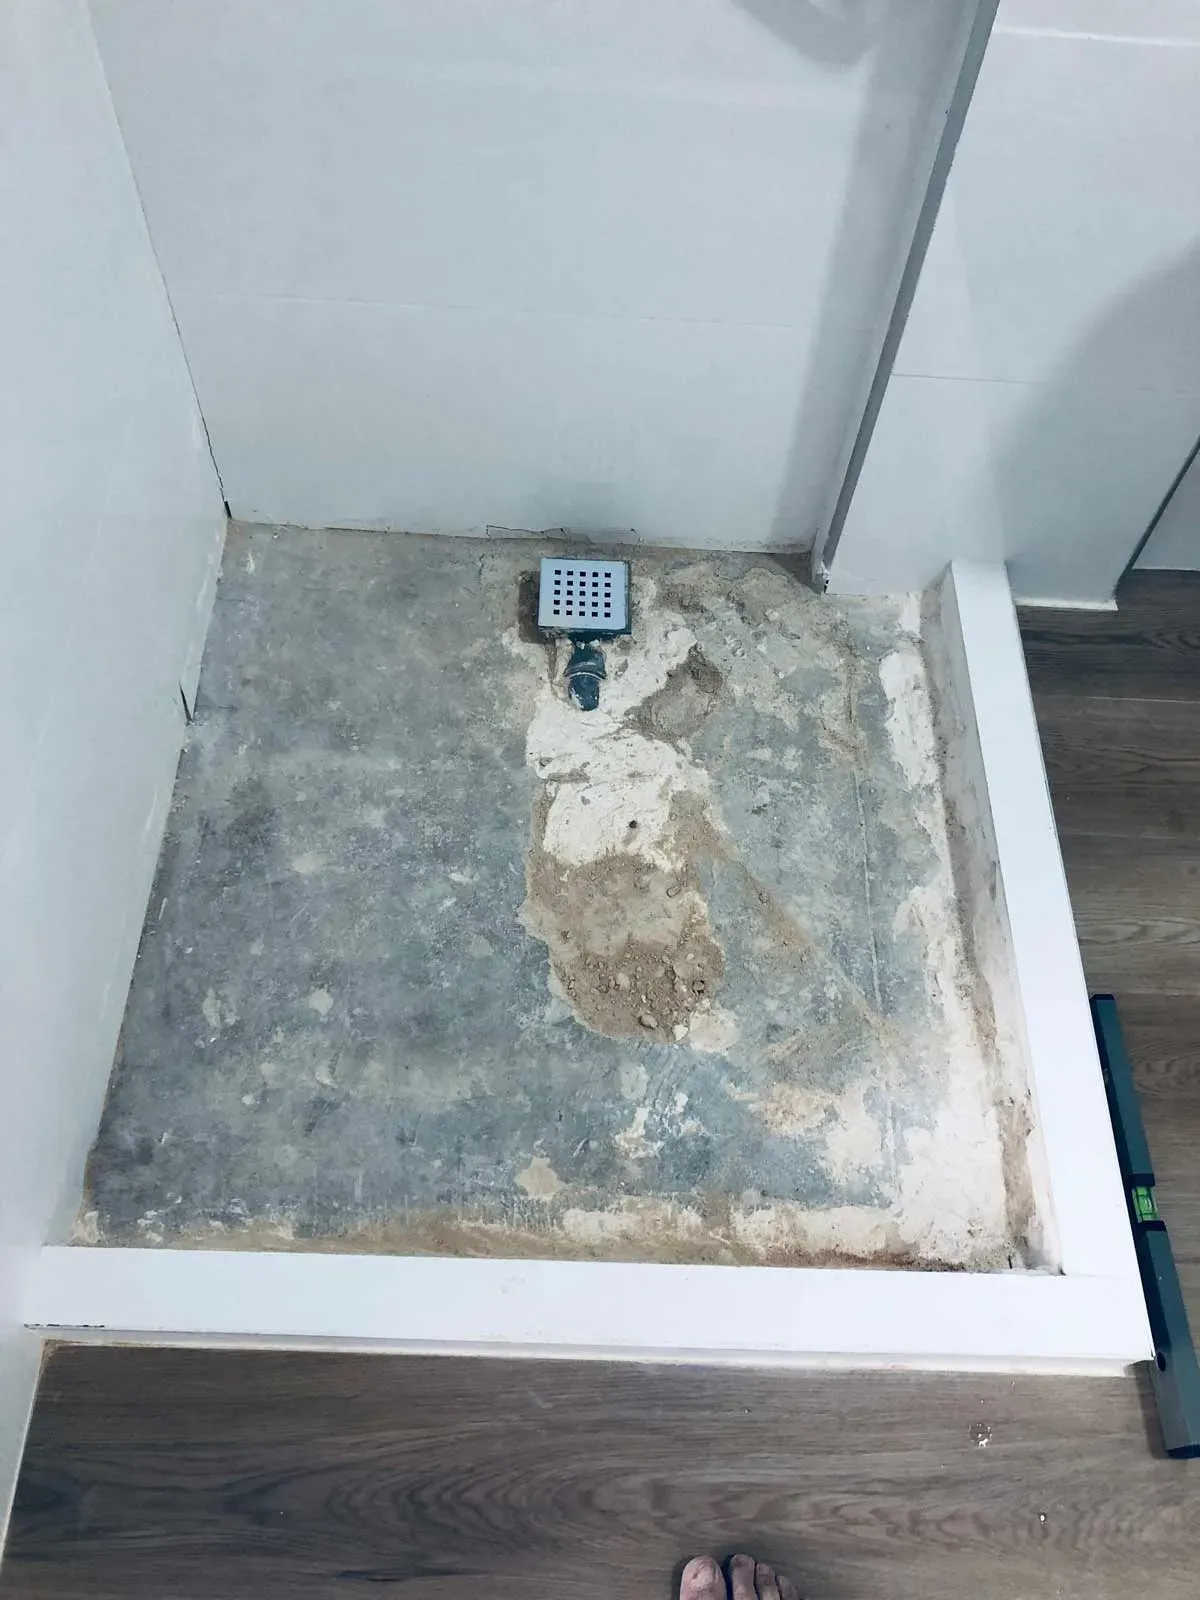
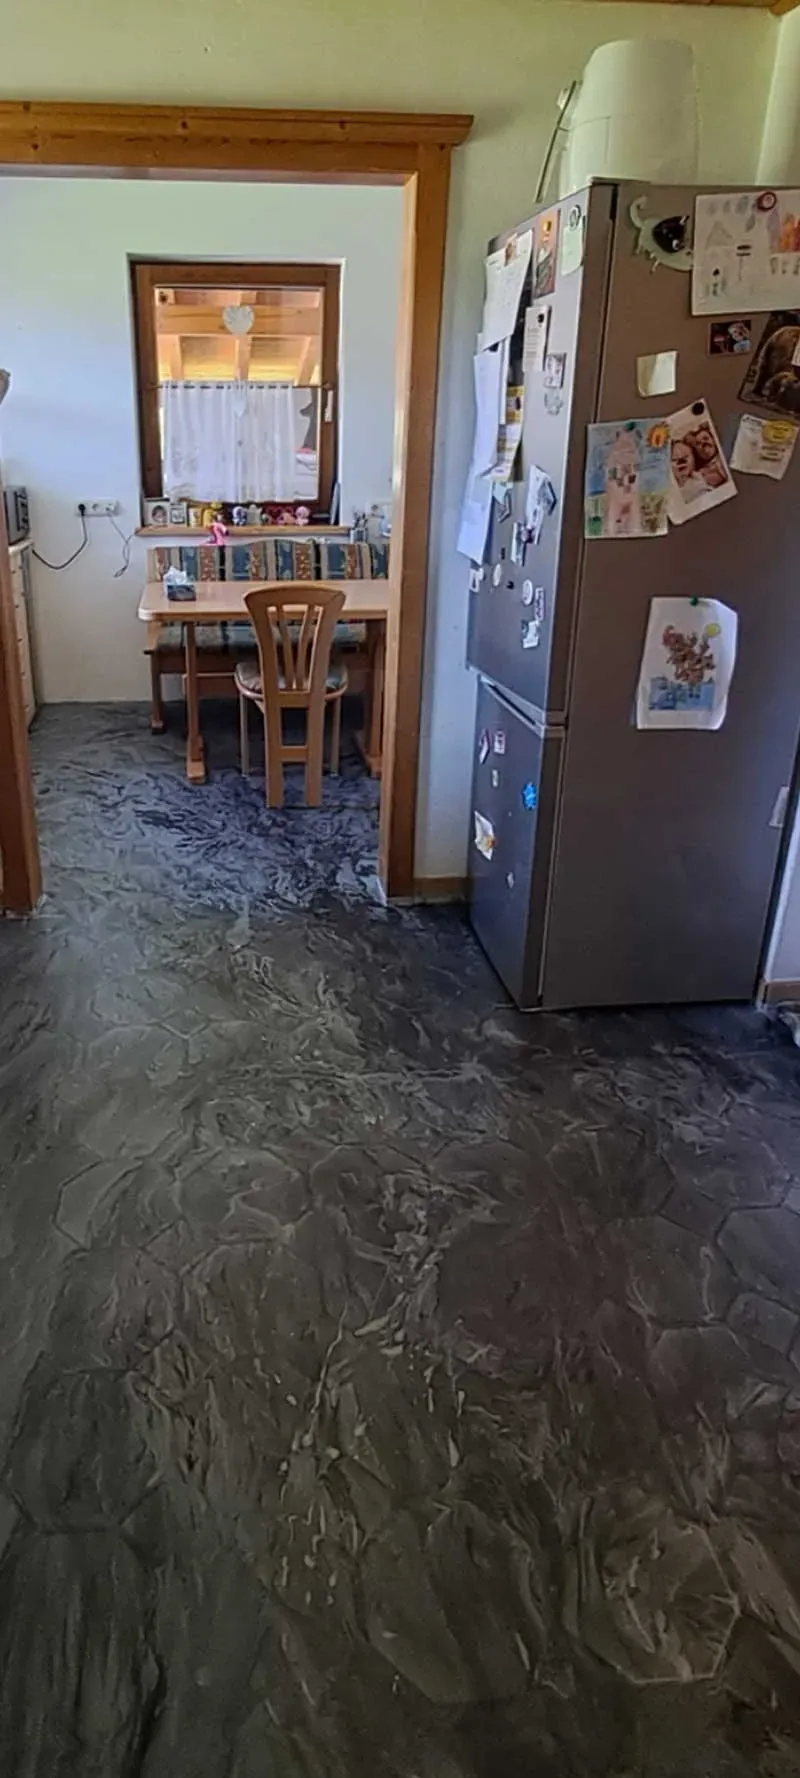
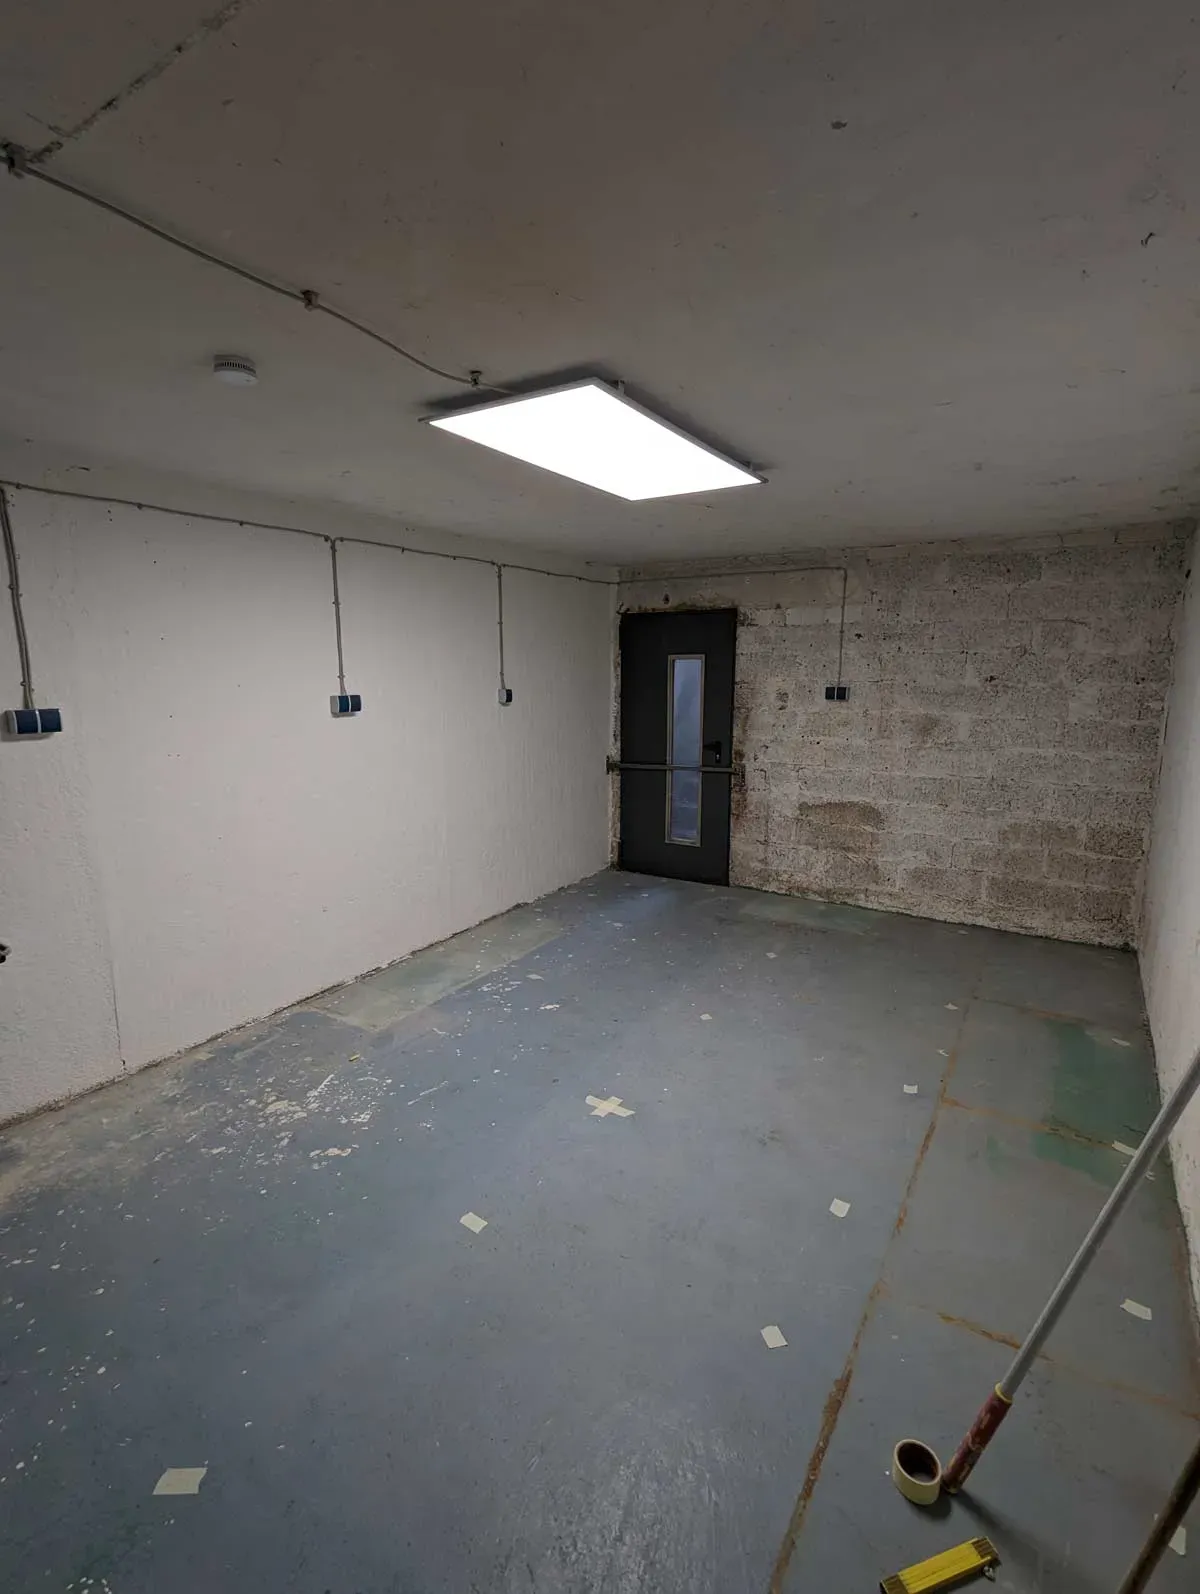
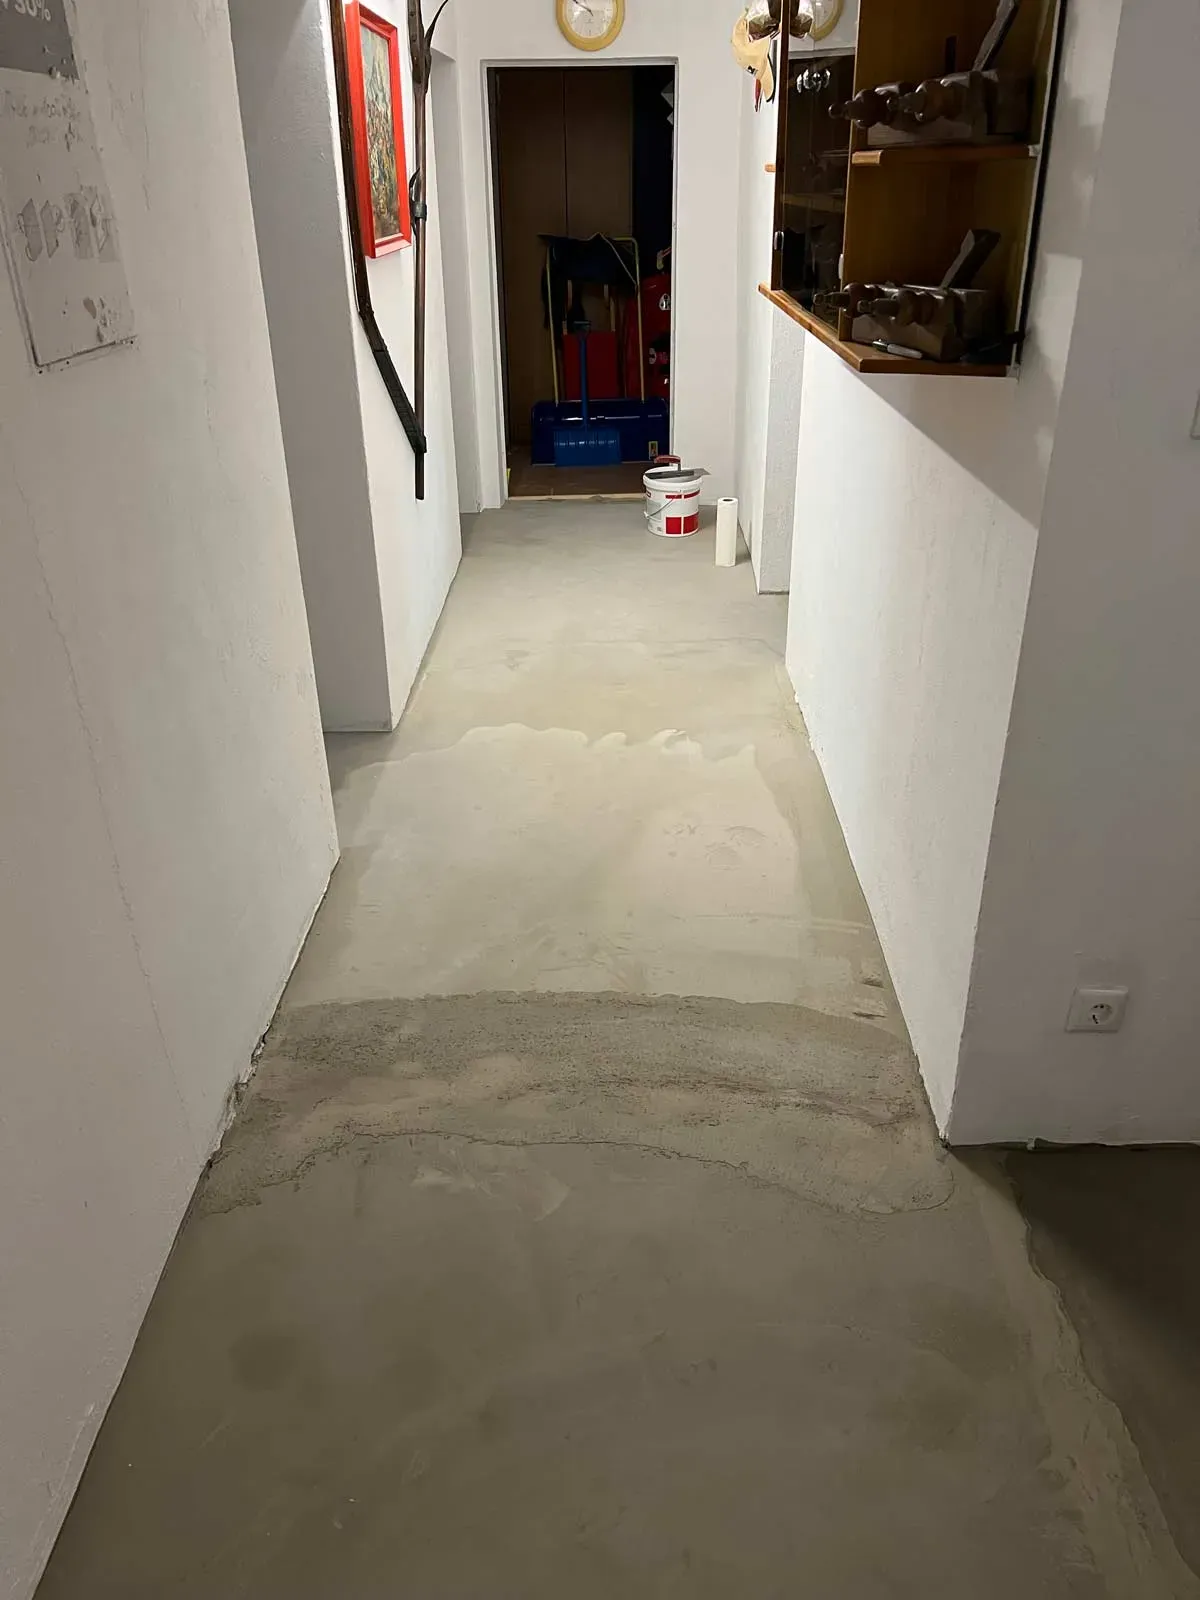
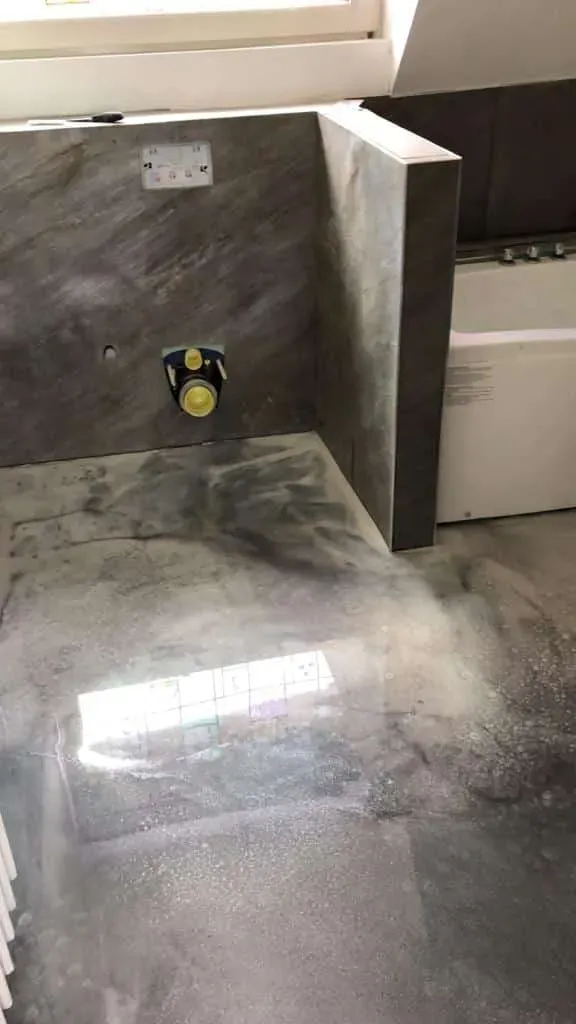
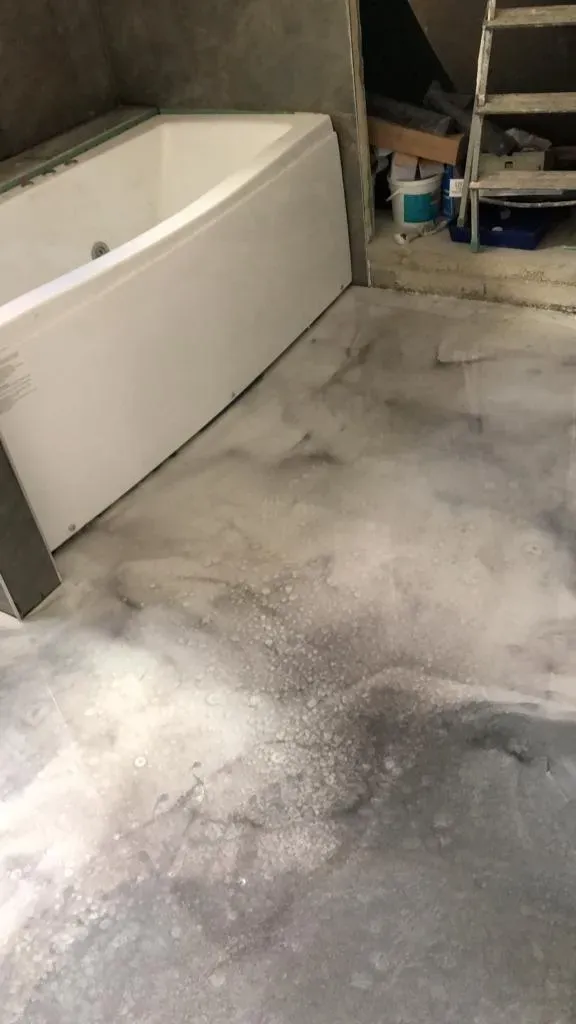
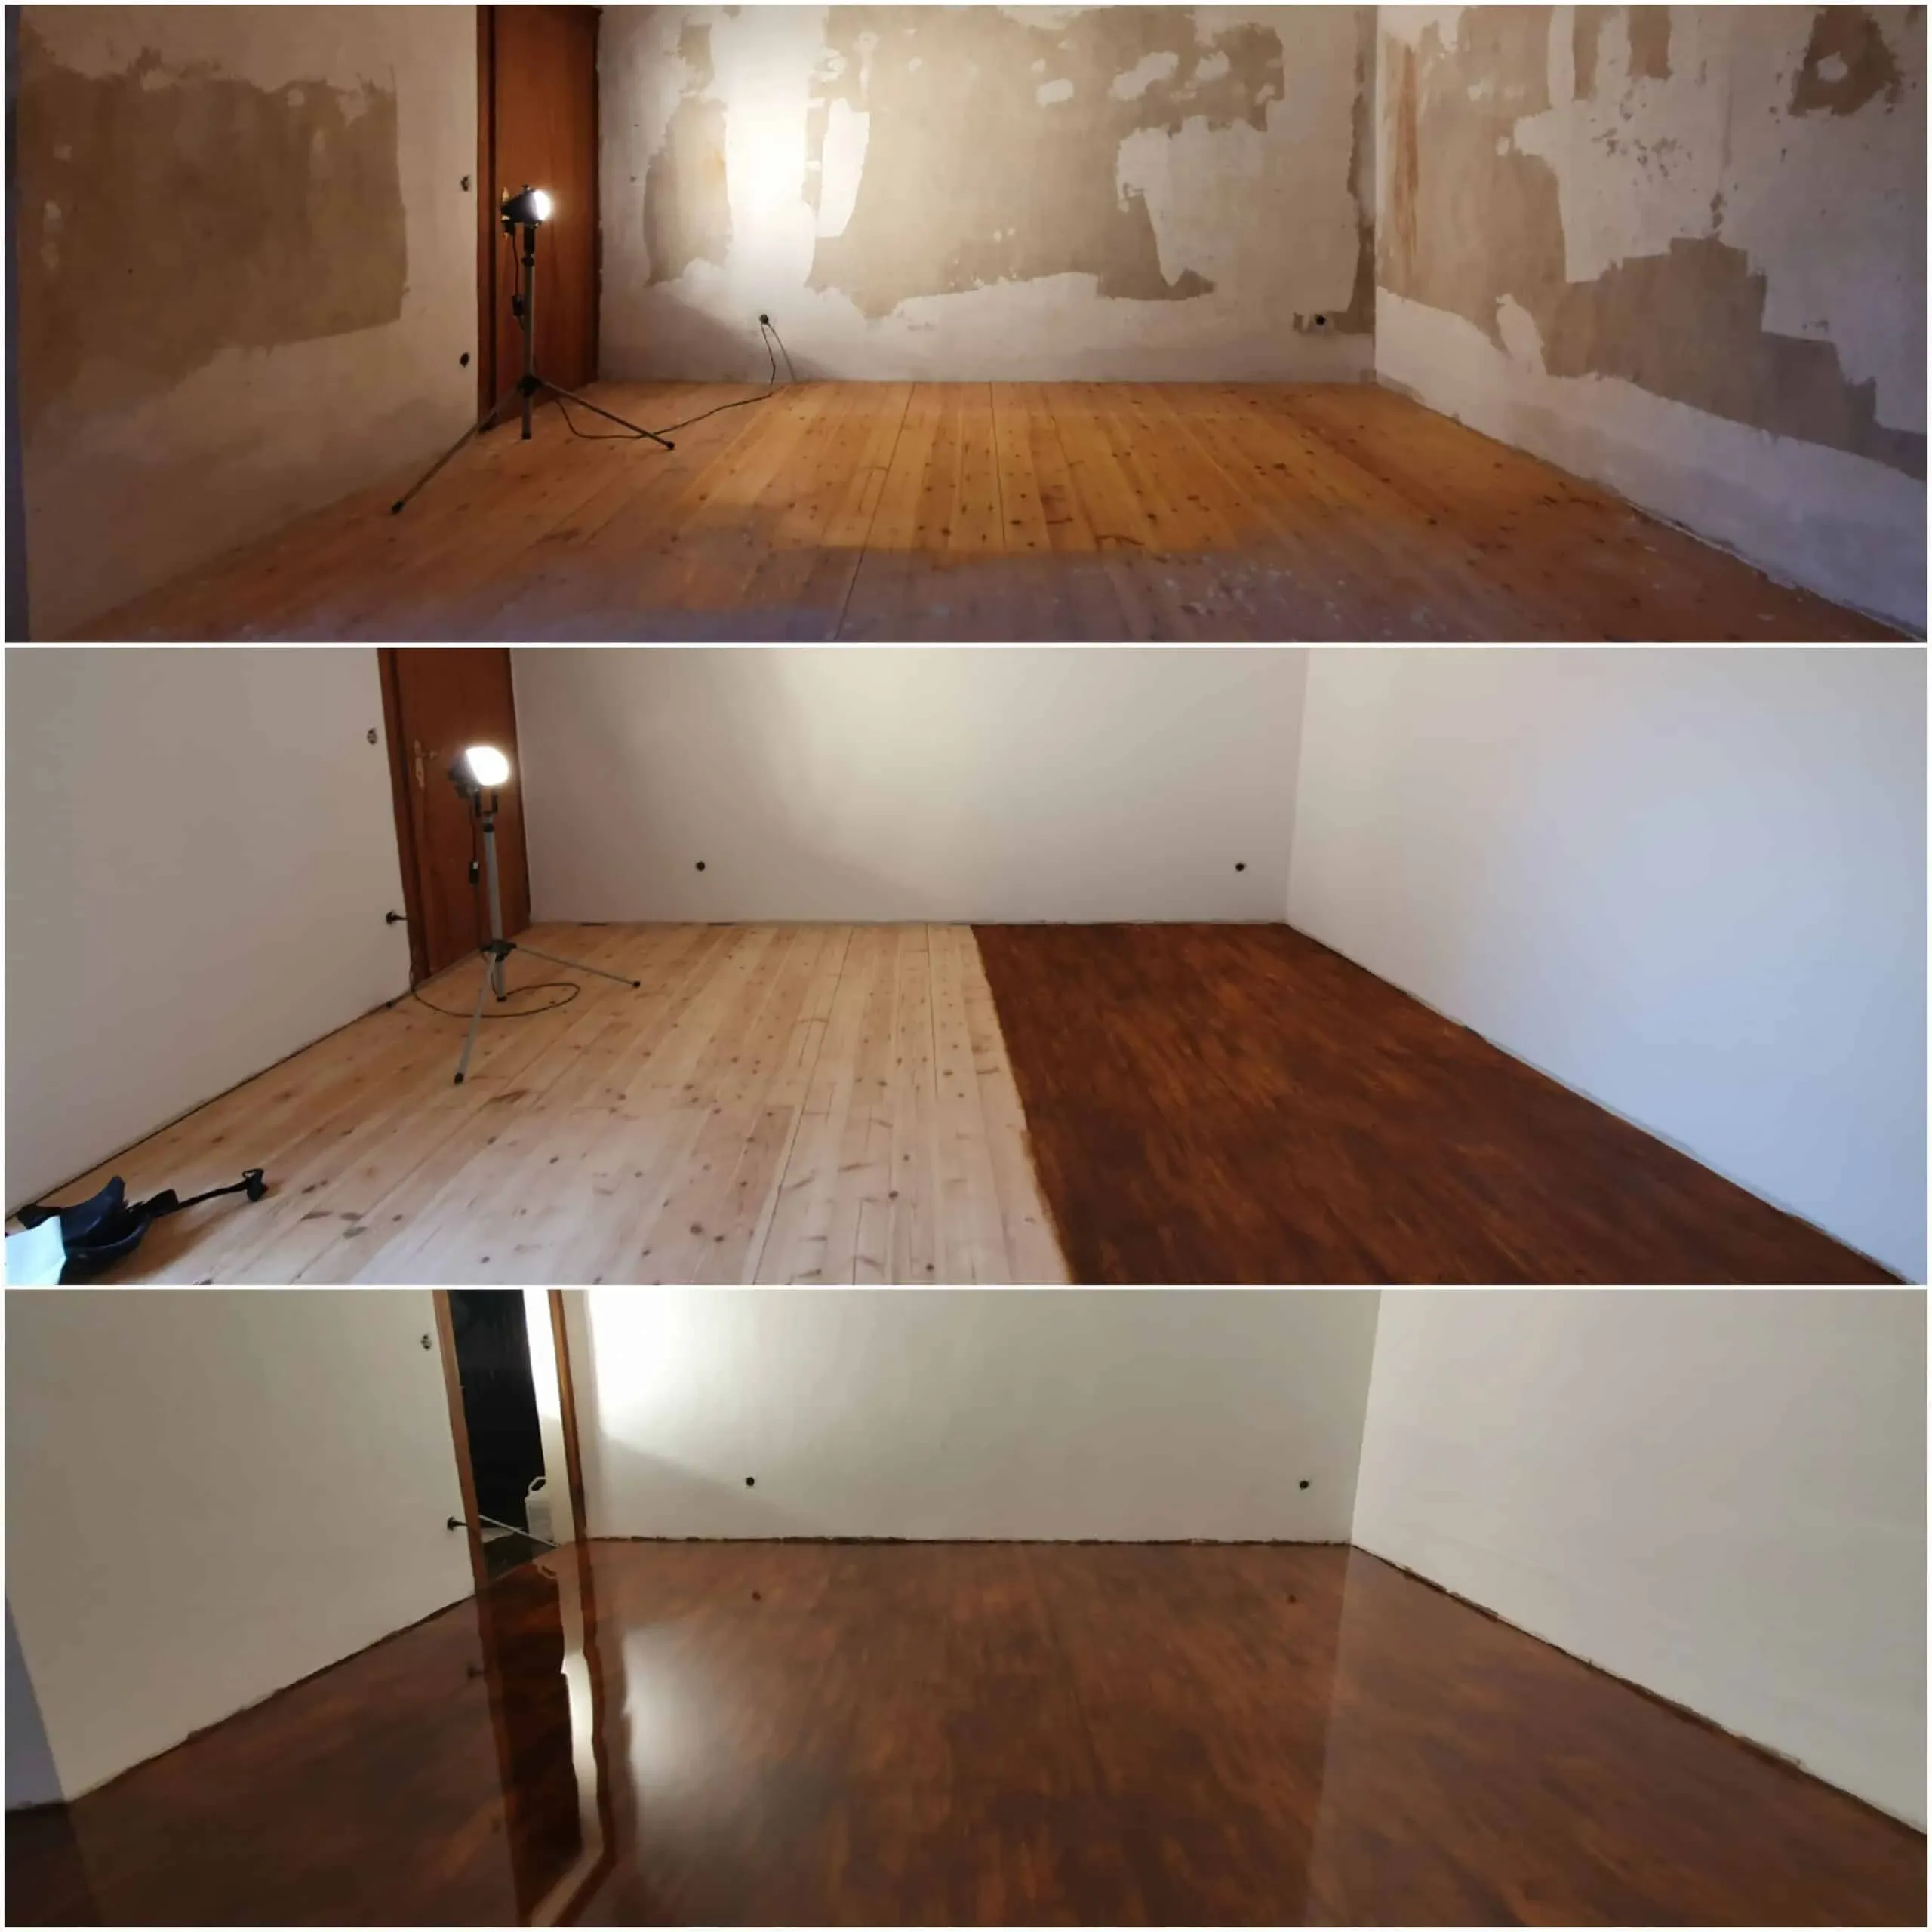
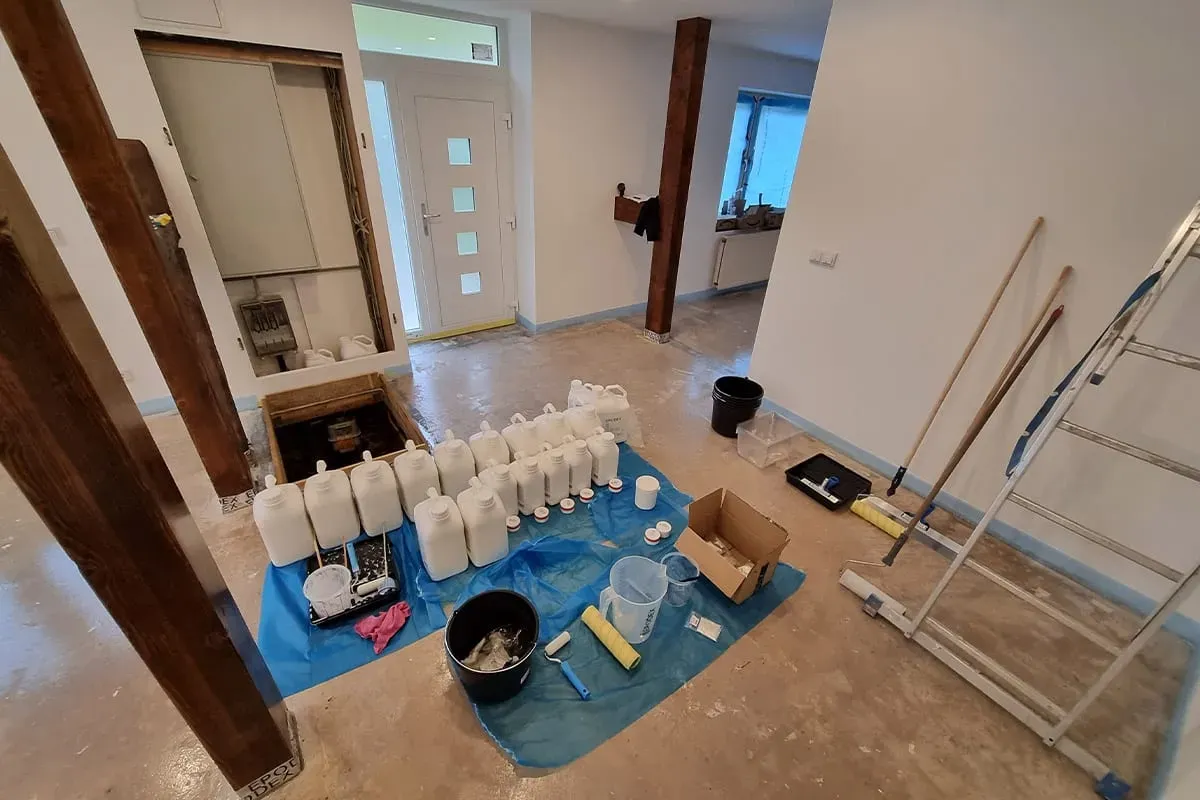
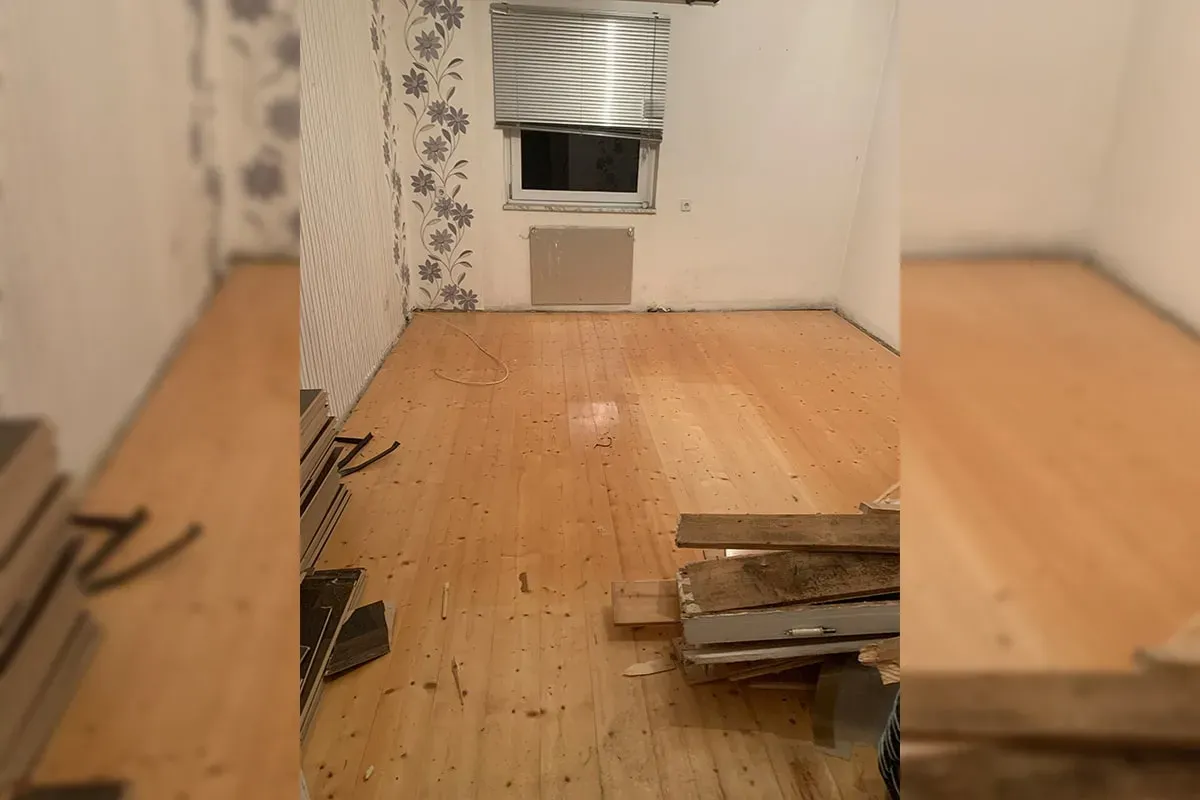
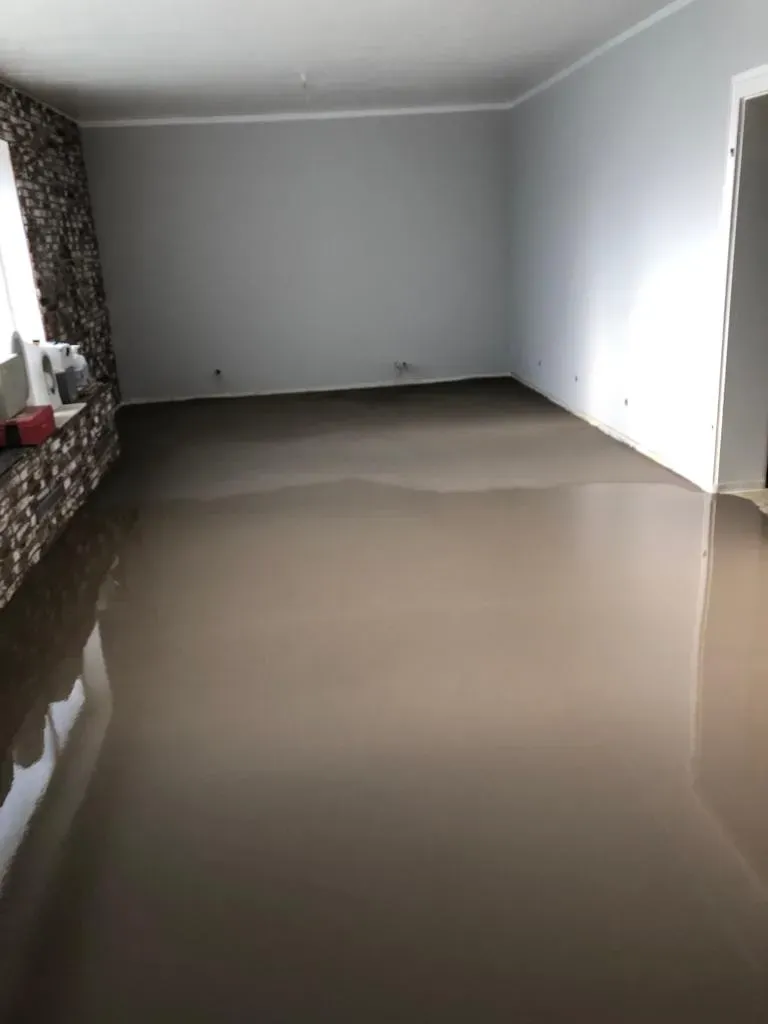
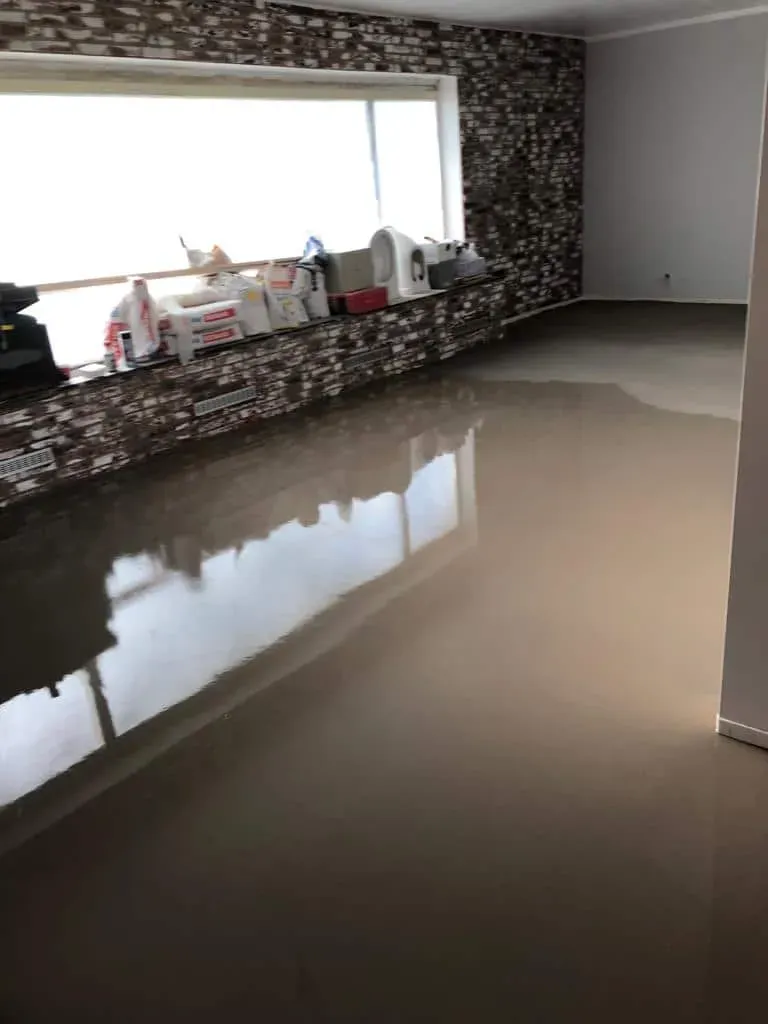
1. Prepare substrate
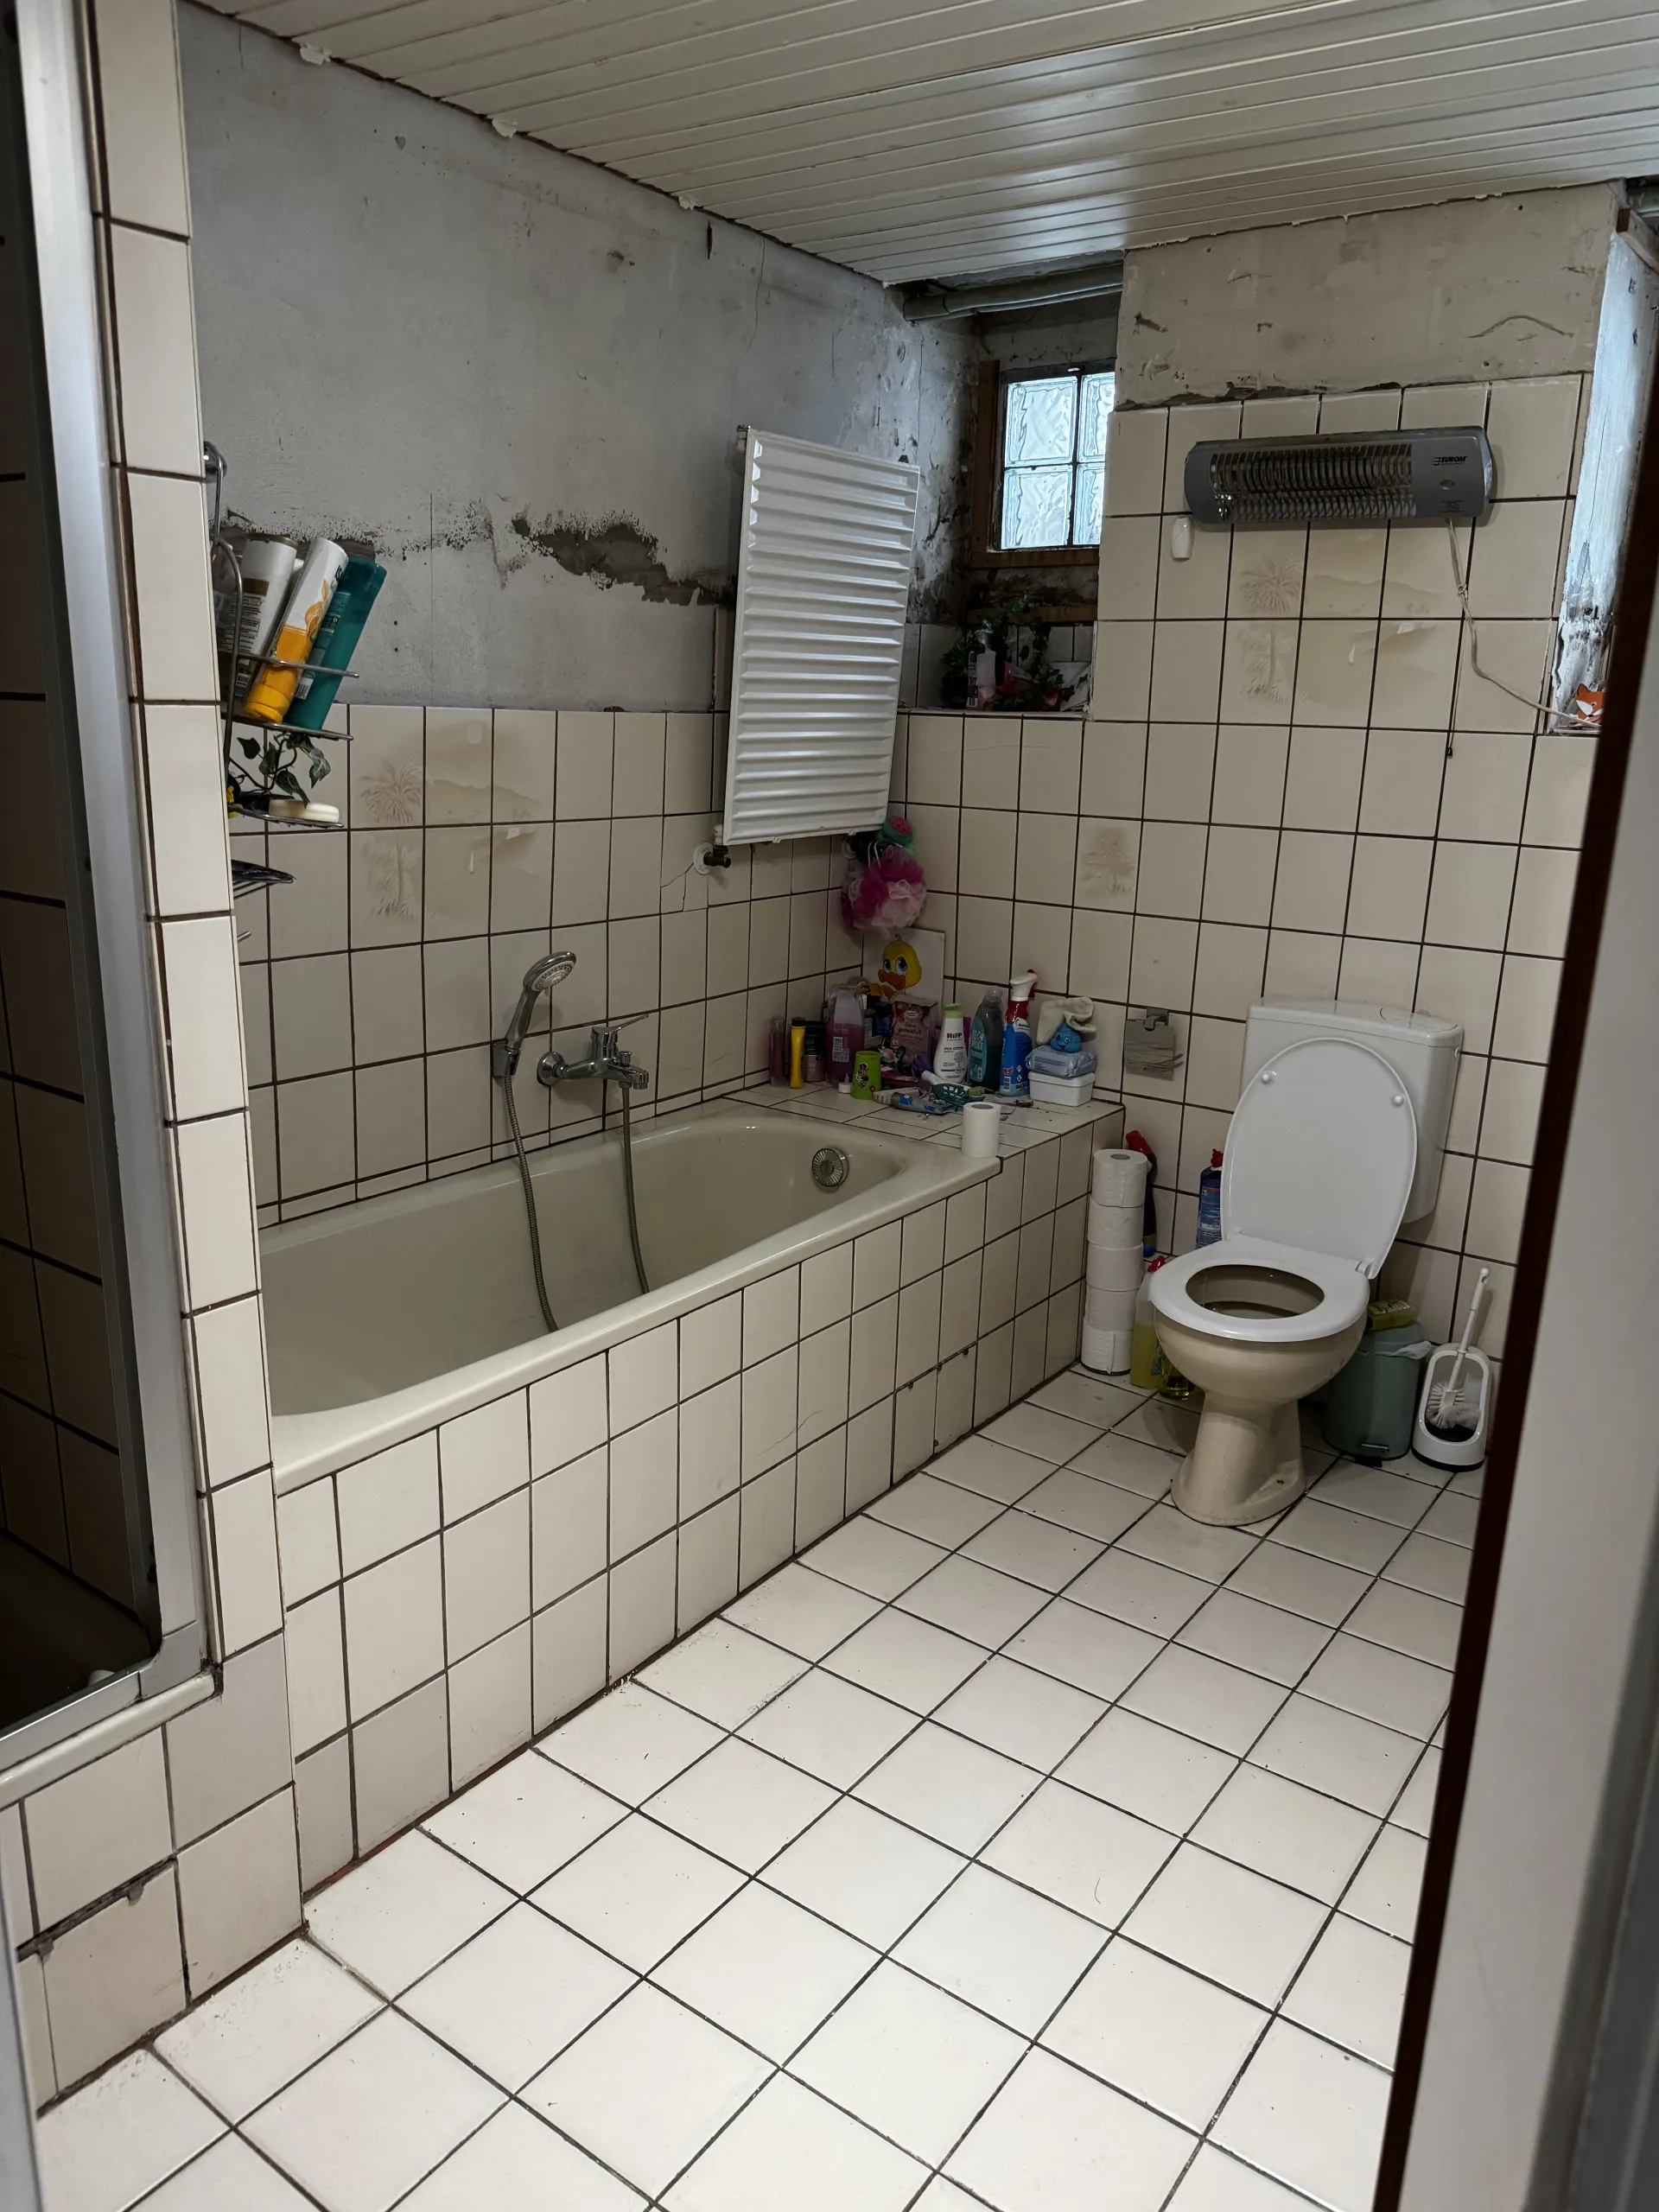
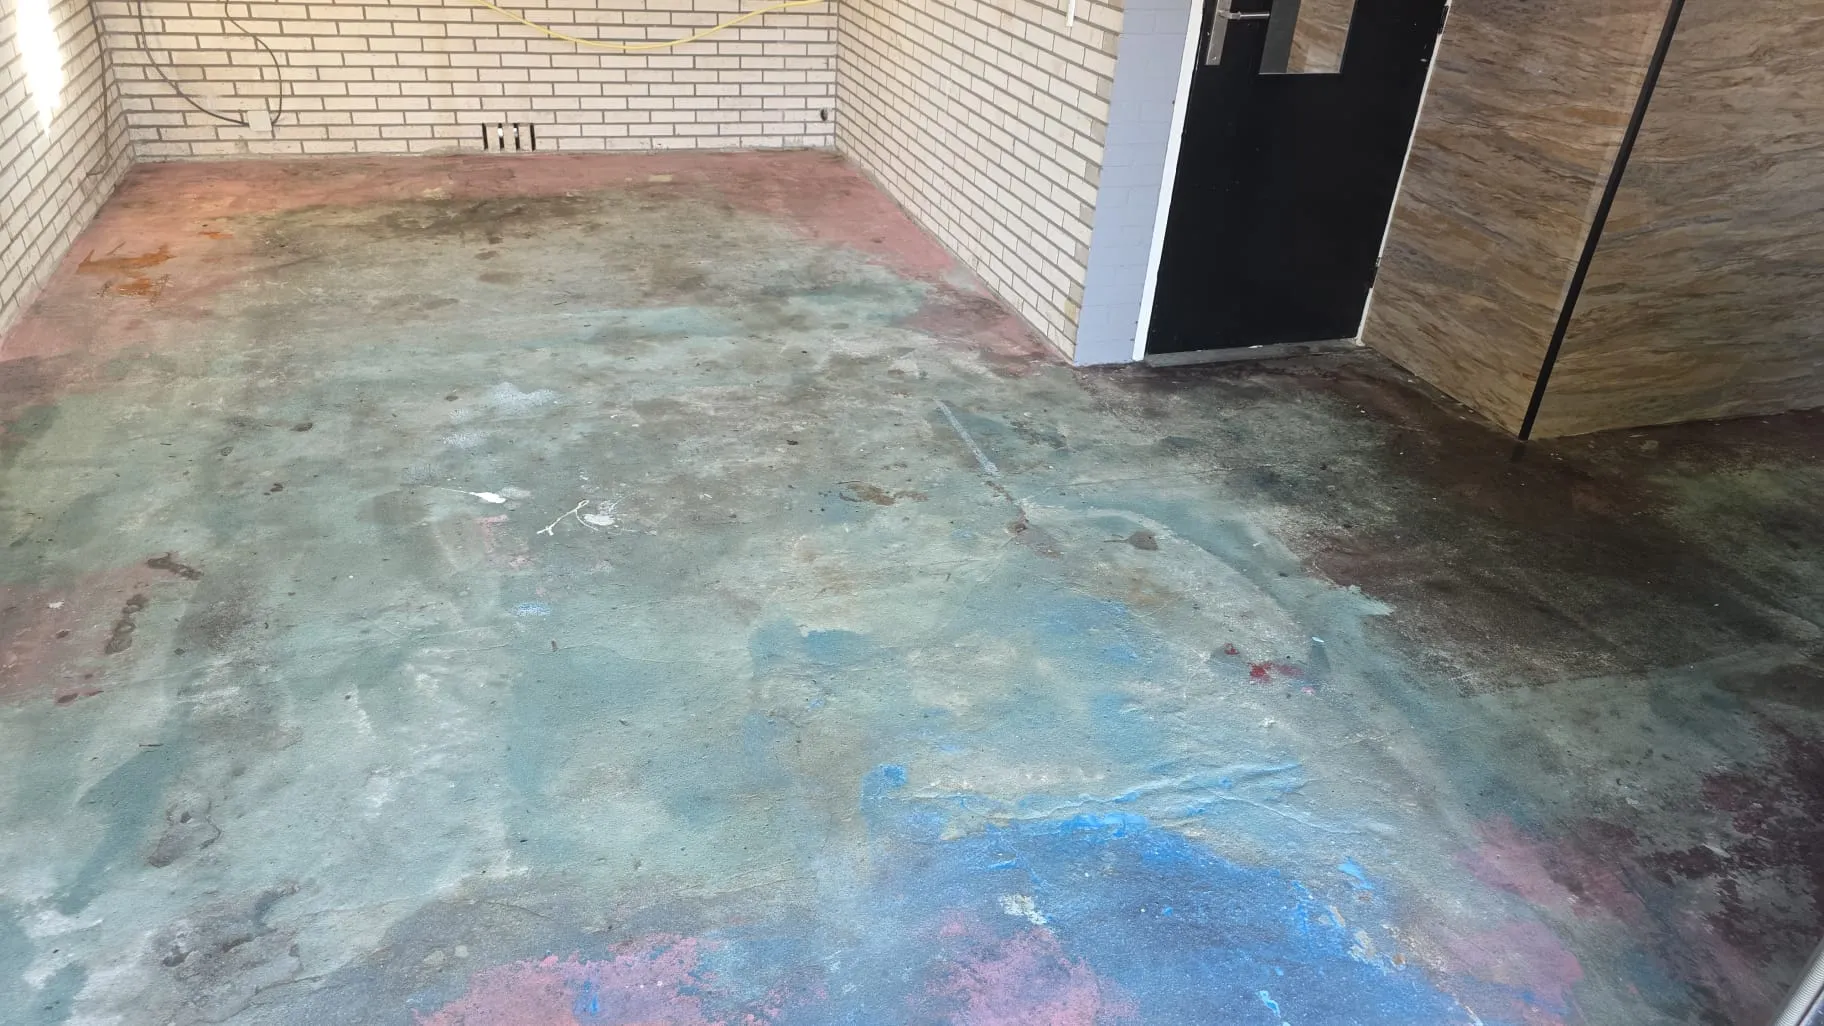
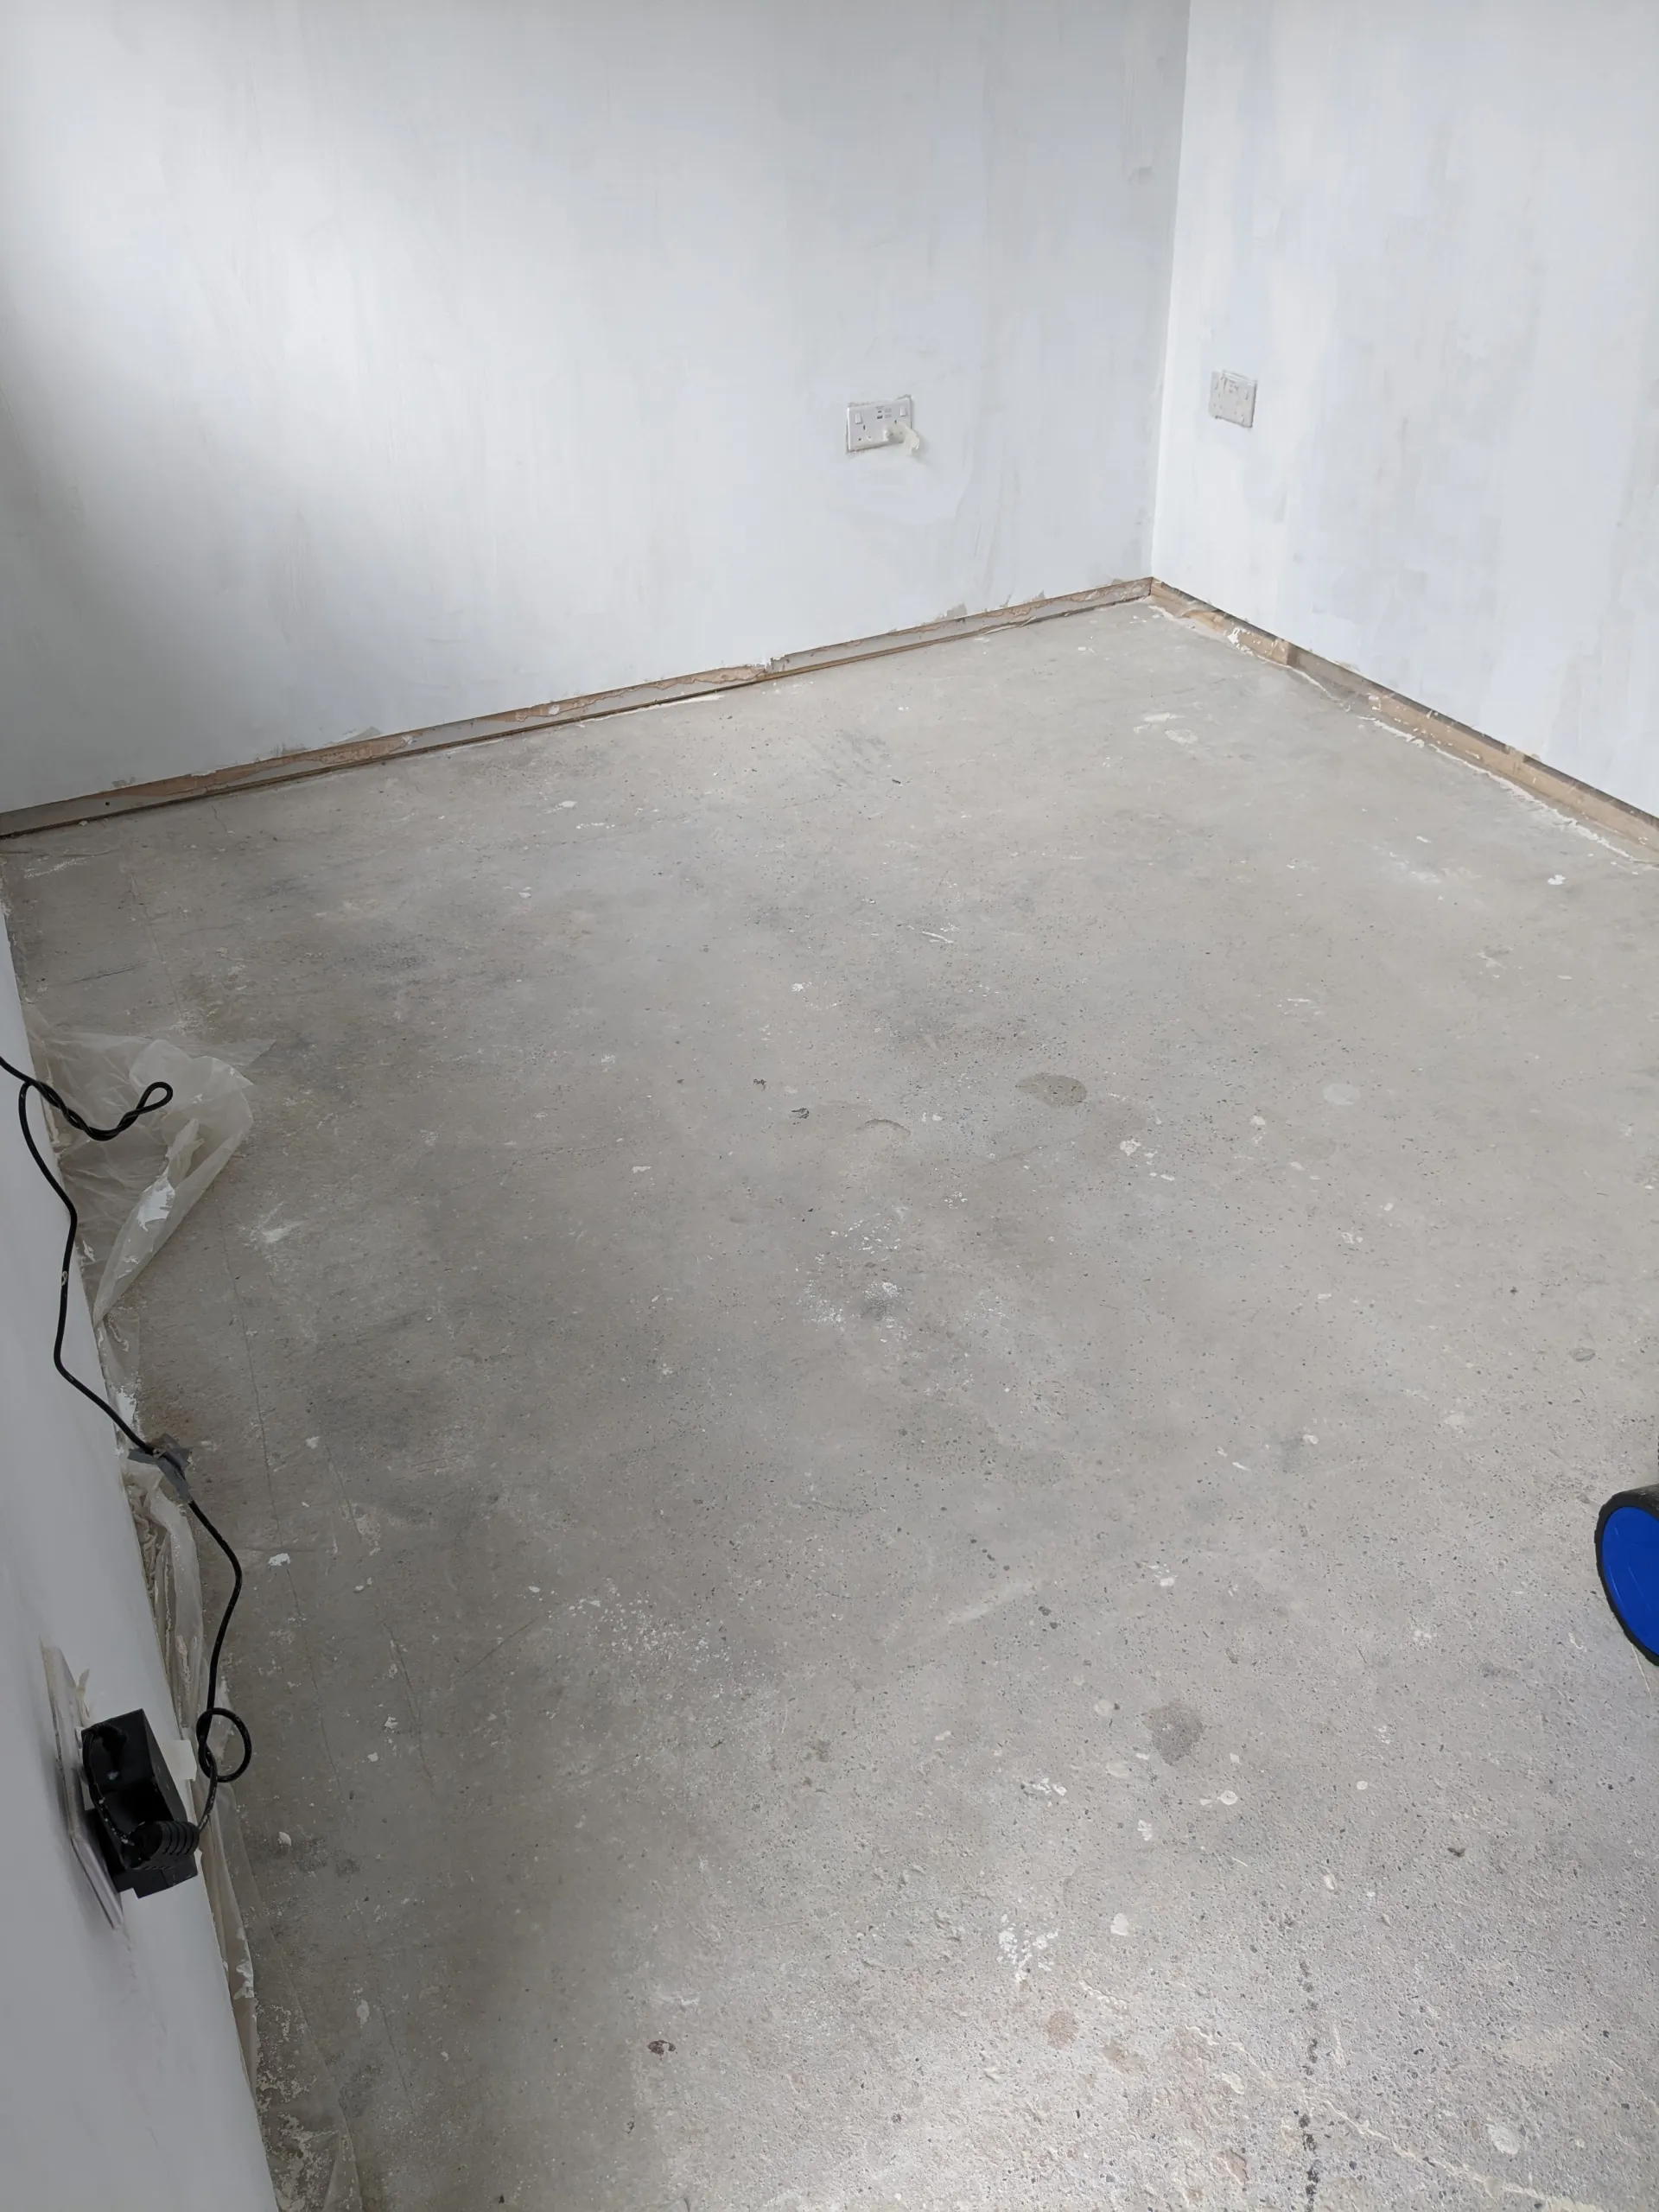
The substrate must be level, load-bearing, dry, sufficiently tensile and compressive strength, and clean. Dust, oil, grease and release agents must be removed in advance using suitable methods (preferred method: shot blasting (except for EP Design transparent); alternatively diamond grinding with thorough vacuuming).
Application should be carried out at 17-23 °C (room and substrate temperature) and a maximum relative humidity of 60 %.
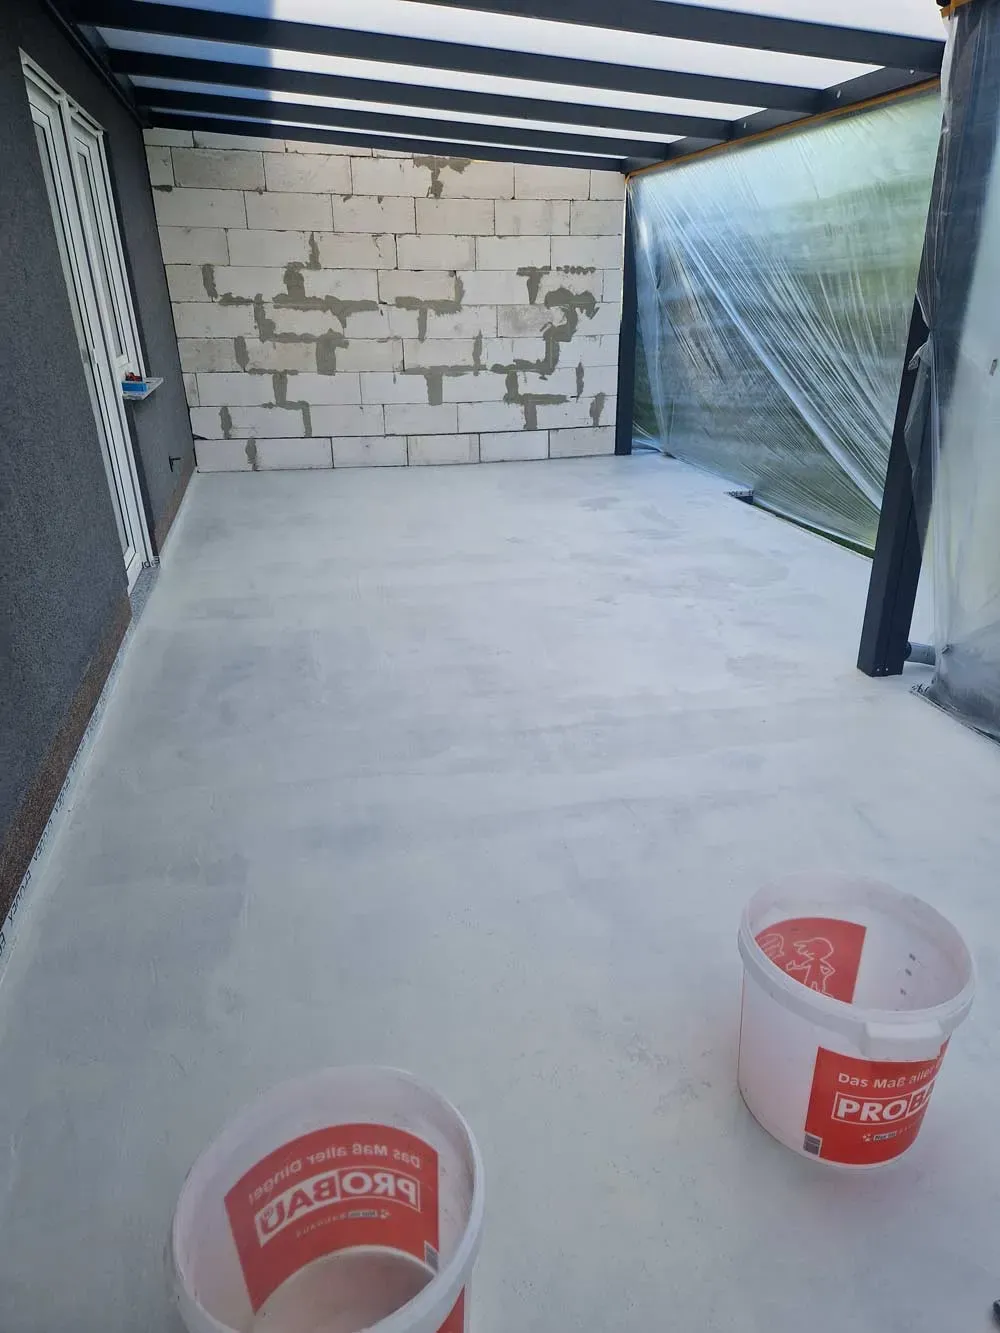
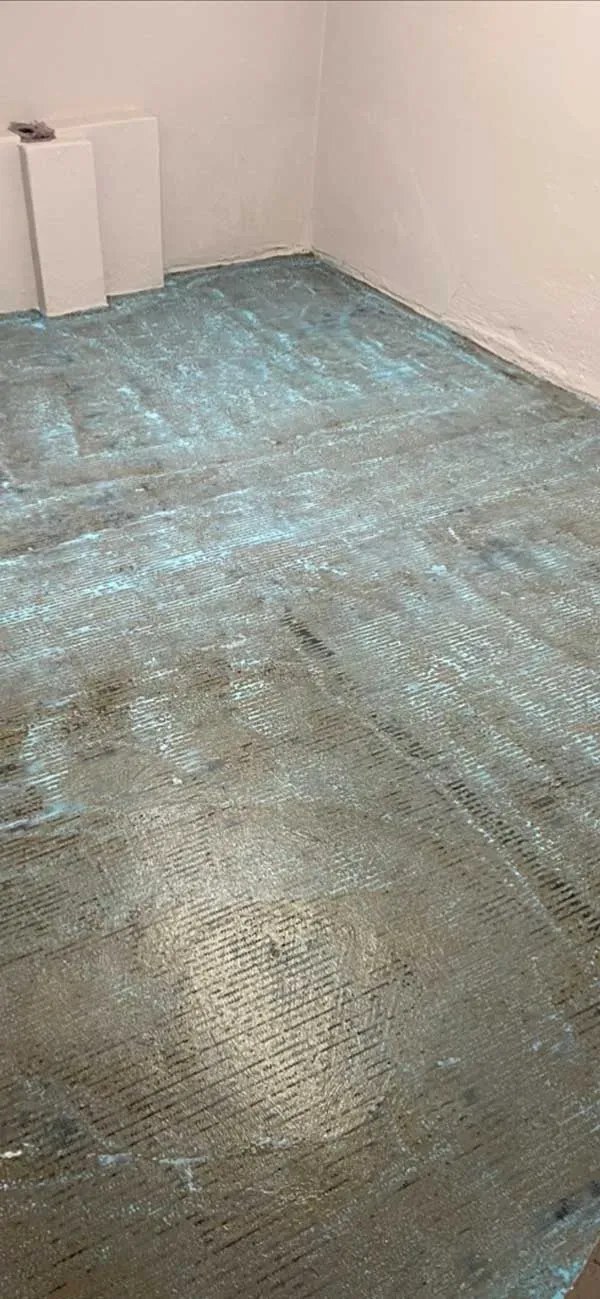
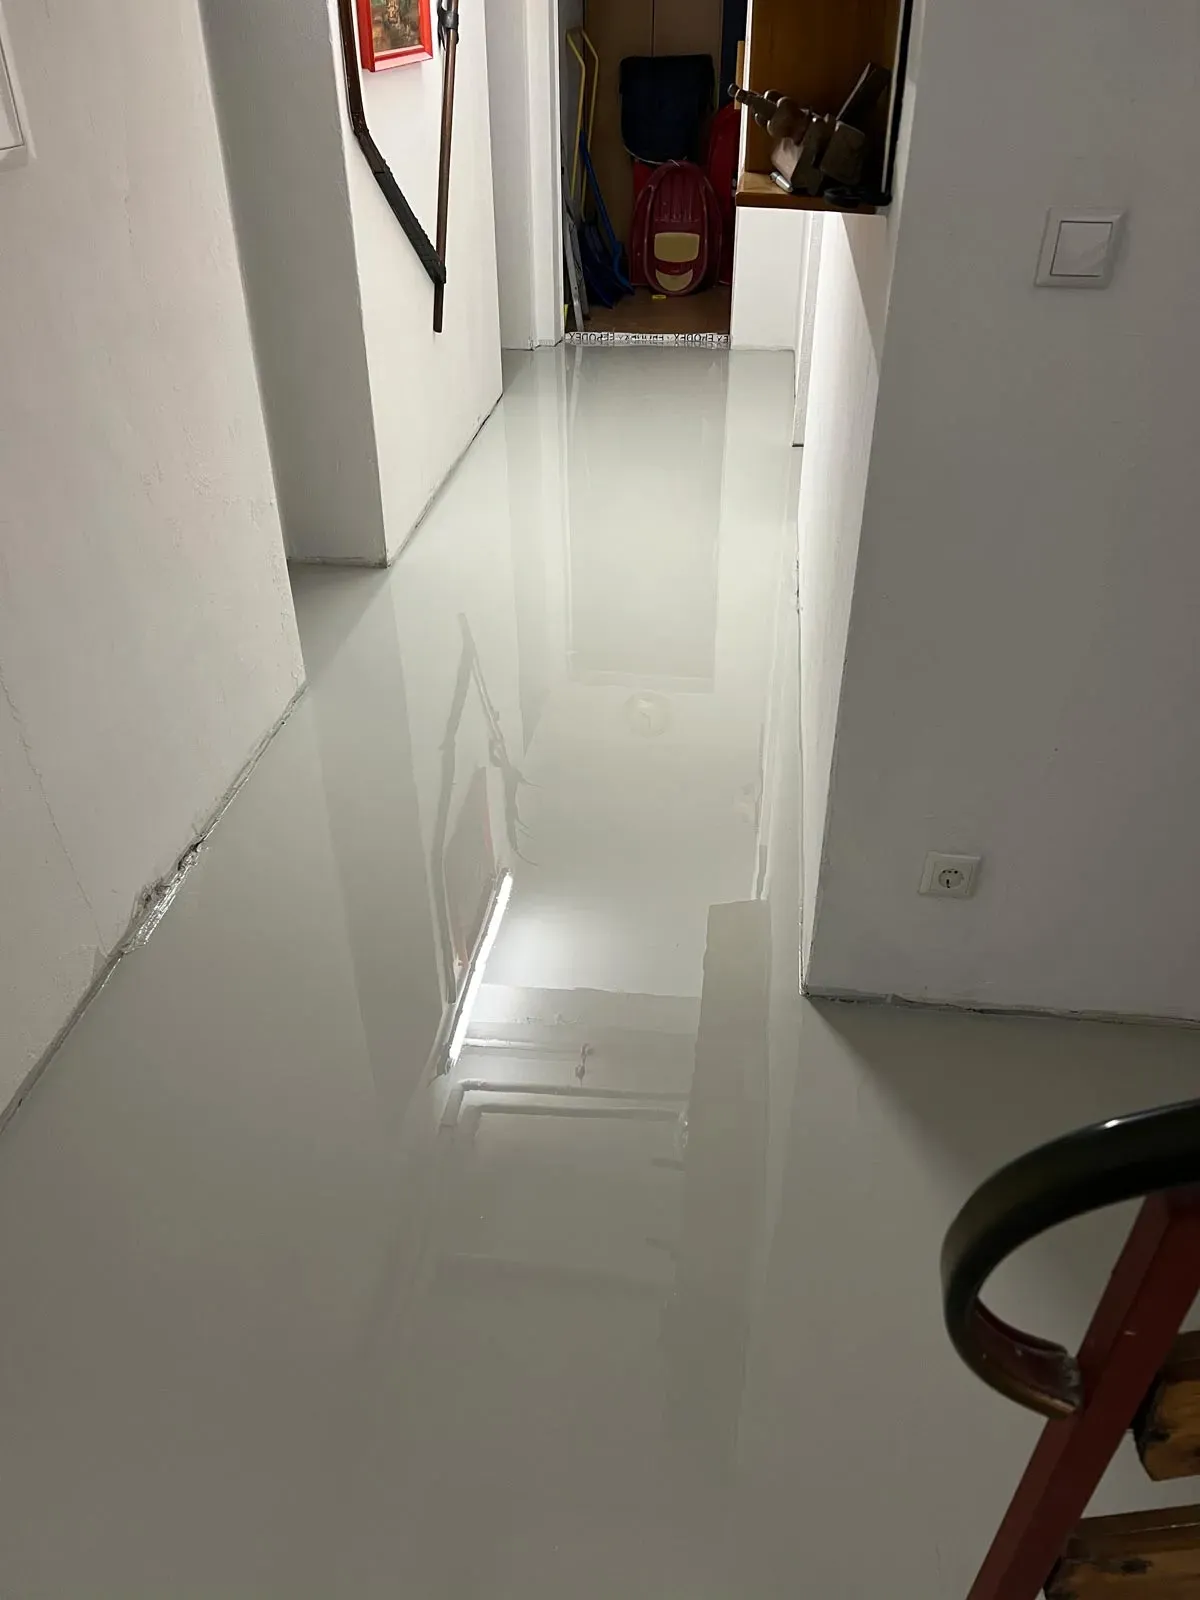
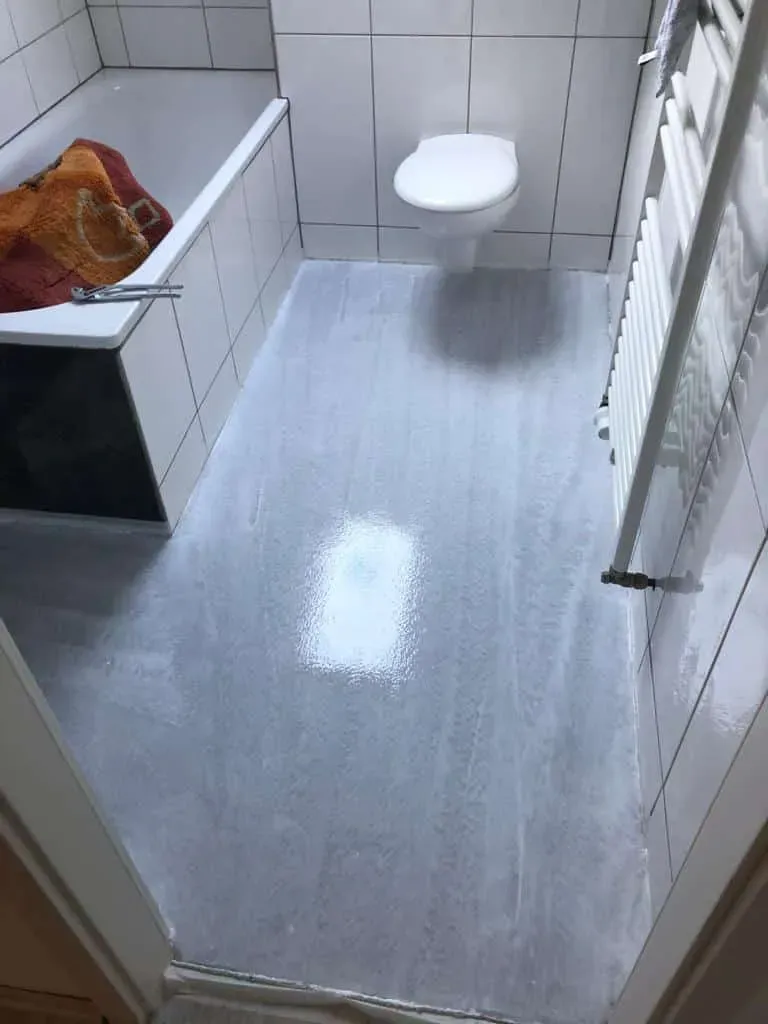
2. Apply EP Primer (except for EP Design transparent)
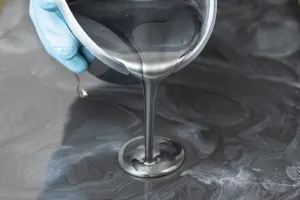
- For mixing, pour the complete contents of EP Primer component B into the container of EP Primer component A and mix slowly and thoroughly with a drill for approx. 3 minutes at 300-400 rpm.
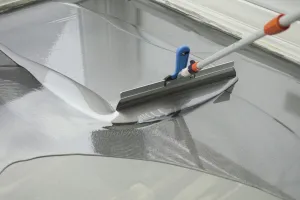
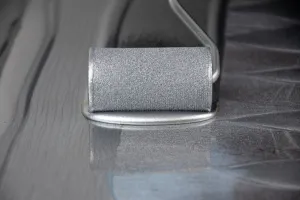
Working Time: approx. 40 minutes at 20 °C. - Immediately after mixing, pour the material onto the floor, spread it with a rubber squeegee and then roll over it to achieve an even surface and retain the floor texture.
- During curing, protect the area from moisture, dust and mechanical stress.
Walkable after approx. 14 hours, fully load-bearing after approx. 7 days (temperature-dependent). - Subsequent coating with other products may be applied at 20 °C no earlier than 14 hours and no later than 36 hours after application of the EP Primer.
Important: If the subsequent coating is not applied within 36 hours, the EP Primer must be broadcast with quartz sand while still fresh/liquid (recommended amount: approx. 300 g/m²).
Before applying the next coating, any loose excess quartz sand must be removed with a broom.
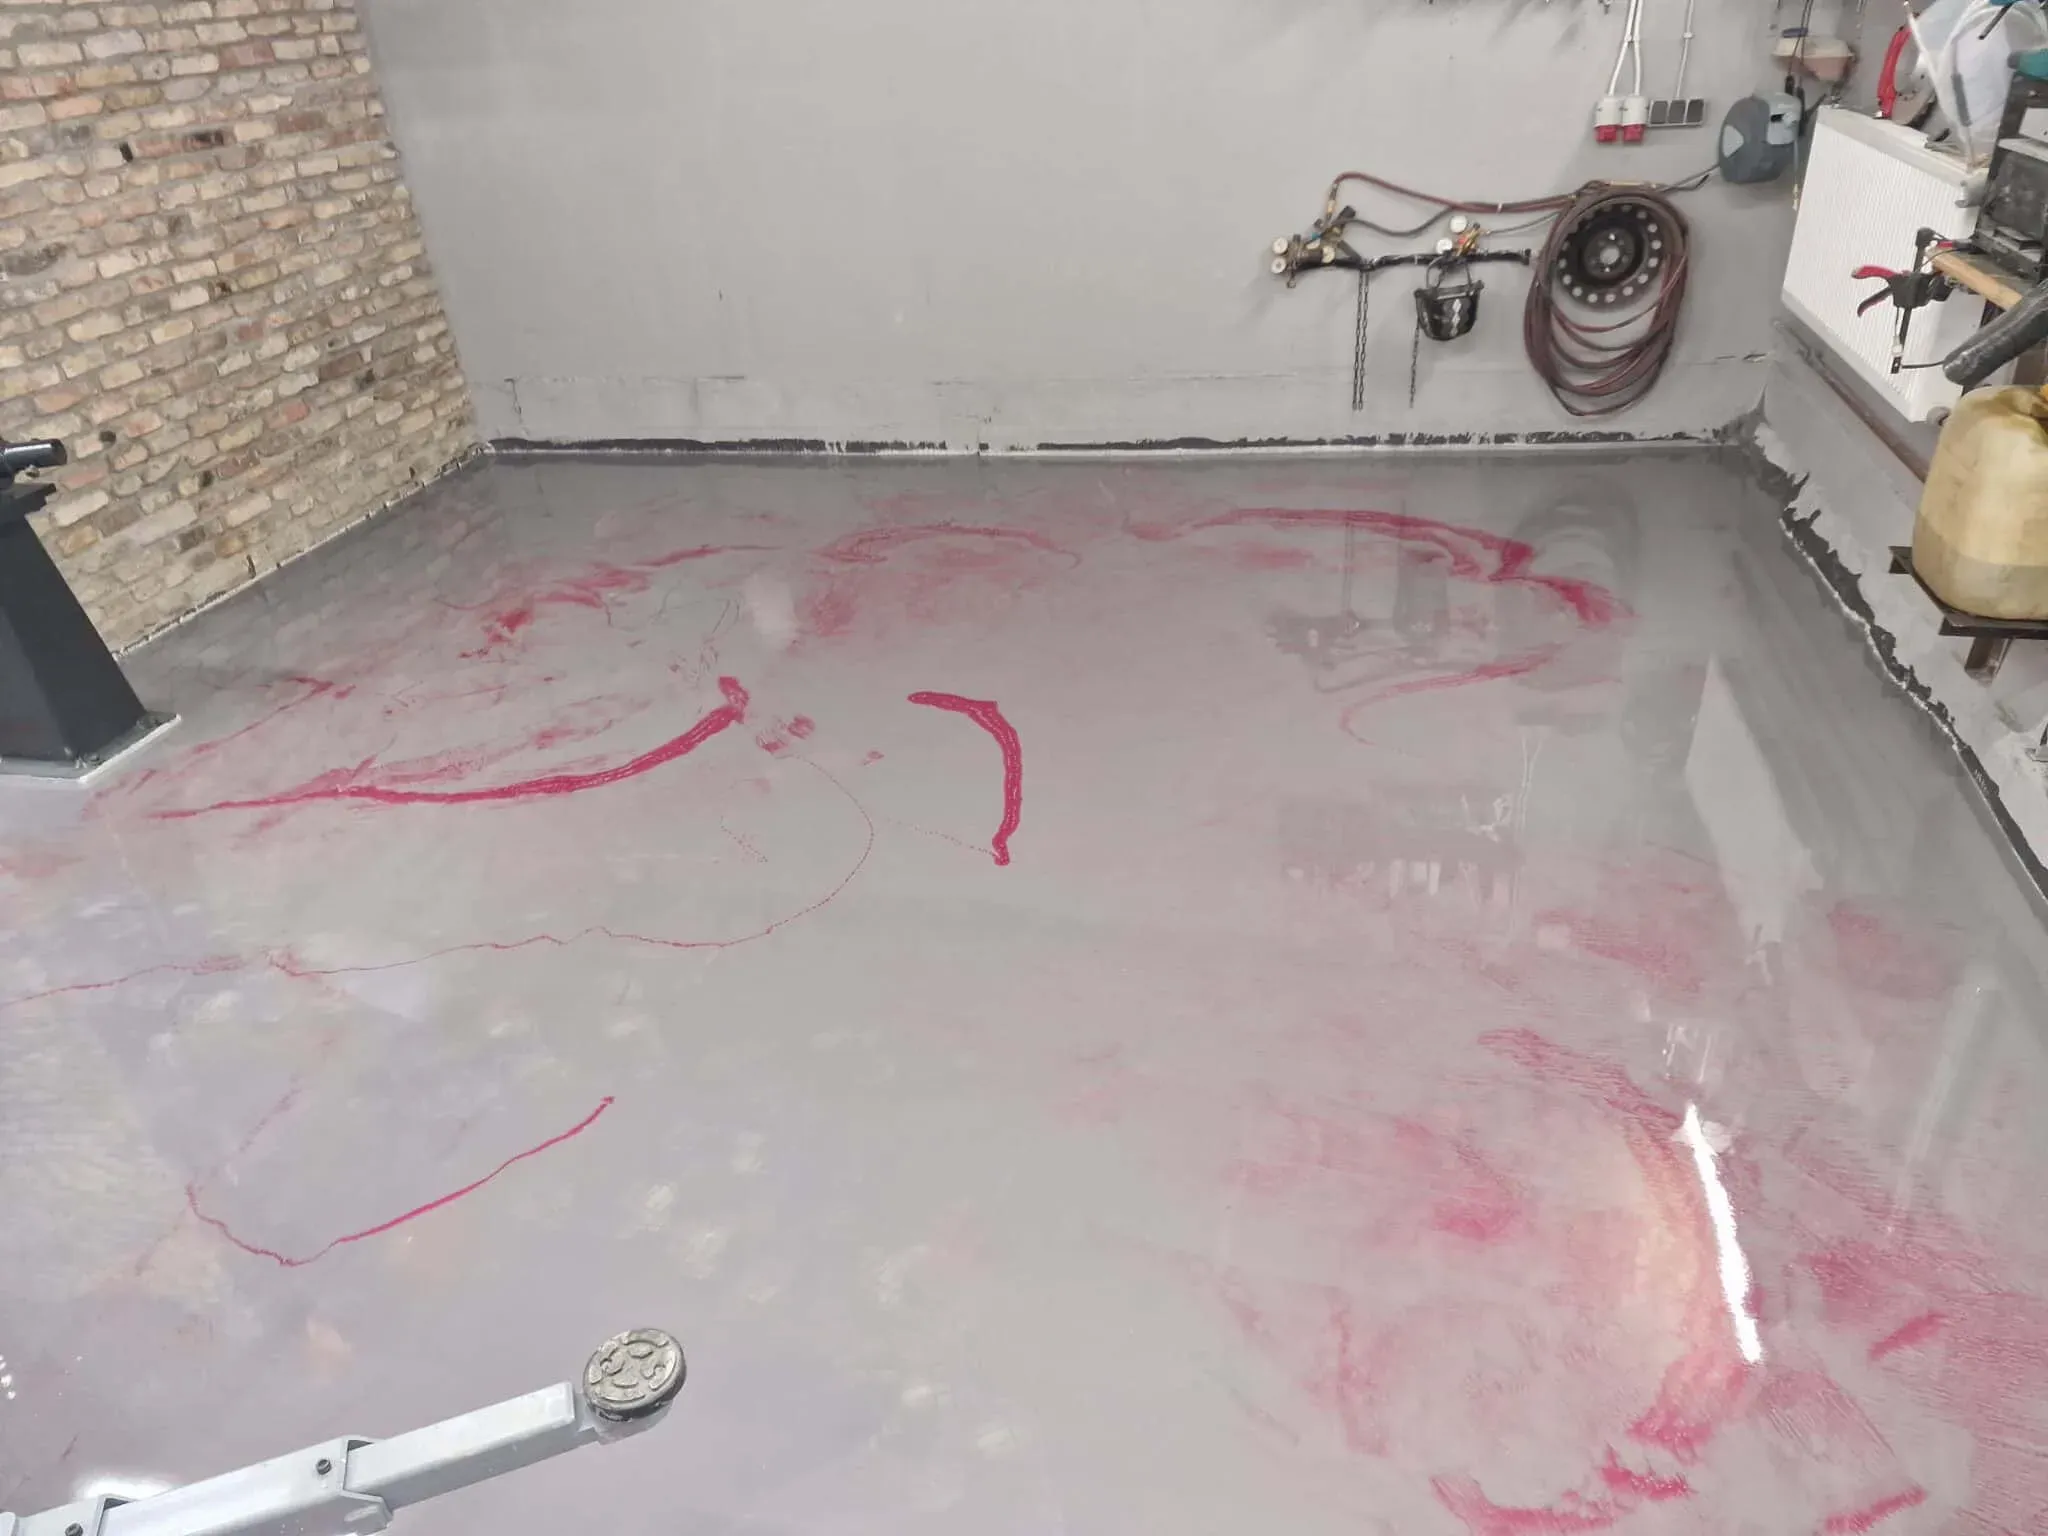
3. If required: level unevenness (surface roughness) greater than 0.5 mm with EP Levelling Compound (except for EP Design transparent)
- For mixing, pour the complete contents of EP Levelling Compound component B and 10 kg of quartz sand into the container of EP Levelling Compound component A and mix slowly and thoroughly with a drill for approx. 3 minutes at 300-400 rpm.
Working Time: approx. 30 minutes at 20 °C. - Immediately after mixing, pour the mixture onto the floor, spread it evenly with a surface squeegee and then deaerate with a spiked roller to achieve an even surface and a smooth finish.
- During curing, protect the area from moisture, dust and mechanical stress.
Walkable after approx. 15 hours, fully load-bearing after approx. 7 days (temperature-dependent). - Subsequent coating with EP Design may be applied at 20 °C no earlier than 15 hours and no later than 36 hours after application of EP Levelling Compound.
Important: If EP Design is not applied within 36 hours, the EP Levelling Compound must be broadcast with quartz sand while still fresh/liquid (recommended amount: approx. 500 g/m²).
Before applying the EP Design coating, any loose excess quartz sand must be removed with a broom.
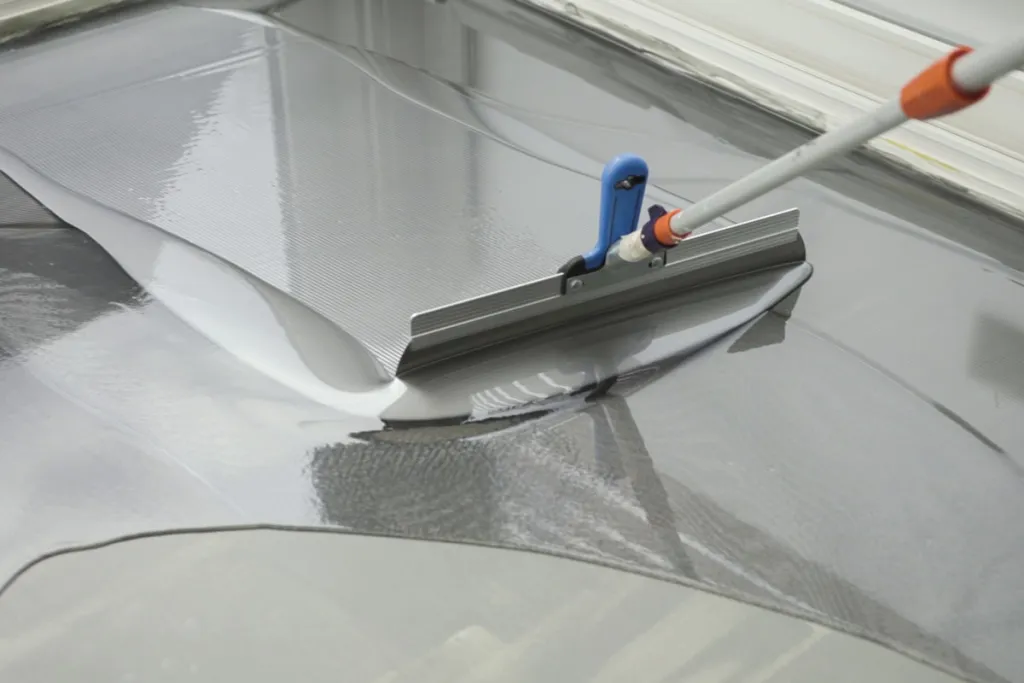
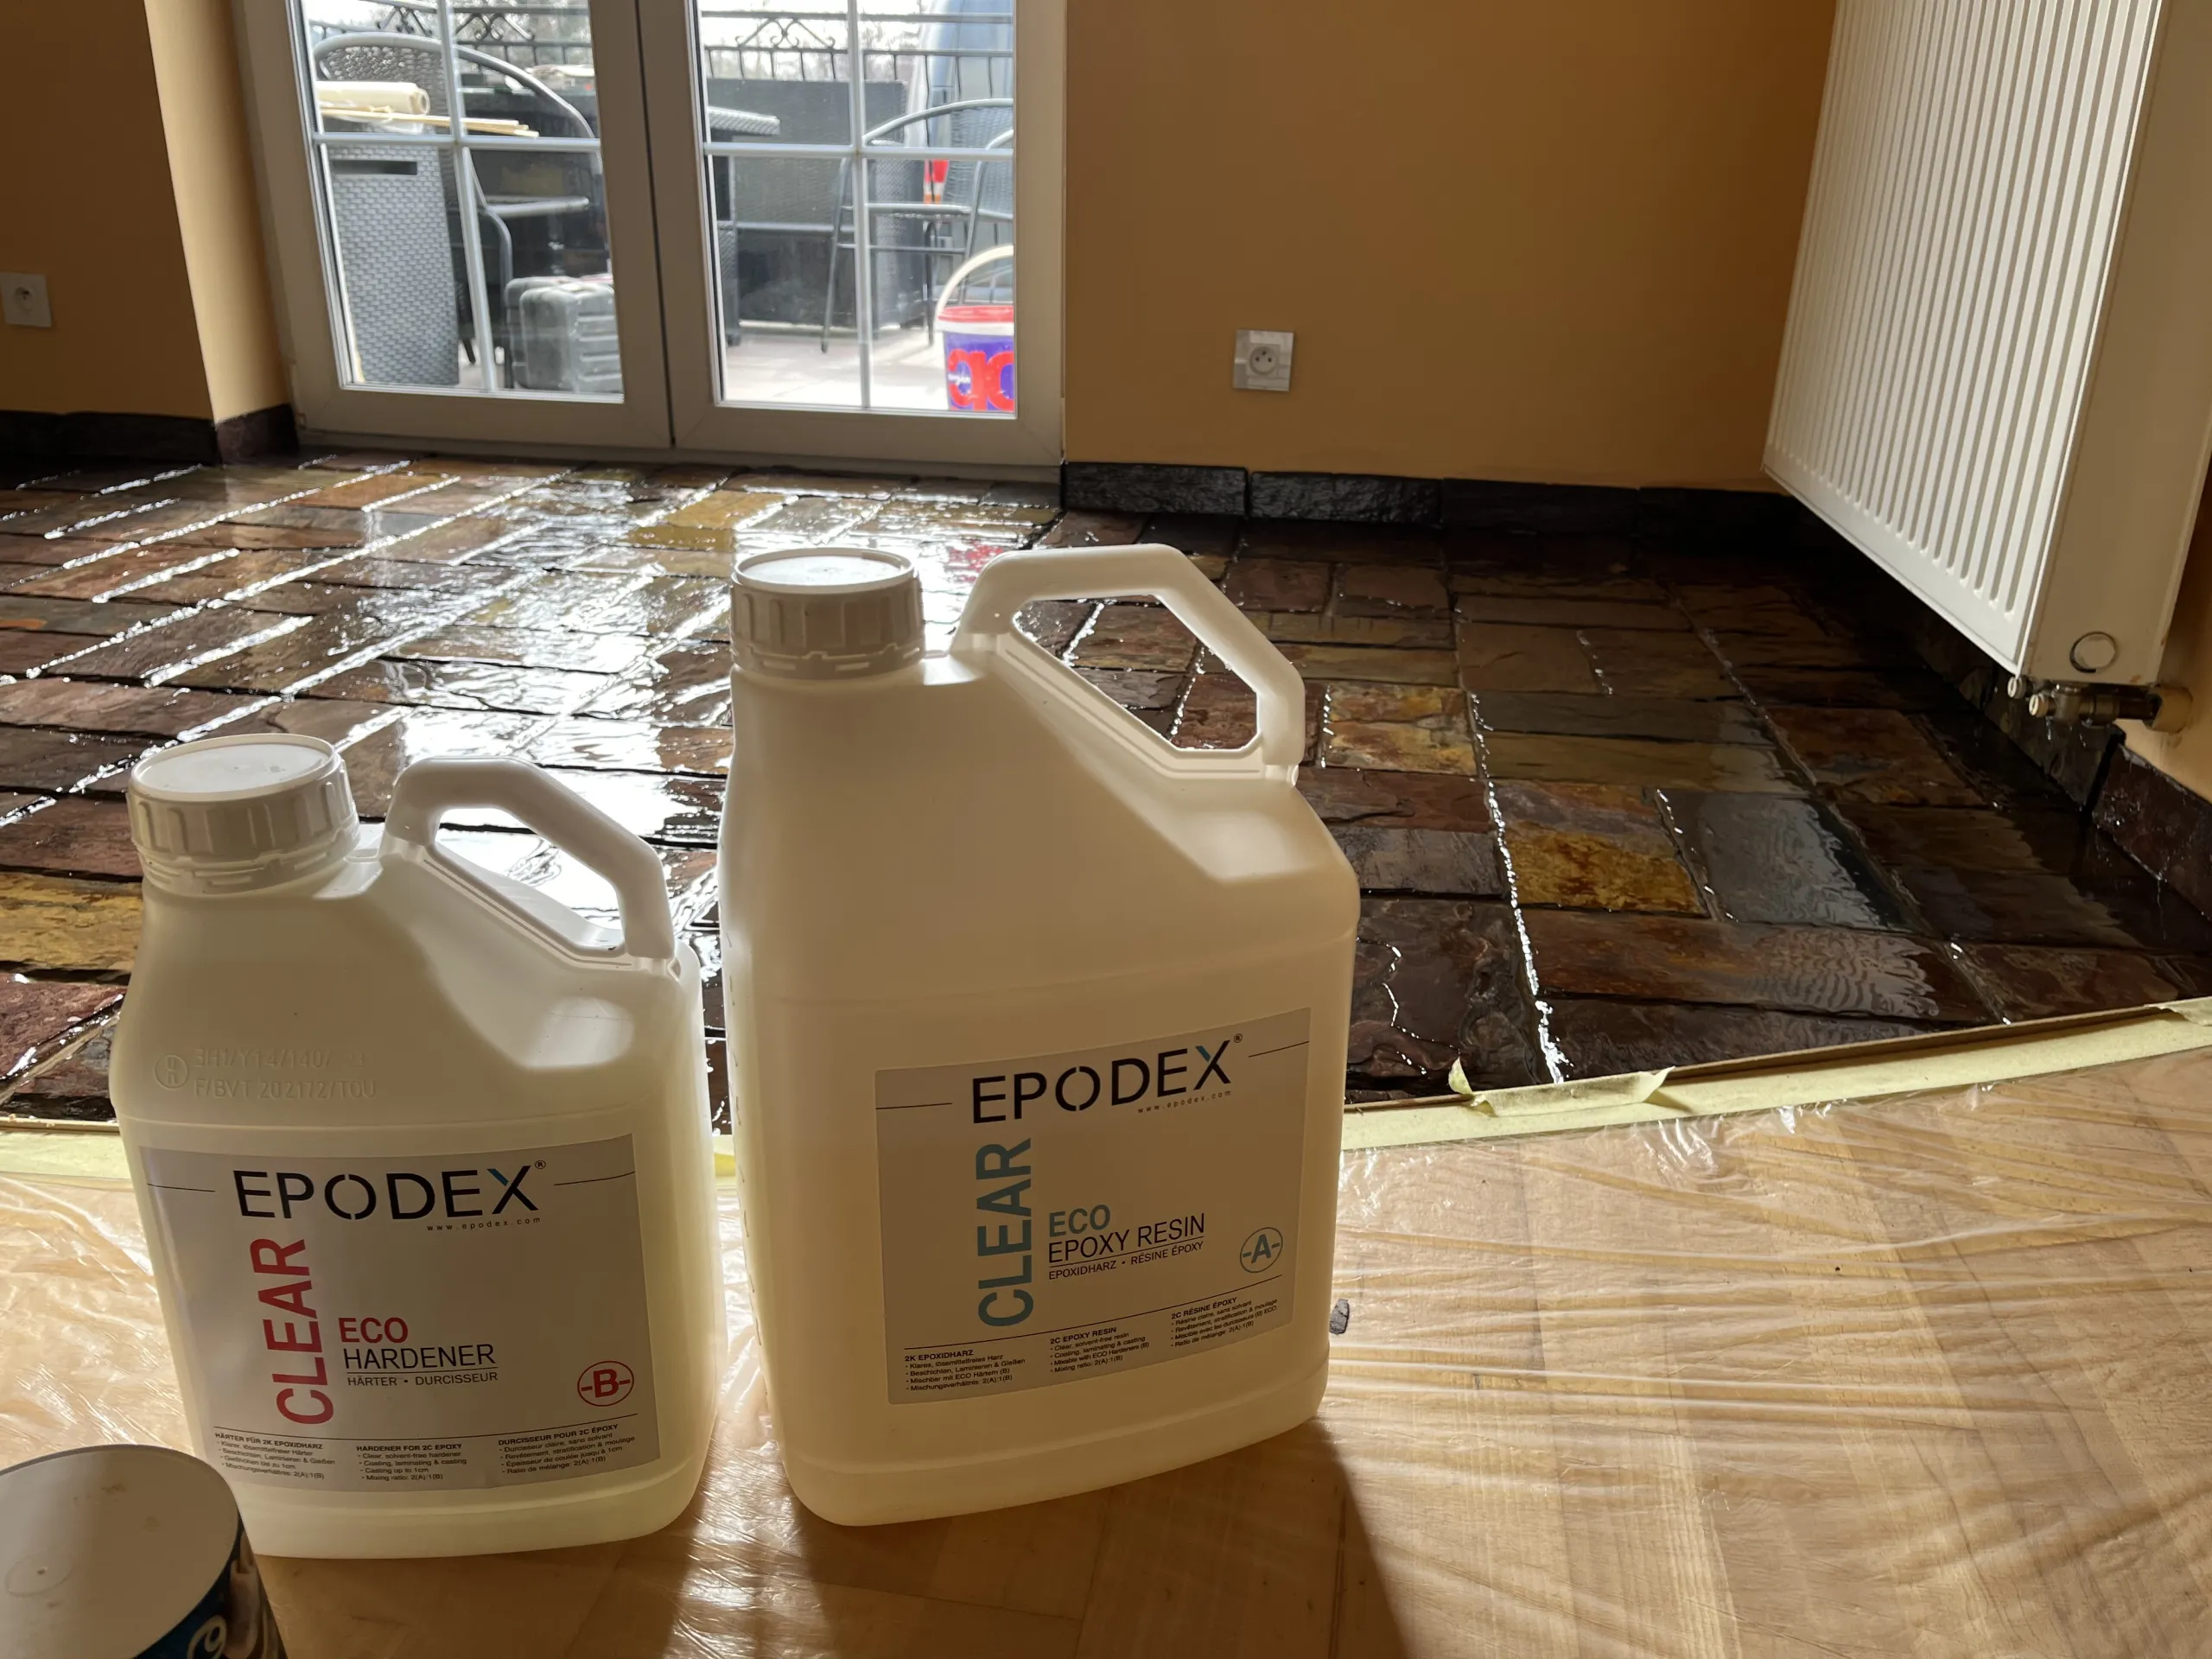
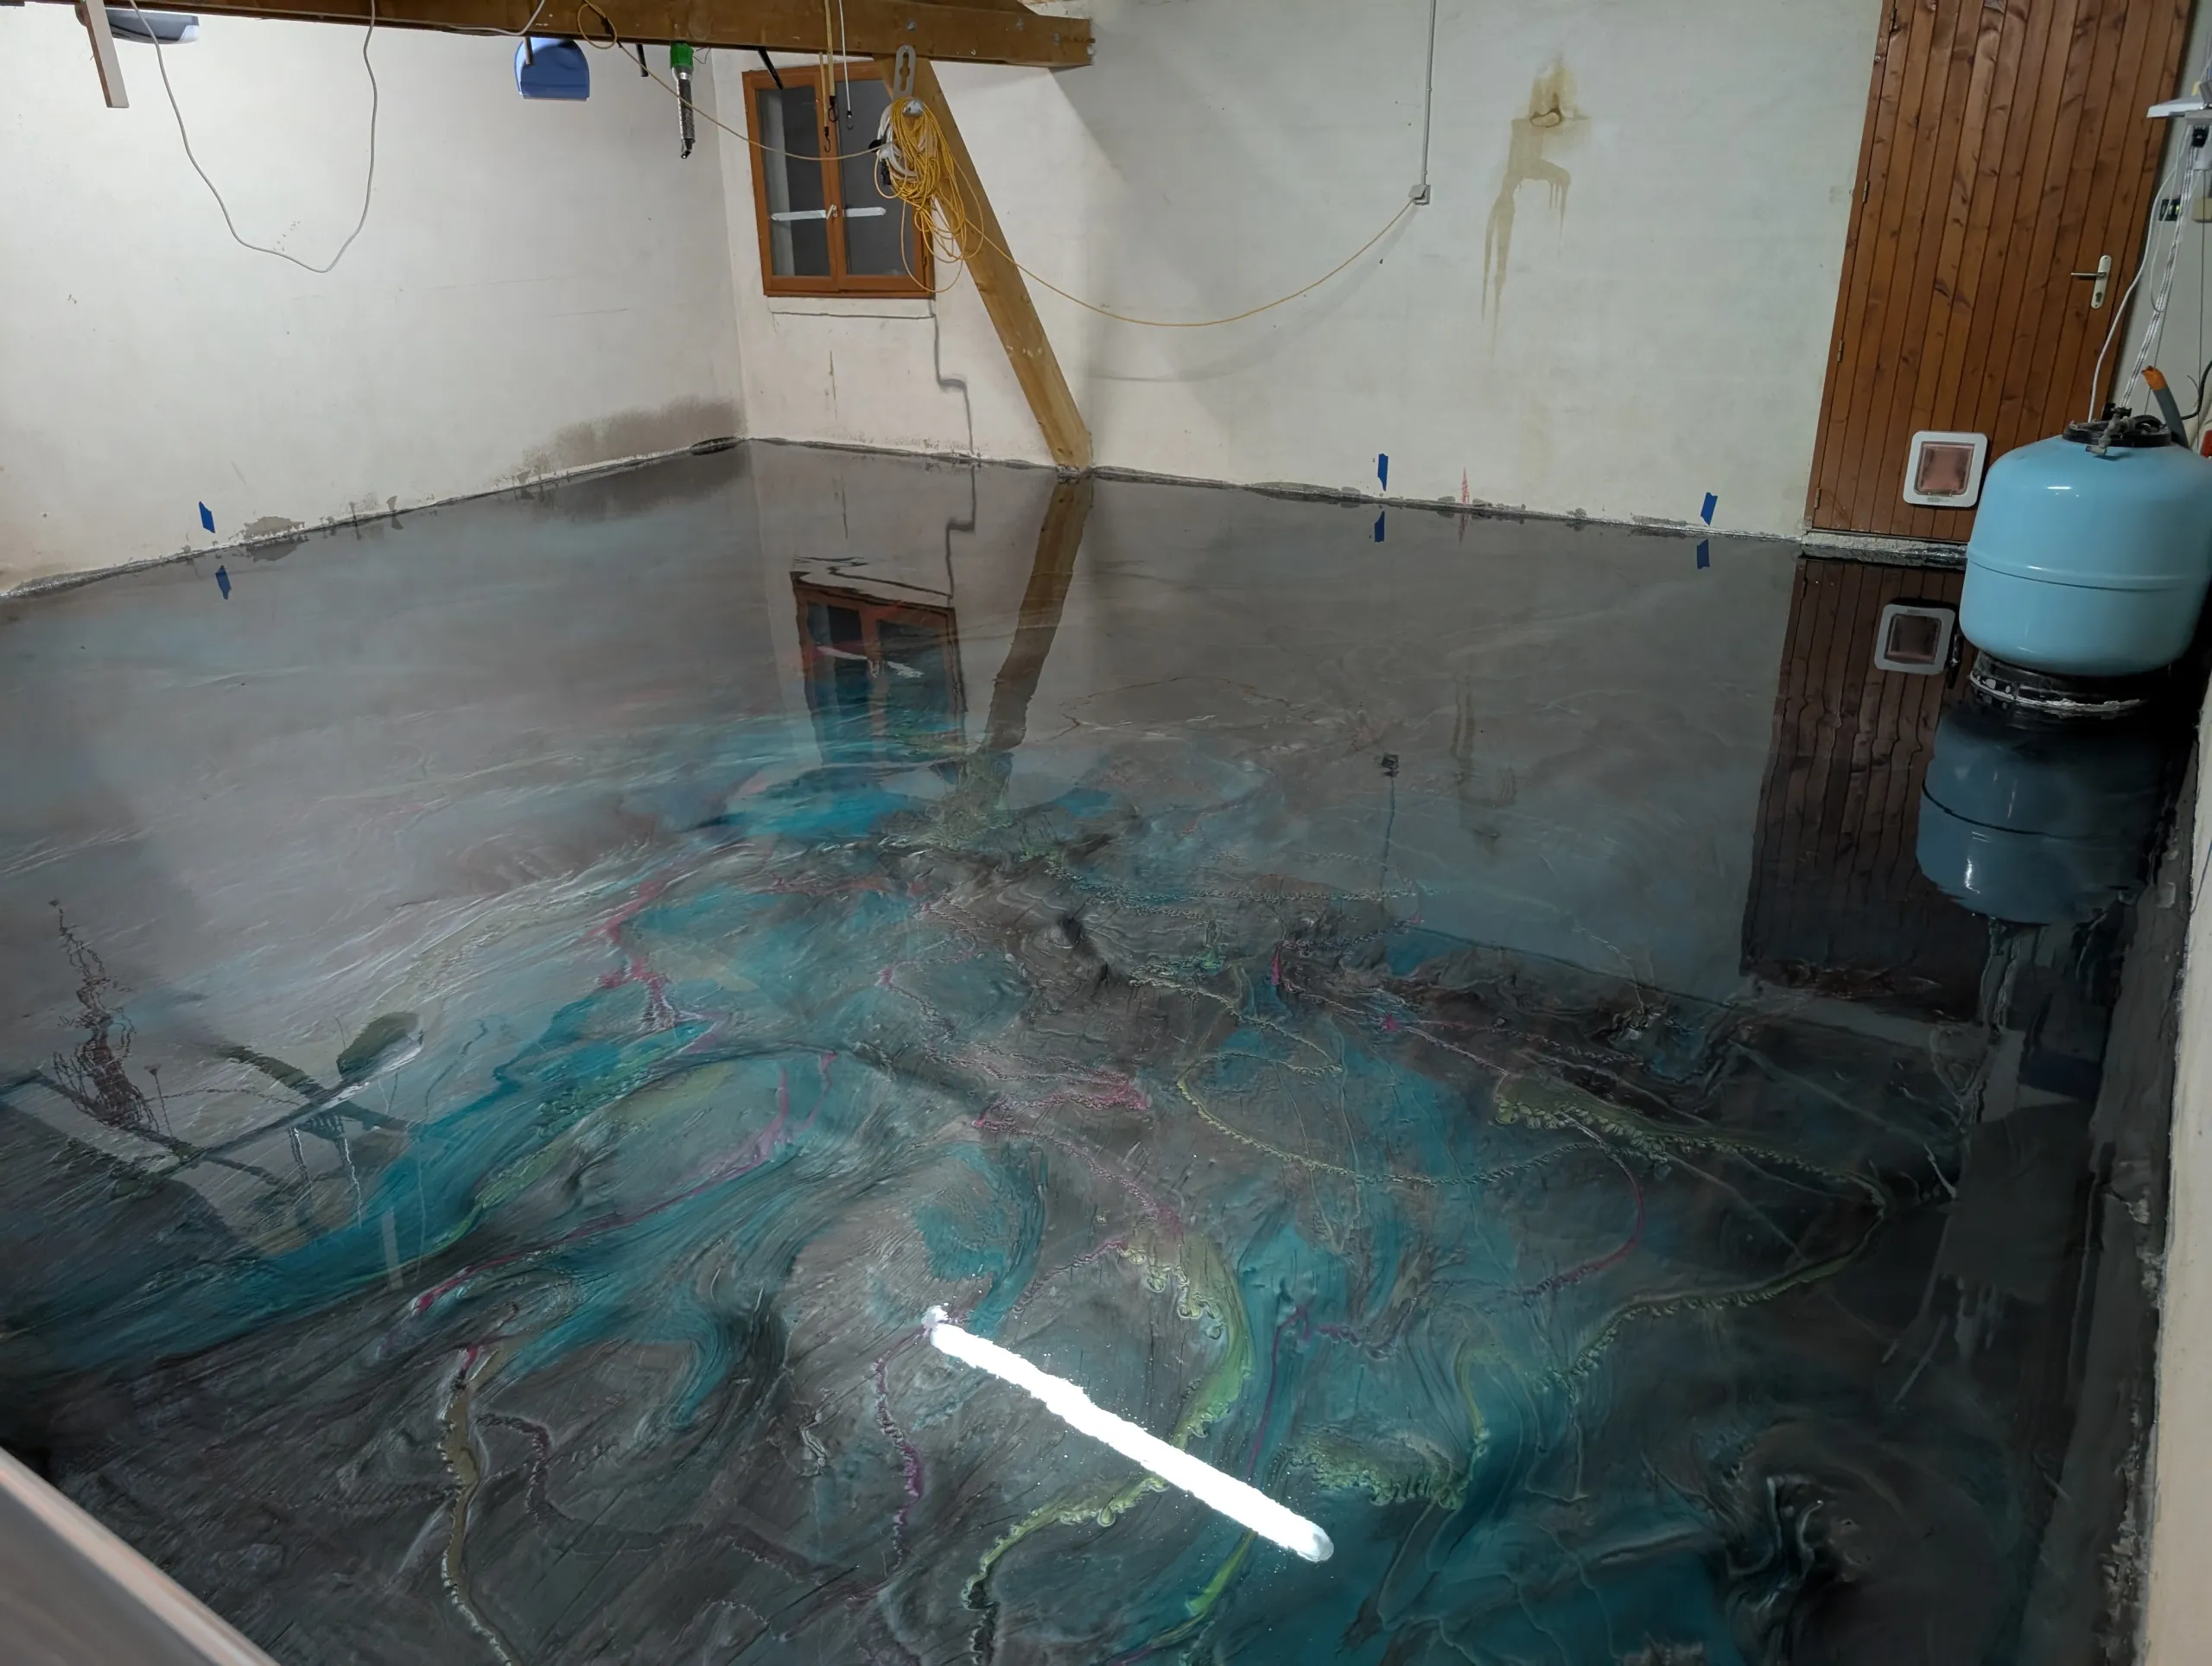
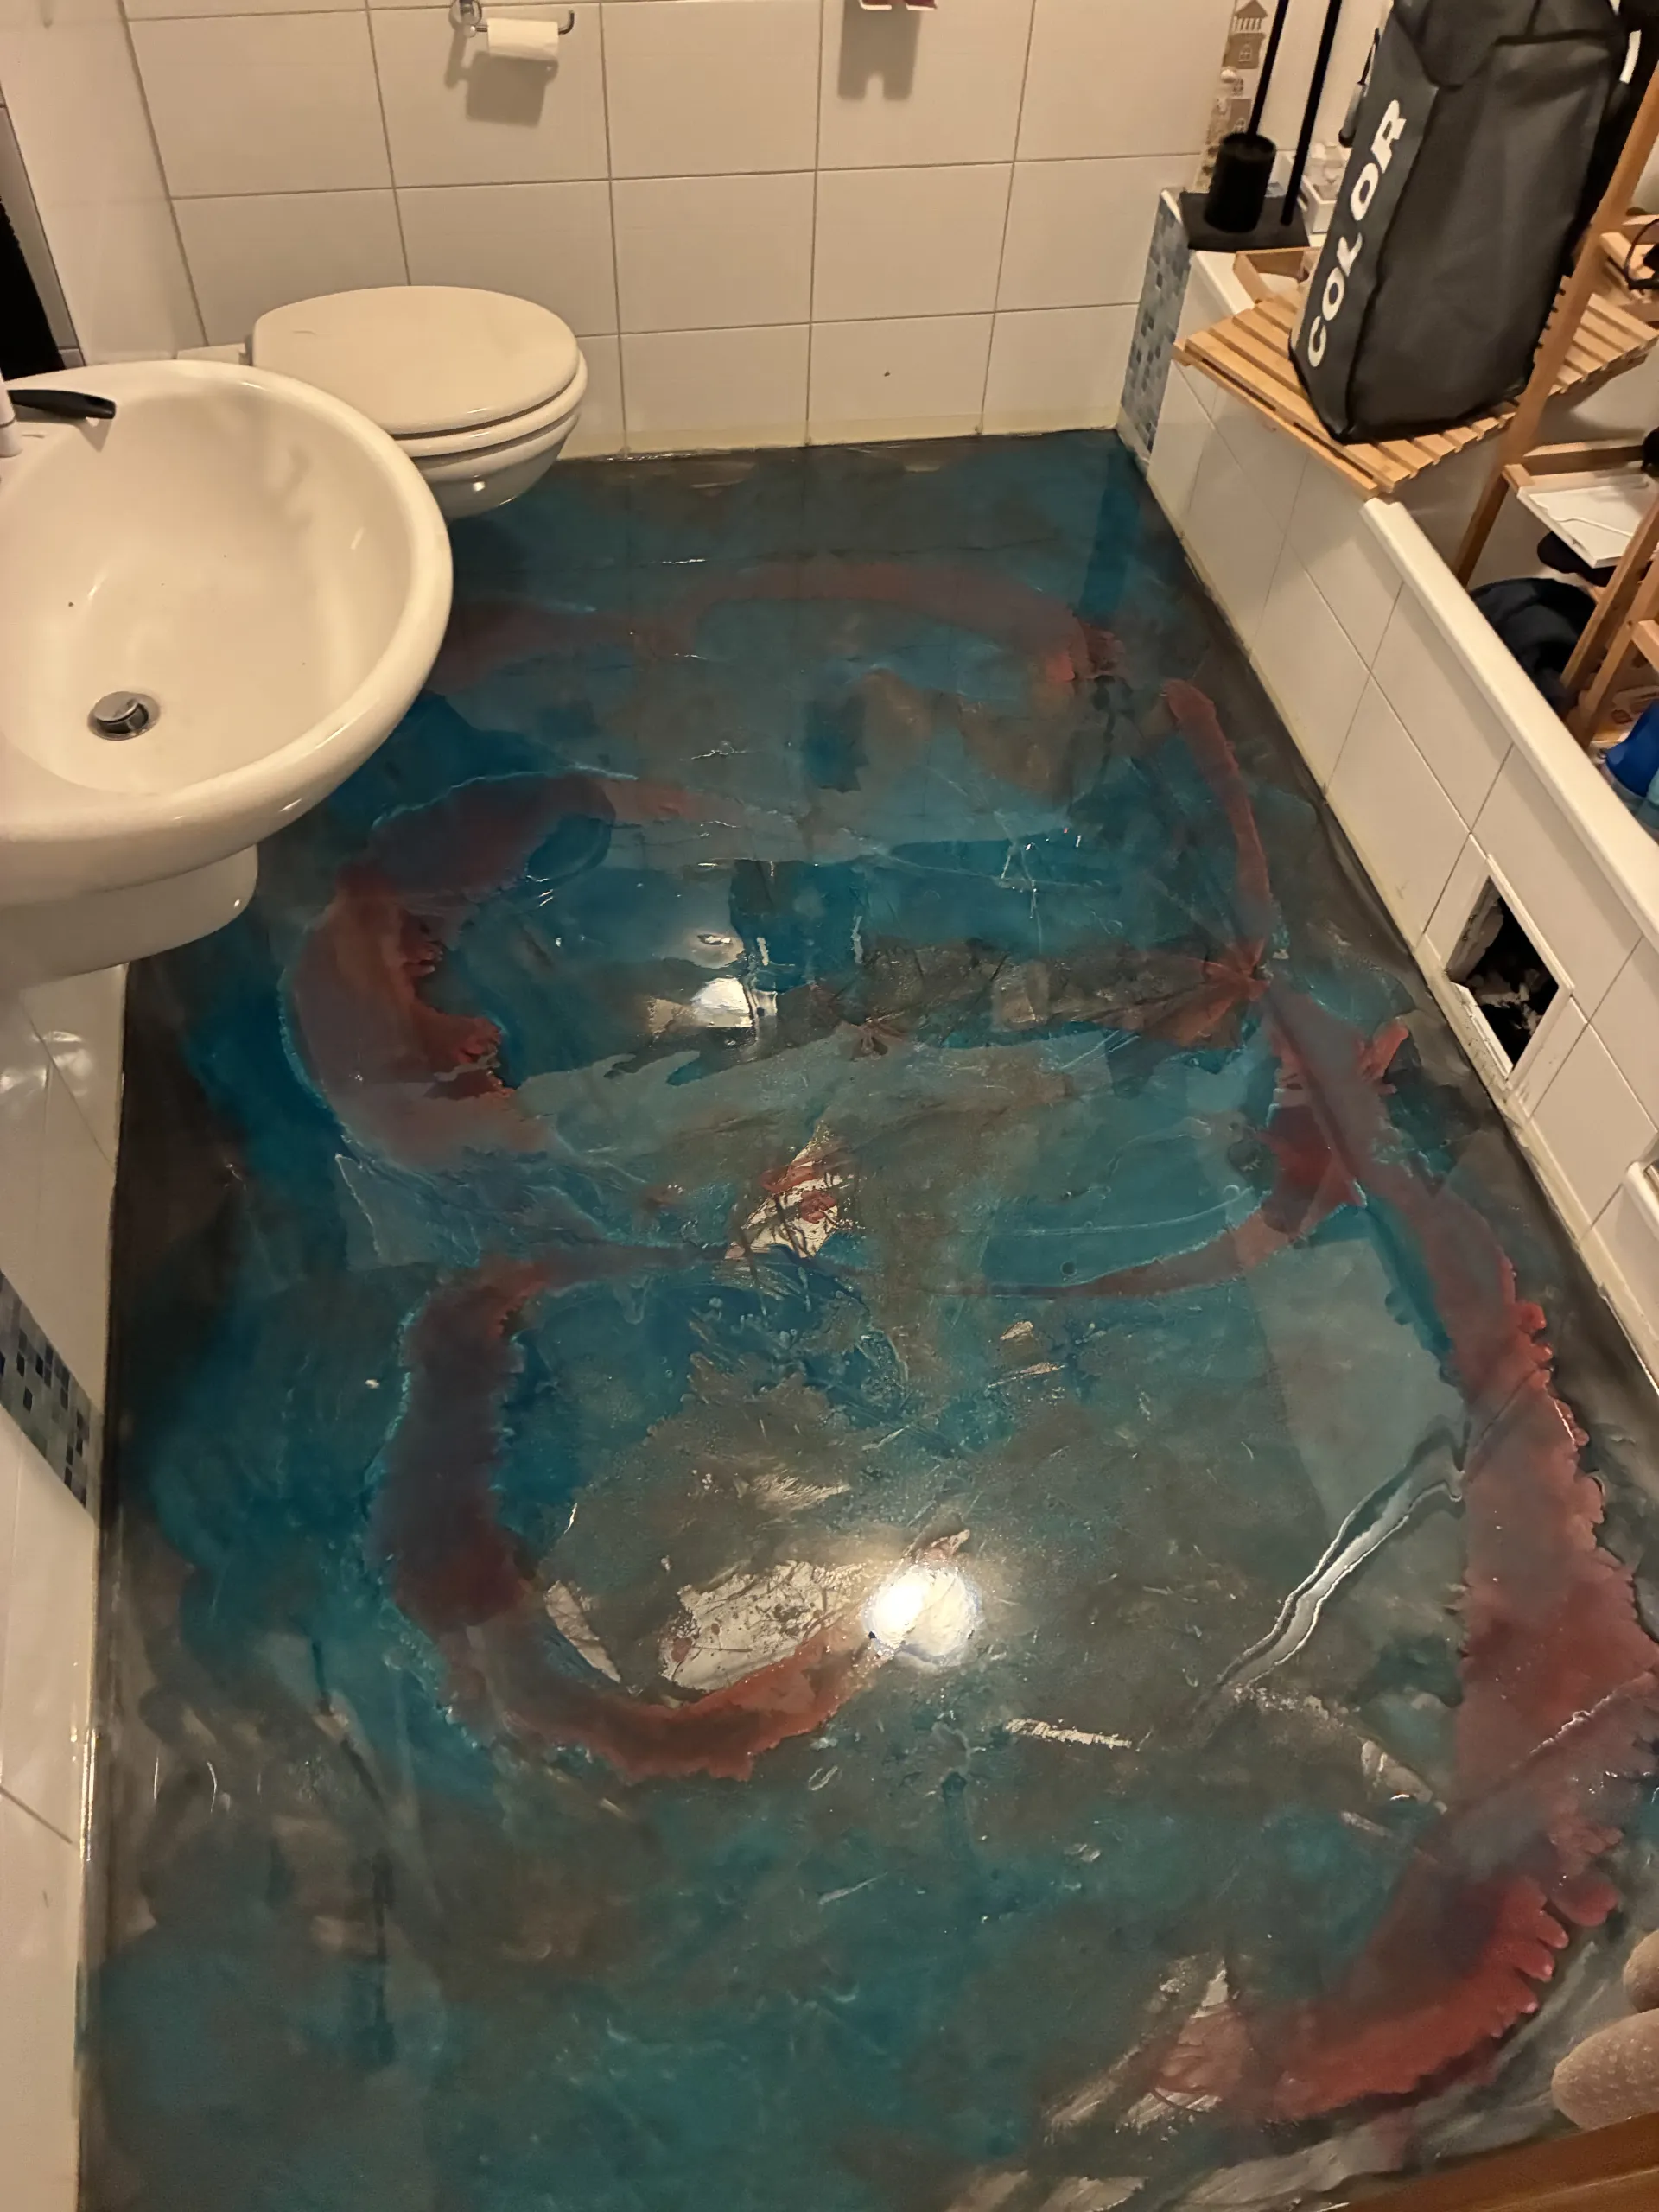
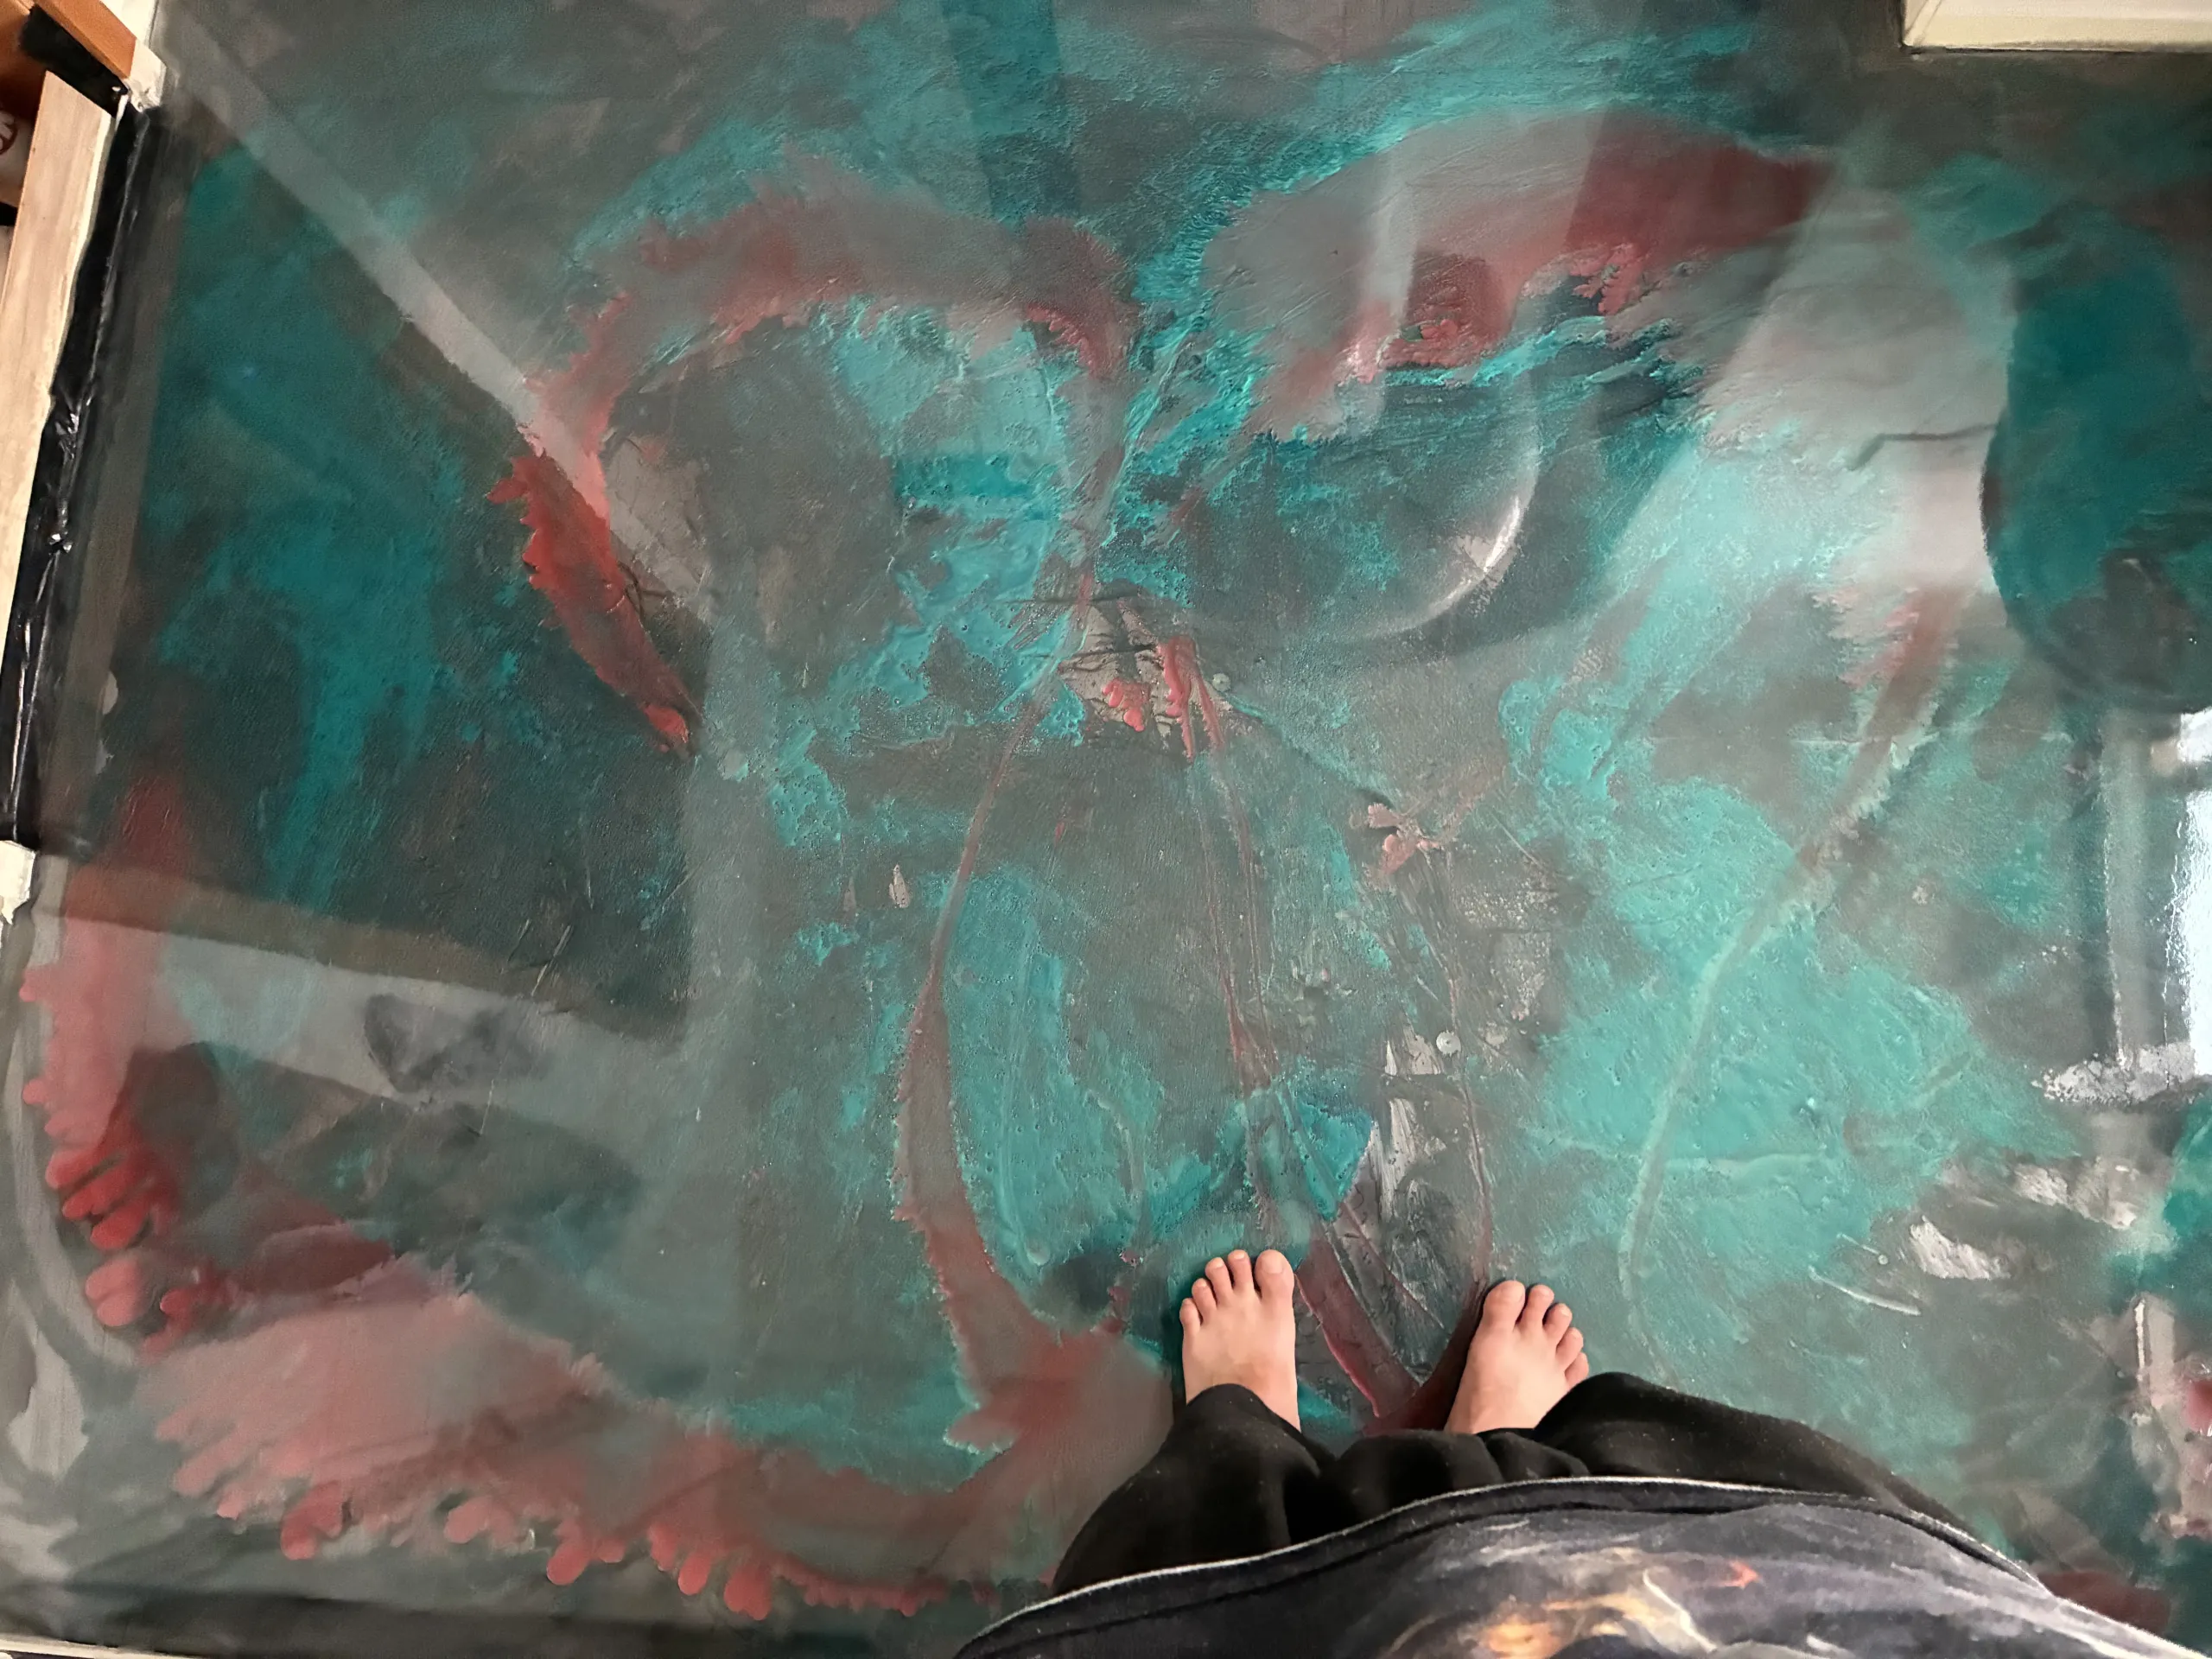
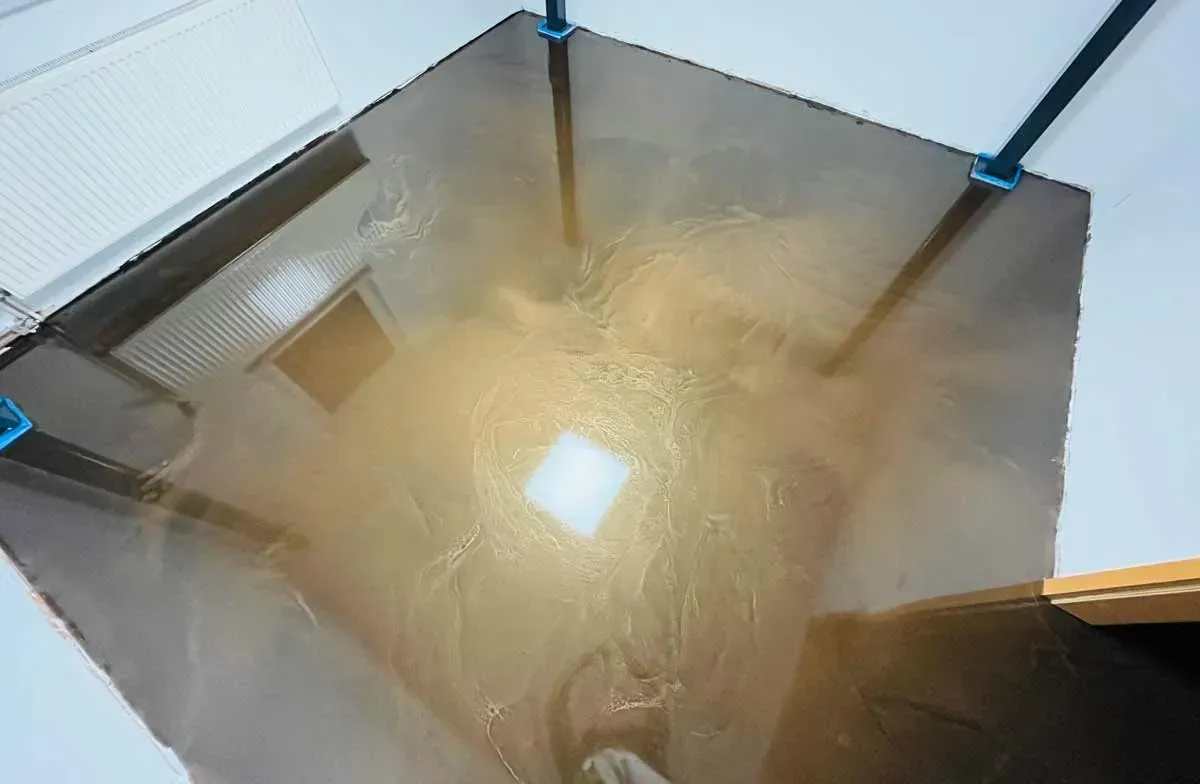
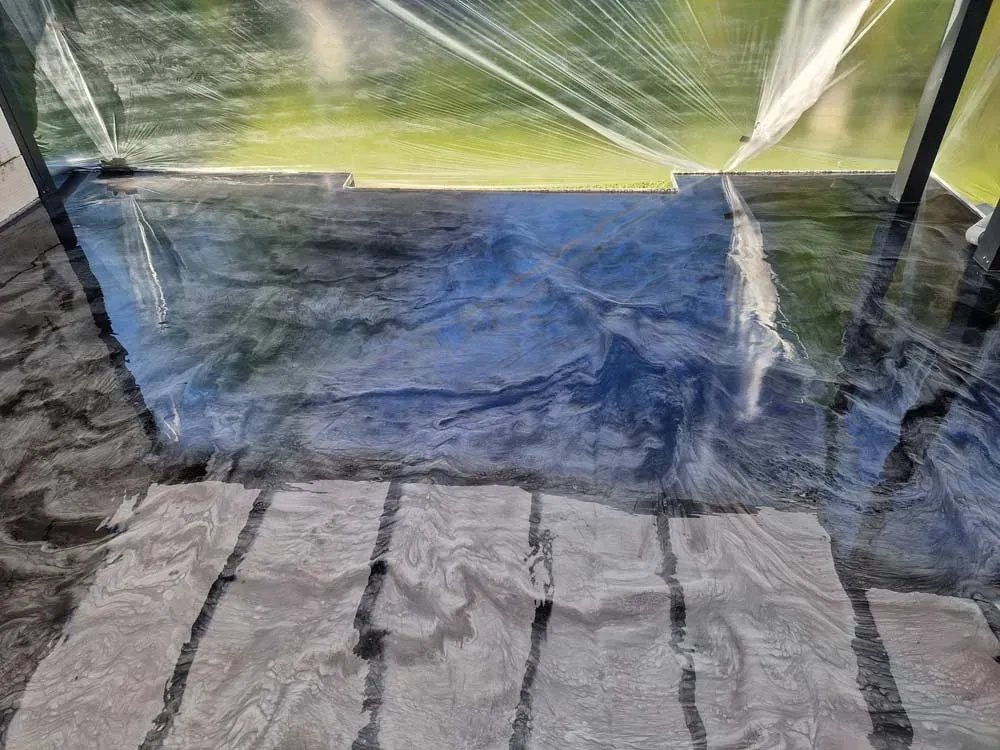
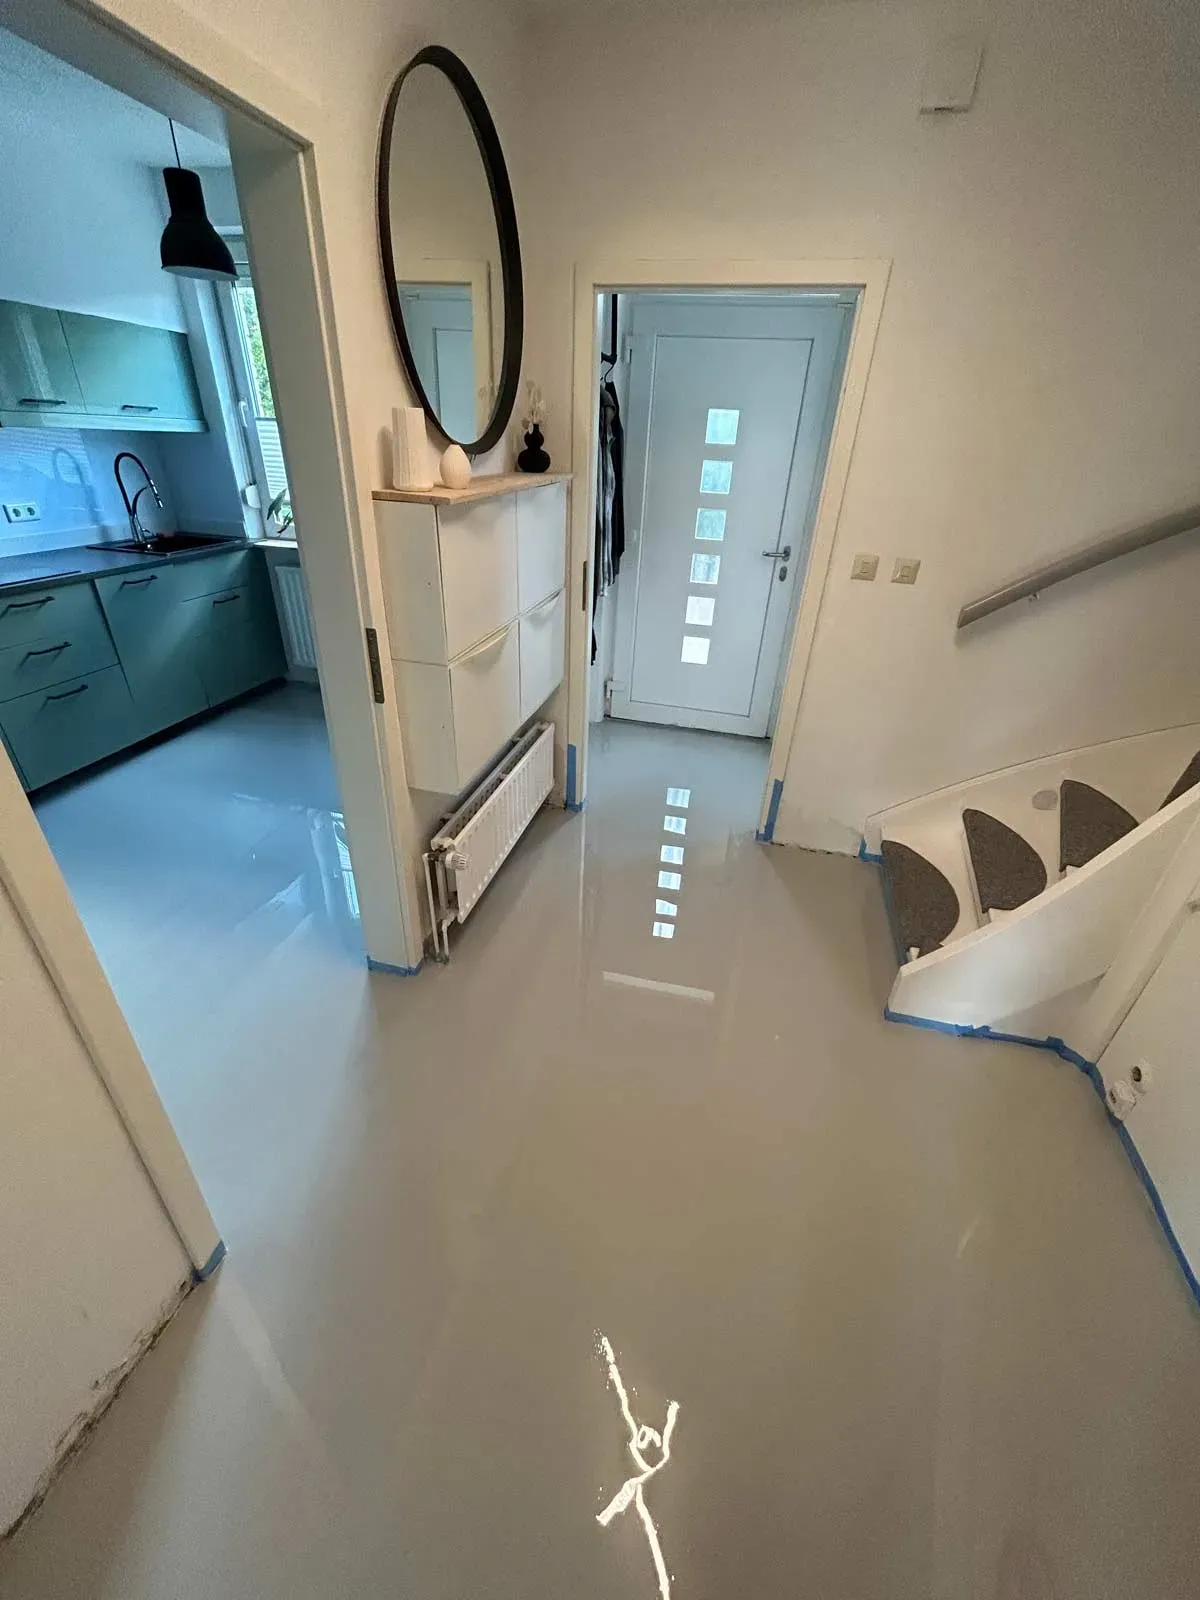
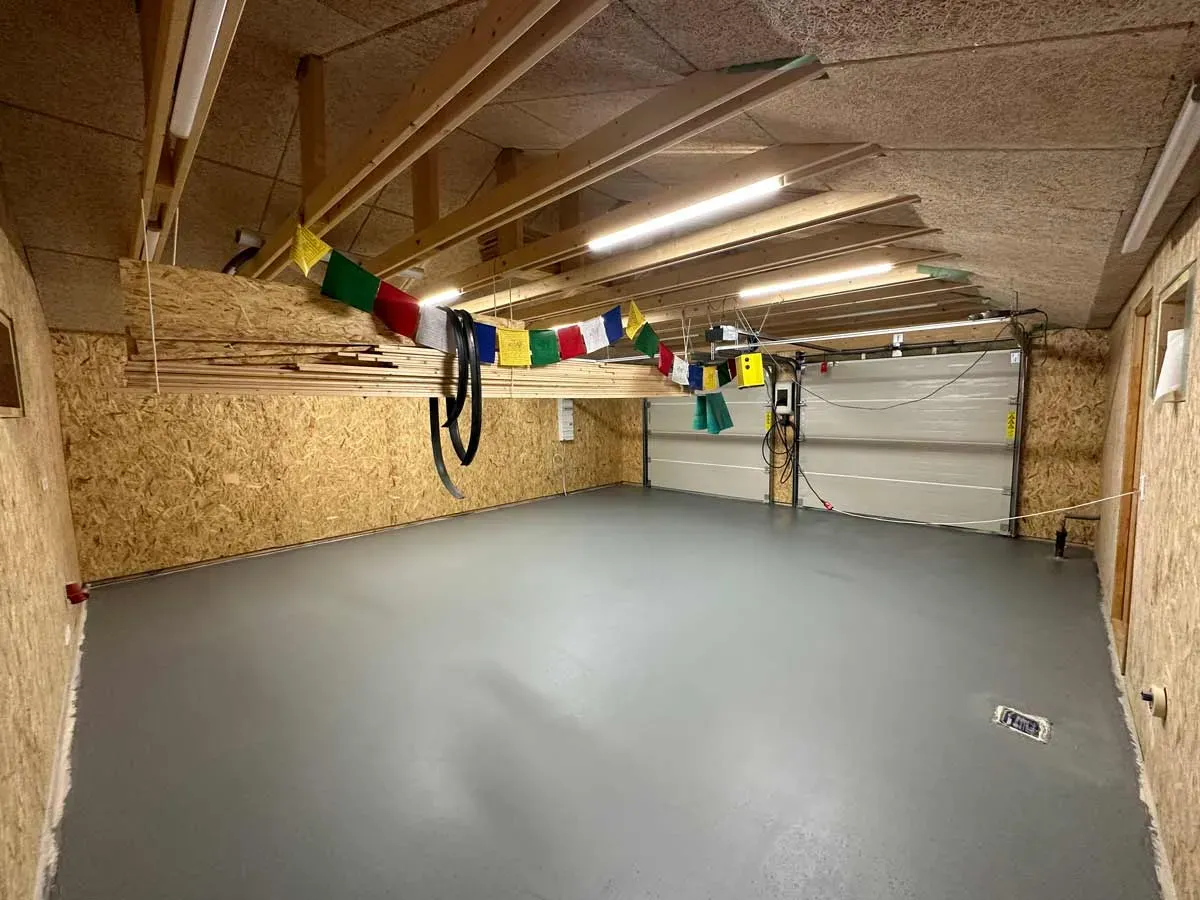
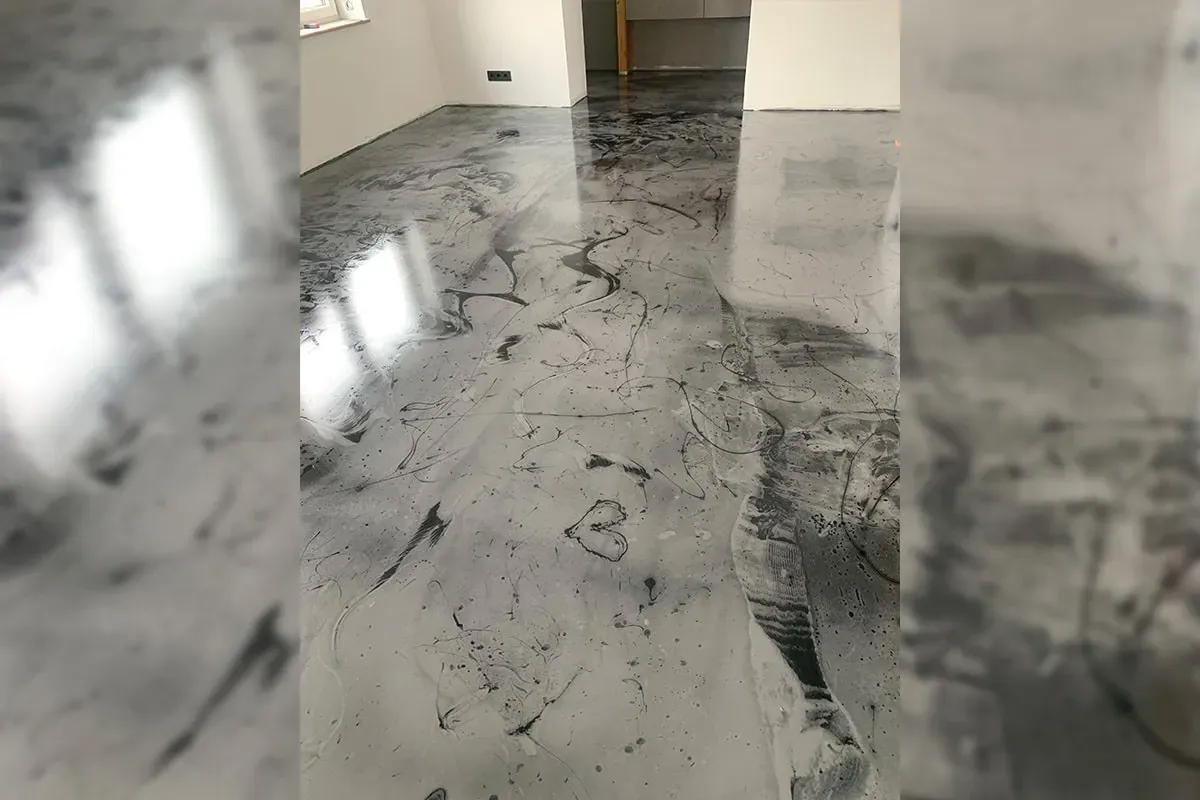
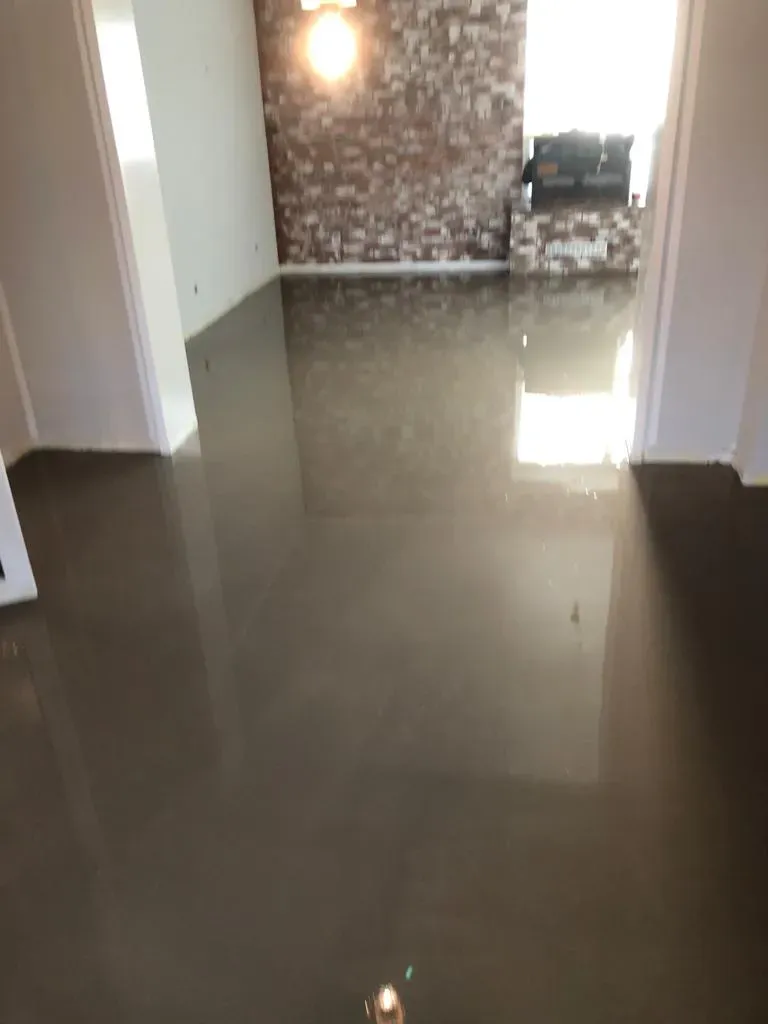
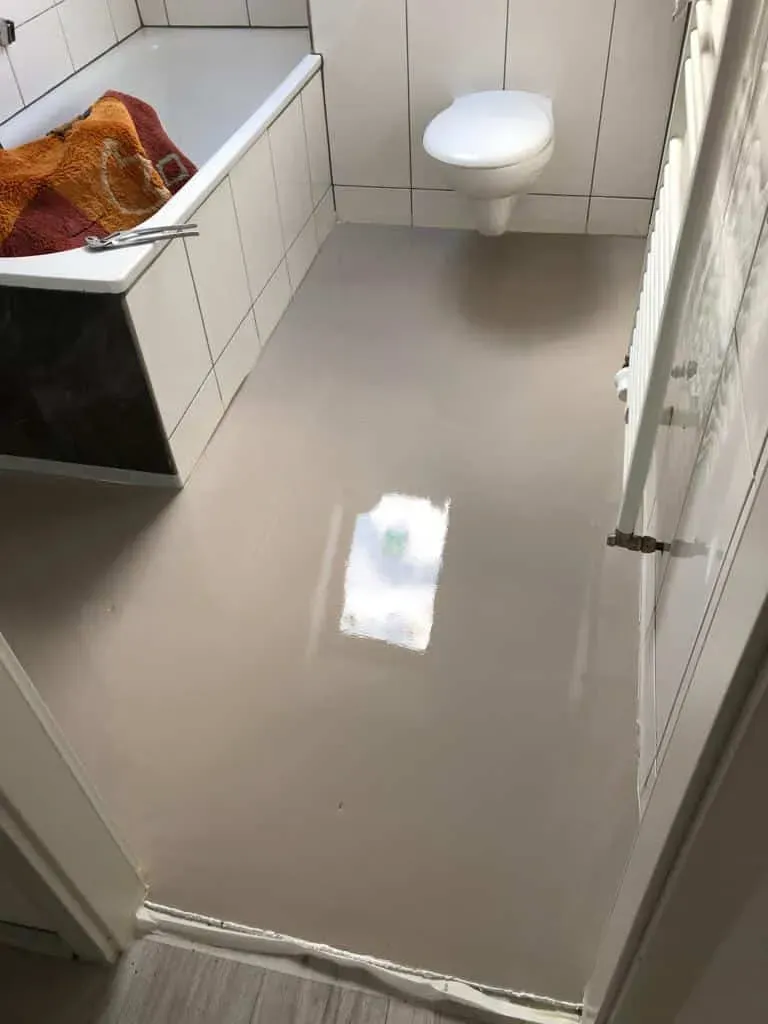
4. Apply EP Design main coating
- Mix EP Design component A with component B in a mixing ratio of 2:1 by weight (e.g. 2 kg component A with 1 kg component B). Then add the pigments and mix thoroughly again (except for EP Design transparent).
Detailed instructions for each colour set can be found at the end of this page under “Instructions for Use”. - Immediately after mixing, pour the mixture onto the floor and spread it evenly with a surface squeegee.
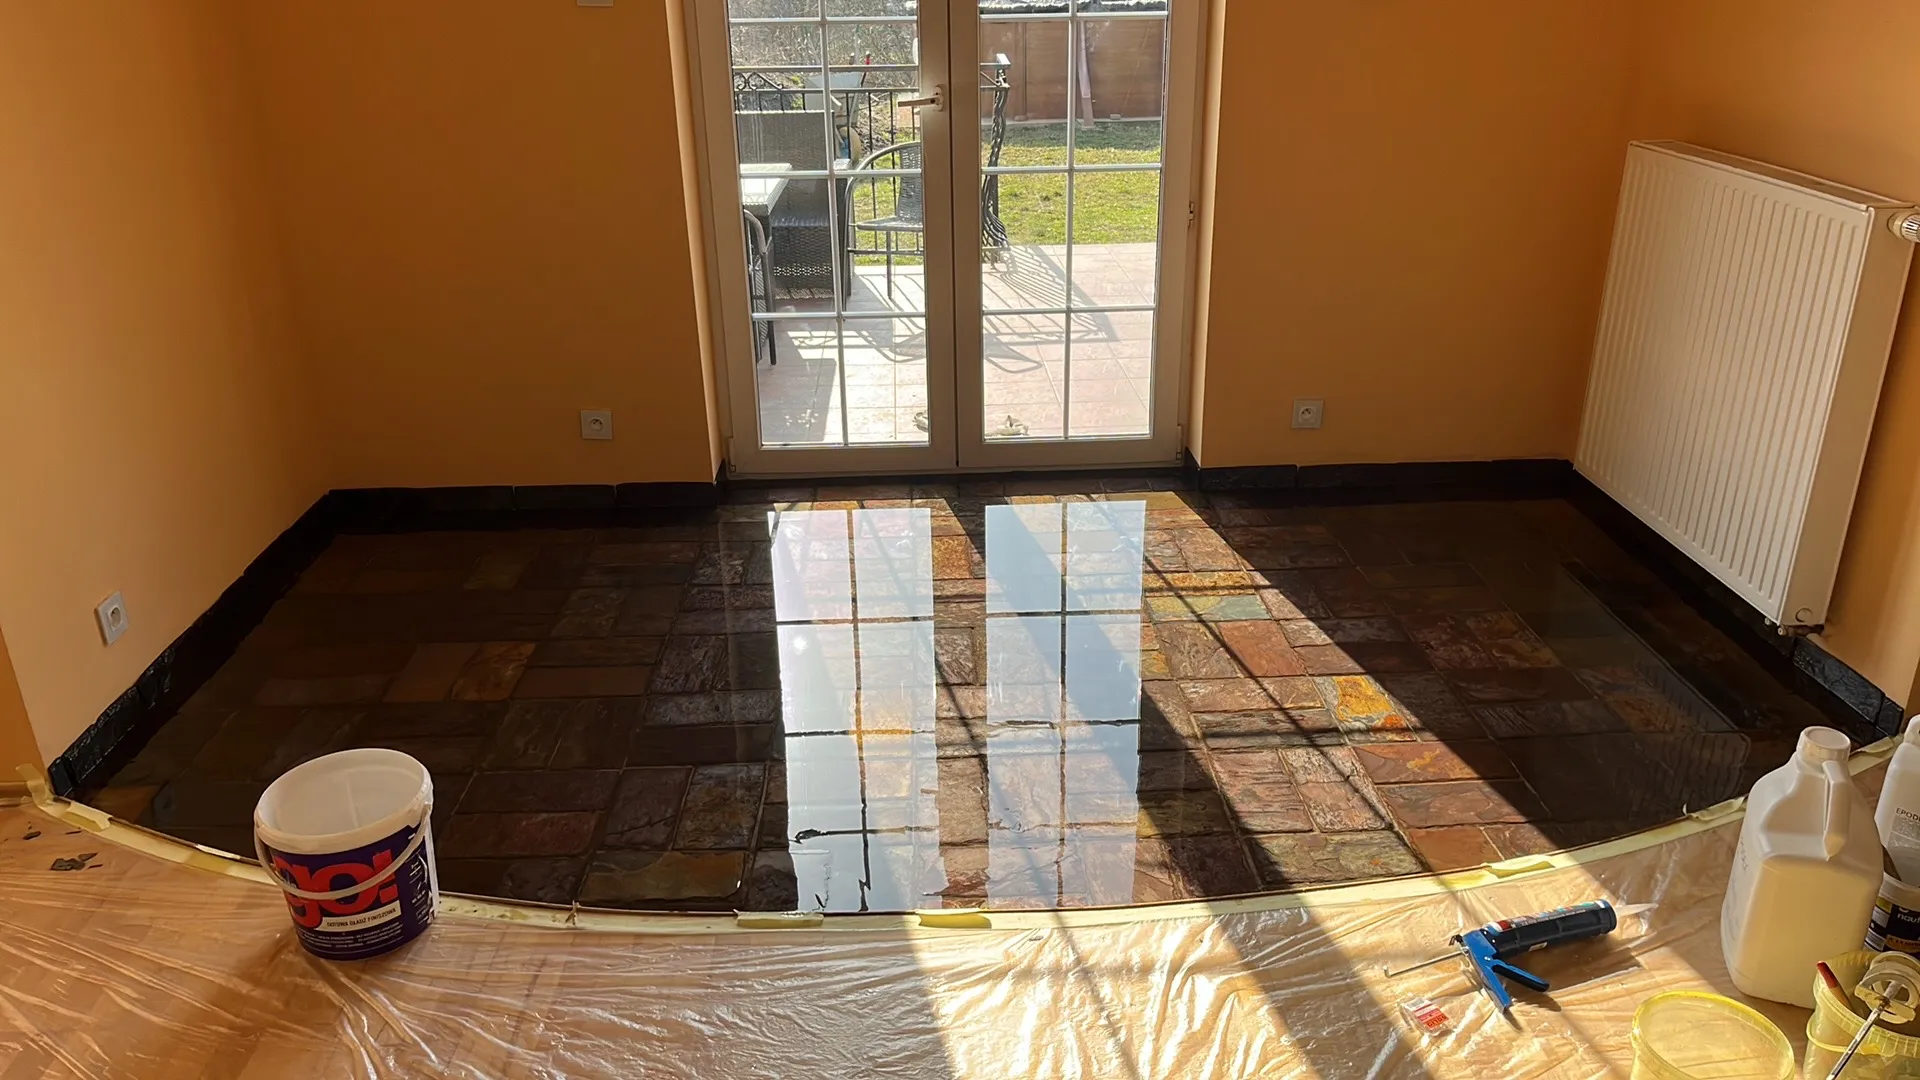
- During curing, protect the area from moisture, dust and mechanical stress. Walkable after approx. 24 hours, fully load-bearing after approx. 7 days (temperature-dependent).
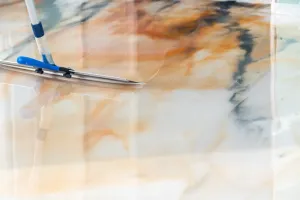
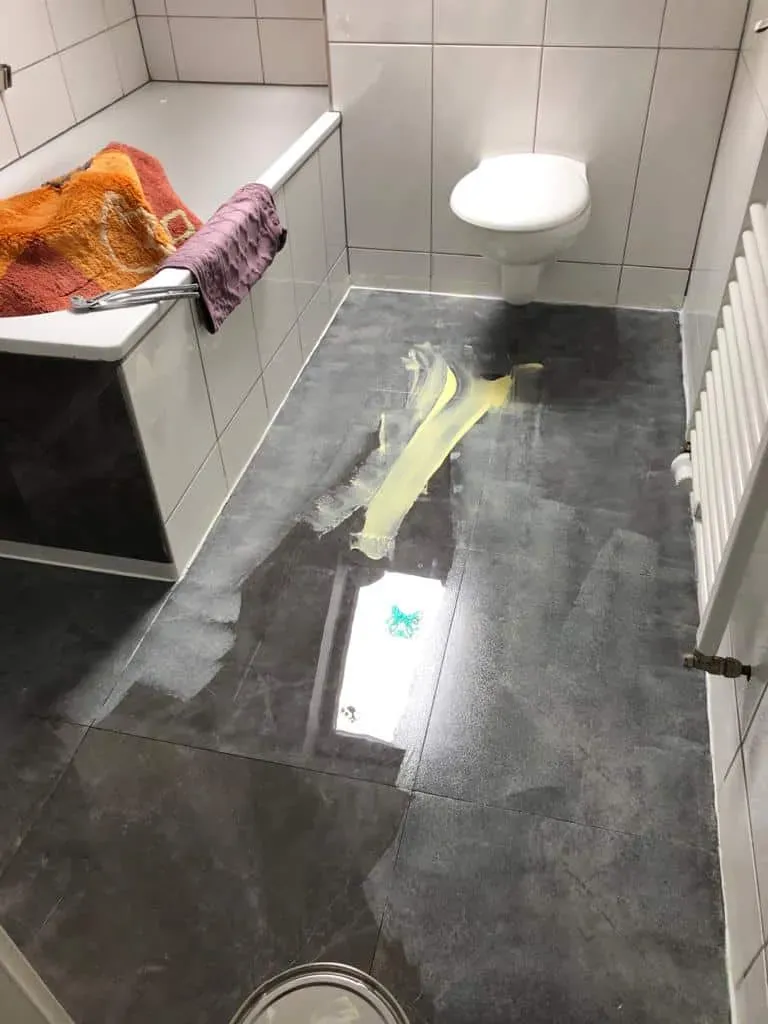
5. Optional: Apply PU Topcoat for additional protection
- Wait at least 24 h before applying the PU Topcoat on top of the EP Design. If you wait more than 7 days before applying the PU Topcoat, we recommend sanding the EP Design to ensure proper adhesion.
- Mix the resin A-component and the hardener B-component in a 2 to 1 mixing ratio (e.g. 1 kg resin A-component with 0.5 kg hardener B-component).
- Stir through the edge and bottom of the mixing cup as the material will settle there. Ideally, pour into a clean mixing cup and mix again until the mixture is streak-free. This ensures that the resin A-component and hardener B-component are completely mixed together. We recommend mixing small quantities, as the material is very reactive and thickens quickly (Max. processing time for 1.5 kg - 20 min at 20°C).
- Pour the mixture into a paint tray and apply it thinly with a roller in a criss-cross pattern.
- Let the first coat cure and apply the second coat in the same way. We recommend applying the second coat after min. 6h but not more than 20h. If you wait more than 20h between the PU Topcoat coats, we recommend sanding the first coat to ensure proper adhesion.
6. Pro Tip for Flooring
Do not wear rubber-soled shoes while sanding, cleaning, after cleaning, or during the application of the 2K PU Topcoat, as rubber microparticles may cause an uneven finish. Rubber-soled shoes can be worn once the second coat of 2K PU Topcoat is cured. Wait until the 2K PU Topcoat is walkable (approx. 12 hours) before applying the second coat.
Application & Substrates
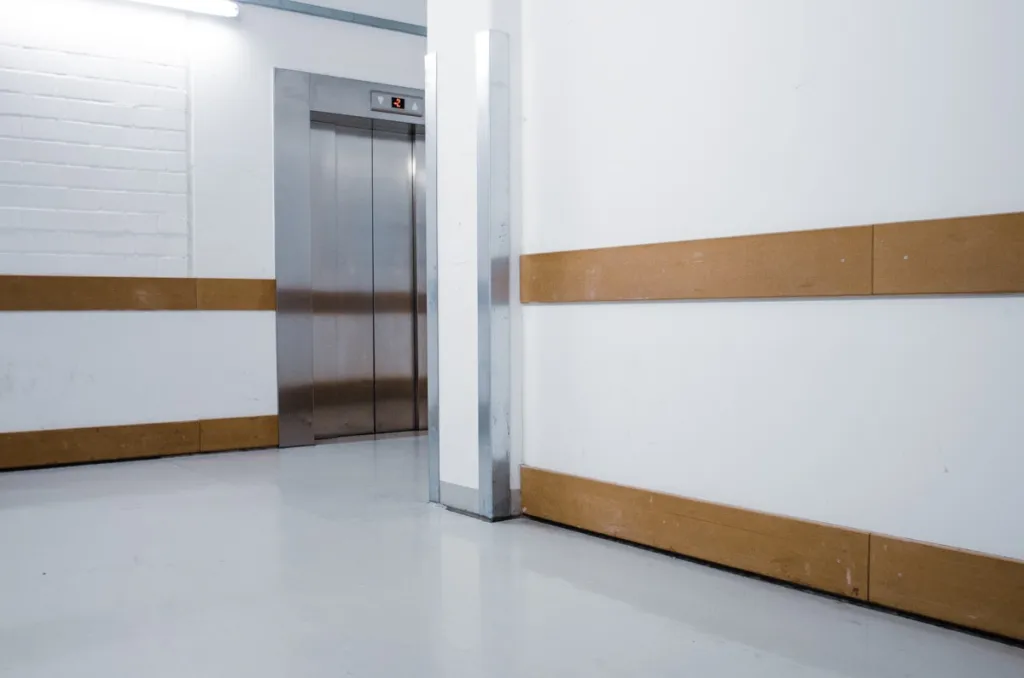
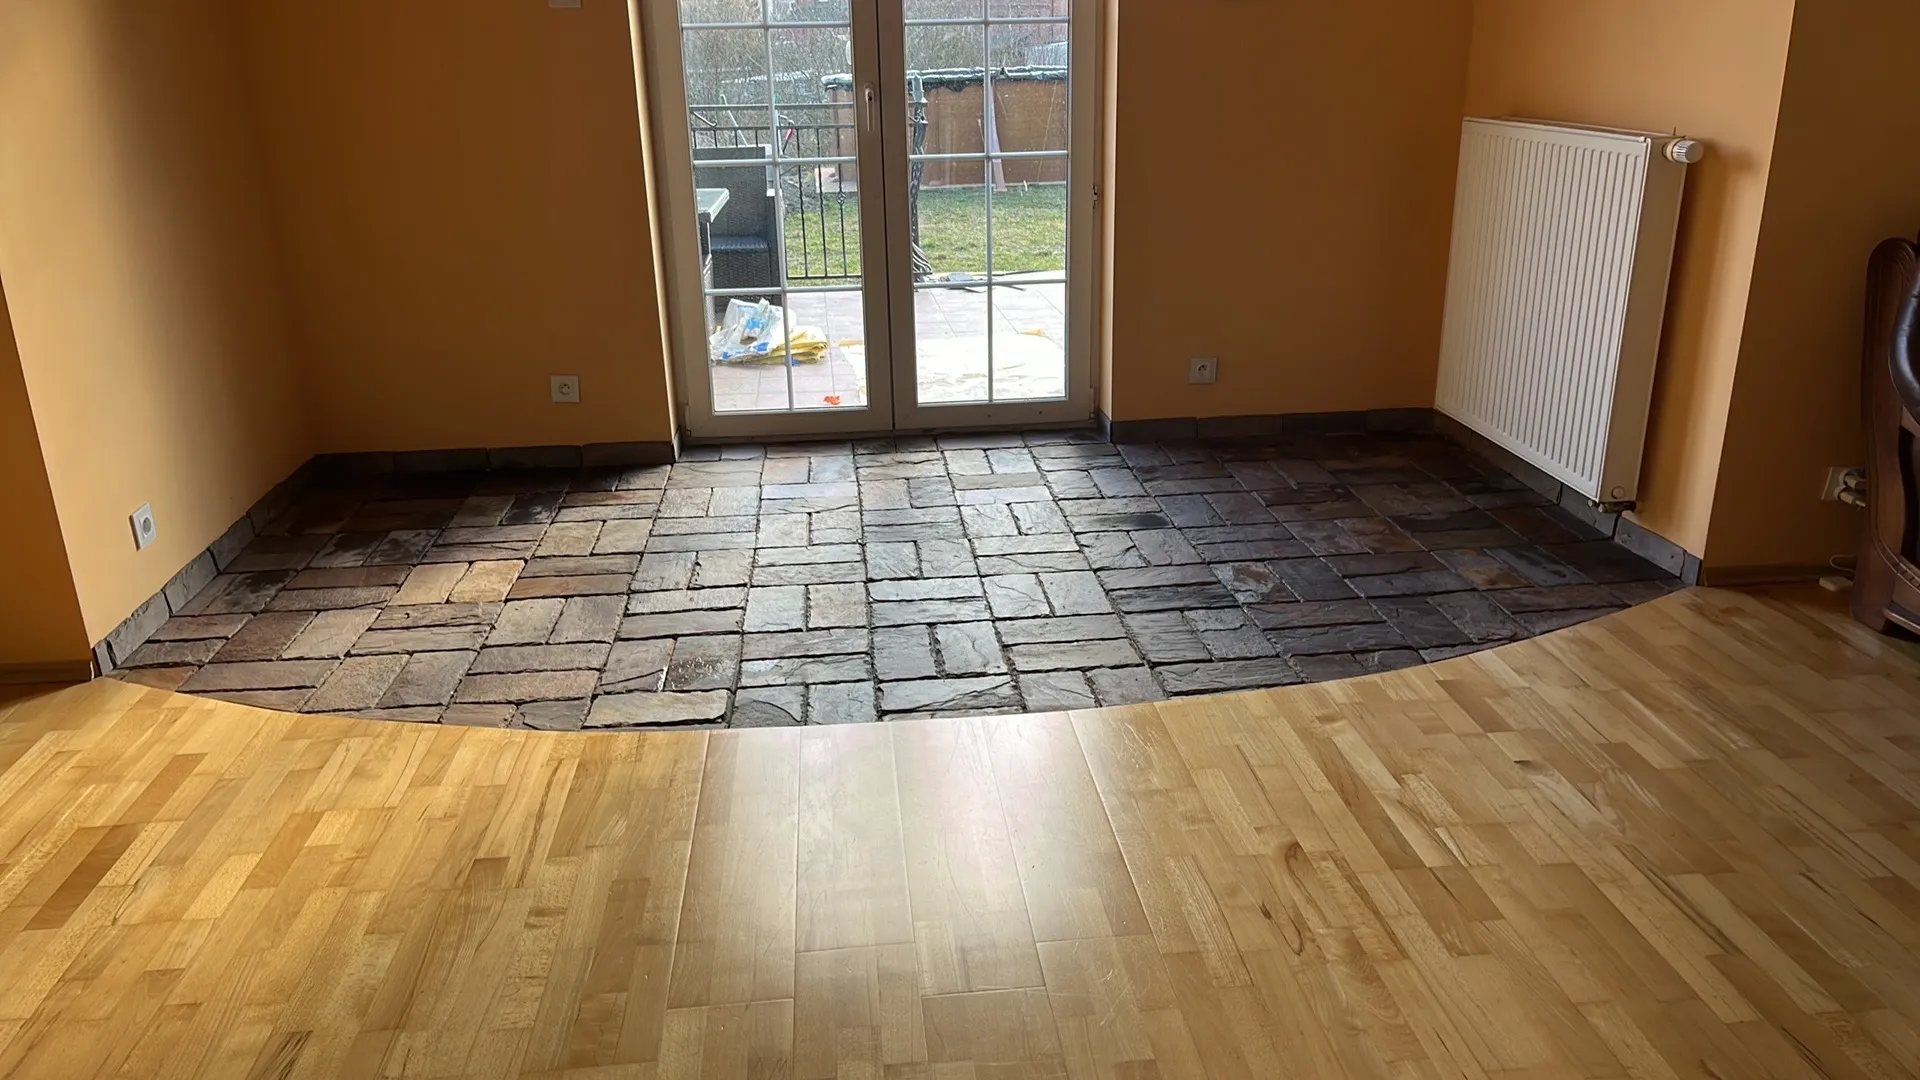
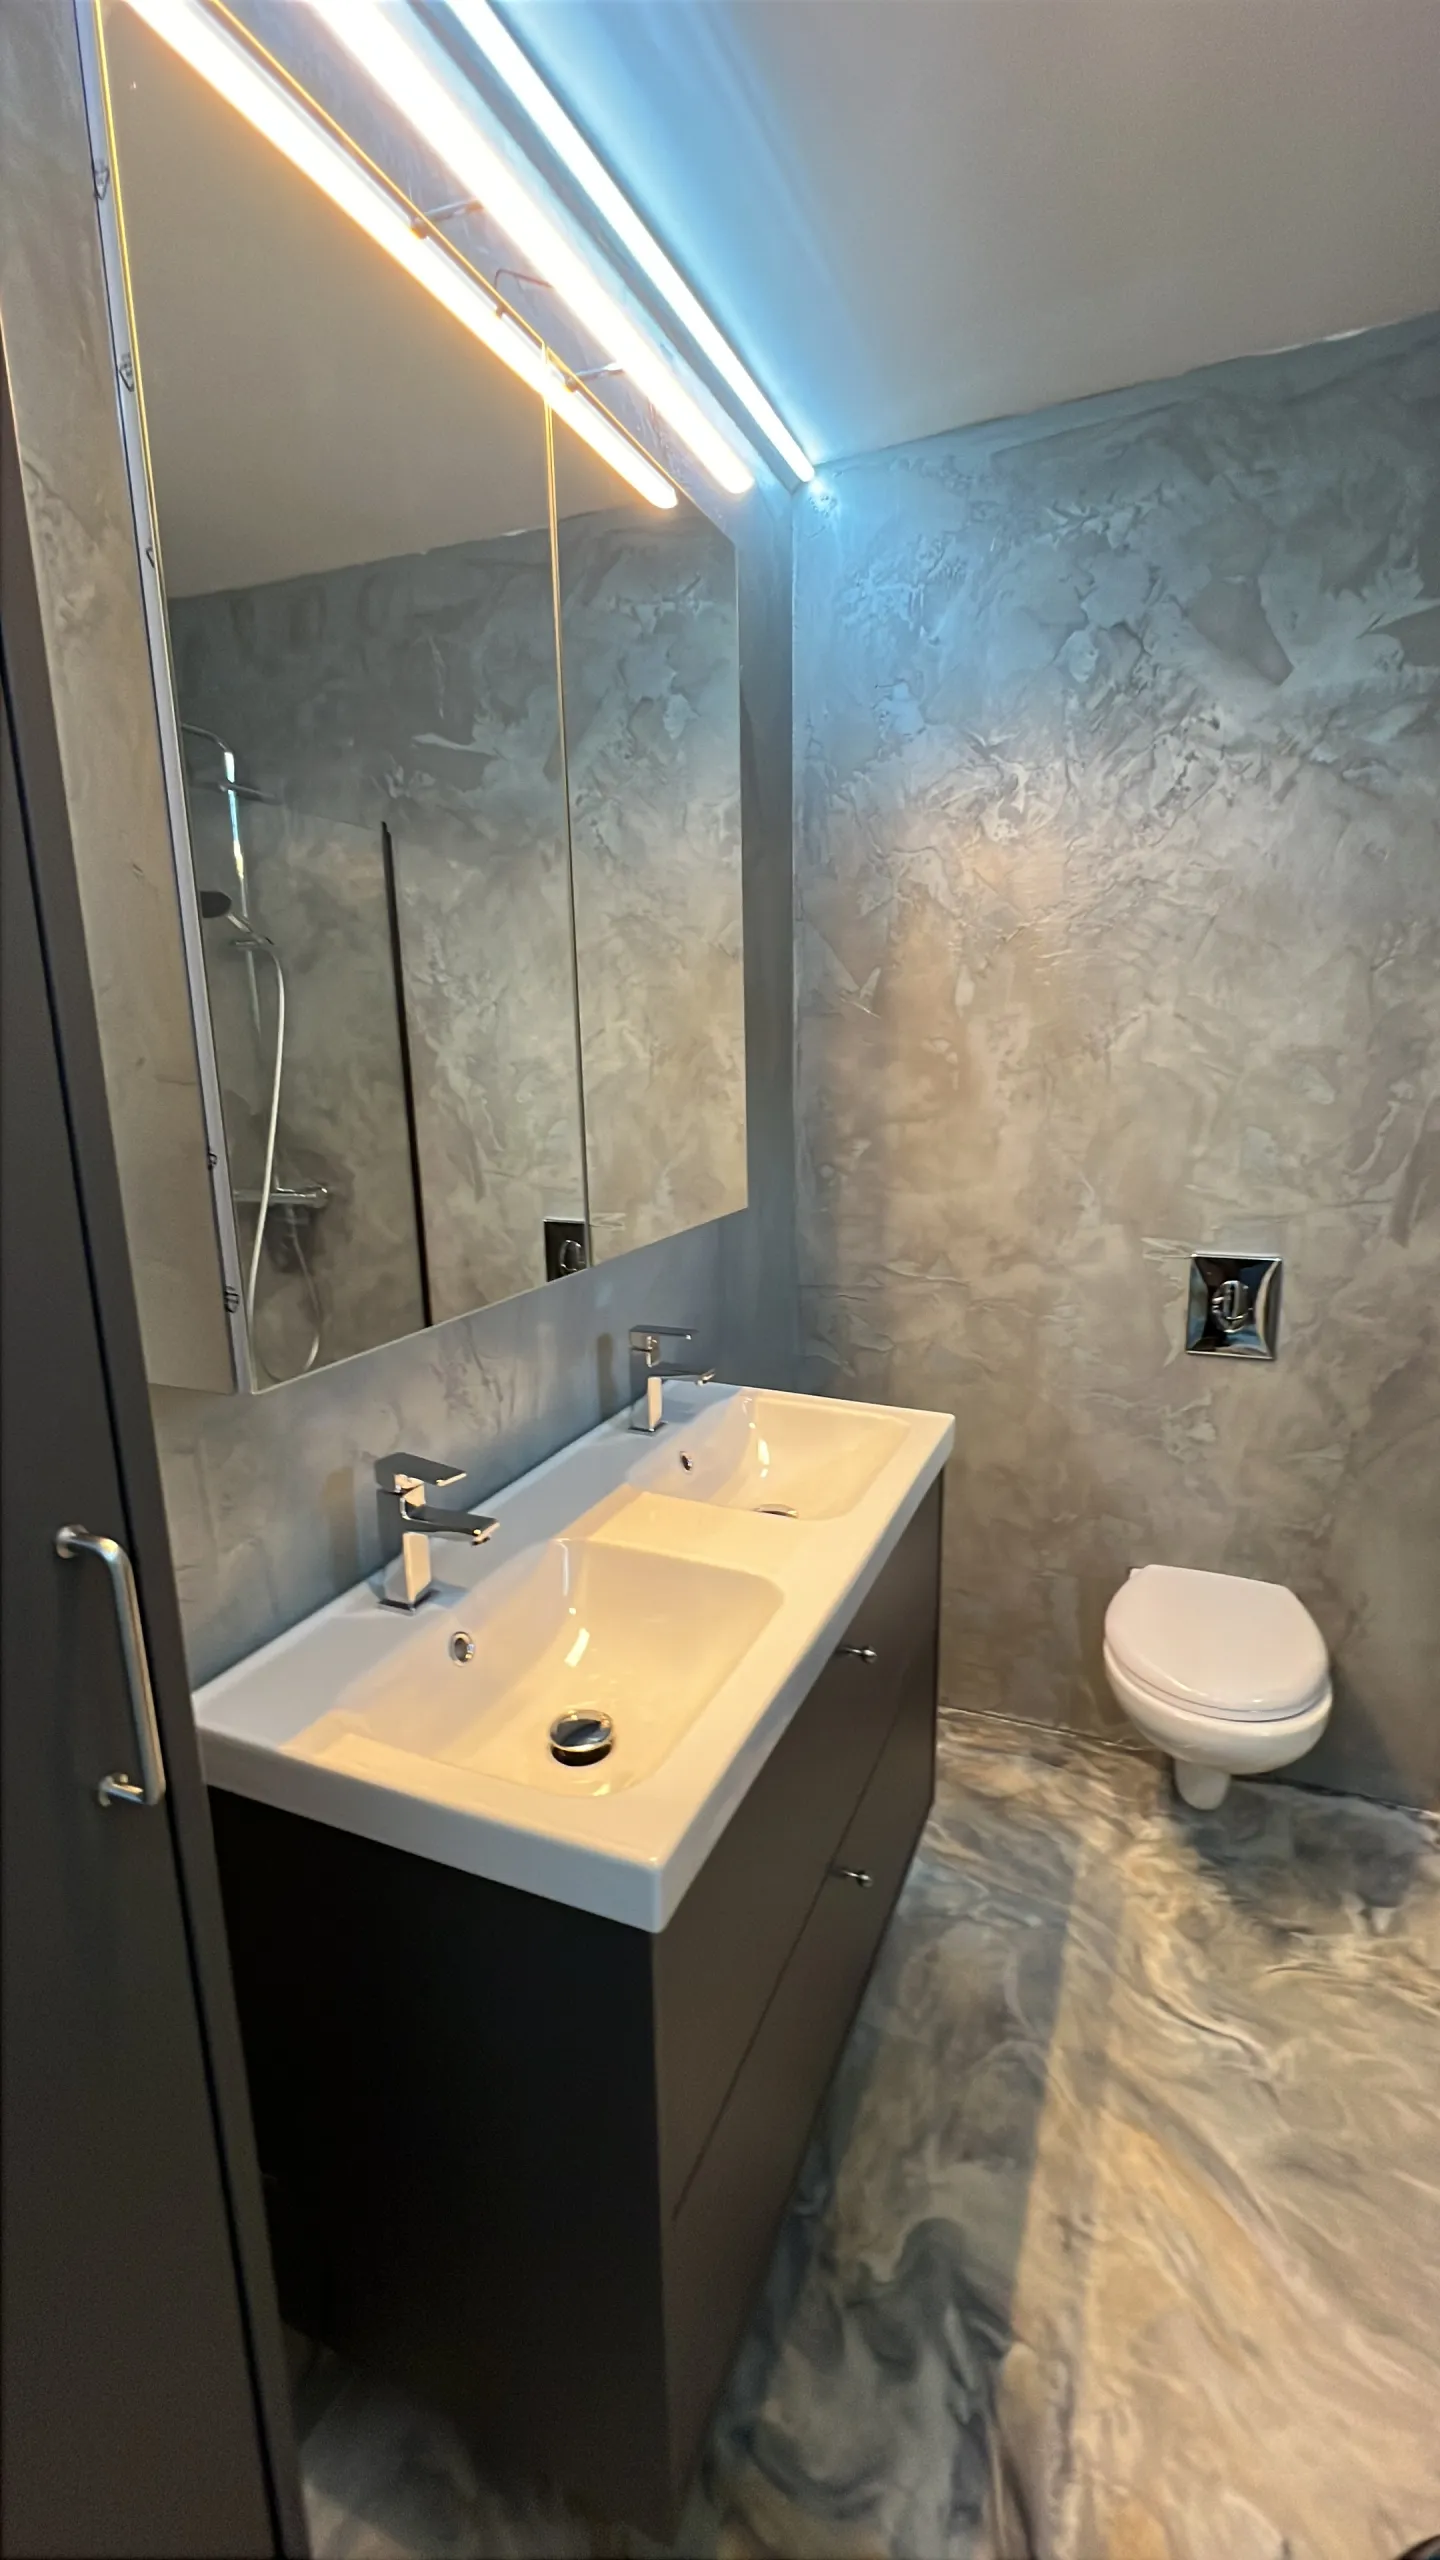
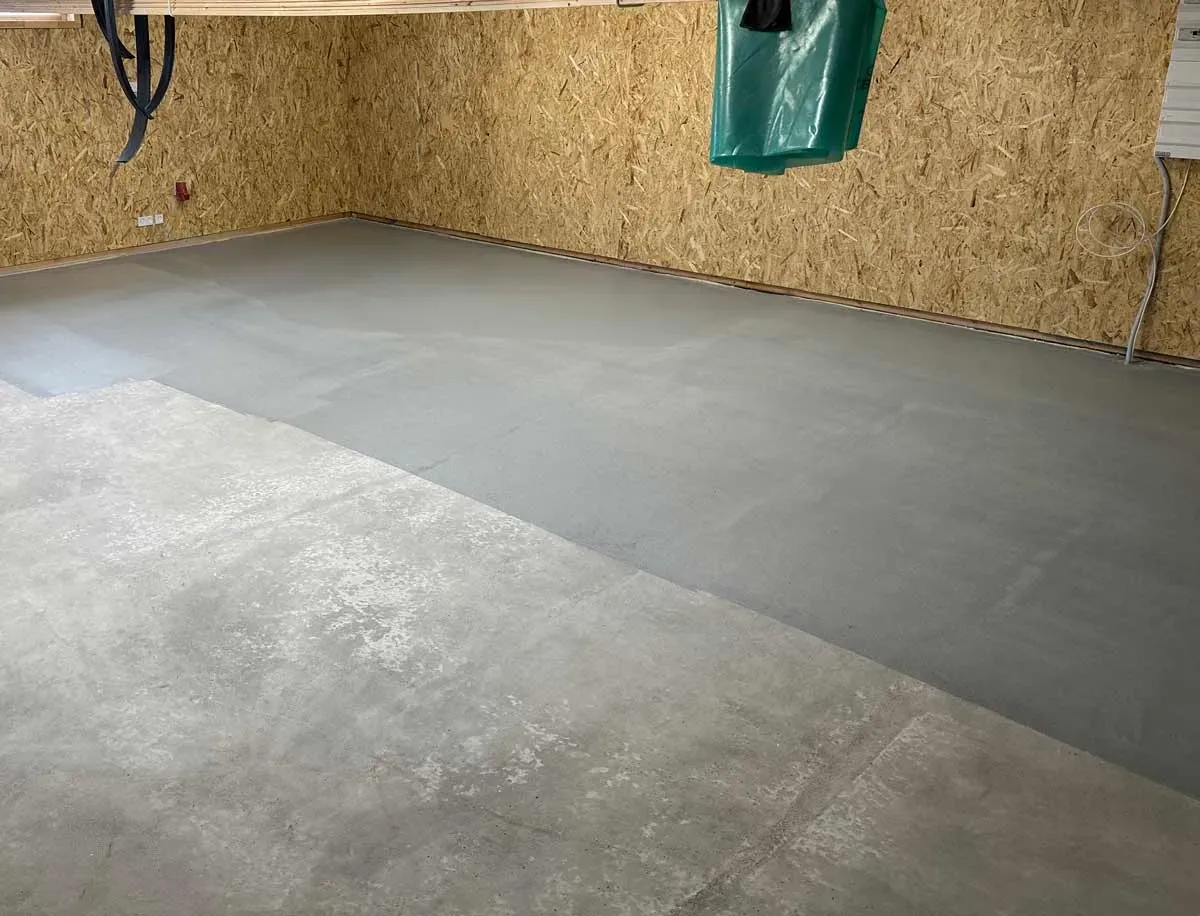
EP Design is suitable for concrete, cement screed and existing coatings (e.g. epoxy resin). This decorative coating is diffusion-tight, suitable for wet areas, and compatible with underfloor heating. The total thickness (primer and main coating) is approx. 1.8 mm. It is not suitable for mastic asphalt, magnesite and anhydrite screeds. In these cases, we recommend using our PU Flex.

Properties & Limitations
The coating provides slip resistance class in the range of R9 and is designed for indoor use. After curing, the surface has medium mechanical load-bearing capacity, i.e. it is suitable for pedestrian traffic of up to 1,000 people per day as well as forklift traffic, car traffic, etc. The material is not frost-resistant and is not suitable for flexible substrates. Because the coating is diffusion-tight, it is suitable for sterile environments such as medical technology facilities.
Important Notes
Colour deviations are possible due to raw material variations. With metallic pigments, different effects may occur depending on the application technique. To avoid curing and mixing problems, components A and B must first be thoroughly mixed, then transferred into a second clean container and mixed again.

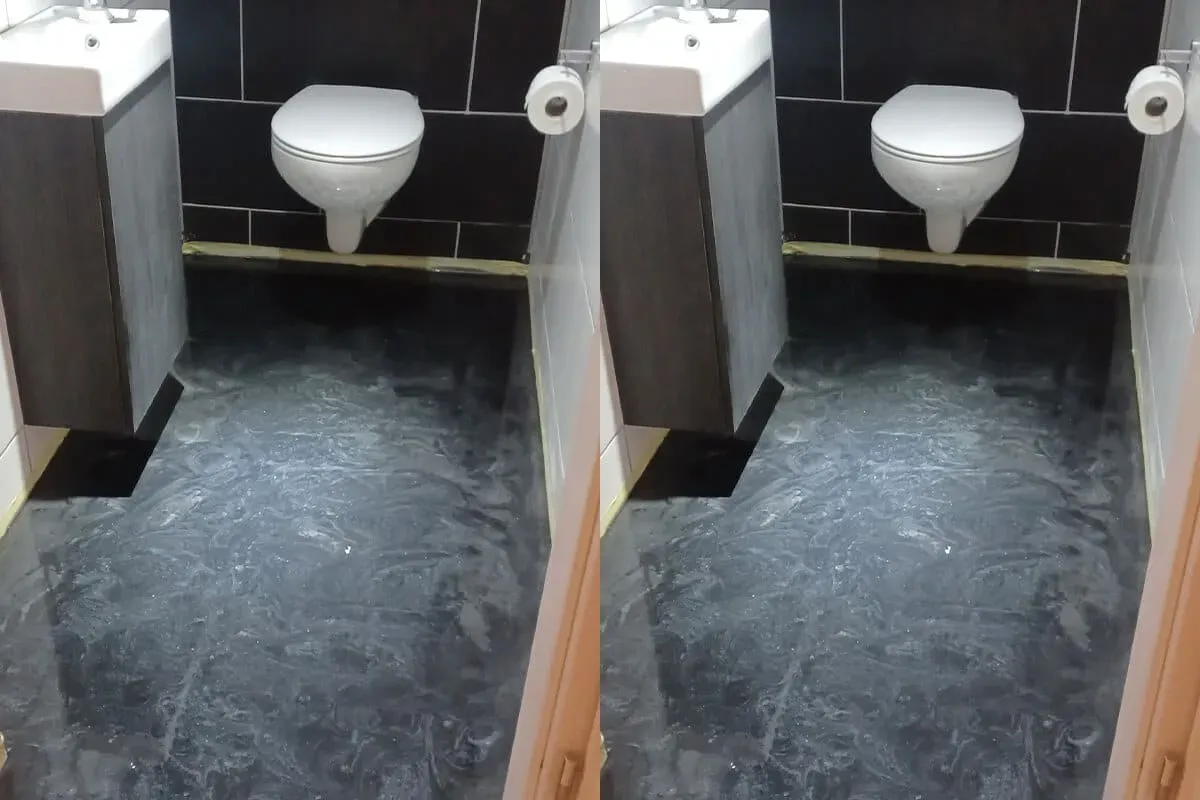
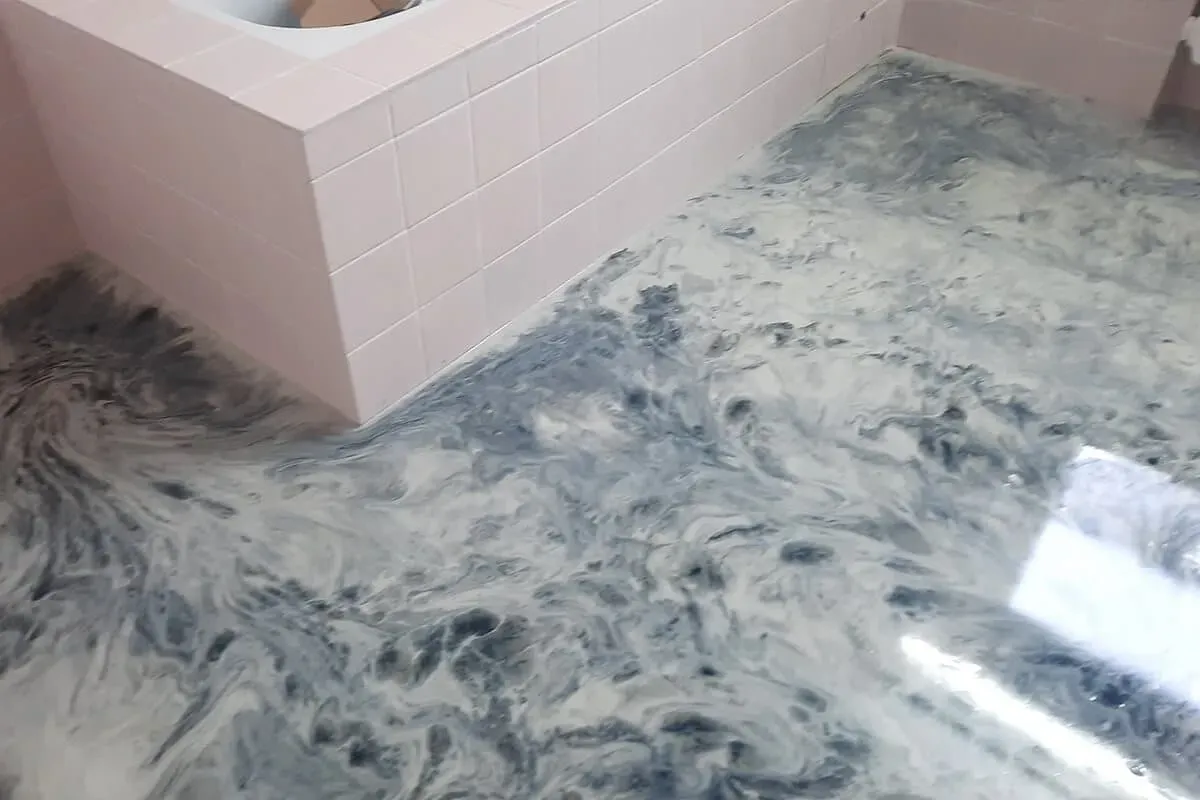
Instructions for Use TRANSPARENT CLEAR
- Mix the resin (A) with the hardener (B) in a ratio of 2:1 by weight (e.g., 1kg A + 0,5kg B).
- Ideally, transfer the material to a clean mixing bucket and stir again. This will ensure that the resin (A) and hardener (B) are completely mixed together.
- Pour the material onto the floor immediately after mixing, as the product can boil up in the mixing bucket.
- Apply the material with a squeegee and foam roller flooding the entire floor. We recommend a layer thickness of 1.5mm.
- The main coating can be walked on after approx. 20 hours and is completely chemically cured after approx. 7 days.
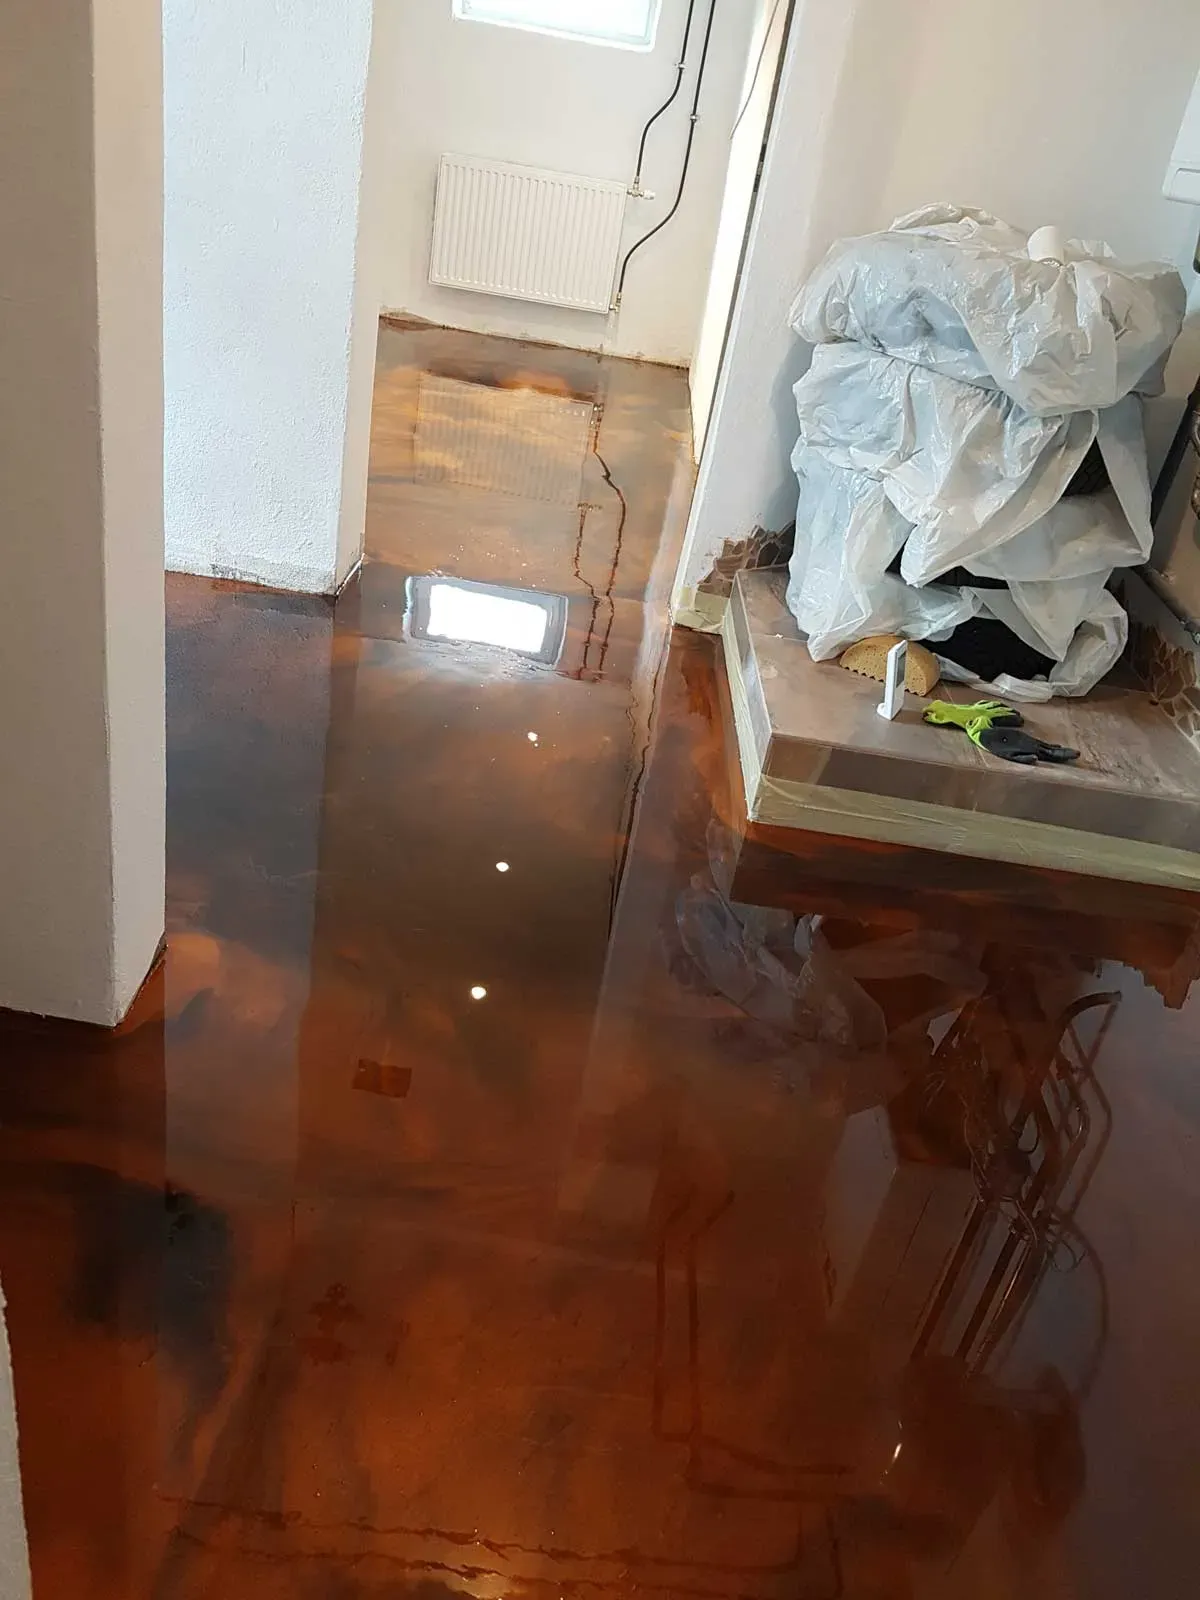
Info: Epoxy resin is sensitive to any kind of moisture during curing (risk of amine blush formation, i.e. white patches in the top layer). For this reason, we recommend that you avoid any contact between water and the epoxy until it has cured completely (at least 7 days). For thin layers, cold temperatures (ambient, substrate, and resin temperatures below 20 °C) and increased humidity, the time until the epoxy resin is fully cured may be extended.
reviews


Danger
Causes skin irritation. Causes serious eye irritation. May damage fertility. Toxic to aquatic life with long lasting effects. Contains epoxy constituents. Causes severe skin burns and eye damage. Harmful if inhaled. Harmful to aquatic life with long lasting effects. Flammable liquid and vapour. May be fatal if swallowed and enters airways. May cause damage to organs through prolonged or repeated exposure. May cause respiratory irritation. Harmful if inhaled. May cause drowsiness or dizziness. Contains isocyanates. The information on the product label must always be followed.

Related Products
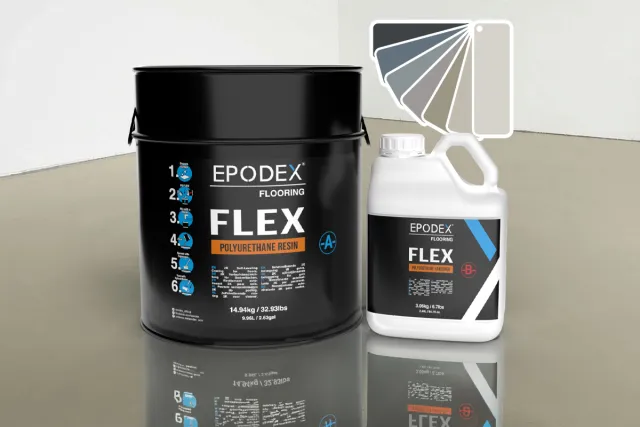
Self-levelling polyurethane coating for indoor floor surfaces (decorative coating)
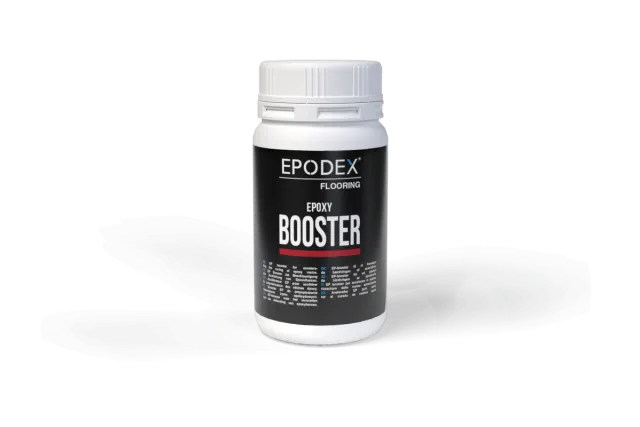
Accelerates the curing of EP Primer, EP Coating and EP Levelling Compound, helping to shorten the entire project timeline.
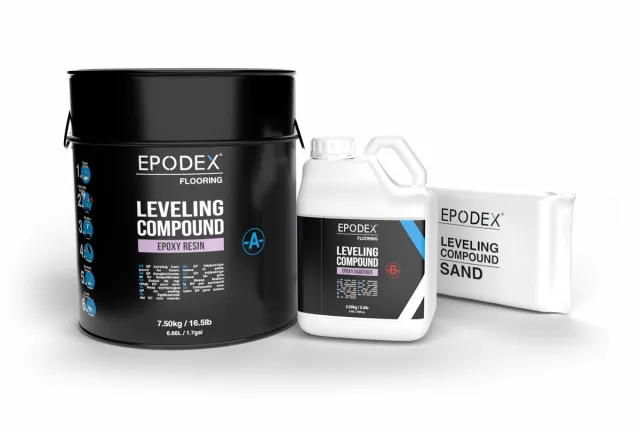
Self-levelling levelling compound for smoothing indoor floor surfaces prior to subsequent coating
Self-levelling 2K polyurethane coating for indoor floor surfaces (flexible thick-layer system)